Discount coupons in WooCommerce are one of the fastest ways to boost conversions, increase average order value, and reduce cart abandonment — if you set them up the right way.
In this guide, you’ll learn two practical ways to create discount coupons in WooCommerce:
- Using the default WooCommerce coupon system for simple percentage or fixed discounts.
- Using ShopLentor’s Advanced Coupon module for conditional, automated, and more profitable promotions.
Table of Contents
TL;DR: Two Ways to Create Discount Coupons in WooCommerce
- Use WooCommerce’s built-in coupons (Marketing → Coupons) for straightforward percentage, fixed cart, or fixed product discounts.
- Use ShopLentor’s Advanced Coupon module when you need conditions like minimum cart value, specific categories, customer segments, automation, or bulk codes — all from your existing ShopLentor setup.
If your current coupons feel too basic or hard to manage, ShopLentor lets you turn them into targeted campaigns without installing multiple extra plugins.
ShopLentor- WooCommerce Builder for Elementor & Gutenberg
A versatile page builder to build modern and excellent online stores with more than 100k+ Active Installations.
What Are Discount Coupons in WooCommerce?
In WooCommerce, a discount coupon is a code that shoppers apply at checkout to get money off their order.
WooCommerce includes a built-in coupon system where you can create, manage, and restrict discounts from your WordPress dashboard.
By default, WooCommerce supports three main coupon types:
- Percentage discount – reduces the order by a percentage (for example, 10% off the cart).
- Fixed cart discount – subtracts a fixed amount from the entire cart (for example, $15 off the order).
- Fixed product discount – subtracts a fixed amount per eligible product (for example, $5 off each T-shirt).
You can also add rules like expiry dates, minimum spend, and product or category restrictions so coupons only apply in the right situations.
Why Use Discount Coupons at All?
When planned well, discount coupons can:
- Increase conversion rates by nudging hesitant visitors to complete checkout.
- Raise average order value by requiring minimum spend or specific product combinations.
- Bring back abandoned carts when combined with follow-up emails and targeted coupon offers.
The challenge is finding the right balance: simple to manage, but powerful enough to support your promotion strategy. That’s why it helps to start with core WooCommerce, then move up to advanced coupons with ShopLentor when you need more control.
Two Main Ways to Create Discount Coupons in WooCommerce
In the rest of this guide, you’ll see two core approaches to creating discount coupons in WooCommerce: first with the built-in WooCommerce coupon system, and then with ShopLentor’s Advanced Coupon module for more advanced, automated campaigns.
Method 1: Create Discount Coupons with WooCommerce Core
This first method uses only what WooCommerce gives you out of the box — no extra coupon plugins required.
Step 1: Make sure coupons are enabled
WooCommerce can disable coupons entirely, so you need to confirm they’re turned on.
- Go to WooCommerce → Settings → General.
- Scroll to the Enable coupons option.
- Check “Enable the use of coupon codes”.
- Save changes.
Now your store can accept coupons at checkout.
Step 2: Create a new coupon
To add your first coupon:
- In your WordPress dashboard, go to Marketing → Coupons.
- Click Add coupon.
- Enter a Coupon code (for example,
WELCOME10). You can also click Generate coupon code to let WooCommerce create a random one. - Add a short Description for internal use (e.g., “10% off for new customers”).
This sets up the basic shell of your coupon.
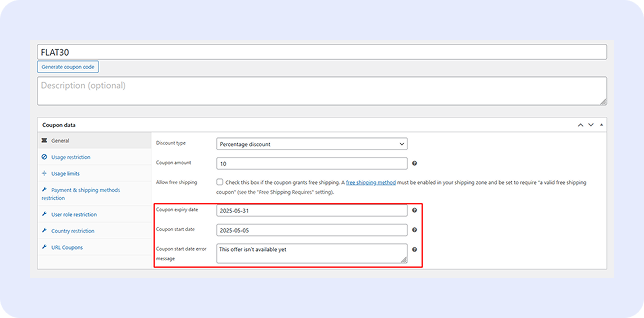
Step 3: Choose the discount type and amount
Under Coupon data → General, you’ll configure how the discount works.
- Discount type:
- Percentage discount – for example, enter “10” to give 10% off.
- Fixed cart discount – subtracts a fixed amount from the cart total.
- Fixed product discount – applies a fixed amount per product.
- Coupon amount – the value of the discount (e.g.
10for 10% or $10 in your store currency). - Coupon expiry date – a date after which customers can’t use the coupon anymore.
For a simple store-wide promotion, “Percentage discount” is usually the easiest for customers to understand.
Step 4: Add usage restrictions
Usage restrictions help protect your margins and keep your coupon aligned with your goals.
In Coupon data → Usage restriction, you can configure:
- Minimum spend – order total must reach a certain amount before the coupon works.
- Maximum spend – optional cap if needed.
- Individual use only – prevents customers from stacking multiple coupons.
- Products / Exclude products – limit the coupon to specific items.
- Product categories / Exclude categories – apply the coupon to certain categories.
- Allowed emails – restrict to specific customers if necessary.
You can also control how many times a coupon can be used in Usage limits (per coupon and per user).
Practical Example: Create a Basic 10% Off Coupon
Let’s walk through a realistic, simple coupon you might create for new visitors.
Goal: “Give 10% off any order over $50 for first-time customers.”
Configuration using WooCommerce core:
- Enable coupons in WooCommerce → Settings → General.
- Go to Marketing → Coupons → Add coupon.
- Coupon code:
WELCOME10 - Discount type: Percentage discount
- Coupon amount:
10 - Coupon expiry: 30 days from today
- Usage restriction:
- Minimum spend:
50 - Individual use only: checked
- Minimum spend:
- Usage limits:
- Usage limit per user:
1
- Usage limit per user:
This simple setup is enough for many stores, especially when you’re just starting with WooCommerce coupons.
Where Core WooCommerce Coupons Fall Short
The built-in coupon system is solid, but it has limitations:
- Complex conditions (like “10% off for VIPs on category X when cart total is over $100”) are hard or impossible to set natively.
- Automation — timed campaigns, behavior-based triggers, bulk coupon generation — requires extra plugins.
- Managing many promotions across segments, campaigns, and channels quickly becomes messy.
That’s where ShopLentor’s Advanced Coupon module becomes a more scalable solution.
Learn more about the WooCommerce Advanced Coupon module in ShopLentor and how it fits into your promotion strategy.
Method 2: Create Advanced Discount Coupons with ShopLentor
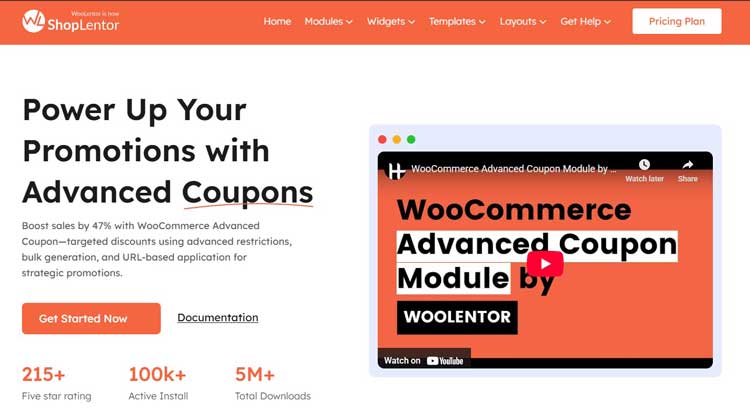
ShopLentor (formerly WooLentor) is an all-in-one WooCommerce growth and page builder plugin for Elementor and Gutenberg. It includes an Advanced Coupon module that extends WooCommerce’s default coupon system with more flexible restrictions, automation options, and marketing-ready coupon workflows.
Step 1: Install and activate ShopLentor
If you haven’t installed ShopLentor yet:
- In your WordPress dashboard, go to Plugins → Add New.
- Search for “ShopLentor”.
- Click Install Now, then Activate.
ShopLentor adds a suite of growth modules, including Advanced Coupon, Abandoned Cart, Sales Countdown Timer, and more.
Step 2: Enable the Advanced Coupon module
To use advanced coupons, you need to enable the module:
- Go to ShopLentor → Settings.
- Open the Modules tab.
- Find the Advanced Coupon in the list.
- Toggle it on.
Now you can configure powerful coupon rules on top of WooCommerce’s core options. Check the ShopLentor Advanced Coupon documentation for a full walkthrough of available settings.
Step 3: Create or edit a coupon as usual
ShopLentor builds on the same Marketing → Coupons area you already use.
- Go to Marketing → Coupons → Add coupon (or edit an existing one).
- Set your base settings (code, description, discount type, amount, expiry) just like in Method 1.
The difference appears when you configure advanced conditions and rules provided by the module.
Step 4: Add advanced conditions with ShopLentor
Depending on your setup and version, the Advanced Coupon module provides options like:
- More granular cart conditions (cart subtotal ranges, quantity conditions, specific combinations).
- Targeting by user roles or customer segments.
- Integration with automated discount campaigns, such as scheduled offers or coupons tied to email marketing flows.
- Bulk coupon generation for campaigns, events, or influencer partnerships.
The core idea is the same: define who gets the discount, when, and under what conditions — without installing a separate advanced coupon plugin.
Practical Example: 20% Off Over a Certain Cart Value
Goal: “Give 20% off when the cart total is at least $75, only on selected categories, and prevent stacking with other coupons.”
A typical workflow with ShopLentor Advanced Coupon:
- Install and activate ShopLentor, then enable the Advanced Coupon module.
- Go to Marketing → Coupons → Add coupon.
- Coupon code:
SAVE15 - Discount type: Percentage discount
- Coupon amount:
20 - Coupon expiry: set for your campaign duration.
- Under Advanced Coupon conditions, configure:
- Minimum cart subtotal:
75 - Apply only to selected product categories (e.g. “Shoes” and “Accessories”)
- Restrict usage per user and per campaign
- Mark as non-stackable with other coupons
- Minimum cart subtotal:
Results:
- You run a targeted promotion without manually checking carts.
- You protect your margins by enforcing the $75 threshold.
- You can replicate similar campaigns quickly using the same Advanced Coupon setup.
Video Presentation
How ShopLentor Extends Your Discount Strategy
Beyond just creating coupons, ShopLentor helps you build promotion systems that work together.
Key modules that complement Advanced Coupon:
- Advanced Coupon – adds flexible restrictions, advanced rules, and smarter discount targeting.
- Abandoned Cart – sends follow-up emails with personalized coupons to recover lost sales.
- Sales Countdown Timer – adds urgency to your coupon campaigns with deadline-driven banners or timers.
- Order Bump / Upsell modules – combine coupons with targeted order bumps to increase average order value.
Because these modules are part of the same plugin, you avoid stacking multiple coupon, cart recovery, and urgency plugins that can slow down your store or cause conflicts.
See how ShopLentor’s Abandoned Cart recovery works alongside Advanced Coupons to win back lost sales.
Default Coupons vs ShopLentor Advanced Coupons: Which Should You Use?
| Use Case / Feature | WooCommerce Core Coupons | ShopLentor Advanced Coupon |
|---|---|---|
| Simple site-wide discounts | Yes – easy percentage/fixed discounts | Yes |
| Category / product-specific discounts | Yes, via usage restrictions | Yes, with more granular rules |
| Minimum/maximum spend | Supported in usage restrictions | Supported, with extended cart conditions |
| Conditional/behavior-based campaigns | Limited without extra code or plugins | Designed for targeted and conditional discounts |
| Automation and scheduling | Basic expiry dates only | Supports scheduled and automated discounts |
| Bulk coupon generation | Not native, needs extra tools | Built into ShopLentor’s Advanced Coupon workflows |
| Integration with abandoned cart | Requires a separate plugin | Integrated via ShopLentor’s Abandoned Cart module |
| Best for | Simple promotions, new stores | Growing stores needing targeted, scalable offers |
When should you switch from default WooCommerce coupons to ShopLentor?
Use core WooCommerce for basic, store-wide promotions or simple coupons.
Switch to ShopLentor’s Advanced Coupon when you want rules like “spend X, get Y,” customer segment targeting, automation, or integrated campaigns with abandoned cart and countdown timers.
Join Our Success Story
Begin crafting the store of your dreams today and watch your vision come to life with every detail you choose!
Best Practices for Using Discount Coupons Without Hurting Profit
Well-designed coupons increase profits; poorly designed ones just train shoppers to wait for discounts. Here are practical tips that apply to both methods.
- Set clear goals for each coupon: Decide whether you’re aiming for first-time purchases, clearing inventory, boosting average order value, or re-activating dormant customers.
- Avoid blanket, permanent discounts: Use expiry dates and clear conditions so discounts feel special, not permanent.
- Protect margins with conditions: Use minimum spend, limit coupons to profitable products, and restrict stacking to avoid “double discounts.”
- Combine coupons with urgency and recovery: Pair Advanced Coupons with the Sales Countdown Timer and Abandoned Cart modules in ShopLentor to increase redemption without extra plugins.
- Track performance and iterate: Use WooCommerce and ShopLentor analytics to see which coupon campaigns actually drive profit, then refine your rules and targeting.
For a deeper look at coupon strategy, read How to Use WooCommerce Coupons to Drive Sales.
Frequently Asked Questions
How do I enable discount coupons in WooCommerce?
Go to WooCommerce → Settings → General, check “Enable the use of coupon codes”, and save changes. After that, create coupons under Marketing → Coupons.
2. What types of discount coupons does WooCommerce support by default?
WooCommerce supports three main types: percentage discount, fixed cart discount, and fixed product discount. You choose one from the Discount type dropdown when editing a coupon.
3. When should I use ShopLentor’s Advanced Coupon instead of core WooCommerce coupons?
Use ShopLentor’s Advanced Coupon when you need conditional rules, bulk coupons, automation, or promotions tied to cart behavior, customer segments, or campaigns. If you only run simple, occasional discounts, core WooCommerce coupons may be enough.
4. Can I recover abandoned carts with coupons using ShopLentor?
Yes. ShopLentor’s Abandoned Cart module lets you send follow-up emails and use coupons to encourage customers to complete their purchases. This works well alongside the Advanced Coupon module, so you can tailor offers to cart value or contents.
5. Does ShopLentor replace separate advanced coupon plugins?
For many stores, yes. ShopLentor’s Advanced Coupon module covers advanced restrictions, targeting, and campaign-style discounts without needing an extra coupon plugin. You also gain tight integration with other ShopLentor growth modules, which is harder to achieve when mixing multiple third-party plugins.
6. Can I run limited-time promotions with countdown timers?
Yes. You can set coupon expiry dates in WooCommerce and then add visual urgency using ShopLentor’s Sales Countdown Timer module on relevant product or landing pages. This combination helps increase redemption rates during flash sales or seasonal campaigns.
7. Is this approach suitable for Elementor and Gutenberg users?
ShopLentor is designed as an all-in-one WooCommerce growth plugin for both Elementor and Gutenberg, so you can design pages and configure coupon campaigns in one ecosystem. That makes it especially useful for store owners and implementers who want to avoid maintaining lots of separate plugins for design and marketing.
Conclusion: Start Simple, Then Scale with ShopLentor
You don’t need a complex setup to start using discount coupons in WooCommerce.
- First, use WooCommerce’s built-in coupons to learn what types of offers your audience responds to.
- As your store grows, enable ShopLentor’s Advanced Coupon module to add powerful conditions, automation, and integrations with other growth modules like Abandoned Cart and Sales Countdown Timer.
This “start simple, then scale” approach keeps your promotions manageable while giving you room to build more advanced campaigns as your traffic and revenue grow.
If you’re already using ShopLentor for layout and checkout optimization, turning on Advanced Coupon is one of the fastest ways to level up your promotion strategy — without adding plugin bloat.