Overview
The WishSuite Counter allows you to display the number of items added to a customer’s wishlist in WooCommerce. It provides a simple yet powerful way to improve user experience by giving customers quick access to their saved products.
You can use this feature in both:
- Elementor (Widget) → WL: WishSuite Counter
- Gutenberg (Block) → WL: WishSuite Counter
This ensures flexibility regardless of your page builder.
Key Features
- Display real-time wishlist item count
- Works with WooCommerce wishlist functionality
- Simple text customization
- Fully customizable styles
- Compatible with Elementor and Gutenberg
- Lightweight and responsive
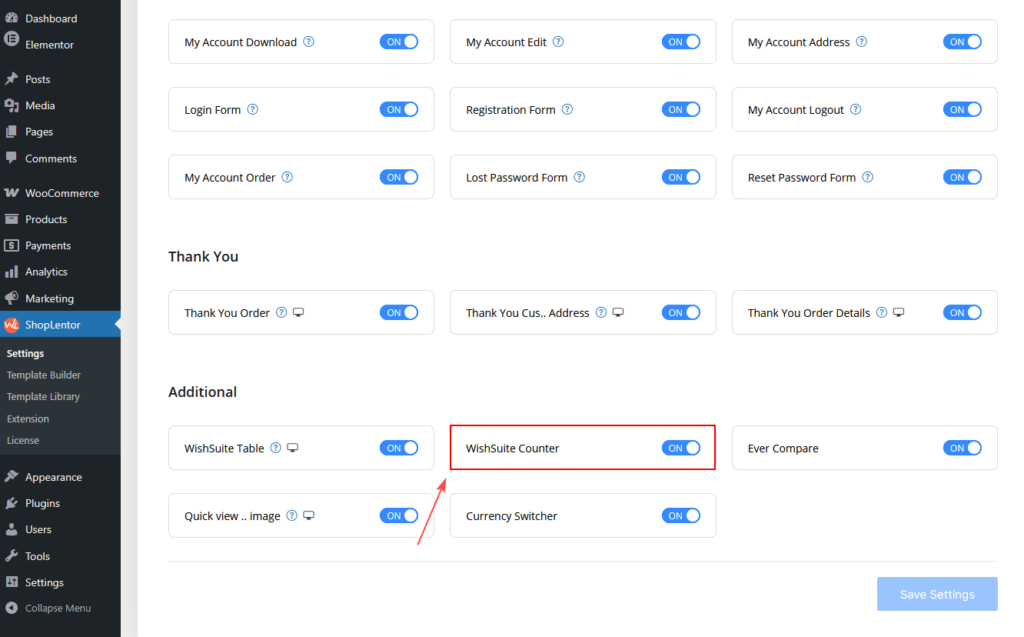
Enable the WishSuite Counter
To use the WishSuite Counter, you first need to enable it from the ShopLentor settings.
- Go to Dashboard → ShopLentor → Settings → Elementor Widgets/ Gutenberg
- Find WishSuite Counter
- Enable the option
- Save your changes
Once enabled, the widget or block will be available in the editor.
How to Use the WishSuite Counter
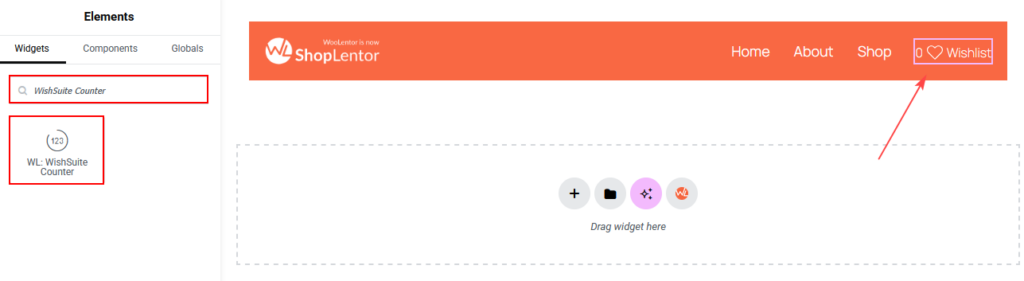
Option A: Elementor (Widget)
Steps:
- Go to your page or template
- Click Edit with Elementor
- Search for WL: WishSuite Counter
- Drag and drop the widget into your layout
- Customize settings from:
- Content tab
- Style tab
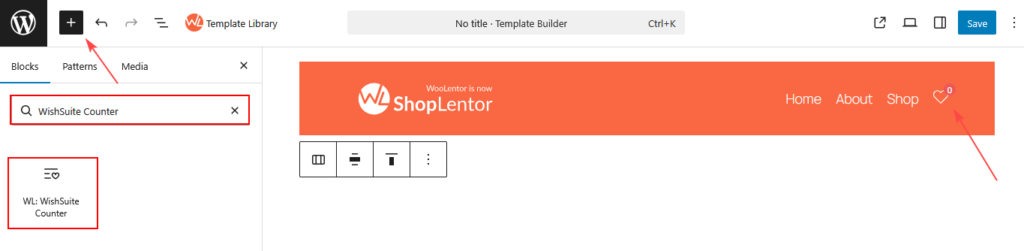
Option B: Gutenberg (Block)
Steps:
- Go to Dashboard → Pages → Edit Page
- Click the + (Add Block) button
- Search for WishSuite Counter
- Select WL: WishSuite Counter
- Configure settings from the right sidebar
Widget / Block Settings
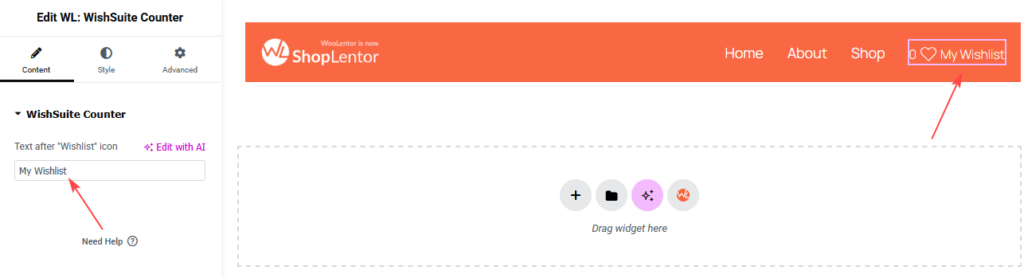
1. General Settings (Content / Block Tab)
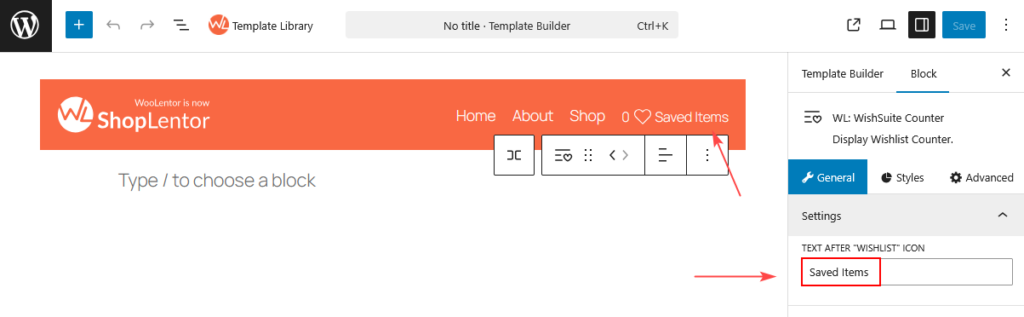
Text After “Wishlist” Icon
- Add custom text beside the wishlist icon
- Example:
- “My Wishlist”
- “Saved Items”
- “Wishlist (0)”
👉 This text appears next to the counter icon.
Elementor Widget
Below is how the setting appears in the Elementor widget:
Gutenberg Block
Below is how the setting appears in the Gutenberg block:
2. Style Settings
The Style Settings allow you to customize the visual appearance of the WishSuite Counter, including alignment, colors, spacing, and typography.
Elementor Widget (Style Settings)
Below is the full Style panel for the Elementor widget:
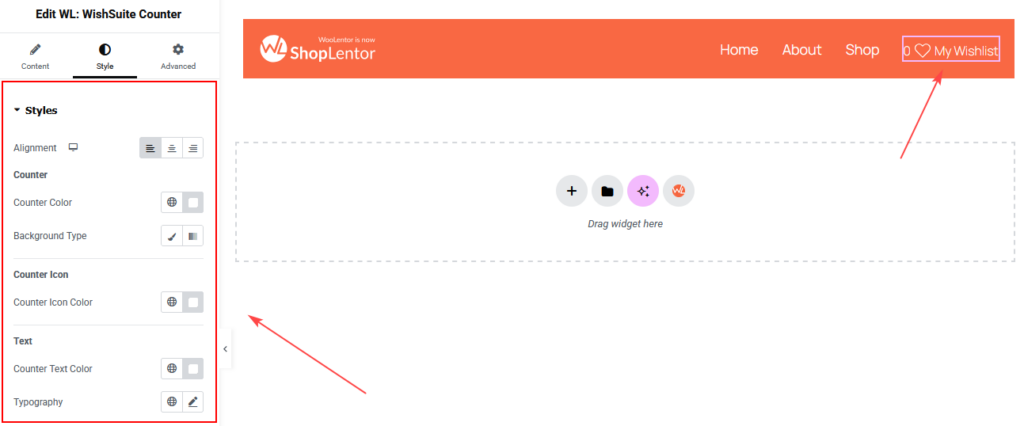
In Elementor, you can customize:
- Alignment – Left, center, or right positioning
- Counter
- Counter color
- Background type (Solid or Gradient)
- Counter Icon
- Icon color
- Text
- Text color
- Full typography controls (font size, weight, spacing, etc.)
Gutenberg Block (Style Settings)
Below is the full Style panel for the Gutenberg block:
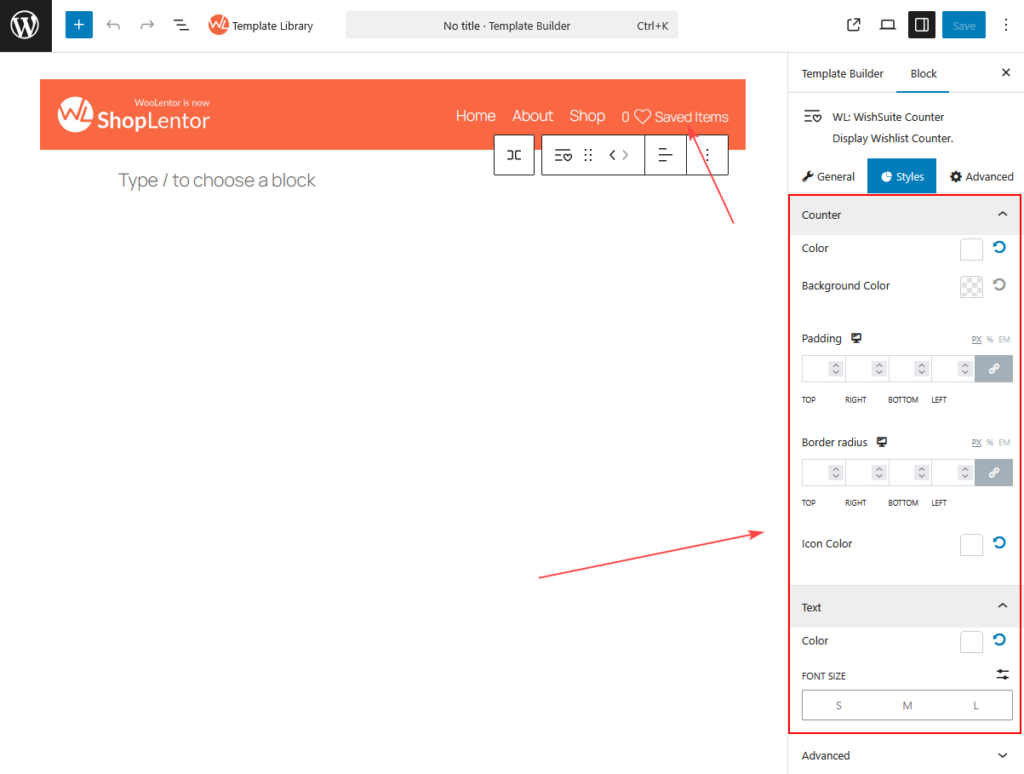
In Gutenberg, you can customize:
- Counter
- Color
- Background color
- Padding (top, right, bottom, left)
- Border radius
- Icon color
- Text
- Text color
- Font size (Small, Medium, Large)
Example Use Cases
1. Header Wishlist Icon
- Place the counter in your header
- Show real-time wishlist count
- Improve navigation experience
2. Product Page Enhancement
- Add near Add to Cart button
- Encourage wishlist engagement
3. Sticky Wishlist Indicator
- Show persistent wishlist access
- Increase return visits
Best Practices
- Keep text short (e.g., “Wishlist”)
- Use contrasting colors for visibility
- Place in header or top section for better UX
- Ensure mobile-friendly spacing
Troubleshooting
Counter Not Showing?
- Ensure wishlist module is enabled
- Check WooCommerce is active
Count Not Updating?
- Clear cache
- Check AJAX conflicts
Styling Not Applying?
- Check theme overrides
- Use Advanced settings if needed
Final Notes
The WishSuite Counter is a small but impactful feature that enhances user experience by making wishlist access visible and interactive.
It works seamlessly across Elementor and Gutenberg, giving you flexibility while maintaining consistent design.