The Email Customizer module in WooLentor allows users an opportunity to customize their WooCommerce Email Templates easily and give them the professional look desired by many – without having any coding knowledge whatsoever.
Why use Email Customizer? #
With the “Email Customizer” module, users can create custom template designs or layouts for all of the default WooCommerce emails using the Elementor page builder. Moreover, the module includes a plethora of customization options, allowing you to get complete control over the look and style of those emails and customize them as you desire.
Steps of adding Email Customizer #
Go to WordPress Dashboard > WooLentor > Settings > Modules. From the list of Modules, turn ON the “Email Customizer” Module.
Step 1: How to Enable Email Customizer Module? #
Go to Dashboard > WooLentor > Settings > Modules. From the list of Modules, click the setting of Email Customizer Module.

Turn on the Email Customizer Module and Save Change after that.

Step 2: How to use the Email Customizer Module? #
If you want to customize your traditional WooCommerce Email Templates, you need to use the module called Email Customizer. To do this, simply turn on the module in the Modules panel and save changes.
How to customize the WooCommerce Email Templates #
Go to Dashboard > WooLentor > Template Builder. Click the Add New button on the top right beside the text Template Builder to create custom Email Templates to override and customize WooCommerce Email Templates.
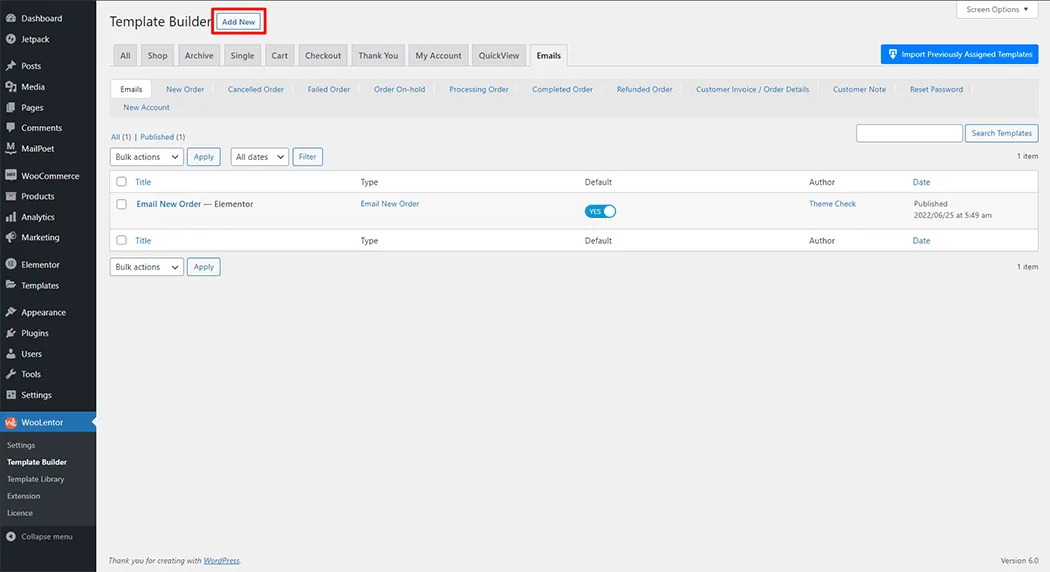
Set the name of your Template in the popup box for template settings. Then click the Set Default checkbox after selecting the desired Email Template type from the dropdown list of type. Now click the Save Settings button to save your settings.
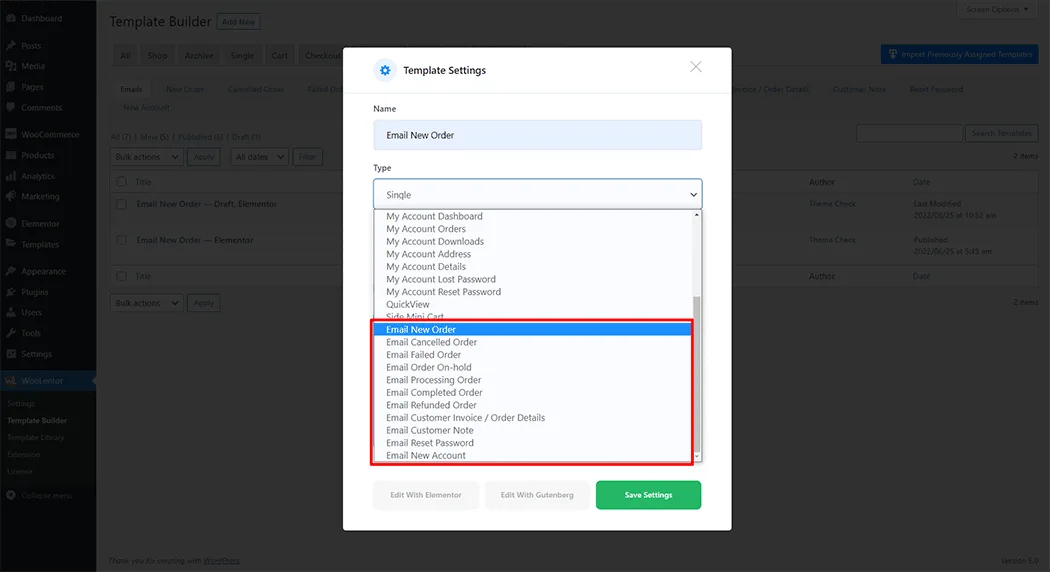

To edit the created Email Template, click the “Edit with Elementor” or “Edit with Gutenberg” button.

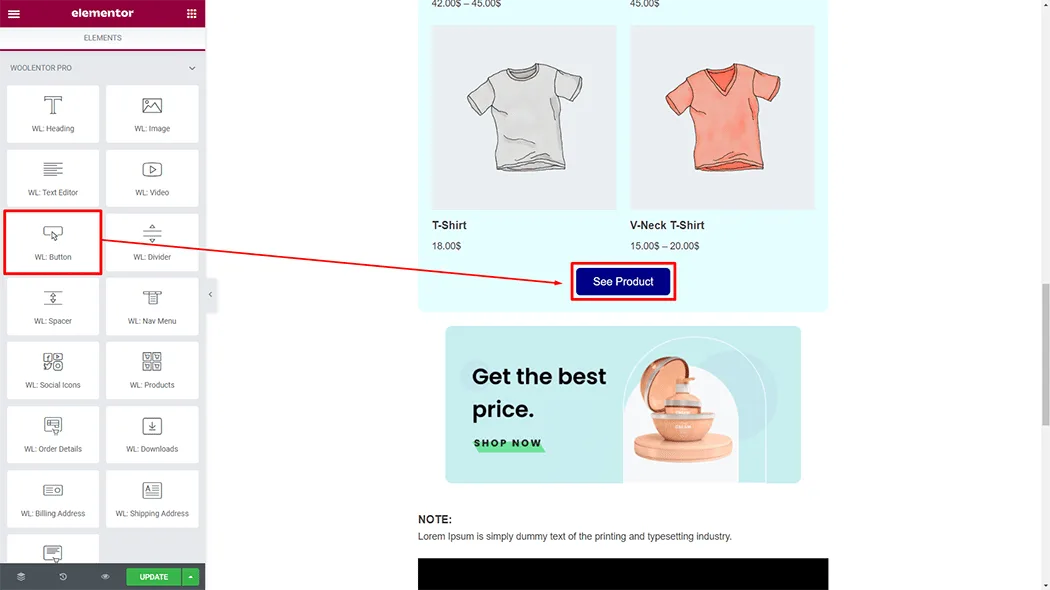
There you will see the necessary widgets (supported for email templates) that have been created to customize Email Templates. You can create Email templates using the widgets you need.

WL: Heading – This is a Heading widget. If you need a new heading, just create the heading on your email template.

WL: Text Editor – This is a Text Editor widget. With this widget, you can write any text, paragraph, and description which can use on your email template.

WL: Order Details – This is an Order Details widget. With this widget, you can show order details on your email template.
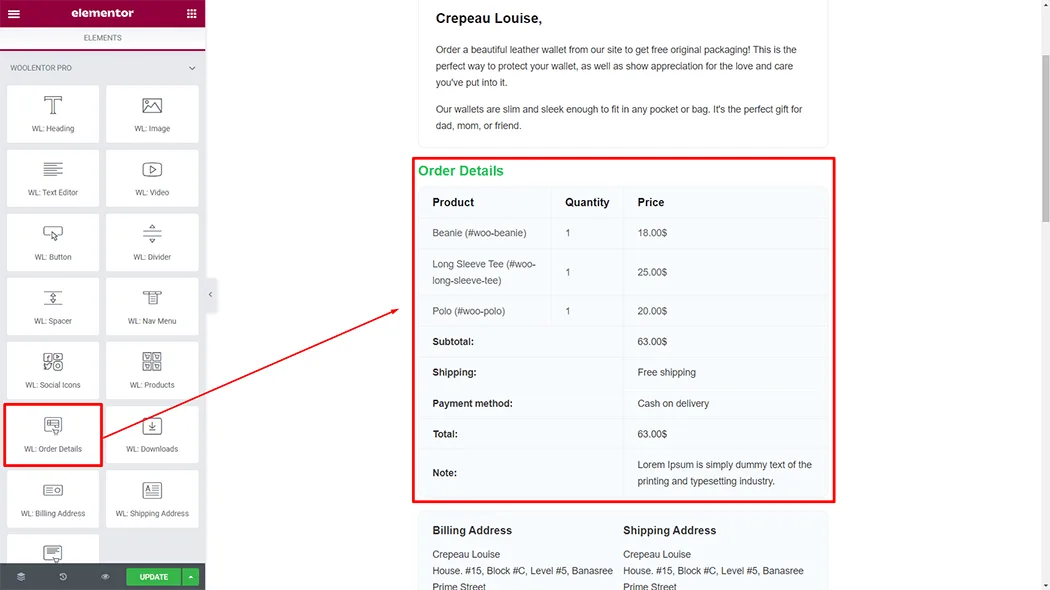
WL: Billing Address – This is a Billing Address widget. With this widget, you can show the billing address on your email template.

WL: Shipping Address – This is a Shipping Address widget. With this widget, you can show the shipping address on your email template.

WL: Products – This is a Product Widget. With this widget, you can show those products on your email template which will come from your store.

WL: Image – This is an Image Widget. With this widget, you can add any Images to your email template.

WL: Nav Menu – This is a Nav menu widget. With this widget, you can show Nav menu on your email template.

WL: Social Icons – This is a Social Icons widget. The store owner can add social media icons and add links to social media to their email template.
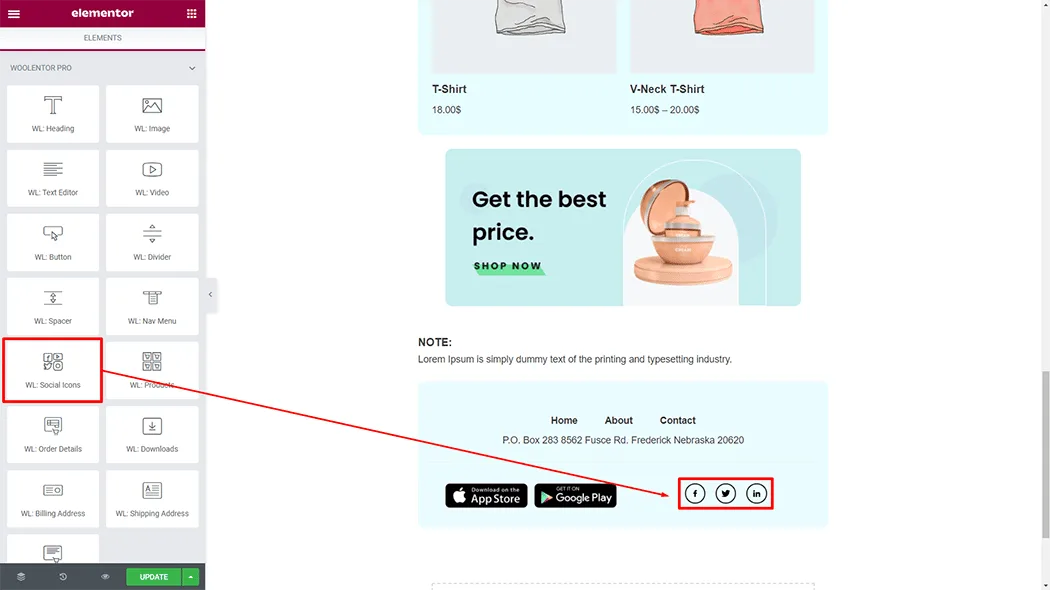
WL: Customer Note – This is a Customer Note widget. With this widget, you can show Customer Note on your email template.

WL: Divider – This Widget is for adding a divider. With this widget, you can add a divider/space on any place of your email template.

WL: Video – This is a Video widget. With this widget, you can add Video to your email template.

WL: Button – This is a Button widget. With this widget, you can add Button to your email template.
There are available all the necessary Placeholders to display dynamic data like order info, customer info, billing info, shipping info, etc. You can use these available Placeholders supported text anywhere.

How to use Placeholders to display dynamic data.

Available Placeholders:
| Placeholder | Data to display |
| {site_title} | Site title of store. |
| {site_address} | Site address of store. |
| {site_url} | Site URL of store. |
| {admin_email} | Site admin email address. |
| {email_from_name} | Site email from name. |
| {email_from_address} | Site email from address. |
| {order_id} | Order ID. |
| {parent_order_id} | Parent order ID. |
| {order_status} | Order status. |
| {order_total} | Order total (amount). |
| {order_currency} | Order currency. |
| {order_received_url} | Order received URL. |
| {order_paid_date} | Order paid date. |
| {order_paid_time} | Order paid time. |
| {order_created_date} | Order created date. |
| {order_created_time} | Order created time. |
| {order_modified_date} | Order modified date. |
| {order_modified_time} | Order modified time. |
| {order_completed_date} | Order completed date. |
| {order_completed_time} | Order completed time. |
| {payment_url} | Order payment URL. |
| {payment_method} | Order payment method |
| {shipping_method} | Order shipping method. |
| {customer_first_name} | Customer first name. |
| {customer_last_name} | Customer last name. |
| {customer_display_name} | Customer display name. |
| {customer_email} | Customer email. |
| {customer_username} | Customer username. |
| {customer_role} | Customer role. |
| {customer_created_date} | Customer created date. |
| {customer_created_time} | Customer created time. |
| {customer_modified_date} | Customer modified date. |
| {customer_modified_time} | Customer modified time. |
| {billing_address} | Order billing address. |
| {billing_first_name} | Order billing first name. |
| {billing_last_name} | Order billing last address. |
| {billing_company} | Order billing company name. |
| {billing_address_1} | Order billing address 1. |
| {billing_address_2} | Order billing address 2. |
| {billing_city} | Order billing city. |
| {billing_state} | Order billing state. |
| {billing_postcode} | Order billing postcode. |
| {billing_country} | Order billing country. |
| {billing_email} | Order billing email. |
| {billing_phone} | Order billing phone. |
| {shipping_address} | Order shipping address. |
| {shipping_first_name} | Order shipping first name. |
| {shipping_last_name} | Order shipping last name. |
| {shipping_company} | Order shipping company. |
| {shipping_address_1} | Order shipping address 1. |
| {shipping_address_2} | Order shipping address 2. |
| {shipping_city} | Order shipping city. |
| {shipping_state} | Order shipping state. |
| {shipping_postcode} | Order shipping postcode. |
| {shipping_country} | Order shipping country. |
| {shipping_phone} | Order shipping phone. |
| {WooCommerce} | The brand WooCommerce. |
| {woocommerce} | The brand WooCommerce (lowercase). |
Email types to customize:
Using Email Customizer module you will be able customize Any Kind of WooCommerce Email Templates. That means you will be able to customize both default and custom email templates. However, WooCommerce default email templates are following:
| Type | Recipient | When to send |
| New order email | Admin | Send to admin when a new order is received. |
| Cancelled order | Admin | Send to admin when an order has been cancelled. |
| Failed order | Admin | Send to admin when an order has failed. |
| Order on-hold | Customer | Send to customers containing order details after an order is placed on-hold. |
| Processing order | Customer | Send to the customer after payment and contains the order details. |
| Completed order | Customer | Send to the customer when the order is marked complete, and usually indicates that the order has been shipped. |
| Refunded order | Customer | Send to customers when their orders are refunded. |
| Customer invoice / Order details | Customer | Send to customers containing their order information and payment links. |
| Customer note | Customer | Send to the customer when a customer note is added from the edit order admin. |
| Reset password | Customer | Send when customers reset their password. |
| New account | Customer | Send when a customer creates a new account. |
See the screenshot below:

Step 4: Preview the created template #
Customized Email Template preview.
