Cross selling refers to the process of a retailer offering what they believe to be complementary or supplementary items to a customer in addition to their primary item selection. If implemented well, cross-selling can be one of the best ways to boost your WooCommerce revenue.
Why Cross Sell Products (Custom) used?
On the Cart Page Template, the “Cross Sell Product (Custom)” widget is used to view the Cart Page Template on WooCommerce. The “Cross Sell Product (Custom)” widget is mainly designed for the Cart Page Template.
Steps of adding Cross Sell Product (Custom) #
Go to WordPress Dashboard > WooLentor > Settings > Elements. From the list of Elements, turn ON the “Cross Sell Product..(Custom)” widget.
- You need to use the “Cross Sell Product (Custom)” widget to view your product on the Cart Page Template.
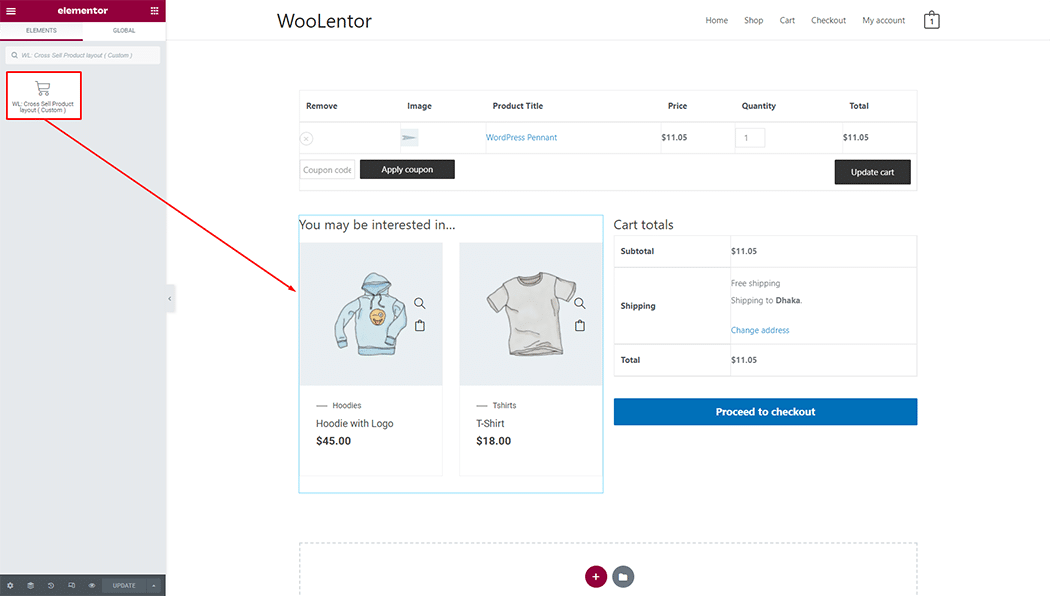
- To add a Cross Sell Product (Custom) widget, Drag and drop the “WL: Cross Sell Product layout (Custom)” widget onto the Cart Page Template.
Step 1: How to Enable Cross Sell Product (Custom) Widget? #
Go to Dashboard > WooLentor > Settings > Elements. From the list of Elements, turn ON the Cross Sell Product..(Custom) widget.
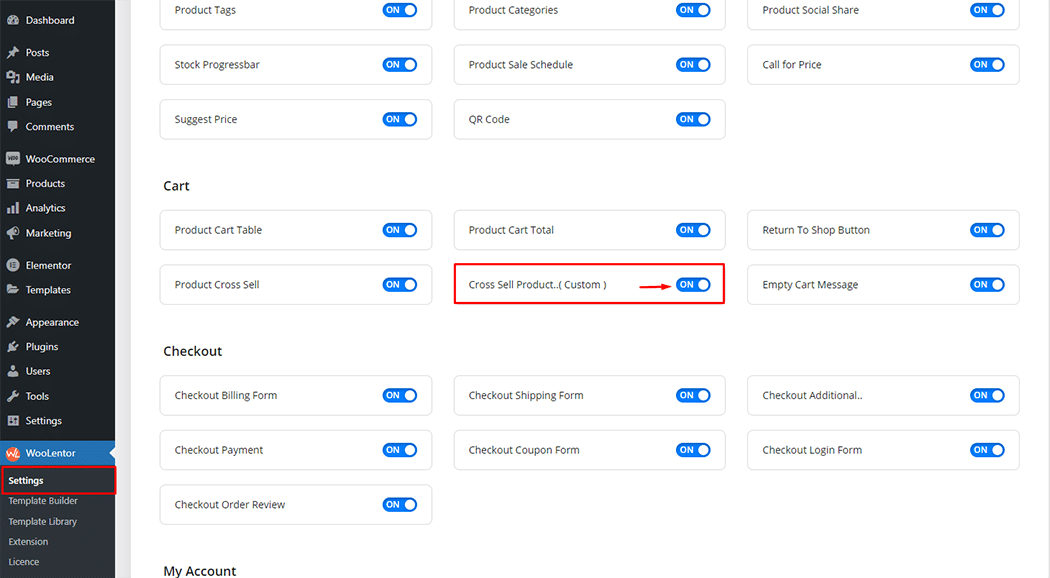
Step 2: How to use the Cross Sell Product (Custom) Widget? #
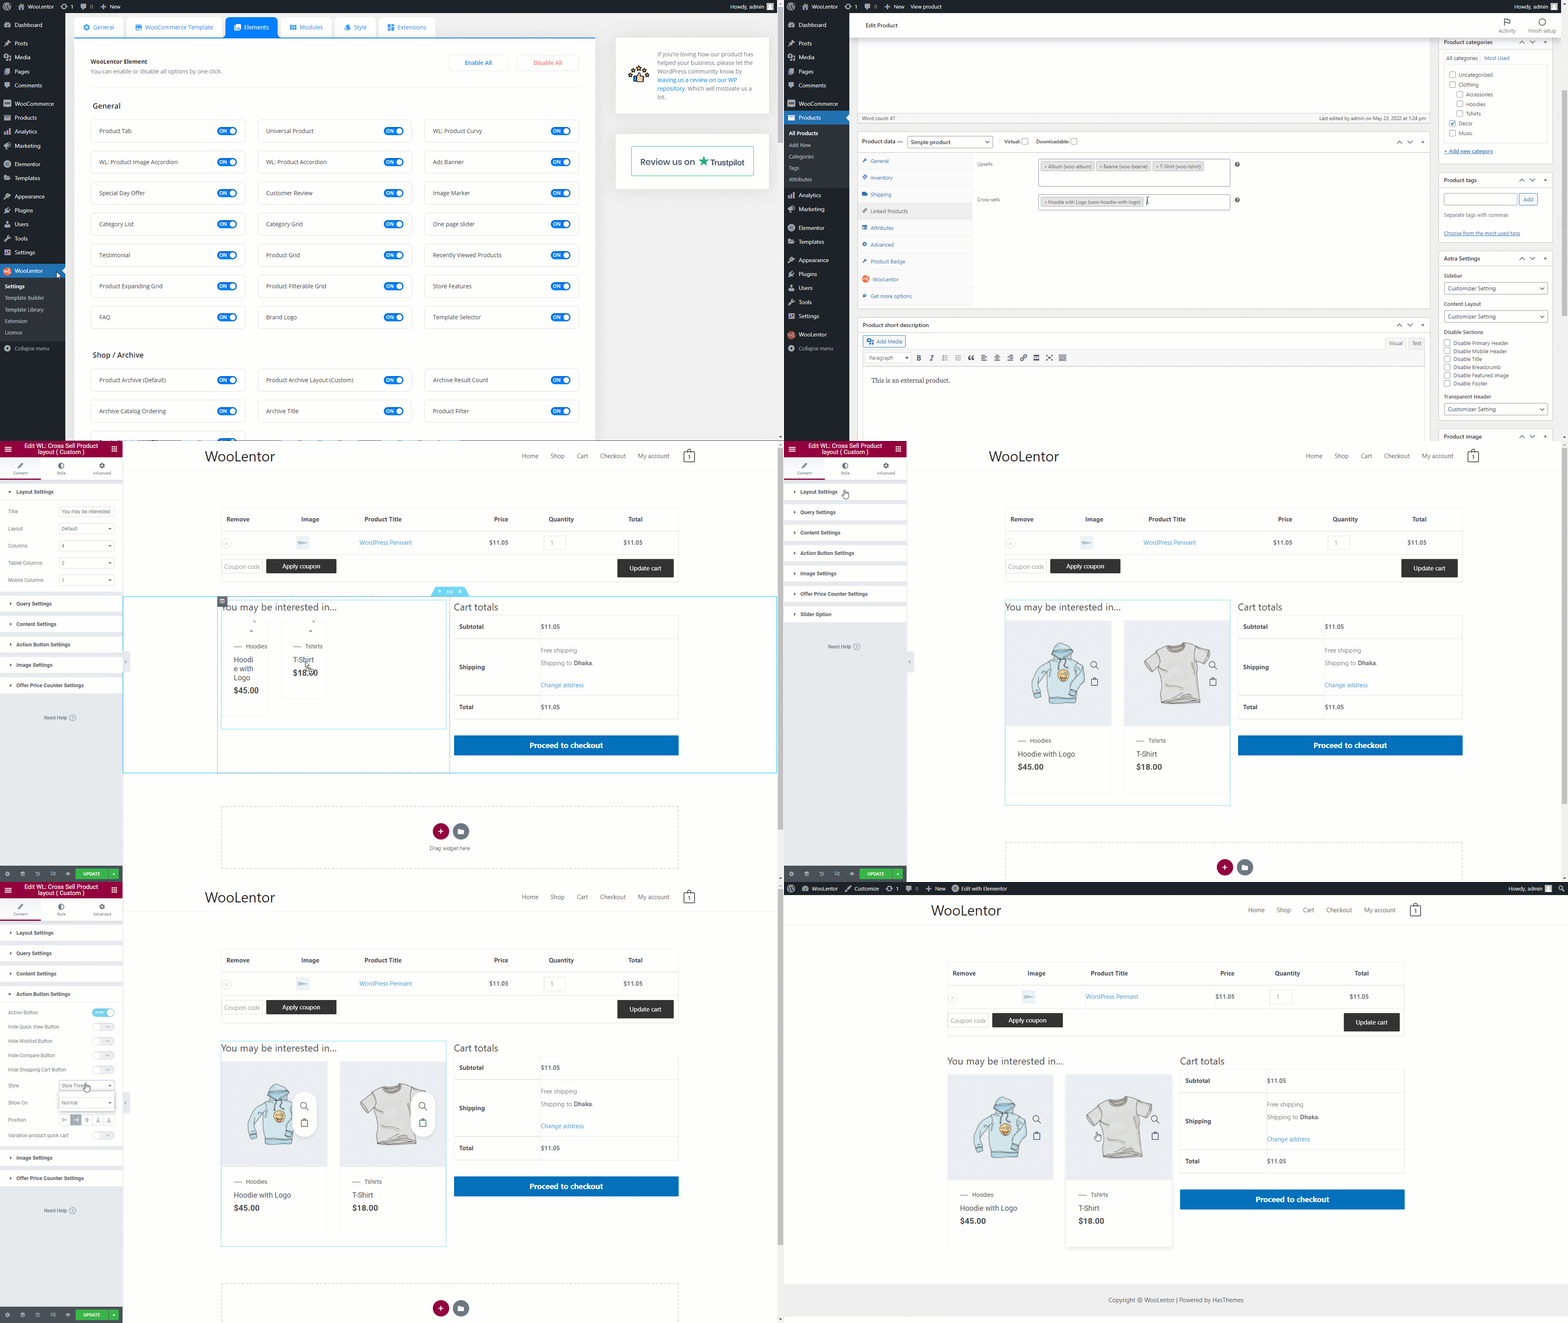
If you want to leverage the Cross Sell Product (Custom) feature on your WooCommerce store, you will need to use a widget named “WL: Cross Sell Product layout (Custom)“. To do so, simply search the widget in the Elementor widget panel, and use it on the corresponding template that you have created for the Cart Page Template.
How to create the Cart Page Template #
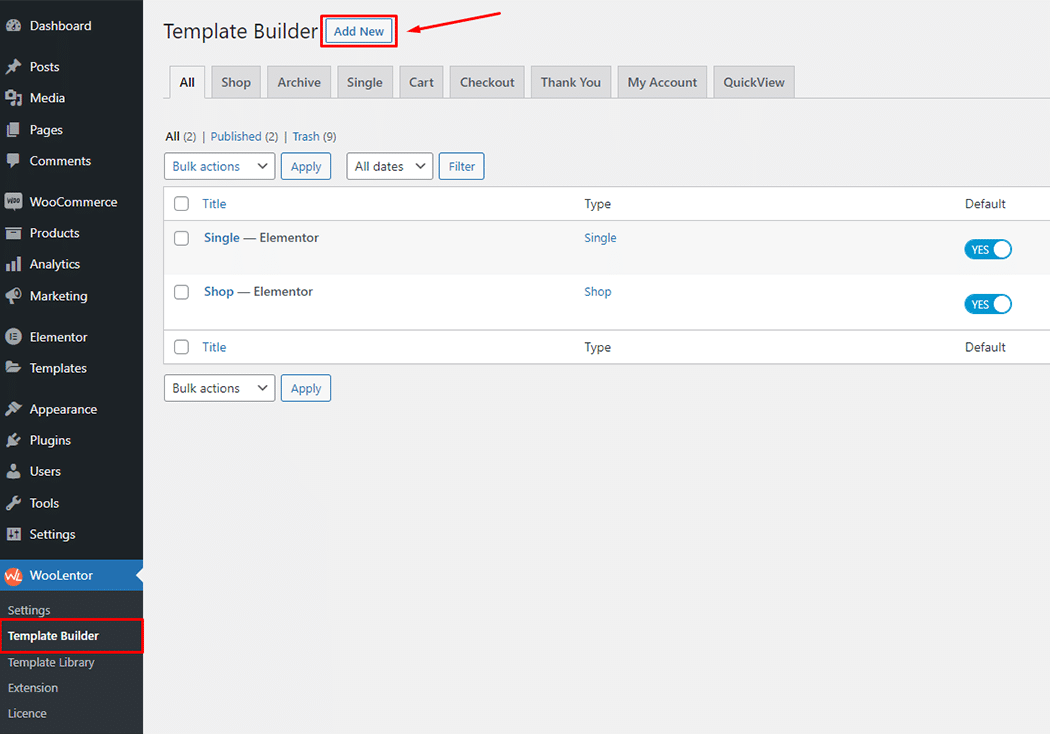
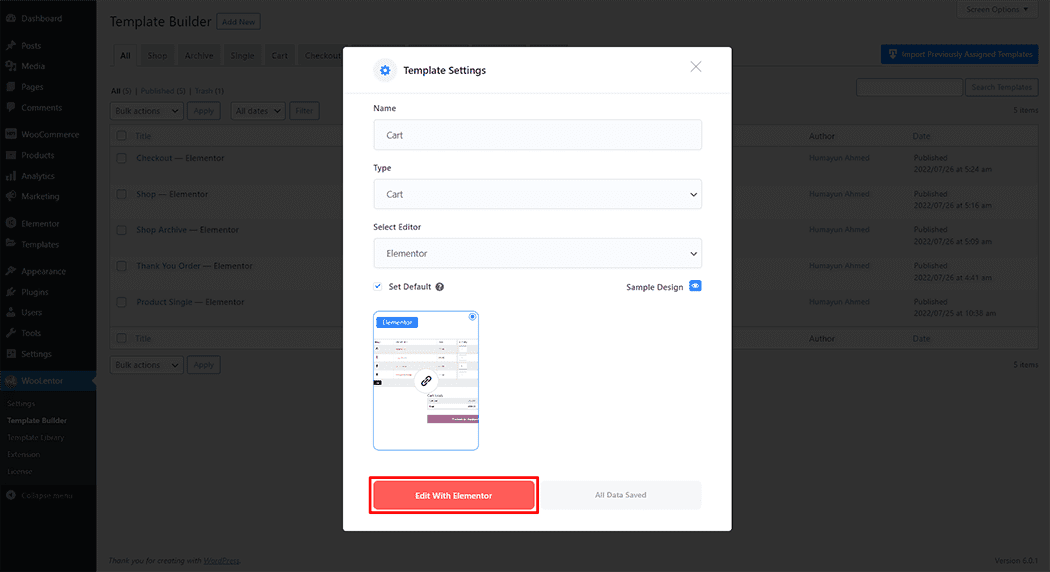
Go to Dashboard > WooLentor > Template Builder. Click the “Add New” button on the top right beside the text “Template Builder” to create a Cart Page Template
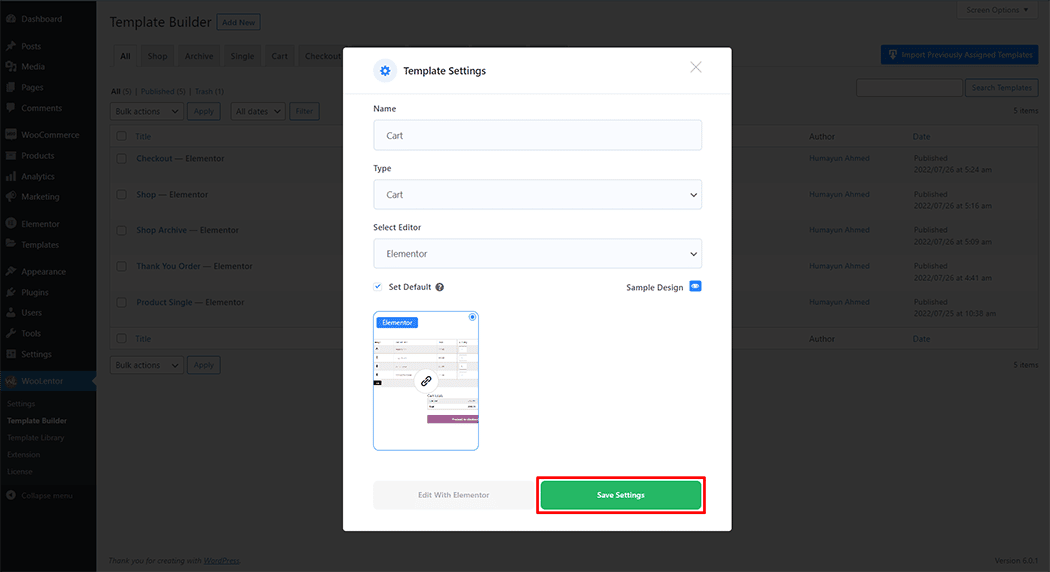
First, set the name of your Template and select it in the popup box for template settings. Select the Single from the dropdown type list. Then select the editor. Here there are two options- Elementor and Gutenburg. After that, choose your preferred template from the available ones. Once you are done You can choose a default sample design from the “Sample Design” button and save the settings by clicking the Save Settings button.
To add the Cross Sell Product Custom widget, click the “Edit with Elementor” or “Edit with Gutenberg” button to edit the Cart Page Template
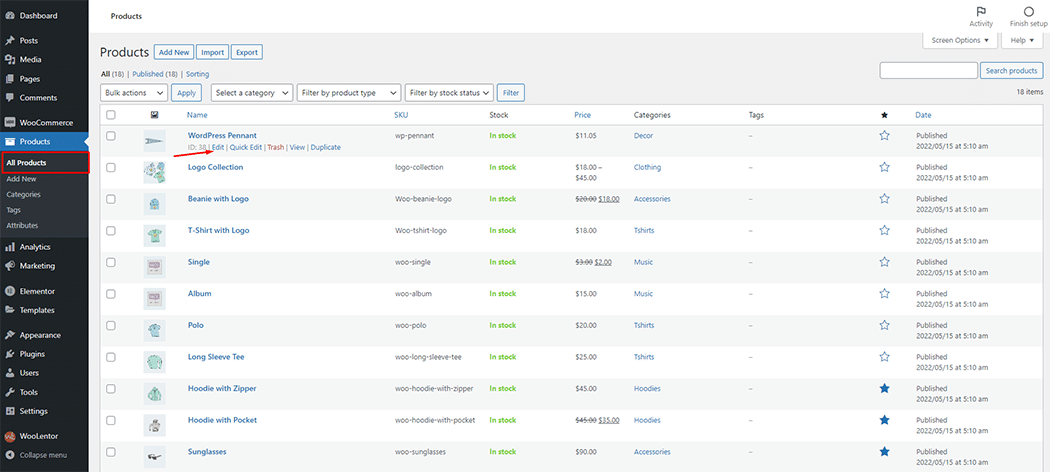
To add the Cross Sell Product (Custom) widget, open the product to edit. Go to Dashboard > Products > All Products
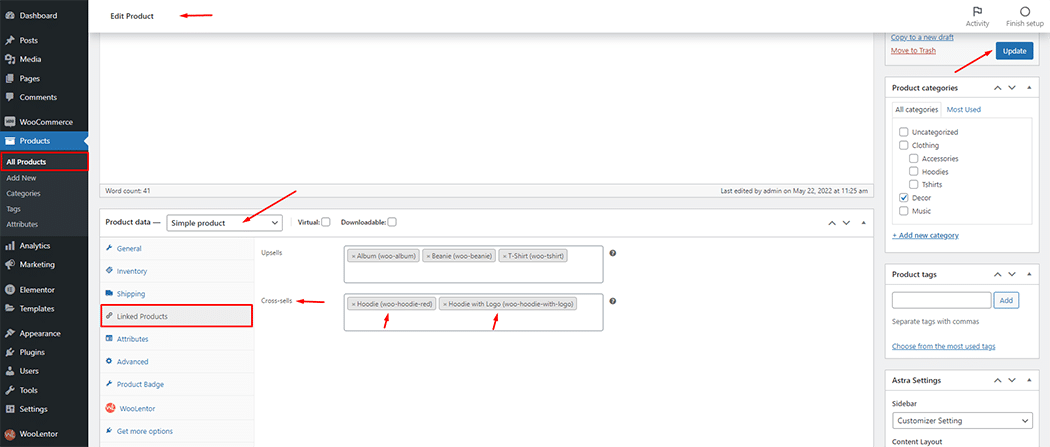
To add the Cross Sell Product (Custom) widget, go to Linked Products option and add your products.
To add the Cross Sell Product (Custom) widget, search by “WL: Cross Sell Product layout (Custom)” and use the widget that has the “WL Badge” on the Cart Page Template.
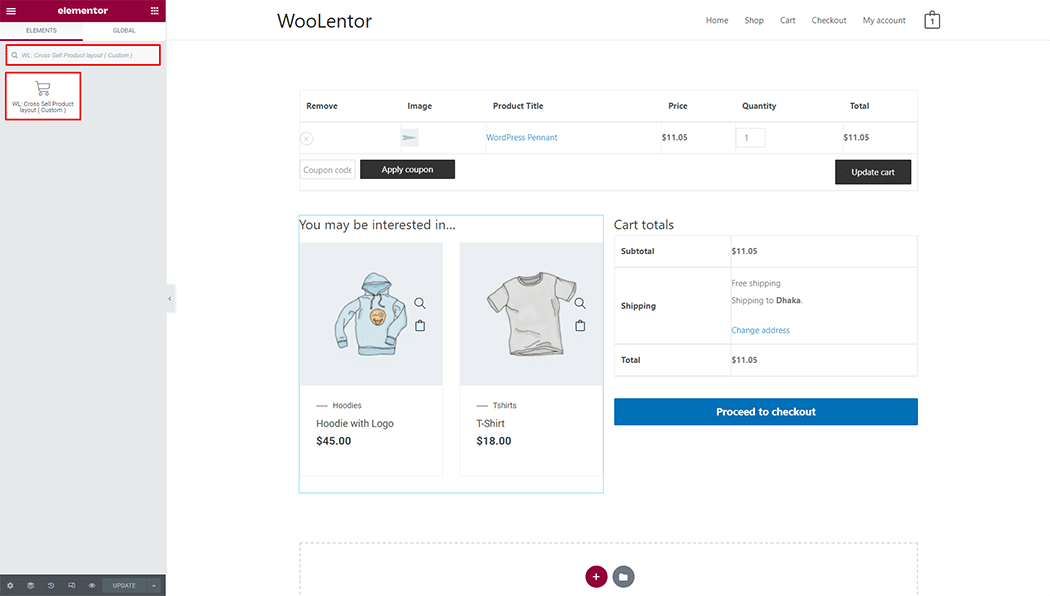
Drag and drop the WooLentor Cross Sell Product (Custom) widget onto the Cart Page Template.
Step 3: How to customize the Cross Sell Product (Custom) Widget? #
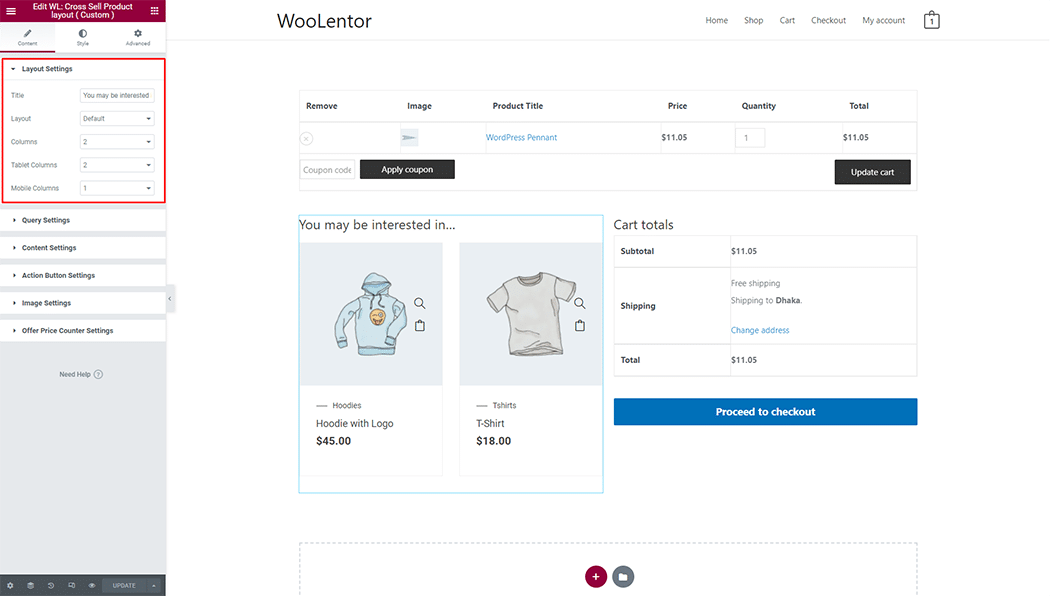
Layout Settings: You can set different layout styles, and columns on the responsive device, and also can change the title.
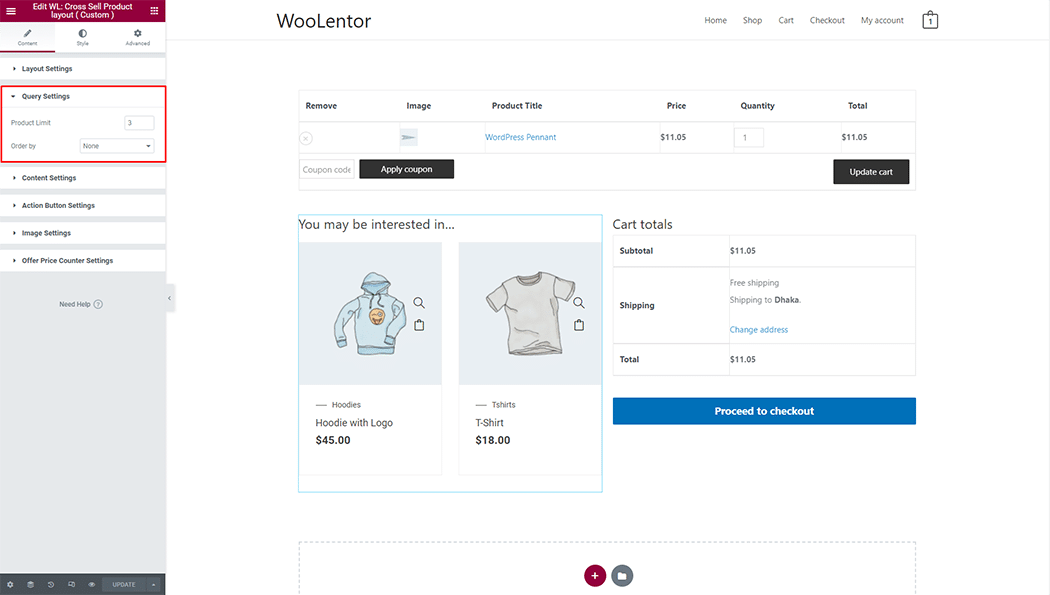
Query Settings: You can set product limit and order type.
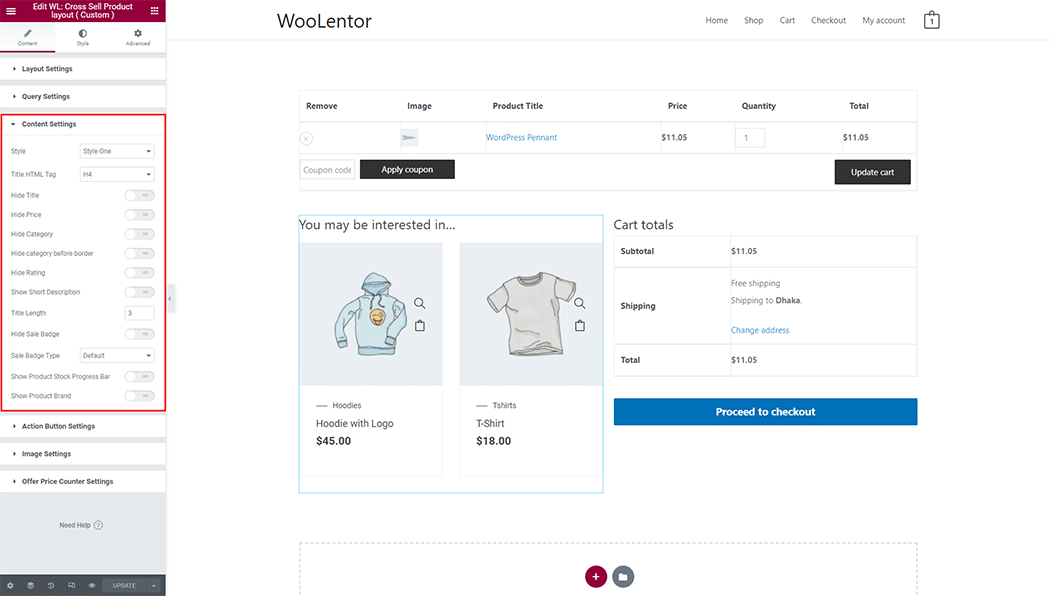
Content Settings: You can set different layout styles, and show or hide any content.
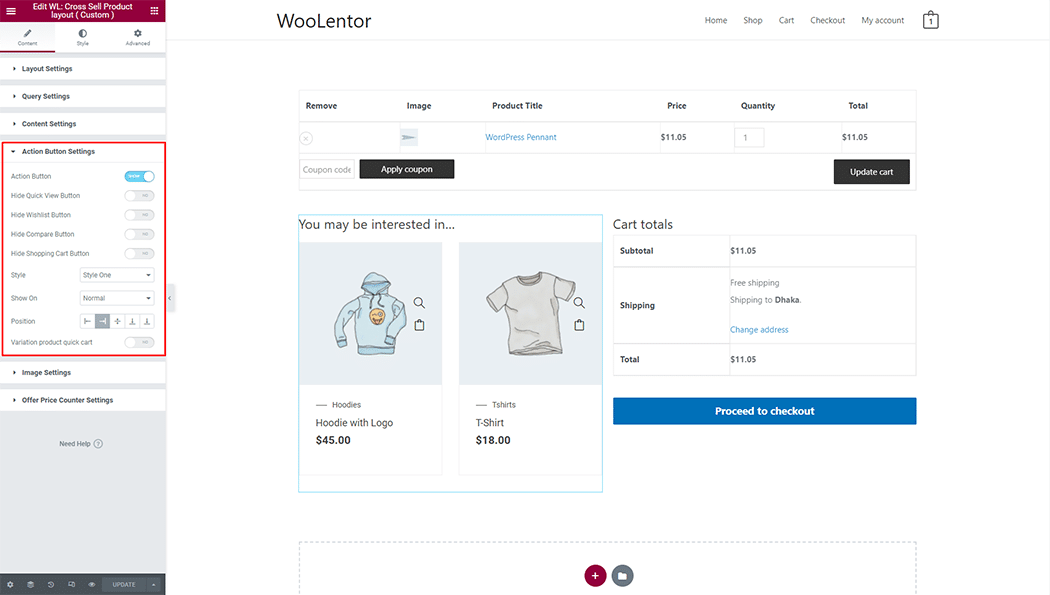
Action Button Settings: You can set different layout styles, and positions, and show or hide any action button.
Quick Checkout Button Options #
Once the Quick Checkout module is enabled, the following options will be available:
- Enable: To activate the Quick Checkout button, simply toggle this option on.
- Hide Text: To hide the text on the Quick Checkout button, enable this option.
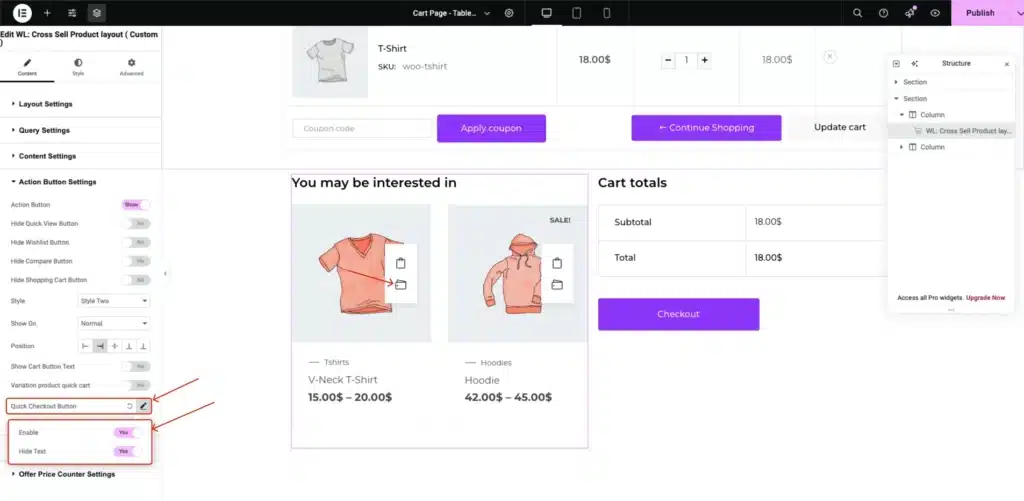
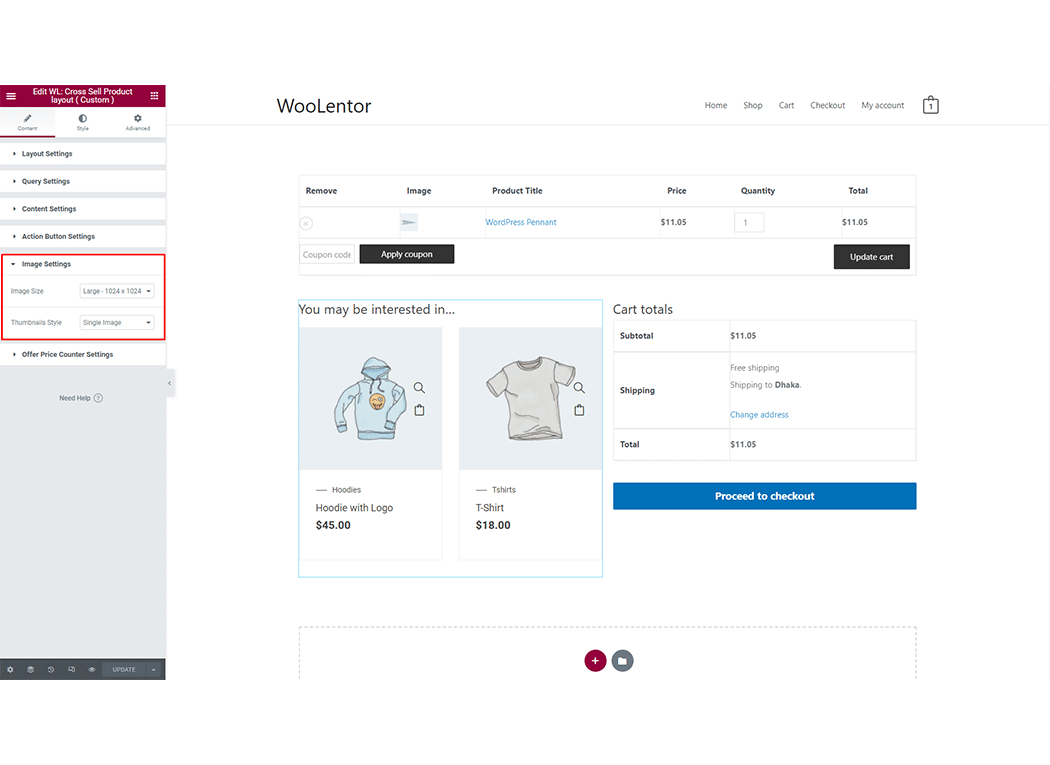
Image Settings: You can set a single image, slider, or tab from the thumbnail style, and also can set image size.
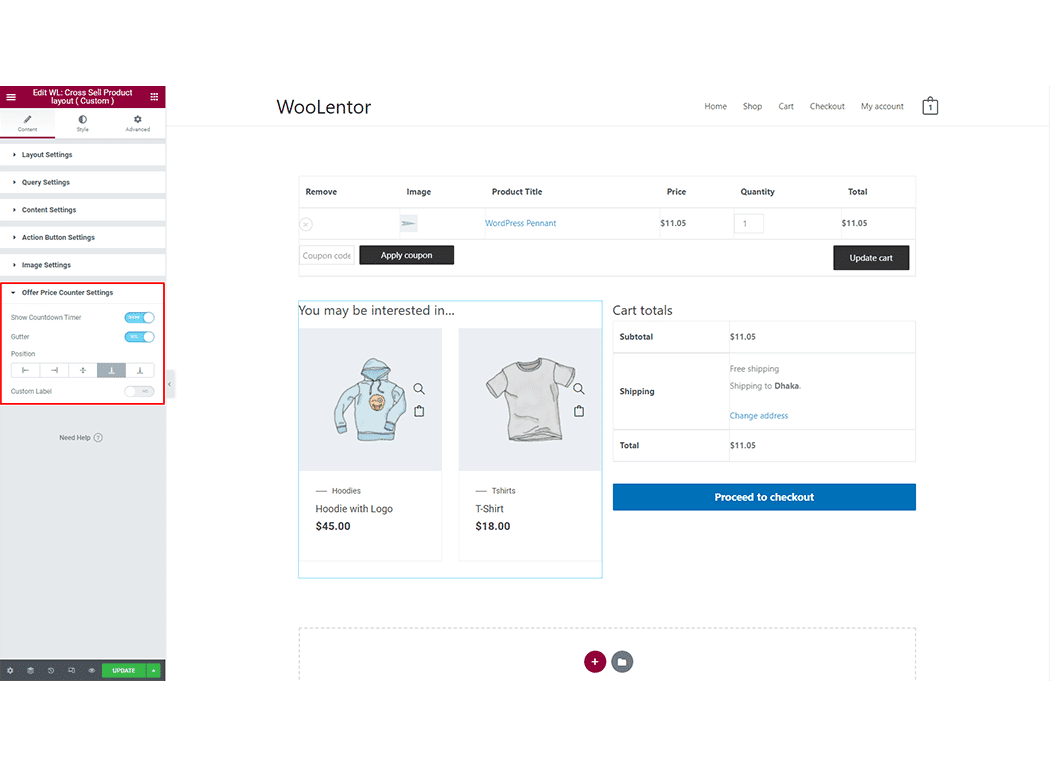
Offer Price Counter Settings: You can show a countdown timer, gutter, position, and custom label.
How to customize the Cross Sell Product (Custom) style #
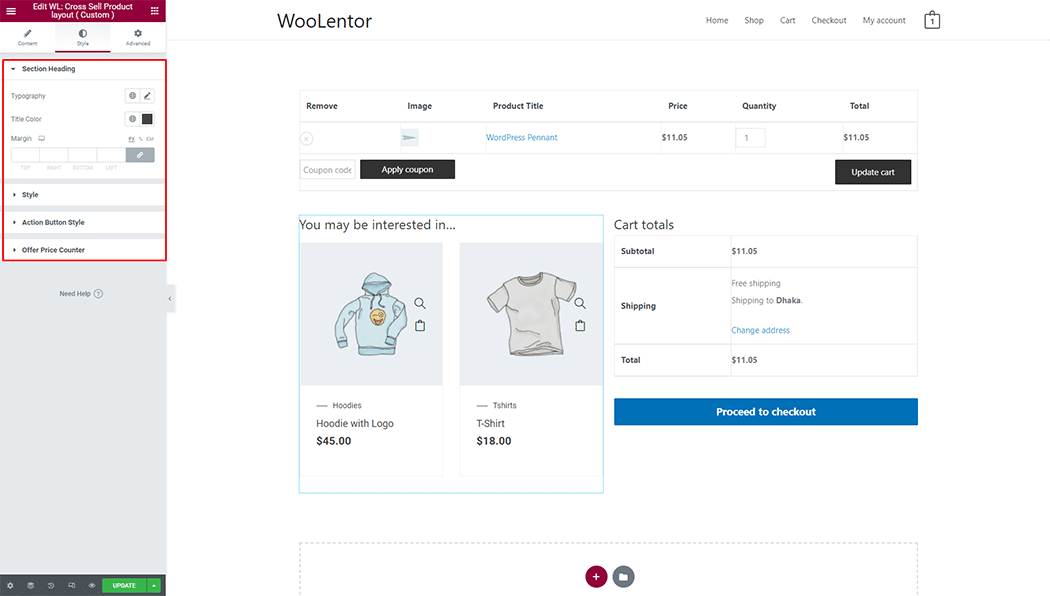
You can change the typography, text color, padding, and margin style of the Cross Sell Product (Custom) as needed.
Step 4: Now visit the site #
Visit the Cart Page Template to Preview.
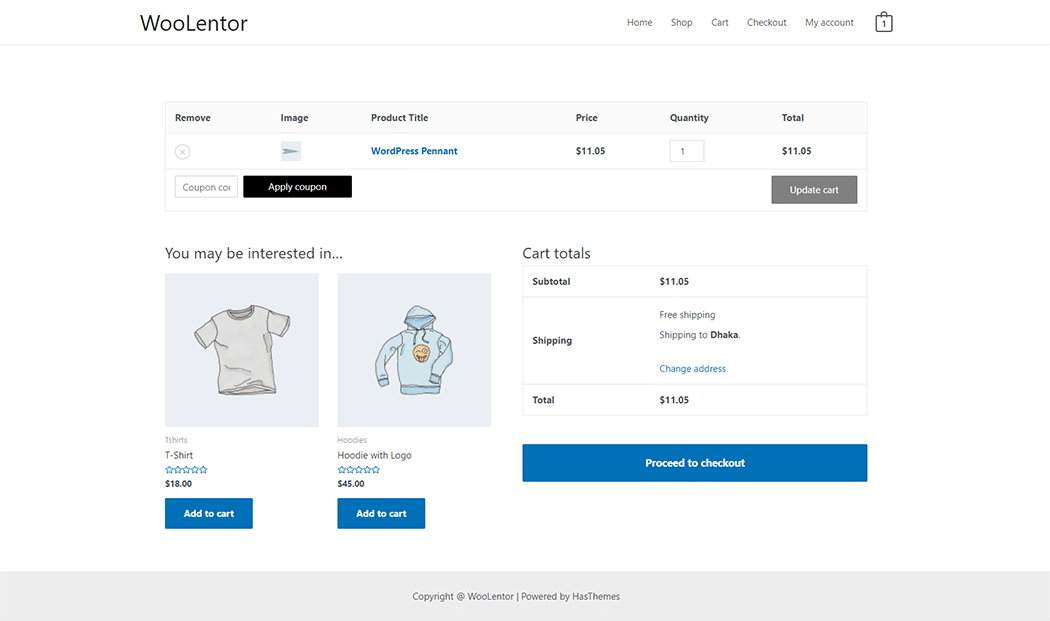
From the style, setting makes necessary customization from the available options.