GTM Conversion Tracking Module helps you keep track of conversions and assign them to specific sources. You may identify whether a sale was caused by a Google Ads/Facebook Ads, a direct website visit, or a social media post. When you link your store seamlessly with GTM, you’ll generate more income from advertising by gathering precise sales data.
Benefits of using GTM Conversion Tracking
Google Tag Manager gives you the ability to add and update your own tags for conversion tracking, site analytics, remarketing, and more.
How to Enable GTM Conversion Tracking?
WordPress Dashboard > WooLentor > Settings > Modules > GTM Conversion Tracking
- Install WooLentor WooCommerce Plugin
- Go to WooLentor -> Settings -> Modules -> GTM Conversion Tracking
- Enable the GTM Conversion Tracking
Steps of adding GTM Conversion Tracking
With WooLentor, you can enable GTM Conversion Tracking. Here are the easy steps of adding a GTM Conversion Tracking.
Follow the following steps:
Step 1: Enable the GTM Conversion Tracking.
First, enter your admin dashboard and go to WooLentor > Settings > Modules > GTM Conversion Tracking

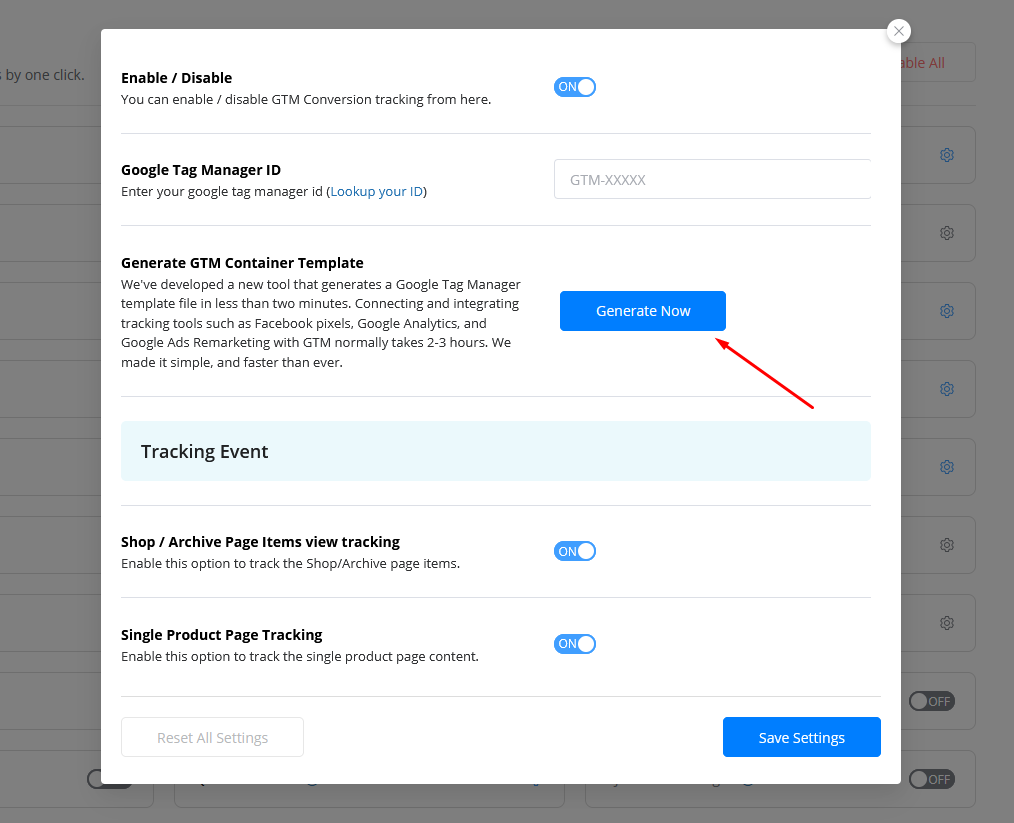
After that, Enable the module and insert the Google Tag Manager ID in the gaps:

To get Google Tag Manager ID > Go to your GTM Account
Click Generate Now button to Generate GTM Container Template
After that, Enable Services one by one with ID then click Download GTM Template button to download the GTM Template
Go to your GTM Account > Container Name > Admin > Import Container
Choose GTM Template Container File You’ve Downloaded Earlier. Choose Workspace and Import Option. After that click the Confirm button to Confirm the Changes.
Go to Workspace > Tags then click the Submit button.
Add a Version Name then click the Publish button to Publish.
Go to Versions to Preview.