Tired of the default “Sale!” badge in WooCommerce? Many store owners want to customize this badge to match their brand voice or promotional strategies.
Customizing your sales badges can significantly impact your store’s conversion rates and brand presence.
Whether you’re running flash sales, seasonal promotions, or special offers, the right badge text can make your products stand out.
This comprehensive guide will explore how to rename sales badge in WooCommerce.
Wth a few simple steps, you can transform your sales badge into something that reflects your brand’s personality and grabs your customers’ attention in all the right ways.
Ready to give your sales a stylish boost? Let’s get started!
Table of Contents
ShopLentor- WooCommerce Builder for Elementor & Gutenberg
A versatile page builder to build modern and excellent online stores with more than 100k+ Active Installations.
Key Takeaways
- Master two proven methods to rename WooCommerce sales badges: custom code implementation and plugin solutions
- Learn how to implement brand-specific sales badge text that resonates with your target audience
- Discover practical examples of effective sales badge text for different promotional scenarios
- Understand how to use ShopLentor’s Product Badges module for easy customization
- Follow best practices for creating clear, action-oriented badge text that drives conversions
- Troubleshoot common issues and implement quick solutions when customizing sales badges
- Learn how to integrate custom sales badges with your marketing campaigns and seasonal promotions
What are WooCommerce Sales Badges
WooCommerce sales badges are dynamic visual elements that automatically appear when products are marked for sale or special promotions. By default, these badges display a simple
Core Functions of Sales Badges in WooCommerce
- Drawing Attention to Special Offers: Sales badges are essential visual elements that highlight discounted products in your WooCommerce store. They create instant visual cues that help shoppers spot special offers while browsing.
- Creating a Sense of Urgency: Sale badges trigger quick buying decisions by showing customers that an offer is time-limited. They encourage immediate action by reminding shoppers that special deals won’t last forever.
- Highlighting Promotional Campaigns: These badges effectively showcase different types of deals like seasonal discounts and flash sales. They make your promotional offers stand out, whether it’s a holiday sale or clearance.
- Enhancing Shopping Experience: Well-placed sales badges help customers find deals quickly as they browse your store. They improve navigation and build trust by clearly showing which products are discounted.
Why Customize Your Sale Badge?
Think of your WooCommerce sale badge as your store’s digital storefront sign. Just like a compelling store window display catches the eye of passersby, a well-crafted sale badge can turn casual browsers into eager shoppers.
Let me show you why it’s worth taking a few minutes to customize yours. Here are some key reasons why renaming your sales badge can make a big difference:
Speak Your Brand’s Language
Your brand has its own unique personality. Shouldn’t your sale badges reflect that? Instead of settling for the plain “Sale” label everyone uses, you can create something that truly represents your brand’s voice.
Running a boutique fashion store? “Chic Deals” might be perfect. Got a tech shop? Try “Tech Flash Sale” or “Innovation Special. You could also use phrases like:
- “Special Offer!”
- “Limited Time Deal”
- “Today’s Deal”
- “Flash Sale!”
Catch Their Eye
We see “SALE!” everywhere online, but what if your badge said “48-Hour Steal” or “Today’s Hidden Gem”? These kinds of phrases make shoppers stop and think, “Hey, what’s this about?” That moment of curiosity is pure gold for engagement.
Turn Browsers into Buyers
When someone visits your store, you’ve got seconds to capture their interest. A badge that says “Members Save 40%” or “Flash Deal: Gone in 24hrs” creates a sense of opportunity and urgency that’s hard to resist. It’s like having a friendly sales associate guiding shoppers to great deals.
Match Your Marketing Moments
Different seasons call for different strategies. Make your badges work harder by aligning them with specific campaigns:
- Holiday Season: Use “Festive Finds” or “Holiday Magic Prices”
- Summer Clearance: Try “Summer Sunset Deals” instead of just “Clearance”
- Black Friday: Create urgency with “24-Hour Deal Dash”
- Seasonal Collections: Use “New Season Style Deals” or “Spring Fashion Flash”
Recommended Blogs for You:
👉 What are Upselling and Cross-Selling? A Simple Guide to Increasing Your Average Order Value
👉 How to Build an eCommerce Website from Scratch
👉 9 Ways to Encourage Returning Customers for Sustainable Business Growth
👉 The 10 Best WooCommerce Product Filter Plugins
How to Rename Sales Badge in WooCommerce
Whether you’re comfortable with code or prefer using plugins, here are two effective methods to customize your sale badges. Let’s explore both options so you can pick the one that suits your comfort level!
Method 1: Using Custom Code
If you’re comfortable working with code, manually renaming your WooCommerce sale badge can give you more control. Here’s how you can do it step-by-step:
Step 1: Access Your Theme Files
Access your child theme’s functions.php file through one of these methods:
- Your hosting provider’s control panel
- cPanel
- SFTP client (like FileZilla)
- WordPress theme file editor
Step 2: Add a code snippet
Add this code snippet to your functions.php file:
add_filter('woocommerce_sale_flash', 'woocommerce_custom_sale_text', 10, 3);

function woocommerce_custom_sale_text($text, $post, $_product) {

    return 'Your Custom Text'; // Replace with your desired text

}
Replace ‘Your Custom Text’ with your desired badge text, such as “Flash Sale!” or “20% OFF.”
For enhanced styling, add this CSS to your theme’s stylesheet:
.onsale {
background-color: #ff0000;
color: #ffffff;
border-radius: 50%;
padding: 5px 10px;
position: absolute;
z-index: 1;
top: 0;
left: 0;
}
Step 3: Save and Test
1. Save the changes and upload the updated file
2. Test on your staging site first
3. Check display on different devices
4. Verify badge appearance on various product types
Important Safety Tips:
- Always back up your site before making code changes
- Use a staging site for testing
- Never modify parent theme files directly
- Keep a record of your customizations
- Test across different devices and browsers
Advantages of Custom Code:
- Full control over badge text and style
- No additional plugins needed
- Better site performance
- Complete customization flexibility
Method 2: Rename the WooCommerce Sale Badge Using Plugins
If you prefer a no-code solution, plugins offer an easier way to customize your WooCommerce sales badges. ShopLentor is a powerful WooCommerce addon that includes a dedicated Product Badges module, making badge customization simple and flexible.
Why Use ShopLentor?
ShopLentor lets you create visually stunning badges with endless customization options using the Product Badges module. Highlight your products with unique badges like “Deal of the Day” or “New Arrival,” and make them stand out to your shoppers.
How to Set Up Badges Using ShopLentor:
Step 1: Install from WordPress Dashboard
1. Go to WordPress Dashboard > Plugins > Add New
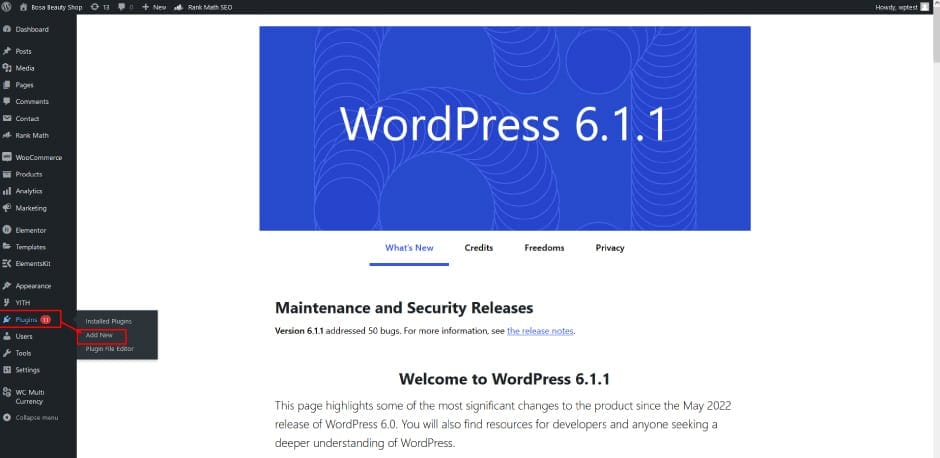
2. Search for “ShopLentor”. Click “Install Now”

3. After installation, click “Activate”

Step 2: Setting Up Product Badges
Once ShopLentor is installed and activated:
1. Navigate to ShopLentor > Settings > Modules and enable the “Product Badges” option.

2. Toggle the switch to activate the feature

Step3 : Set Position and Conditions
Badge Position Options: Now, you can set badge position such as Top Left / Top Right / Bottom Left /Bottom Right /Custom Position
Display Conditions: Use conditions to display badges based on product categories, sale items, or availability. All Products >Selected Products > Category> On Sale Only> Out of Stock
ShopLentor- WooCommerce Builder for Elementor & Gutenberg
A versatile page builder to build modern and excellent online stores with more than 100k+ Active Installations.
Best Practices for Sales Badge Customization
Customizing your WooCommerce sales badge can be a game-changer in grabbing attention and boosting conversions. Here’s how you can get it right:
- Keep it Short and Clear: Choose concise, straightforward text for your badges. Examples like “50% Off” or “Limited Offer” instantly convey value without clutter.
- Use Action-Oriented or Time-Sensitive Language: Create urgency with phrases like “Buy Now” or “Ends Soon.” These encourage shoppers to take immediate action.
- Ensure Compatibility with Your Theme: Test your customized badges to ensure they align seamlessly with your WooCommerce theme, maintaining visual consistency and mobile responsiveness.
- Test for Optimization: Run A/B tests on different badge names and styles to see which drive higher click-through rates and conversions.
- Highlight Campaigns Creatively: Whether you’re renaming sales badges in WooCommerce to “Holiday Specials” or “Flash Sale,” ensure the badges align with your brand’s messaging and promotional goals.
Common Issues and Troubleshooting
When renaming or customizing WooCommerce sale badges, you might encounter some common challenges. Here’s how to identify and resolve these issues:
Code-Related Problems
Problem: Custom Code Not Working
The most common issue is when your custom code doesn’t take effect. This usually happens because of:
- Syntax errors in the PHP code
- Missing code dependencies
- Incorrect file placement
Solution:
- Validate your code using online PHP validators
- Double-check code placement in functions.php
- Clear your website cache after making changes
- Test in different browsers to confirm the issue
Plugin-Related Issues:
Problem: Plugin Conflicts
Sometimes other plugins or your theme might override your sale badge customizations. Signs include:
- Badge changes not appearing
- Multiple badges showing up
- Inconsistent badge display
Solution:
- Disable other plugins one by one to identify conflicts
- Test with your theme’s default settings
- Contact plugin support if conflicts persist
- Update all plugins to their latest versions
Restoring Default Settings
If you need to revert to the original WooCommerce sale badges:
Using Custom Code Method:
- Remove the added code from your functions.php file
- Clear your website cache
- Refresh your pages
Using Plugin Method:
- Disable the badge customization feature
- Reset plugin settings to default
- Clear cache and refresh your store
Always back up your site before making any changes, and test modifications on a staging site when possible.
Frequently Asked Questions
How do I rename the sales badge in WooCommerce?
You can rename the WooCommerce sales badge by adding custom PHP code to your theme’s functions.php file or using plugins. Choose a method that aligns with your technical skills.
Can I use different sales badges for different products?
Yes, you can assign unique sales badges to specific products using conditional logic in your code or through a plugin’s settings.
Will changing the badge affect my site’s performance?
Minimal impact when implemented correctly, especially with custom code. If you use custom code, ensure it’s added properly to the functions.php file without introducing unnecessary scripts or conflicts.
What if my custom sales badge doesn’t display correctly?
Check for syntax errors in your code or plugin settings if your custom sales badge doesn’t display correctly. Conflicts with other plugins or themes could also cause issues. Resolve these by disabling conflicting plugins or reverting to default settings for troubleshooting.
What are the best plugins to customize WooCommerce sales badges?
Some of the best plugins to customize WooCommerce sales badges include:
ShopLentor: Create unlimited badges, customize text, colors, and positions easily.
YITH WooCommerce Badge Management: Offers extensive badge customization options.
WooCommerce Custom Badges: Allows easy creation and management of custom sale badges.
Badges for WooCommerce: Customizes badges for different product conditions.
WooCommerce Product Badge Manager: Allows advanced customization and placement of badges.
WooCommerce Badge Designer: Lets you design unique badges for your products.
How can I revert changes if something goes wrong?
If something goes wrong after renaming or customizing your sales badge, you can quickly revert the changes by keeping backups of your website. Always use a child theme when making custom code changes to ensure you don’t lose modifications during theme updates.
Additionally, if you’re using a plugin, you can disable it or reset settings within its dashboard to restore the default sale badge.
Final Words
Learning how to rename sales badges in WooCommerce is more than just a technical customization.
Whether you choose the custom code approach or the ShopLentor plugin solution, ensure your changes align with your overall marketing strategy and brand voice.
The beauty of customizing your WooCommerce sale badges lies in the flexibility to experiment and find what resonates best with your specific audience.
Start small by testing different badge texts on specific product categories. Monitor how your customers respond to various messages and adjust accordingly.
Remember that effective badge customization is an ongoing process—what works today might need refreshing tomorrow as your store grows and evolves.
The power of custom sales badges lies in their ability to speak directly to your customers and influence their buying decisions.
Even a small change in your sales badge text can significantly impact how shoppers interact with your store. Keep testing new ideas, watch your analytics, and listen to customer feedback.
By making every word count on your sales badges, you’ll transform these simple elements into powerful tools for driving engagement and sales in your WooCommerce store.