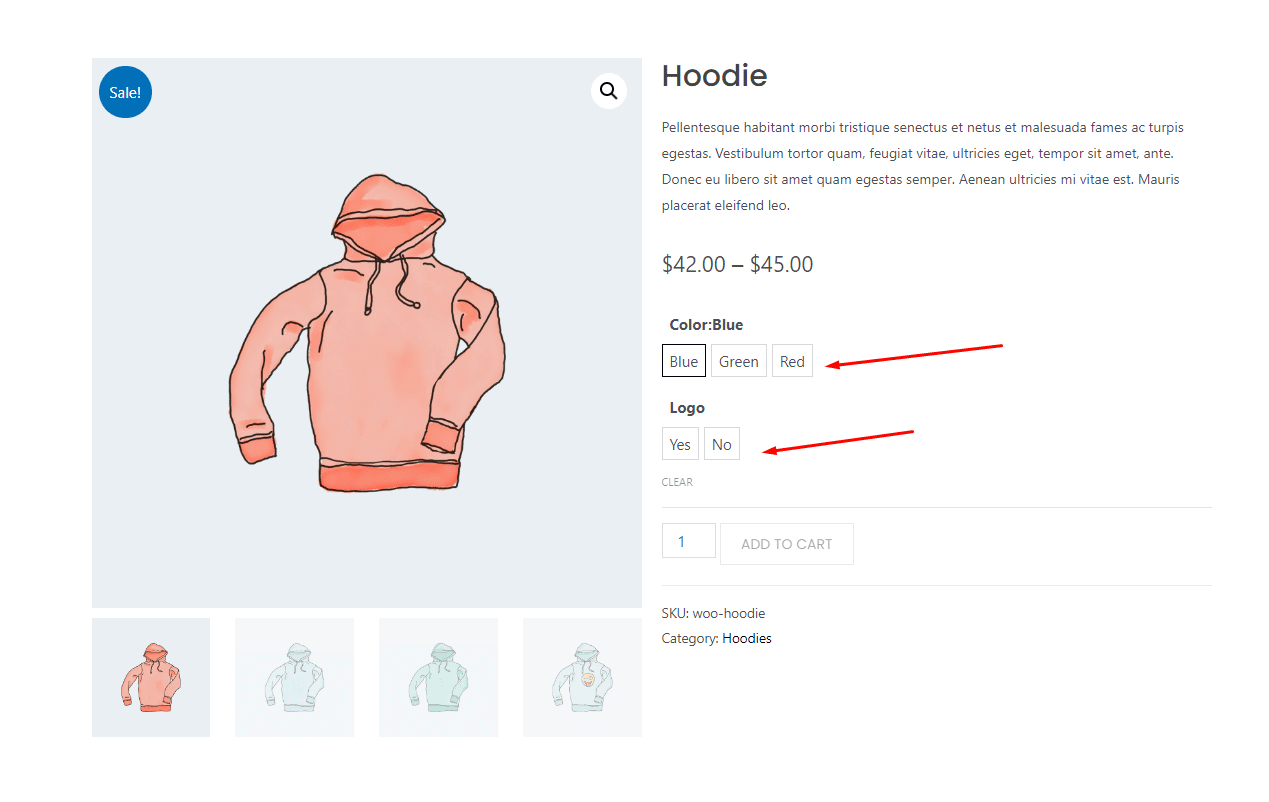
The Variation Swatches module in WooLentor allows users an opportunity to customize their WooCommerce Variation Swatches easily and gives them the professional look desired by many – without having any coding knowledge whatsoever.
Why use Variation Swatches? #
Are you getting frustrated with WooCommerce’s current way of presenting product attributes for your products? Well, Variation Swatches allows you to turn the WooCommerce product variation’s select options into more user-friendly swatches. Such as color swatch, button swatch & image swatch. That means you no longer need to rely on the default dropdown options when it comes to selecting product variations. With the help of this module, the customers will have the opportunity to observe the products they need more visually than the default dropdown options shown in WooCommerce.
Steps of adding WooLentor Variation Swatches #
Go to WordPress Dashboard > WooLentor > Settings > Modules. From the list of Modules, turn ON the “Variation Swatches” Module.
Step 1: How to Enable Variation Swatches Module?
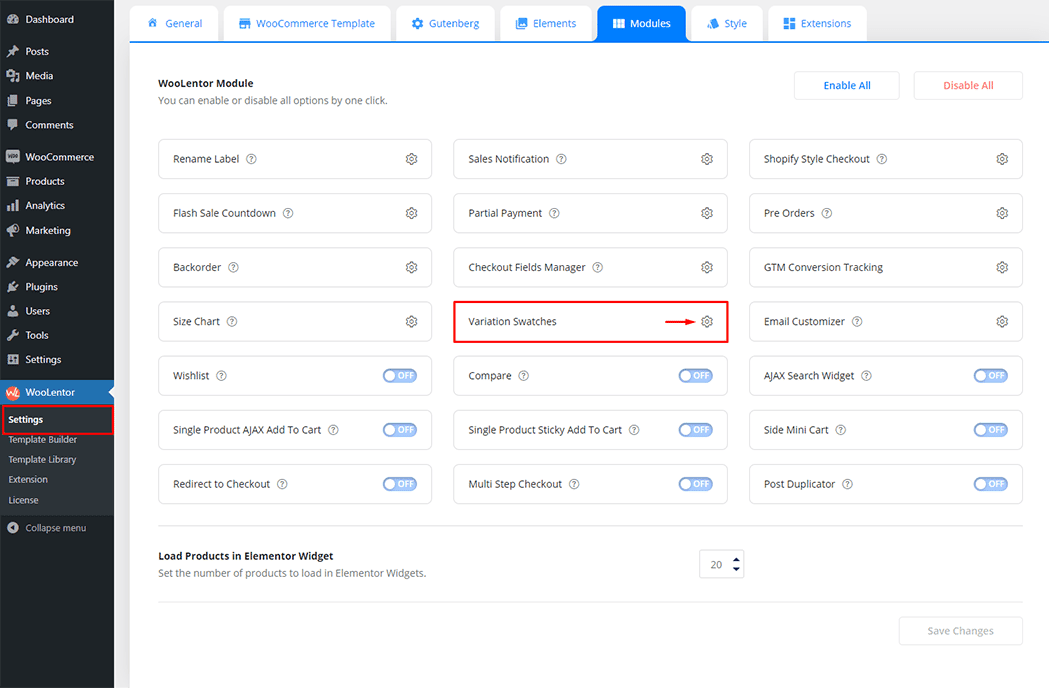
Go to Dashboard > WooLentor > Settings > Modules. From the list of Modules, click the setting of Variation Swatches Module.
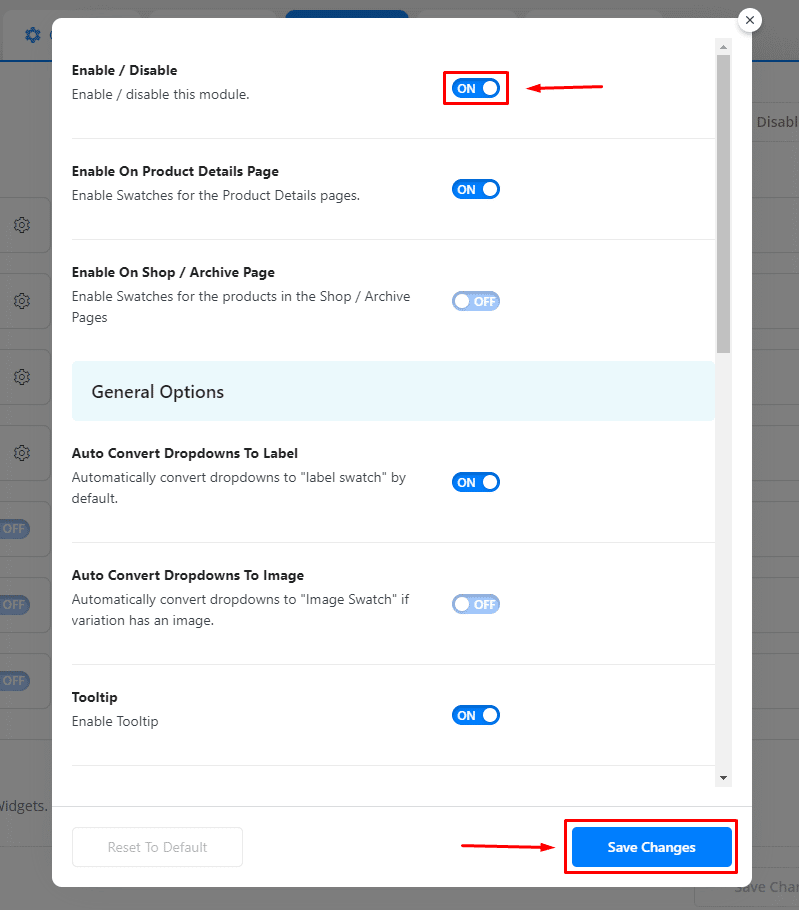
Turn On to enable Variation Swatches and click the Save Changes button to save
Step 2: How to use the Variation Swatches Module? #
To customize your traditional WooCommerce Variation Swatches, you need to use the Variation Swatches module. To do this, simply turn on the module in the Modules panel and save changes.
General Options: #
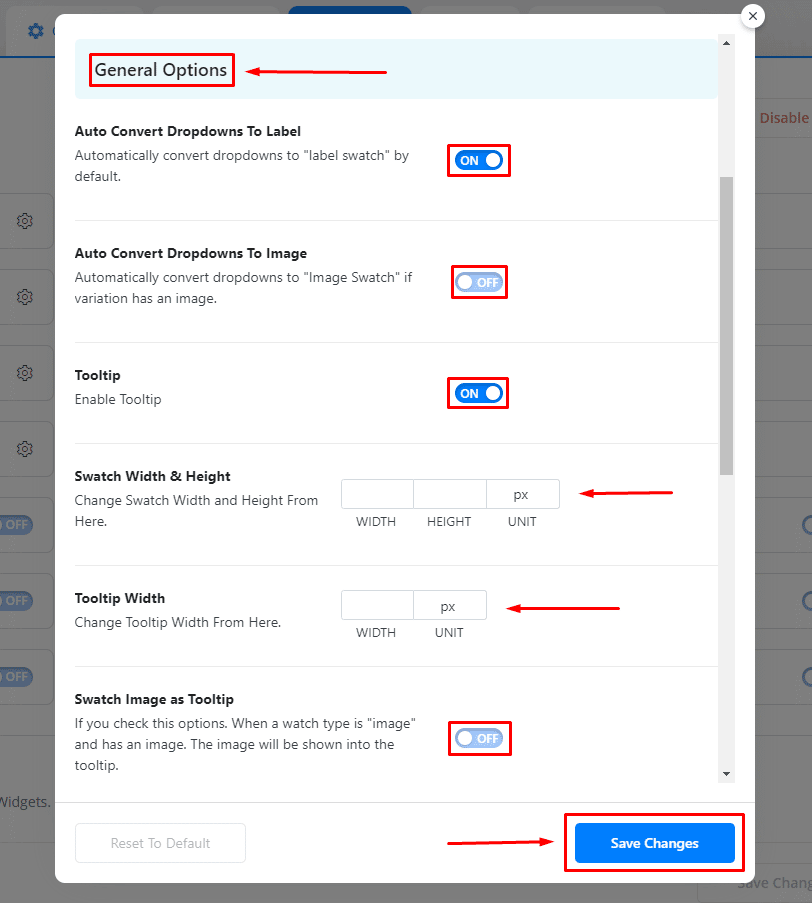
You can ON/Off different options from General Options.
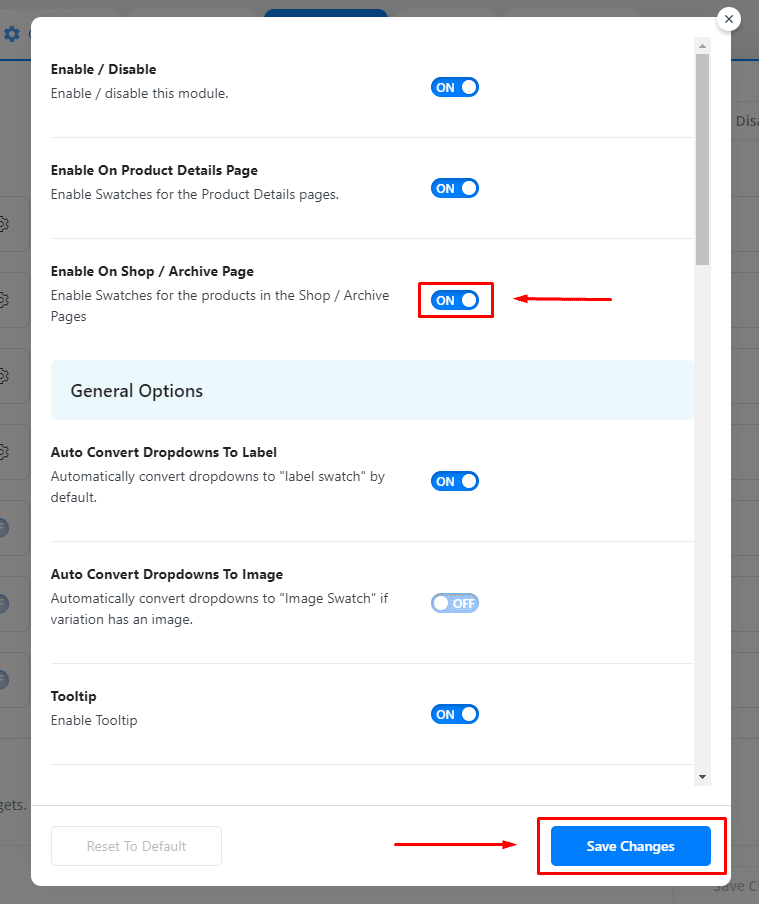
- Auto Convert Dropdowns To Label: Automatically convert dropdowns to “label swatch” by default.
- Auto Convert Dropdowns To Image: Automatically convert dropdowns to “Image Swatch” if the variation has an image.
- Tooltip: Enable Tooltip
- Swatch Width & Height: Change the Swatch Width and Height From Here.
- Tooltip Width: Change the Tooltip Width From Here.
- Swatch Image as Tooltip: If you check this options. When a watch type is “image” and has an image. The image will be shown in the tooltip.
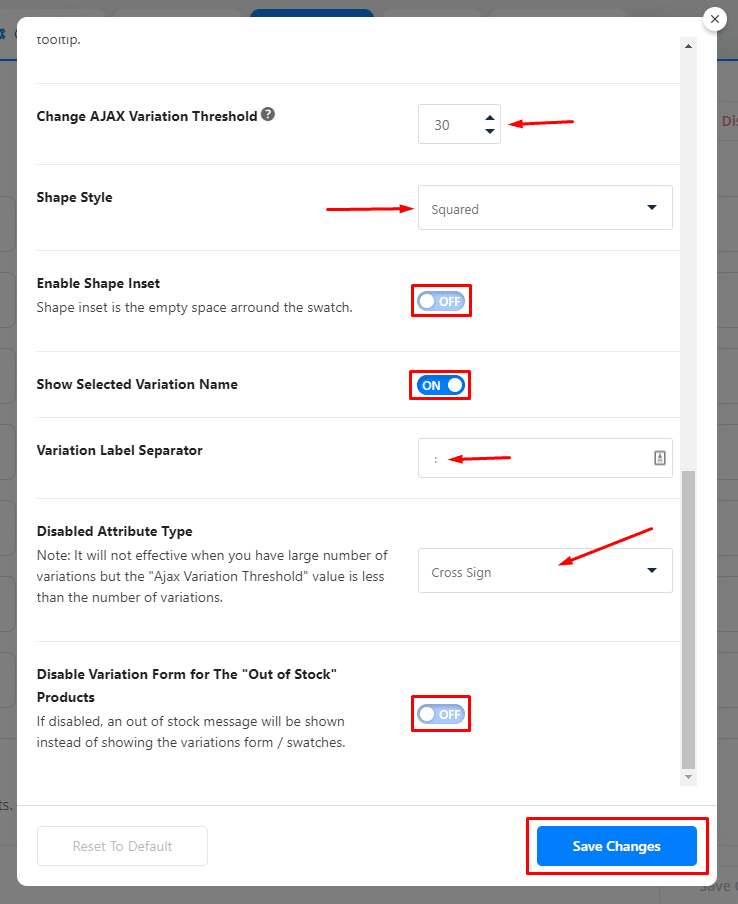
- Change AJAX Variation Threshold: If a variable product has over 30 variants, WooCommerce doesn’t allow you to show which combinations are unavailable for purchase.
- Shape Style: Squared/Rounded/Circle
- Enable Shape Inset: The shape inset is the empty space around the swatch.
- Show Selected Variation Name: Turn On to Show Selected Variation Name.
- Variation Label Separator: You can input Variation Label Separator here.
- Disabled Attribute Type: Cross Sign/Blur With The Cross /Blur/Hide
- Disable Variation Form for The “Out of Stock” Products: If disabled, an out-of-stock message will be shown instead of showing the variations form/swatches.
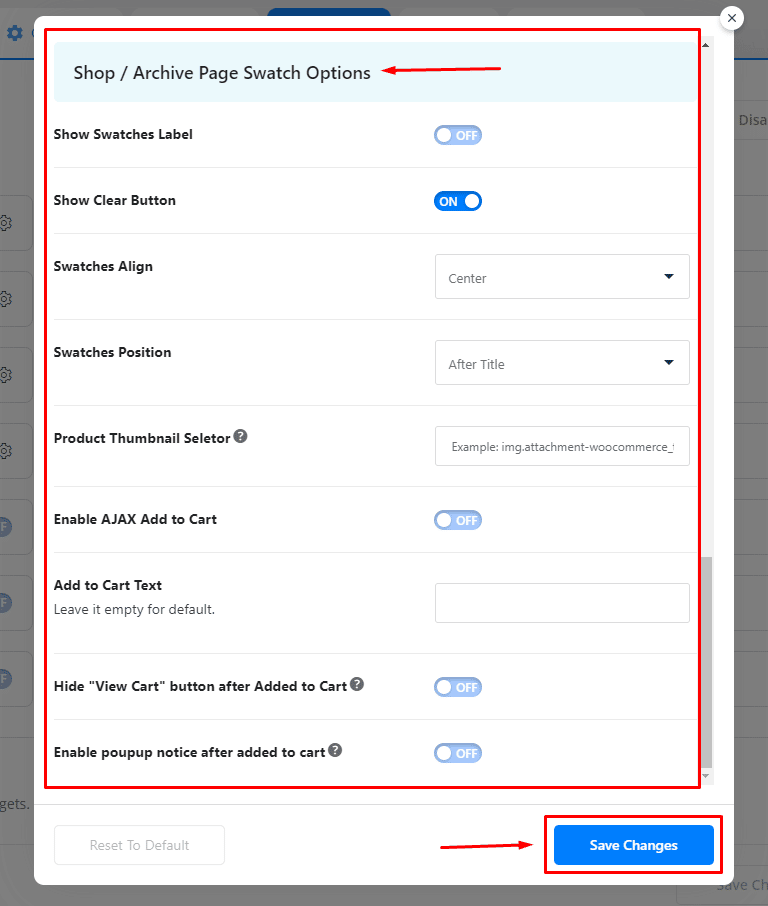
Shop / Archive Page Swatch Options: #
Turn ON “Enable On Shop / Archive Page” to Enable Swatches for the Products in the Shop / Archive Pages
- Show Swatches Label: Turn ON to Show Swatches Label
- Show Clear Button: Turn ON to Show Clear Button
- Swatches Align: Left/Center/Right
- Swatches Position: Before Title/After Title/Before Price/After Price/Custom Position/Use Shortcode
- Product Thumbnail Selector: Some themes remove the default product image. In this case, the variation image will not be changed after choosing a variation. Here you can place the CSS selector of the product thumbnail, so the product image will be changed once a variation is chosen.
- Enable AJAX Add to Cart:
- Add to Cart Text: Leave it empty for default or you can add text here.
- Hide “View Cart” button after Adding to the Cart: Turn ON to hide “View Cart” button after being added to Cart.
- Enable popup notice after added to cart: Turn ON to enable popup notice after adding to cart.
How to use the WooCommerce Variation Swatches Attributes? #
You can select any Type (Label/Color/Image) Variation Swatches.
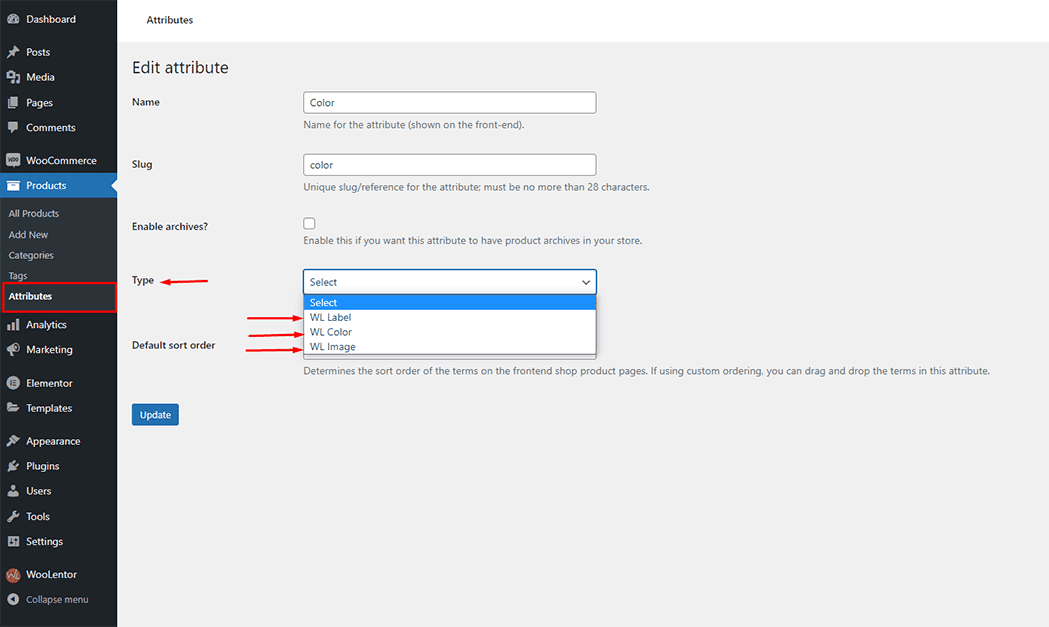
For example: If you want to represent color attribute variations in a “Color” type swatch. You can achieve this by following the procedure mentioned below.
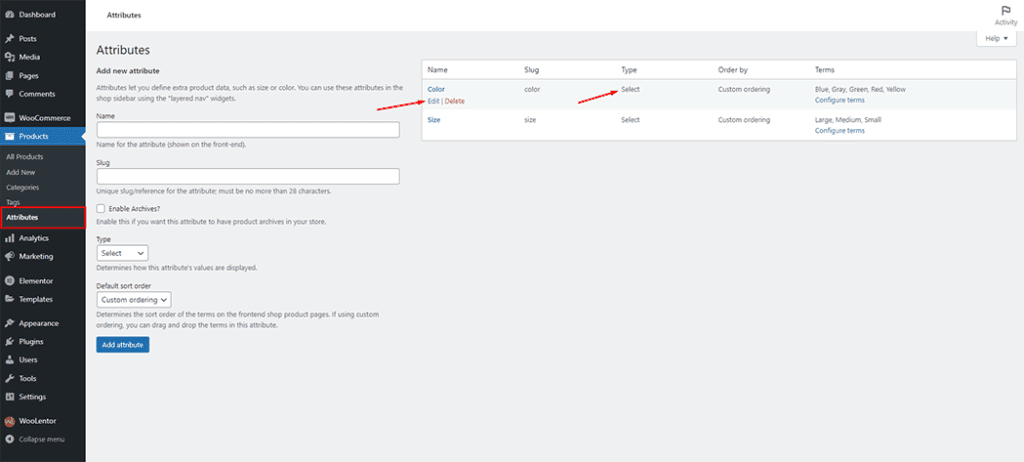
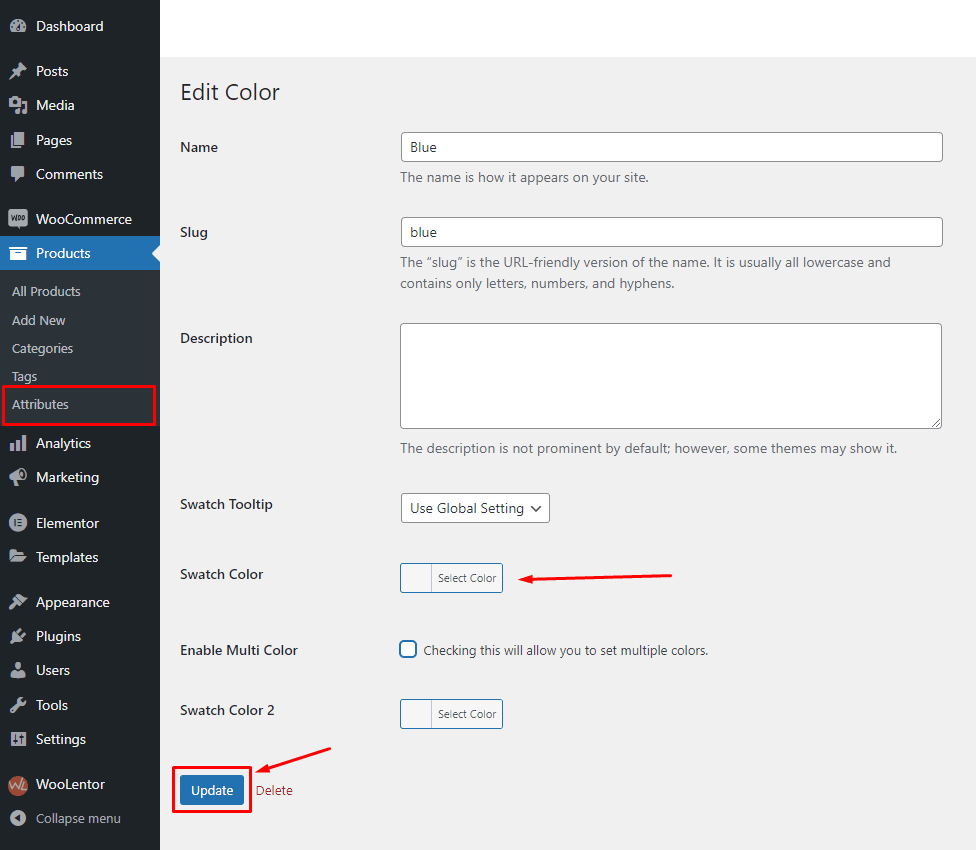
- Navigate to “Products > Attributes”
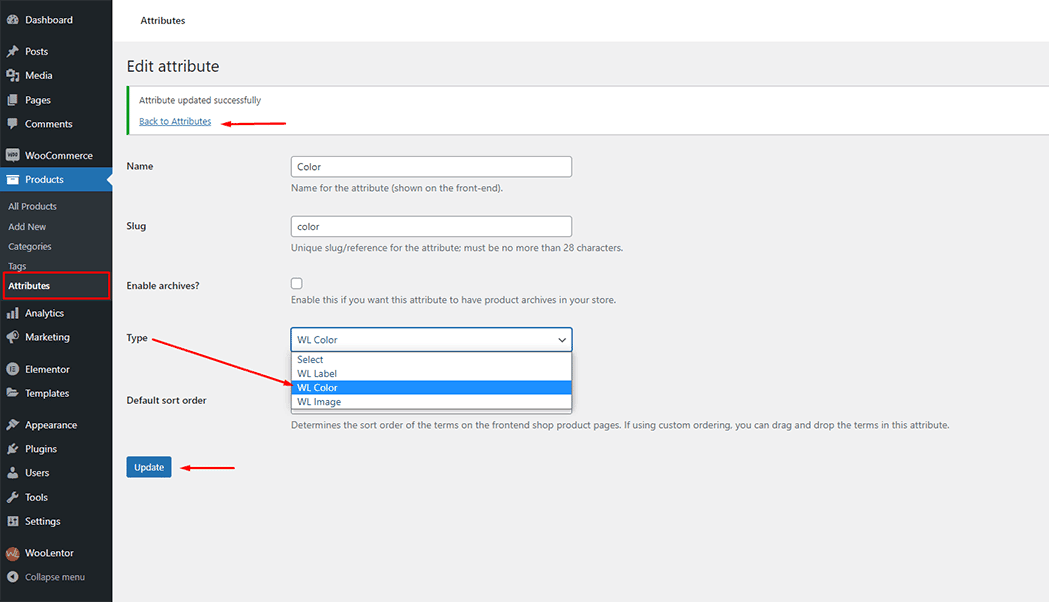
- Edit an Attribute. In the below screenshot, we will edit the “Color” Attribute & set the type from “Select” to “Color”
- Select the type “Color”
- Click on the “Update” button
- Click on the “Back to Attributes” link to get back to the attributes page
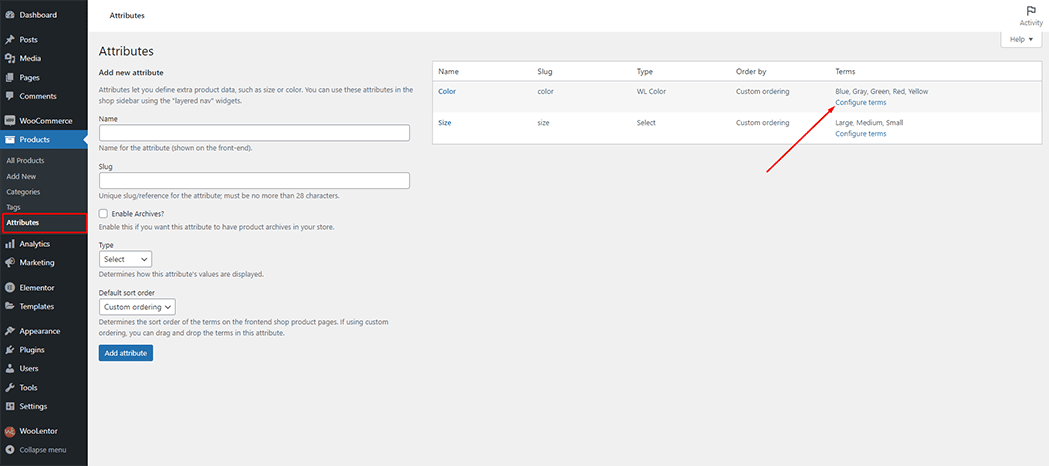
Click on the “Configure terms” link
Click on the “Edit” link
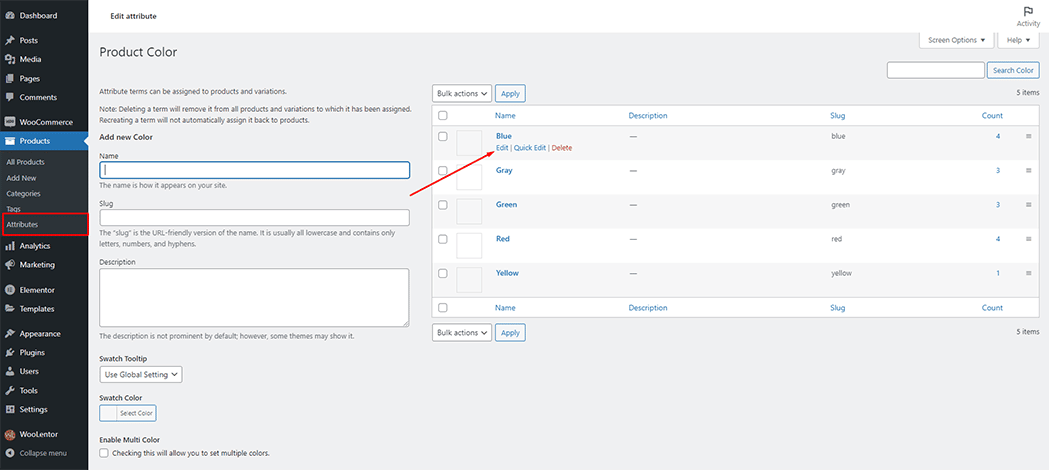
- Select your desired color
- Click on the Update button to set the color
Product level (Individual Product) Options: #
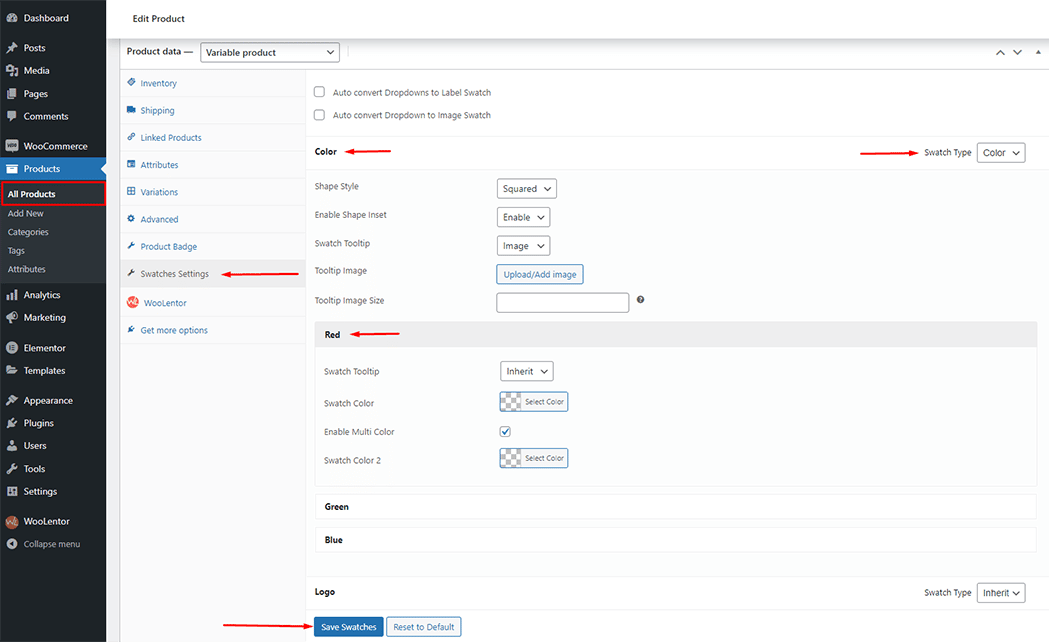
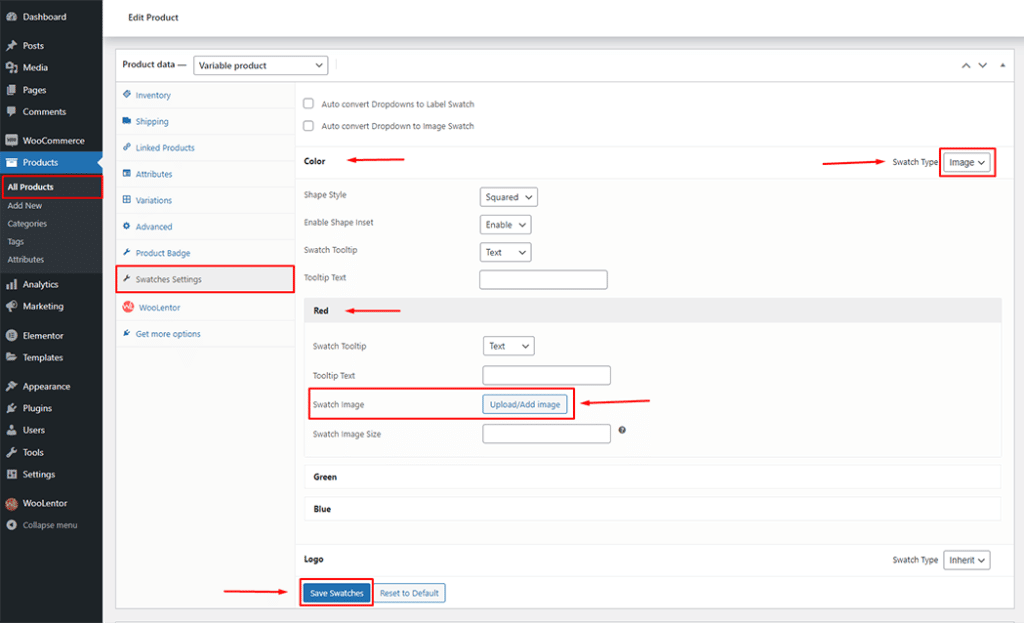
You are using the individual product options. You can override/change the settings for an individual product separately. For example: When you configure the variation dropdown into swatches. The dropdowns will be represented as swatches for all of the products. But for a few products, you don’t want to represent the variations as swatches rather want to show the native dropdown menu. This is one of the cases you will need to use the “Individual Product” options. There are also several other cases of using these options. Explore the options below to get an idea about what you can do.
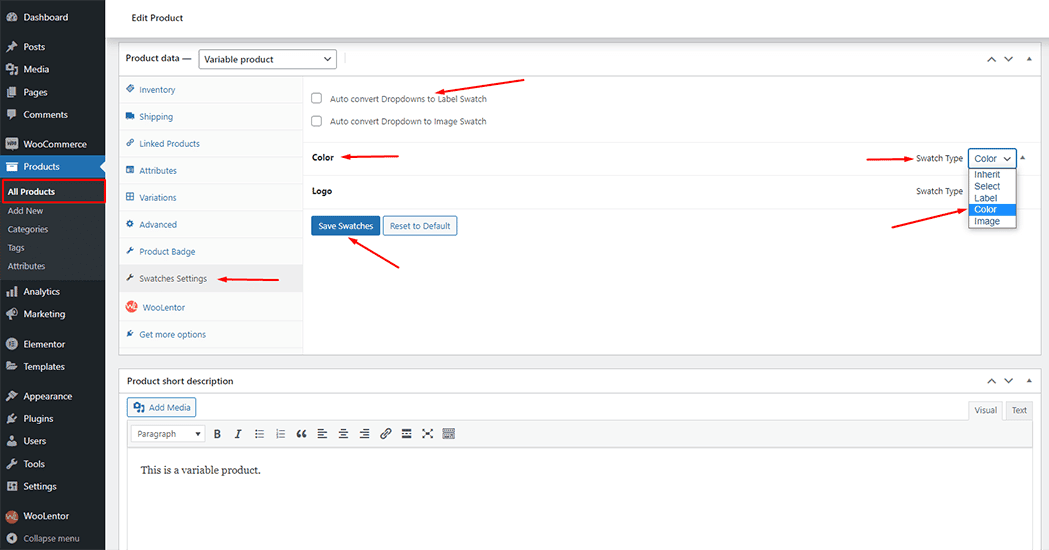
“Color” type swatch options for an individual product.
“Image” type swatch options for an individual product.
Step 4: Now visit the site #
Visit the Page to Preview.
