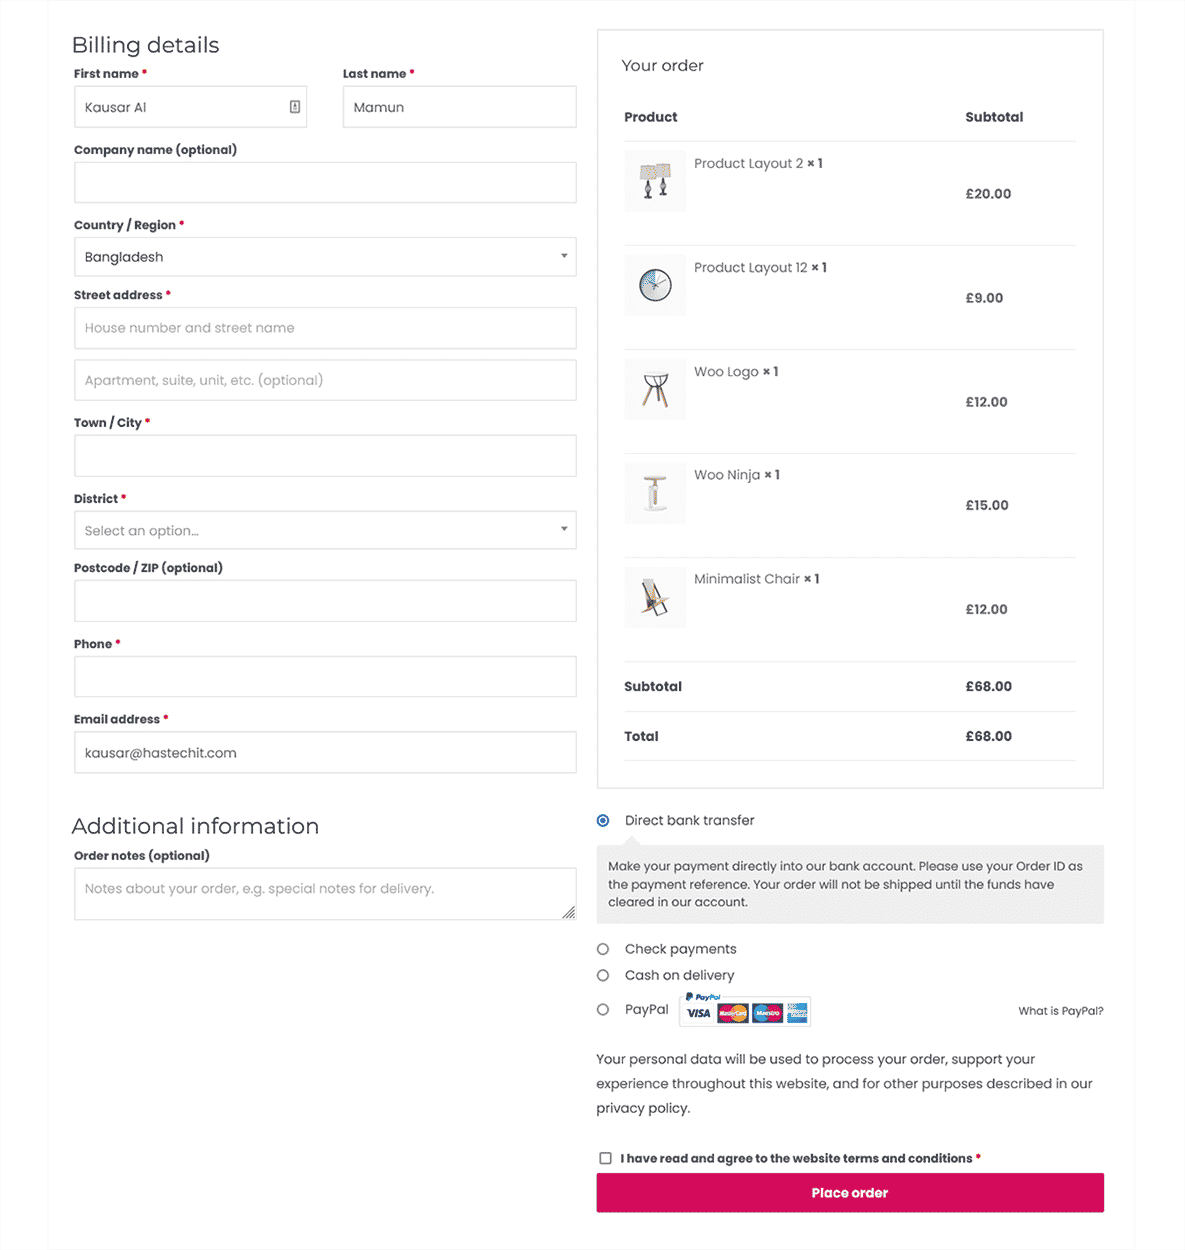
If you’re looking for a way to customize your checkout page in Elementor, look no further! In this article, we will guide you on how to do just that. We’ll walk you through the steps necessary to add and customize elements on your checkout page. Plus, we’ll give you some tips on how to Customize a Checkout Page in Elementor as smoothly as possible for your customers. Let’s get started!
What is a checkout page, and why customize it? #

A checkout page is a final step in a WooCommerce store’s sales process, where customers input their payment and shipping information and review their order before completing the purchase.
While WooCommerce automatically generates a checkout page for your store, it’s important to customize it to match the design of your site and ensure a smooth user experience.
By adding a few simple features to your checkout page, you can encourage more customers to complete their purchases and reduce cart abandonment. In addition, a well-designed WooCommerce checkout page can help boost your conversion rate and increase your average order value.
Customizing your WooCommerce checkout page can significantly impact the bottom line.
How do You customize a checkout page in Elementor? #
Customizing a Checkout in Elementor page builder is straightforward. It has tons of options as well as many popular add-ons. One of those add-ons is the well-liked ShopLentor WooCommerce Page Builder Add-ons. It has pre-made page templates for the Checkout page as well as numerous WooCommerce checkout widget elementor to customize the checkout design.
Let’s learn more about the process of checkout page customization through the Elementor checkout widget using this amazing add-ons plugin.
Step-1: Install the ShopLentor (Formerly WooLentor) Plugin #

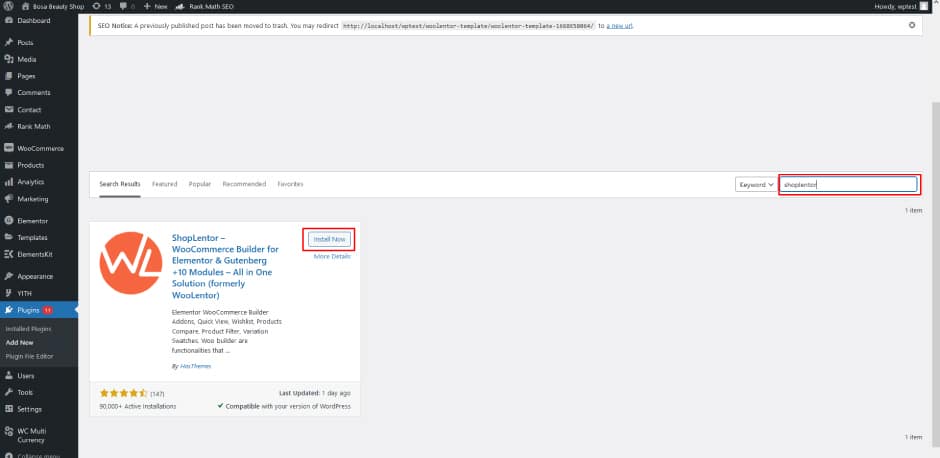
Get started by installing the ShopLentor Plugin. The installation process for the ShopLentor plugin is straightforward and only takes a few minutes.
Step-2: Go to ShopLentor Dashboard and Configure the Template Builder #
To create the checkout page with ShopLentor, you will need to use a template named “Checkout Page Template.”
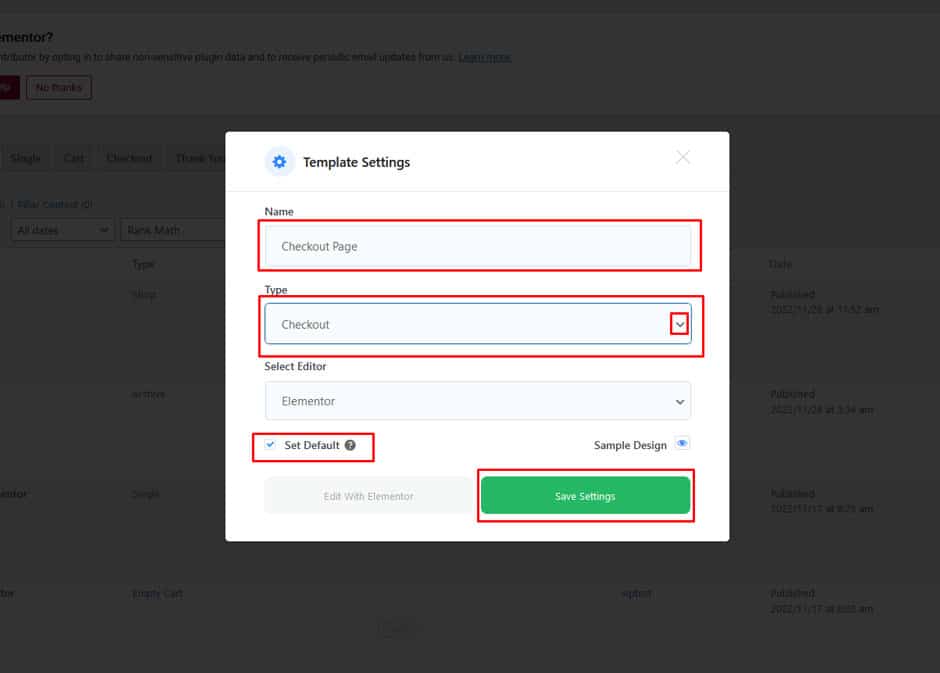
To create a Checkout Page Template, follow these steps: go to Dashboard, select ShopLentor and then select “Template Builder.” Once you’re there, click the “Add New” button on the top right side of the page.
After that, in the popup window for template settings, enter the name of your Template. After selecting Checkout from the dropdown type list, click the “Set Default” checkbox. You may select a default sample design from the “Sample Design” button.
To save your preferences, click edit the “Save Settings” button.

Step-3: Edit the Template with Elementor #

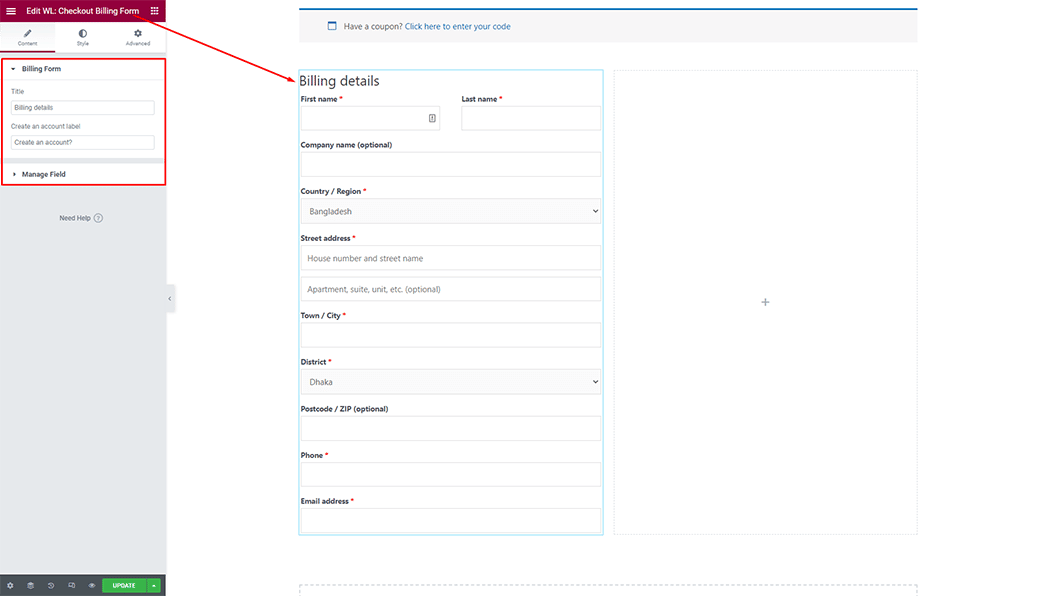
Click edit to the “Edit with Elementor” button to customize WooCommerce Checkout Page Template and add the Widget.
- To add a WooCommerce Checkout Coupon Form widget, search for “Checkout Coupon Form” and pick the one with the “WL Badge.”
- To set up a Billing Form for your customer add the WooCommerce Checkout Billing Form widget. Search for “Checkout Billing Form” and choose the one labeled with the “WL Badge.
- To use the WooCommerce Checkout Shipping Form widget, simply search for “Checkout Shipping Form” and select the widget with the “WL Badge.”
- To insert a WooCommerce Checkout Additional information Form widget, search for “Checkout Additional information Form” and choose the one with the “WL Badge.”
- The WooCommerce Checkout Order Review widget can be easily added by searching “Checkout Order Review” and using the corresponding WL Badge.
- To add a WooCommerce Checkout Payment Method widget, search for “Checkout Payment Method” and pick the one with the “WL Badge.
Step-4: Visit the Site #
To see how the final design will look, go to the WooCommerce Checkout Page Template and preview it.
Tips for making the checkout process smooth for your customers #
A major element of the WooCommerce Checkout Page is the smoothness of the checkout process. The following tips can help you make the checkout process smooth for your customers:
- Use a clear and concise title. The checkout design of the title should be reflective of what the customer will be checking out – whether it’s their shopping cart checkout, order total, or shipping information.
- Put the element in an easily visible place on the checkout page. You want customers to be able to see it as soon as they arrive on the checkout page. You have the option to add custom fields or remove them on your checkout page by using the WooCommerce checkout field editor.
- Configure your payment gateway so that customers can pay without having to leave your site. This will reduce friction and make it more likely that customers will complete their purchases.
- Include all of the necessary data and modify the checkout design. Your element should have all the relevant information for the customer – such as product price, shipping cost, any applicable taxes, and expected delivery times.
- Use simple language to customize WooCommerce checkout process. Avoid complex jargon or technical terms that might confuse or frustrate your customers. Keep it simple so they can easily understand what they’re seeing.
- Offer customer support in case anything goes wrong during the checkout process. This could be something as simple as providing a phone number or email address that customers can use to reach out to you.
By following these tips, you can create a smooth and seamless beautiful WooCommerce checkout experience for your customers.
Wrap-up #
The WooCommerce checkout page is the last step in a customer’s journey before they make a purchase, so it’s essential that the checkout page be well-designed and user-friendly. This is where customers enter their billing and shipping information and select a payment method.
Checkout pages should be customized to match the branding of the site and provide a seamless user experience. The ShopLentor plugin makes it easy to add and customize checkout page elements using the intuitive Template builder. With drag-and-drop features, you can easily rearrange elements, change colors and fonts,
By taking the time to customize your checkout page, you can create a user-friendly experience that will encourage customers to complete their purchases.