The “Checkout Shipping Form” widget is designed with the Checkout page in mind. With this widget enabled on your WooCommerce store, you can showcase the Checkout Shipping form. Thus, customers can fill up their shipping details in a straightforward way.
Why Checkout Shipping Form is used?
On the Checkout page, “WL: Checkout Shipping Form” widget is used for the Checkout Shipping Form on WooCommerce.
The “Checkout Shipping Form” widget is mainly designed for the Checkout page template.
Steps of adding Checkout Shipping Form
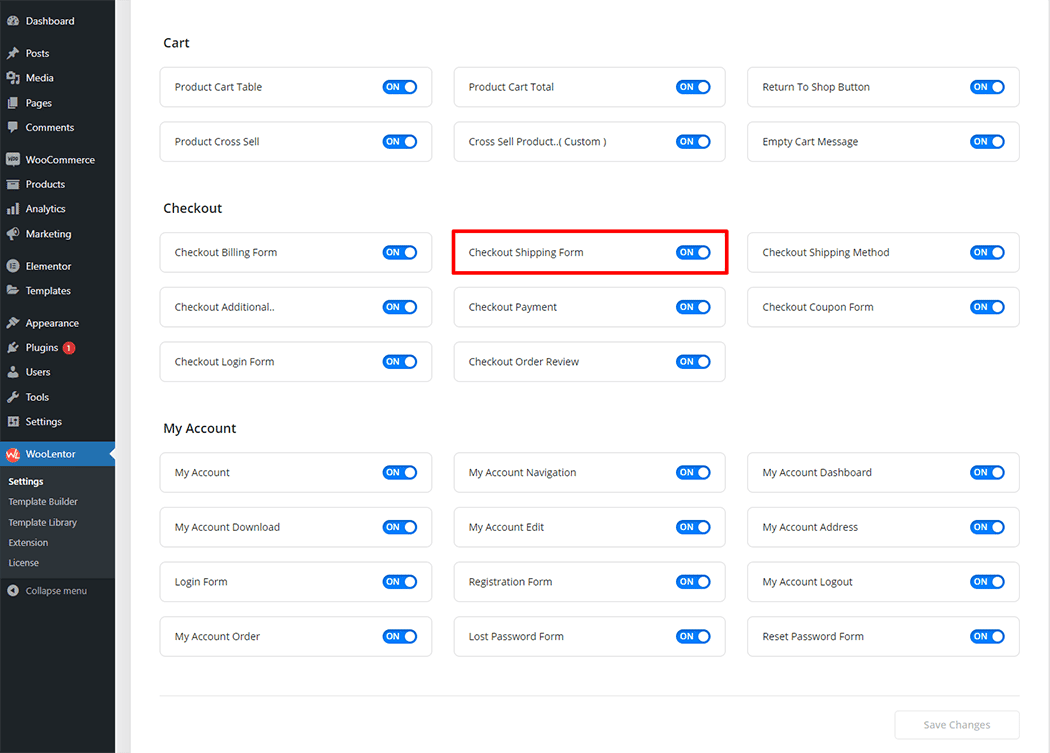
Go to WordPress Dashboard > WooLentor > Settings > Elements. From the list of Elements, turn ON the “Checkout Shipping Form” widget.
- You need to use the “Checkout Shipping Form†widget on the Checkout template.
- To add a Checkout Shipping Form widget, Drag and drop the “WL: Checkout Shipping Form” widget onto the Checkout page template.
Step 1: How to Enable Checkout Shipping Form Widget?
Go to Dashboard > WooLentor > Settings > Elements. From the list of Elements, turn ON the Checkout Shipping Form widget.
Step 2: How to use the Checkout Shipping Form Widget?
Check out the process to easily understand how to add the Checkout Shipping Form, see the GIF image or follow the manual steps below.
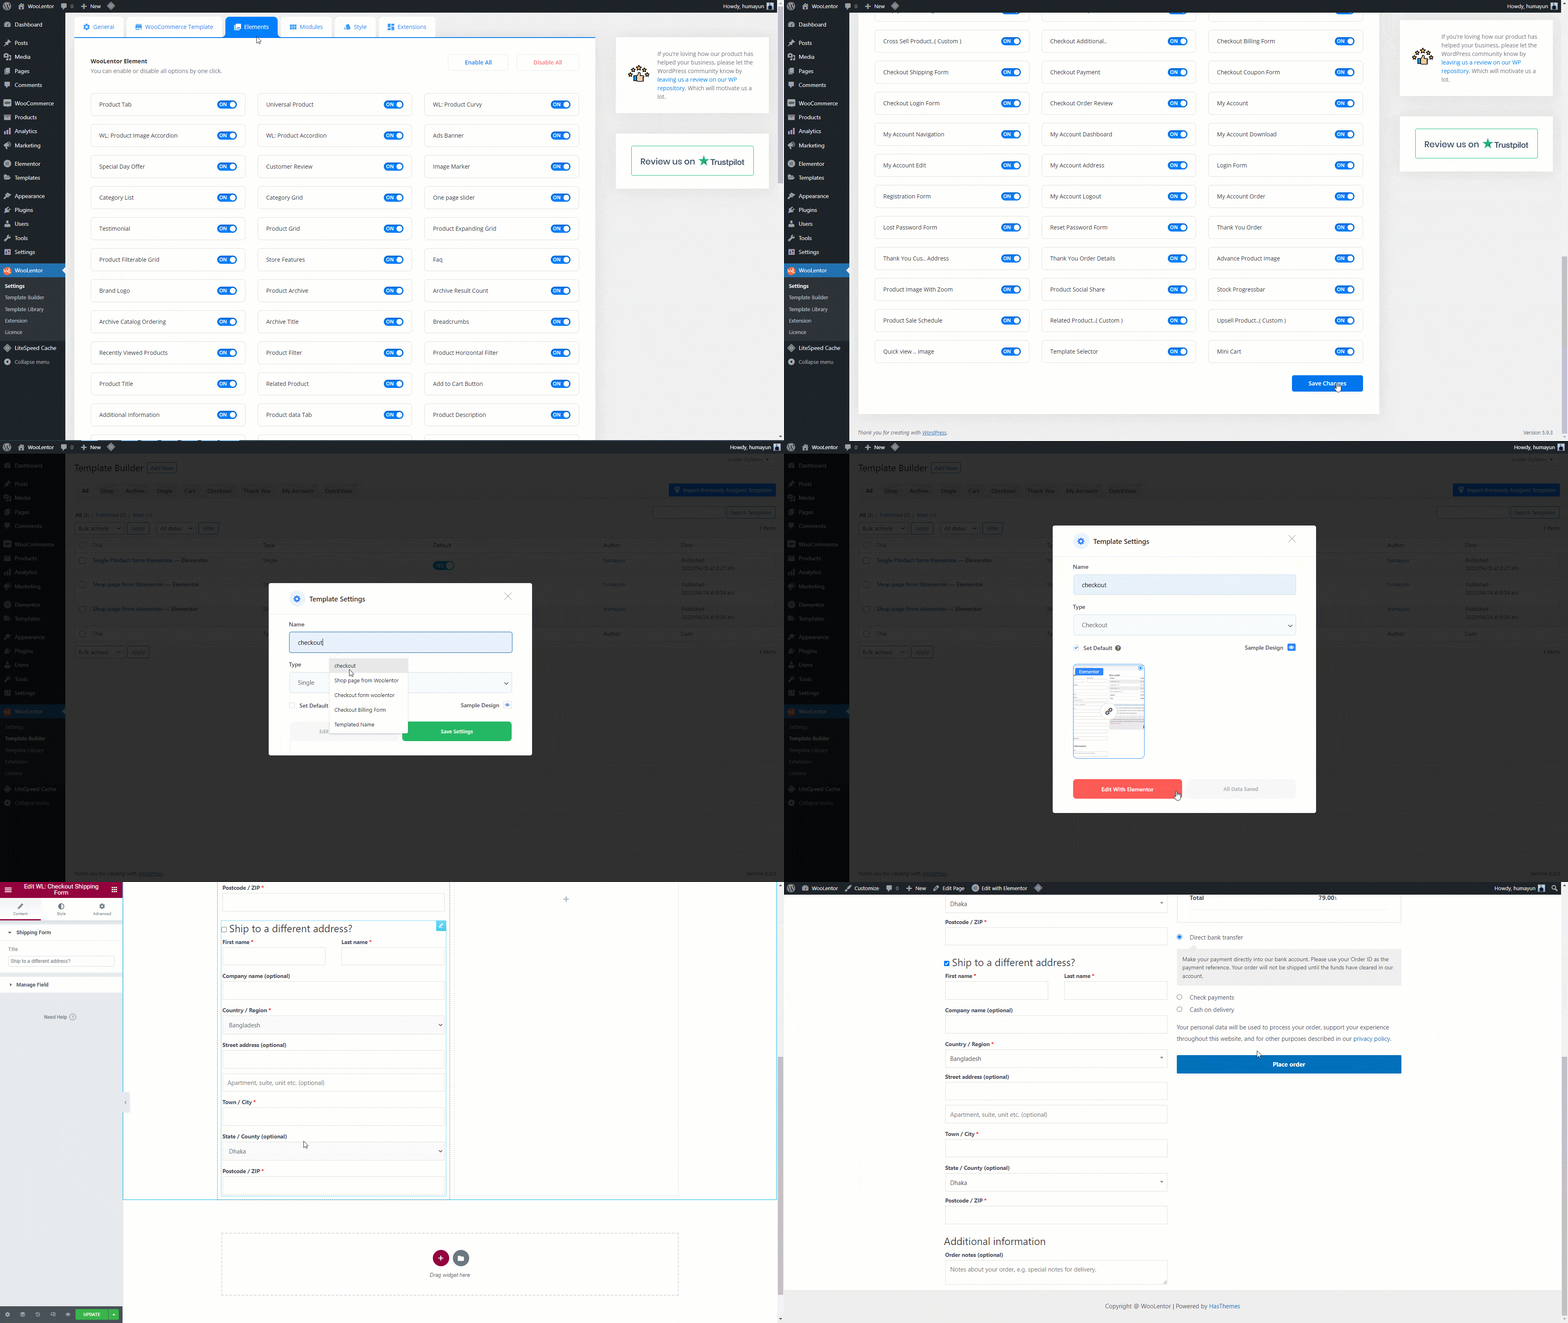
Go to Dashboard > WooLentor > Template Builder. Click the “Add New†button on the top right beside the text “Template Builder†to create a Checkout Page Template

First, set the name of your Template and select it in the popup box for template settings. Select the Single from the dropdown type list. Then select the editor. Here there are two options- Elementor and Gutenburg. After that, choose your preferred template from the available ones. Once you are done You can choose a default sample design from the “Sample Design†button and save the settings by clicking the Save Settings button.

To add the Checkout Shipping Form widget, click the “Edit with Elementor†button to edit the Checkout Page Template

To add a Checkout Shipping Form widget, search by “Checkout Shipping Form†and use the widget that has the “WL Badgeâ€.
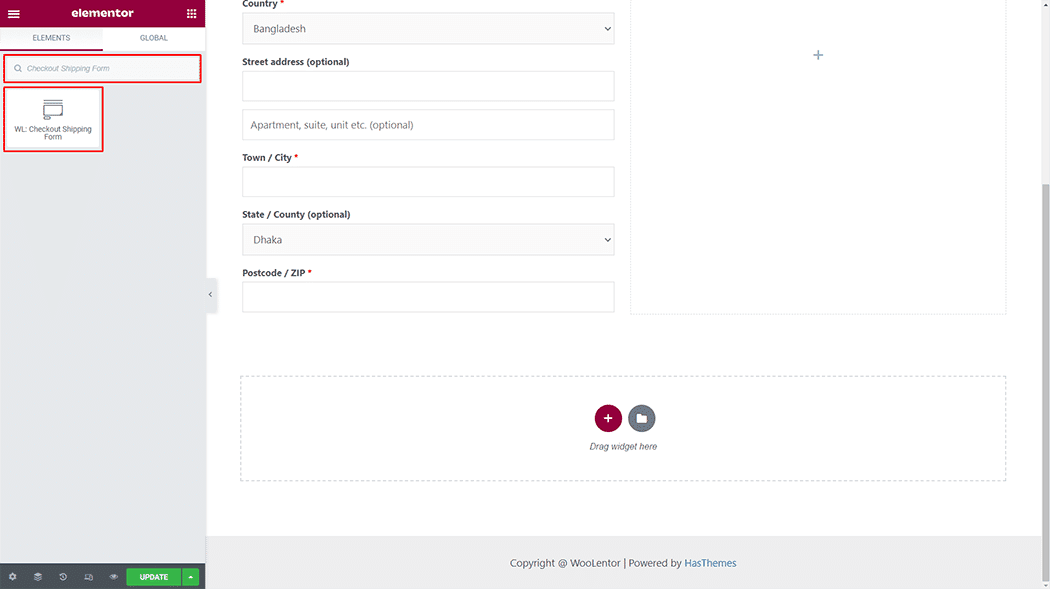
Drag and drop the WooLentor “Checkout Shipping Form” widget onto the Checkout Page Template.
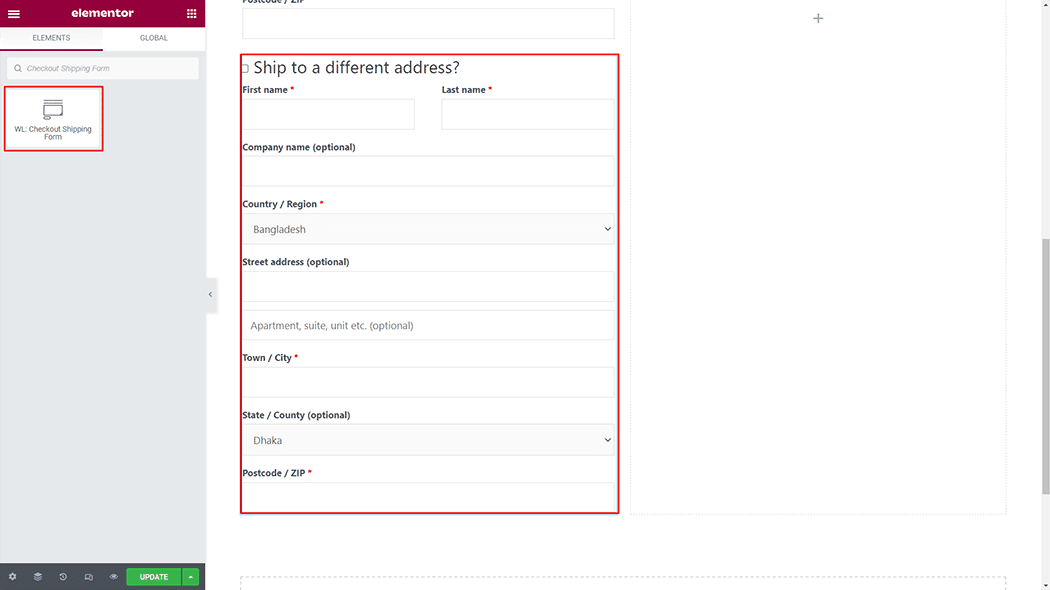
Step 3: How to customize Checkout Shipping Form Widget?
You can easily change the Title as you need.
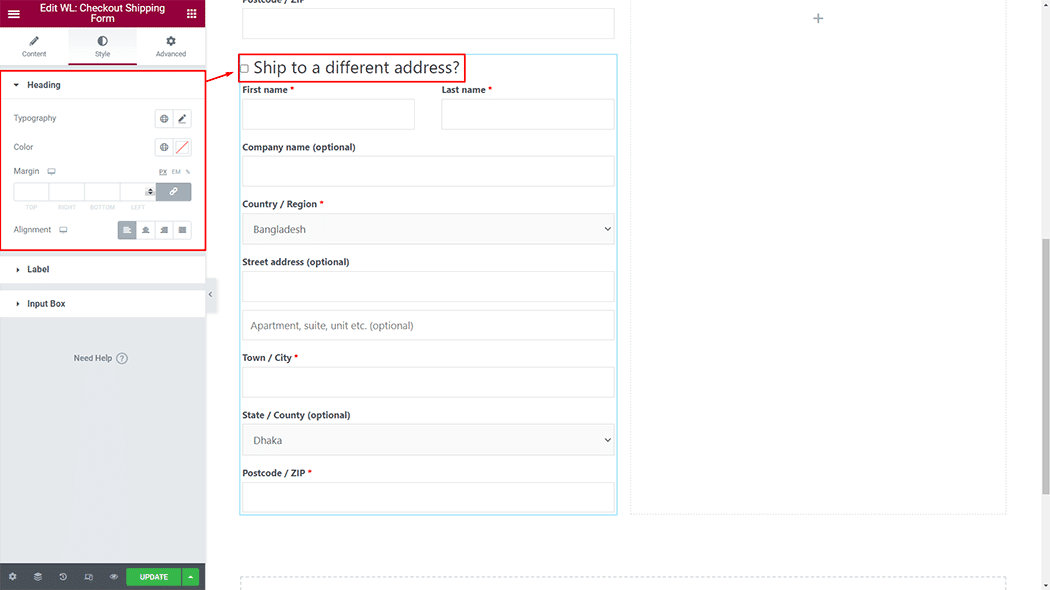
How to customize the Checkout Shipping Form style
Heading: You can change the Checkout Shipping Form Heading style as you need
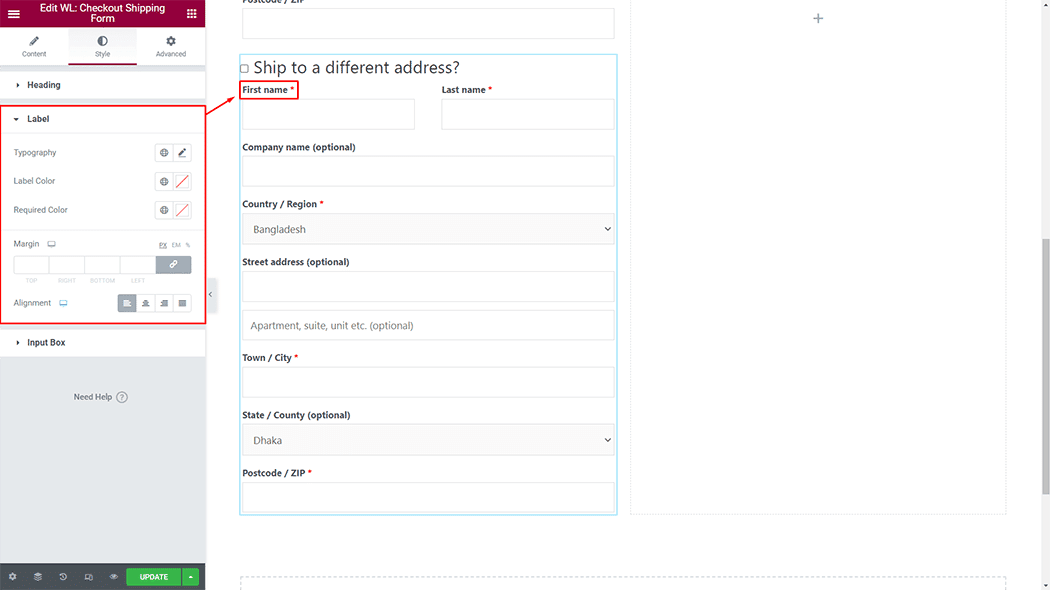
Label: You can change the Checkout Shipping Form Label style as you need
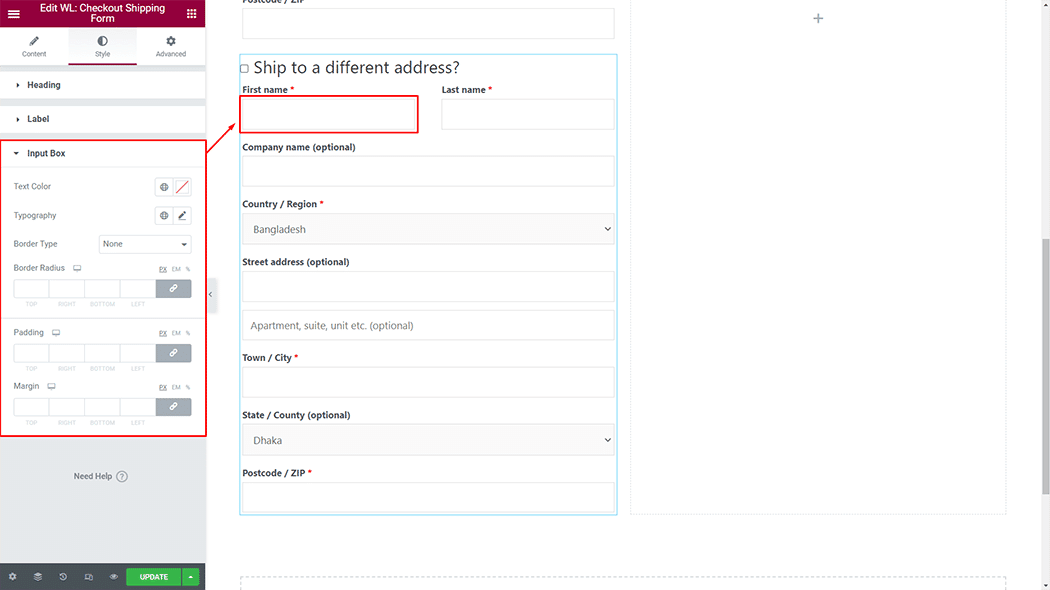
Input Box: You can change the Checkout Shipping Form Input Box style as you need
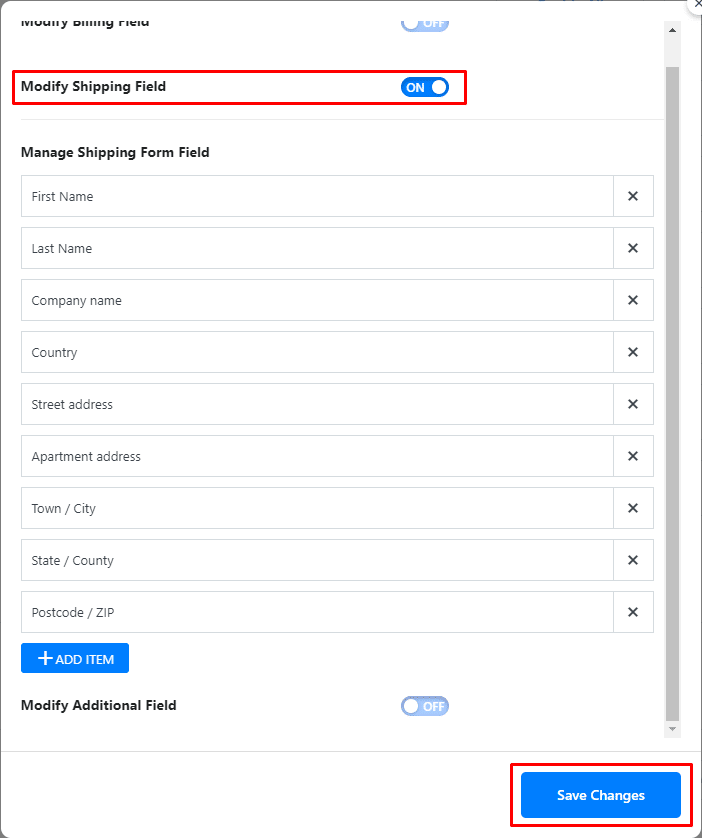
To keep things tidy and user-friendly, field settings have now been moved to WooLentor > Settings > Modules > Checkout Fields Manager

From the Elements, turn ON the Modify Shipping Field widget.

Step 4: Now visit the site
Visit the Checkout Page Template to Preview.

From the style, the setting makes necessary customization from the available options.
Do you want to use Checkout Shipping Form Block for Gutenberg? Click Here