If you’re looking for a way to increase your average order value and boost your conversion rate, then the WooLentor WooCommerce Order Bump module is just what you need! With the help of this module, you can add more items to your checkout page and specify special pricing for them. This helps you to tempt customers into buying more products or services from you.
Benefits of using WooCommerce Order Bump #
With WooCommerce Order Bump module, you can avail the following benefits:
- Boost your average order value.
- Get more visibility of products.
- Offer acceptance with a single click.
How to add WooCommerce Order Bump? #
Using WooLentor, you can add the Order Bump feature in your WooCommerce store and make the process of buying products easier and faster. Here are the easy steps of adding an Order Bump in a store.
Step 1: Enable the Order Bump module #
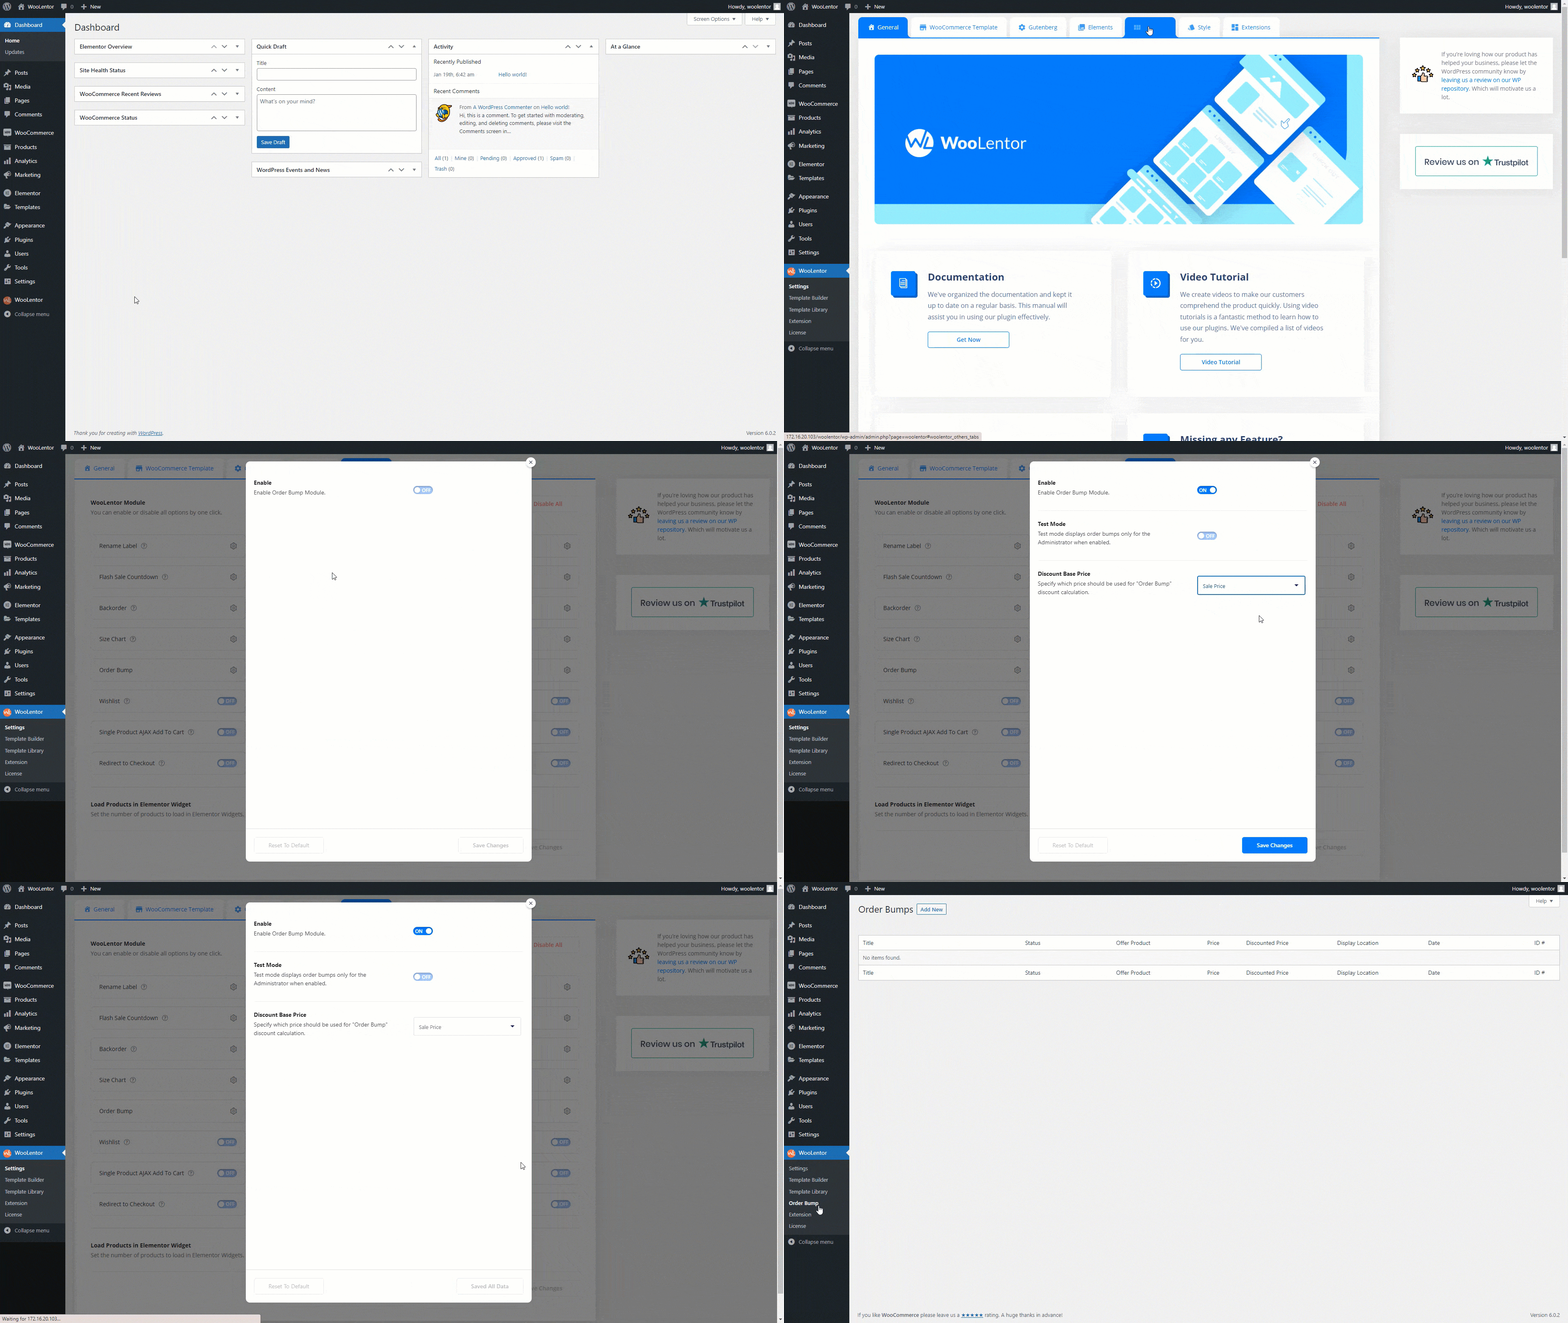
Go to WordPress dashboard > WooLentor > Settings > Modules > Order Bump
After that, enable the module and configure the settings as per your needs:
- Enable/Disable: You can enable/disable the Order Bump module from here.
- Test Mode: Test mode displays order bumps only for the Administrator when enabled.
- Discount Base Price: The product discount price will be calculated based on this setting. You can select Sale price or Regular price.

Once the configuration is complete, click Save Changes then reload this page to appear Order Bump menu.
Step 2: Add An Order Bump #
Click on the Order Bump from the WooLentor Menu.

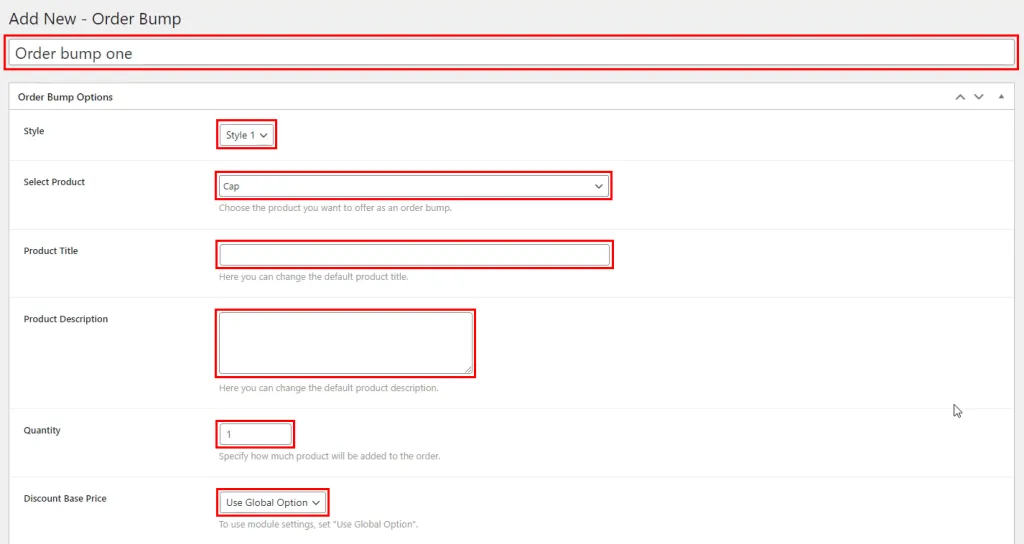
Then Click on Add New button and fill out the information below.
- Style: Select a style as you prefer.
- Select Product: Select the product you want to show as an order bump offer on the checkout page.
- Product Title: You can change the product title for this offer product.
- Product Description: You can change the description for this offer product.
- Quantity: Specify how much product will be added to the order.
- Discount Base Price: You can override the global “Discount Base Price” option from here.

- Discount Type: Select a discount type.
- Percentage Amount: Will apply a percentage discount.
- Fixed Amount: Will apply a fixed discount.
- Set Fixed Price: Will update the actual product price with the new amount.
- None: The original product price will be used. Discounts will not be applied.

- Amount: Add the amount based on the discount type selected.
- Position: Select the position of this Order Bump.
- Label – Grab this offer!: You can change the “Grab this offer” text.

Rules – To Trigger Order Bump #
Specify when your Order Bump should appear. Once the rule matches the specified conditions, the Order Bump will be displayed on the checkout page.
To set rules, click on Add Rule button. Then select a rule from the drop-down. You can set simple or complex conditions at once using the ‘AND’ and ‘OR’ functionality.

- Ignore Rules: To show the Order Bump without any rules, simply set the option “yes”.

After configuring all the settings, click on Publish button by scrolling up to publish this Order Bump.
Step 3: Let’s check the Order Bump #
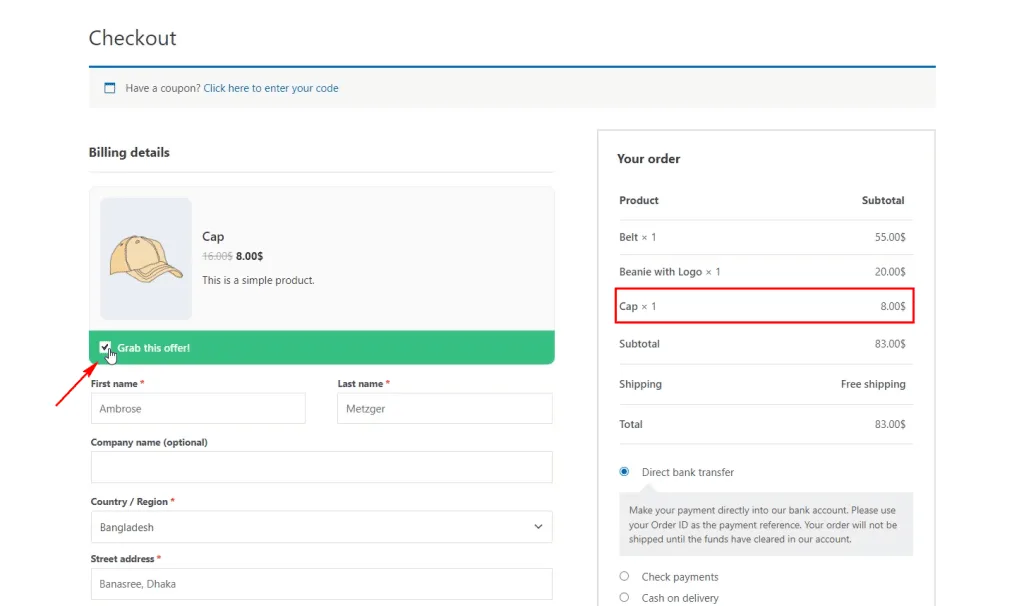
Add the products along with the ones added through order bump rules.

Checkout page is showing the Order Bump product. The product which we added as an Order bump is visible here.

After applying Order Bump product to the existing order, the discounted product price is added.
