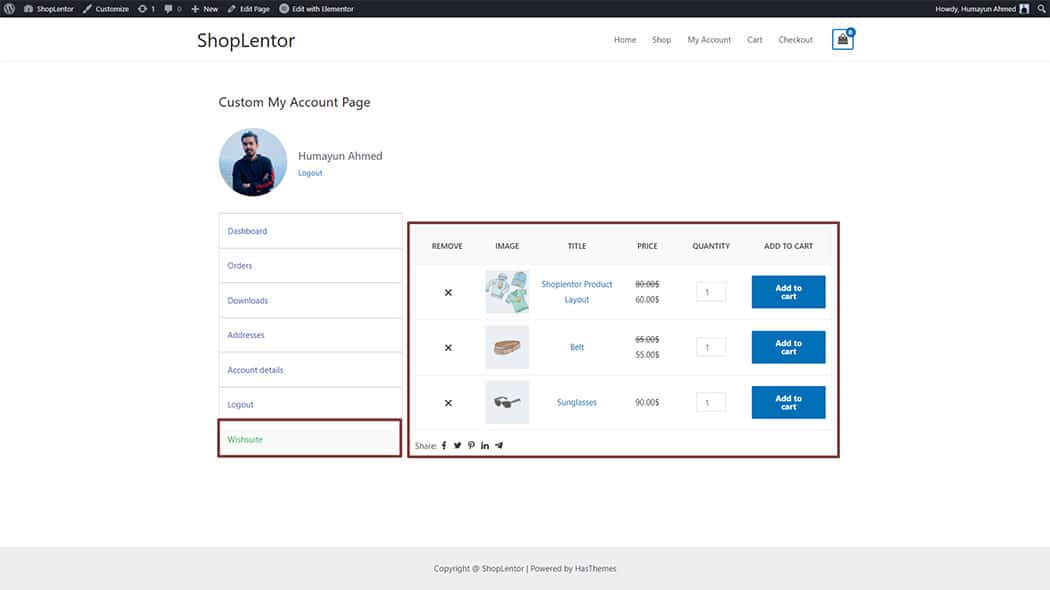
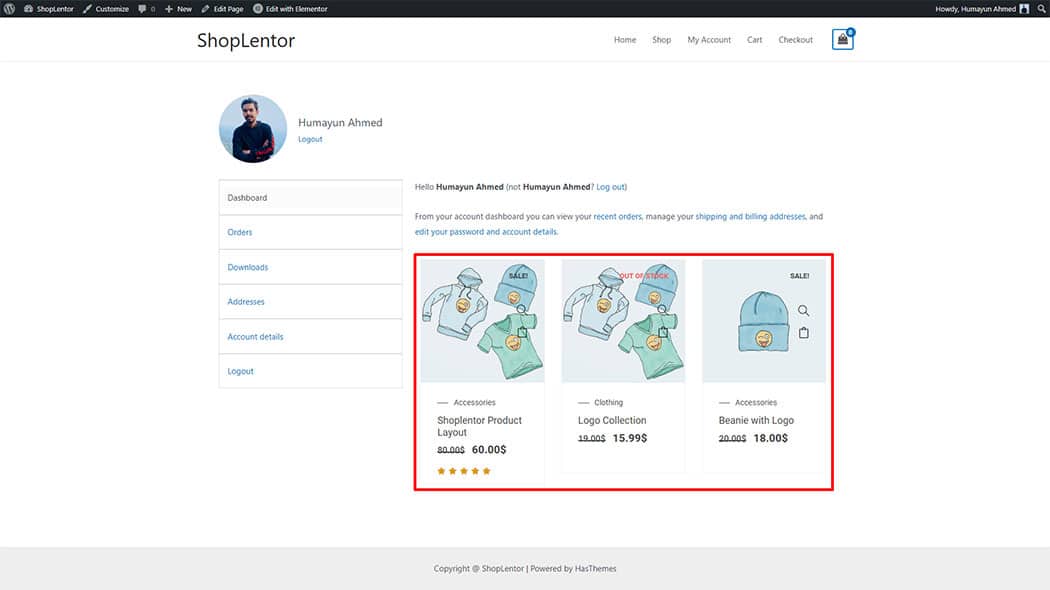
If you want to display additional data on the My Account page, such as a wishlist or any other custom content, you can easily do that in WooCommerce with the help of some great plugins such as ShopLentor. Read on to find out how to add custom endpoints in just a few simple steps.
Steps of Adding My Account #
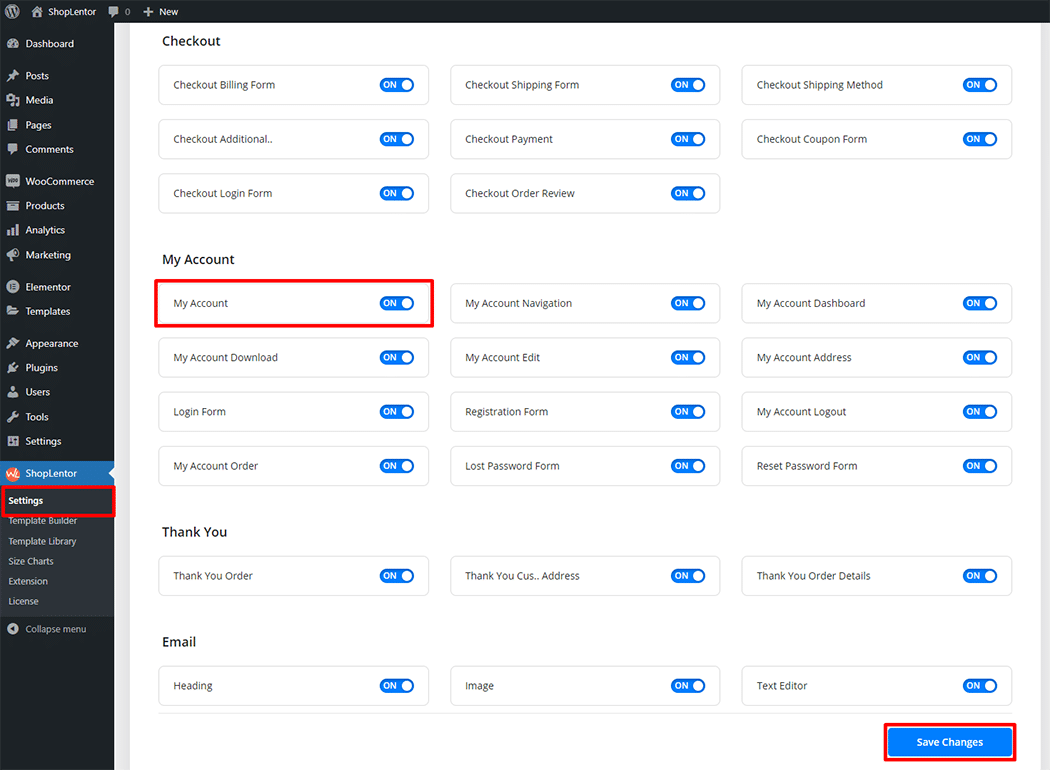
Go to WordPress Dashboard > WooLentor > Settings > Elements. From the list of Elements, turn ON the “My Account” widget.
- You need to use the “My Account” widget in the My Account page template.
- To add a My Account widget, Drag and drop the “WL: My Account” widget into the My Account page template.
Step 1: How to Enable My Account Widget? #
Go to Dashboard > WooLentor > Settings > Elements. From the list of Elements, turn ON the My Account widget.
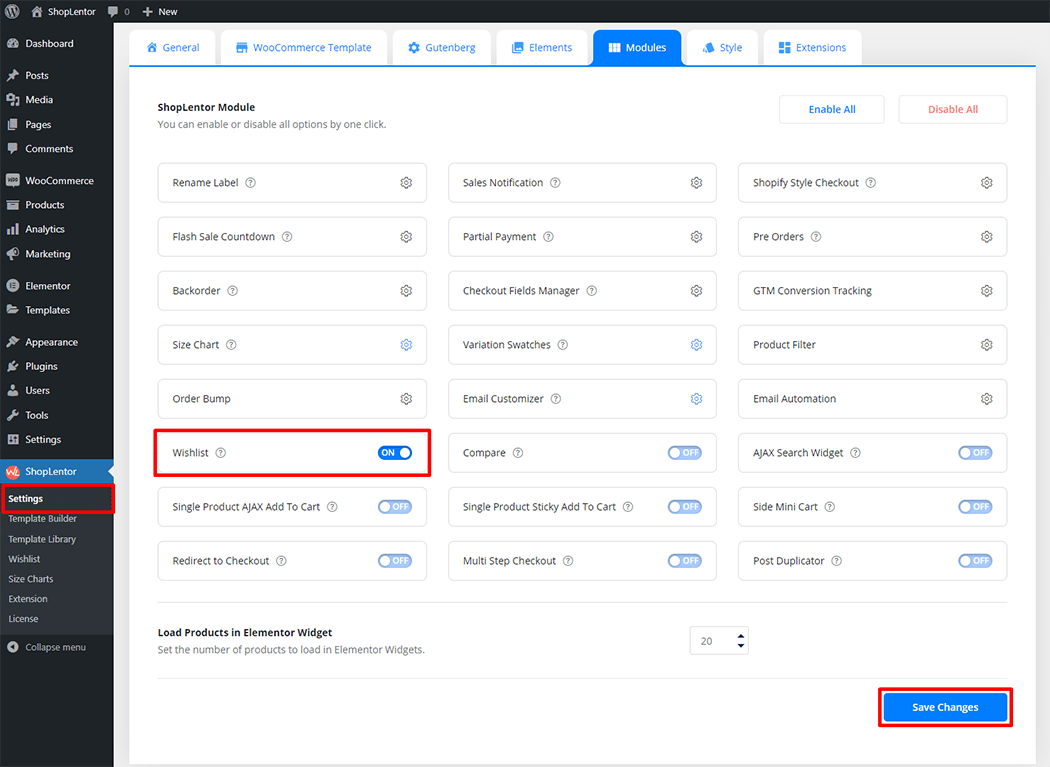
Go to Dashboard > WooLentor > Settings > Modules. From the list of Modules, turn ON.
Step 2: How to use the My Account Widget? #
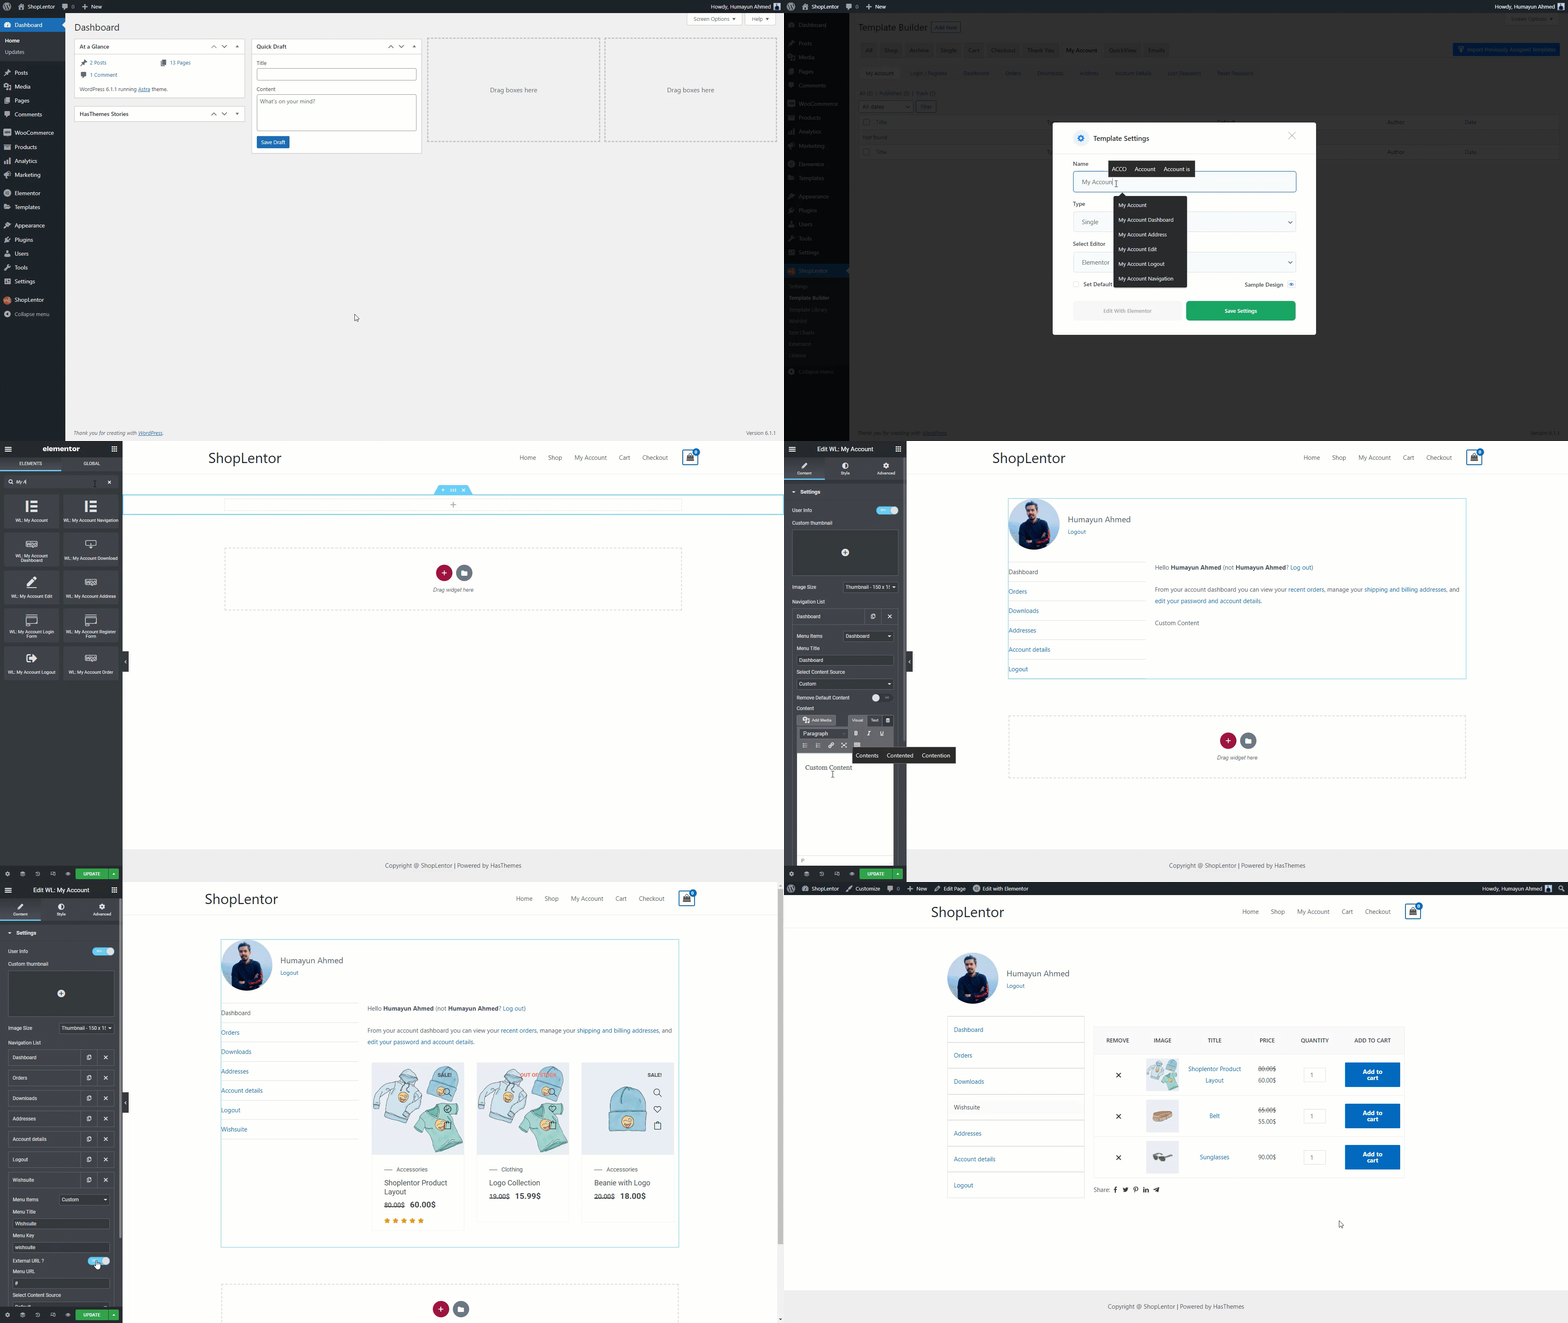
Check out the process to easily understand how to add the My Account, see the GIF image or follow the manual steps below.
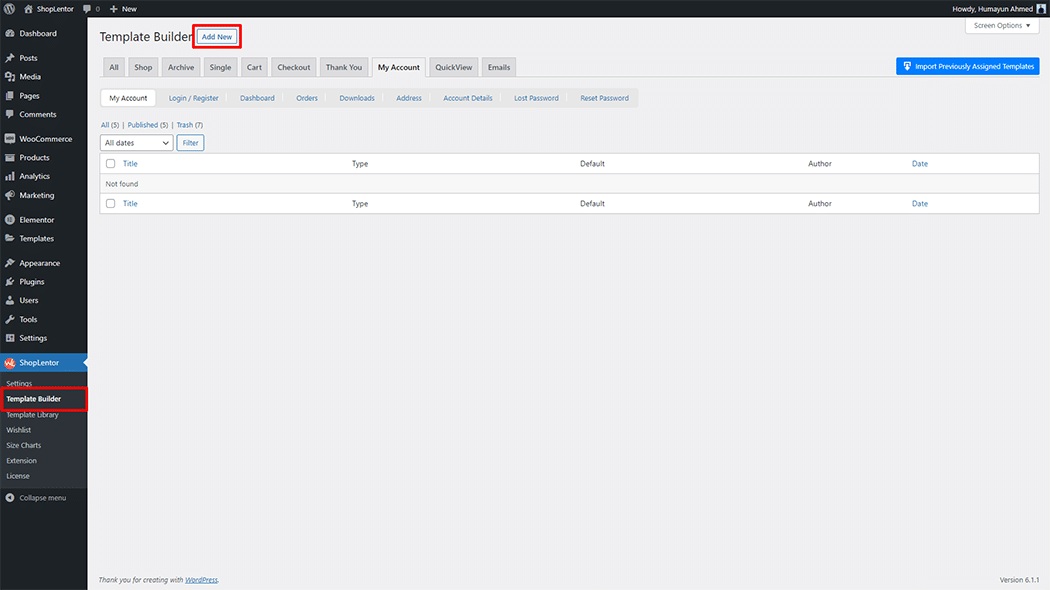
Go to Dashboard > WooLentor > Template Builder. Click the “Add New” button on the top right beside the text “Template Builder” to create a My Account Page Template
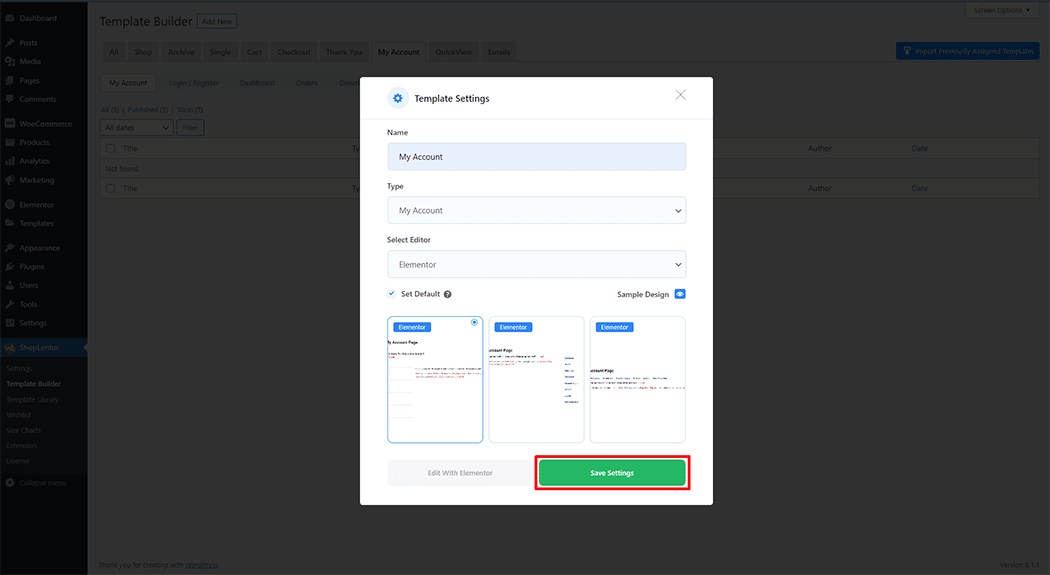
First, set the name of your Template and select it in the popup box for template settings. Select the My Account from the dropdown type list. Then select the editor. Here there are two options- Elementor and Gutenburg. After that, choose your preferred template from the available ones. Once you are done You can choose a default sample design from the “Sample Design” button and save the settings by clicking the Save Settings button.
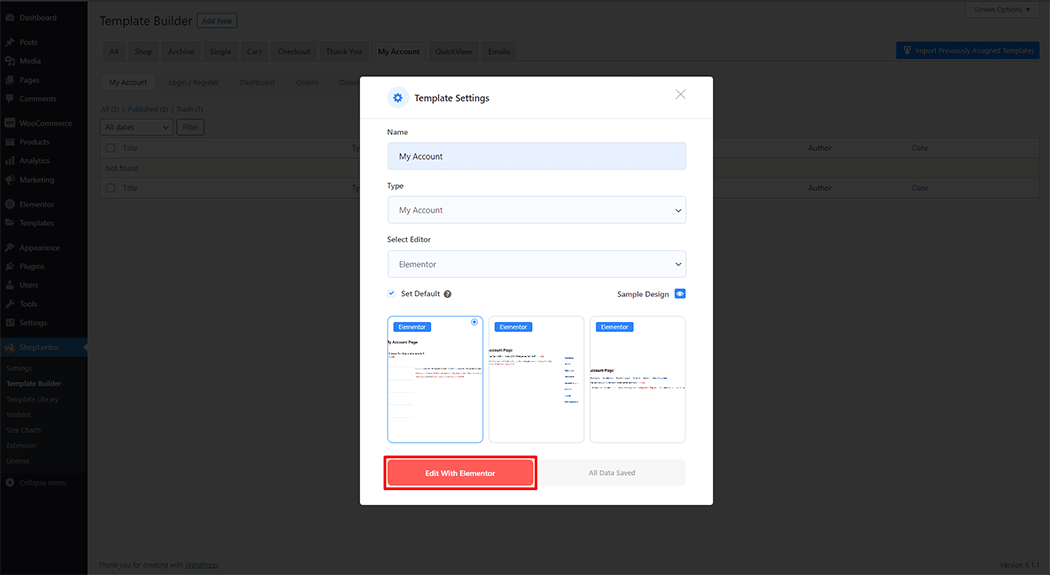
To add the My Account widget, click the “Edit with Elementor” button to edit the My Account Page Template
To add a My Account widget, search by “My Account” and use the widget that has the “WL Badge”.
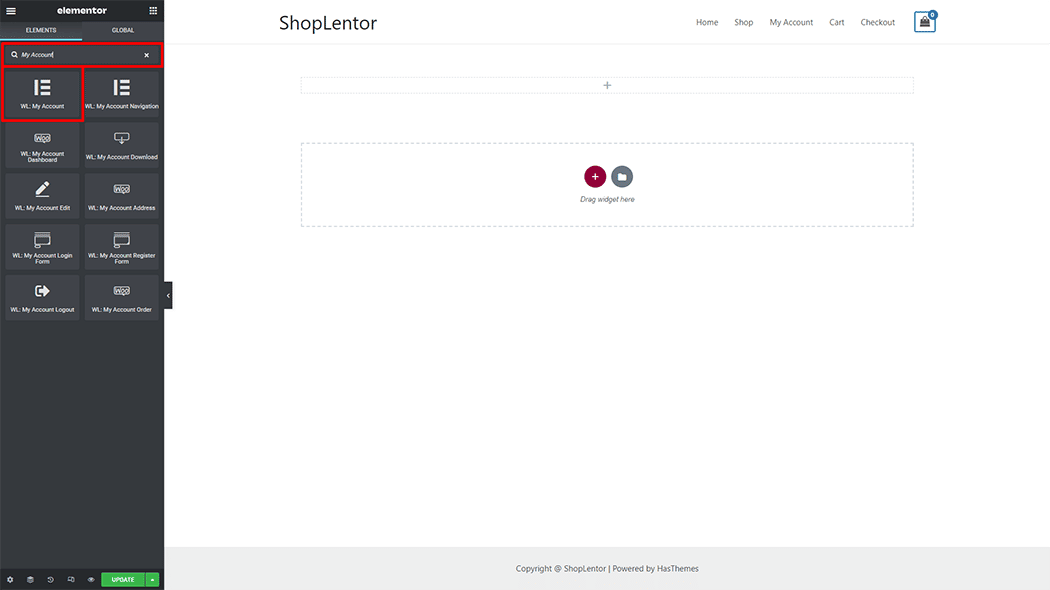
Drag and drop the WooLentor My Account widget into the My Account page template.
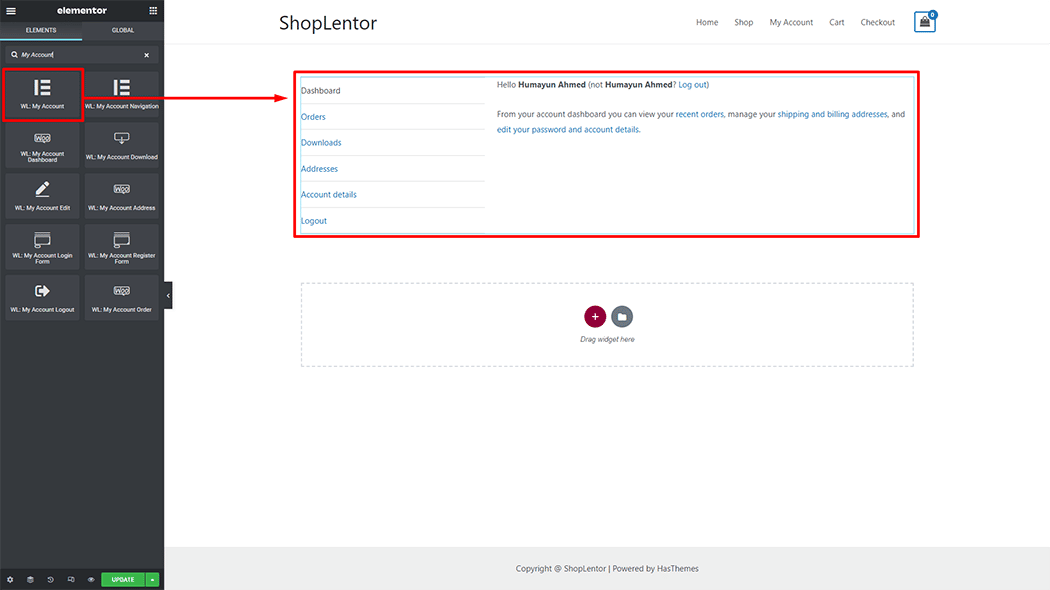
Step 3: How to add custom endpoints to the My Account page? #
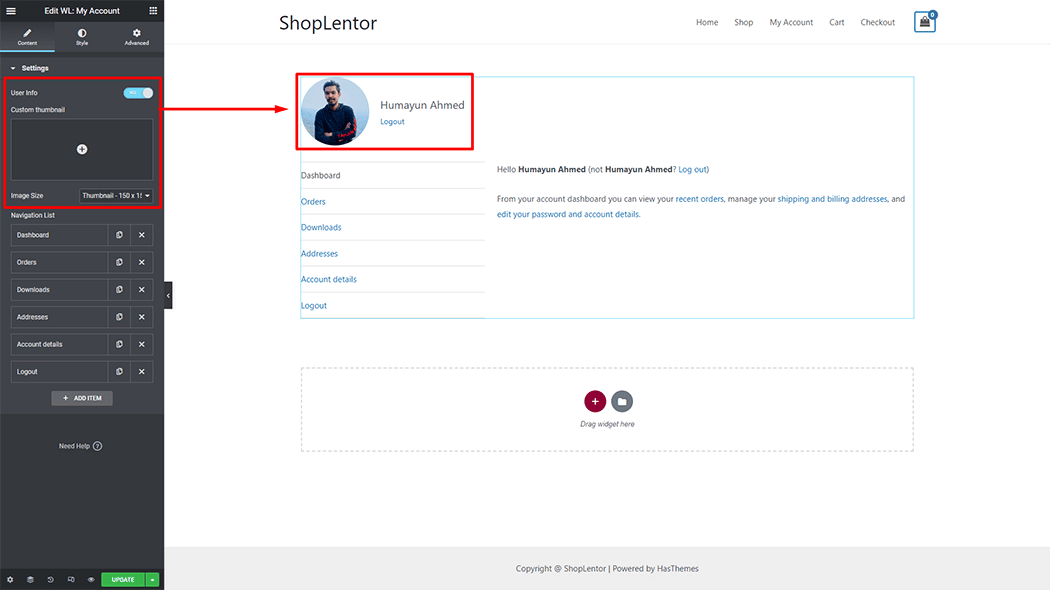
User Info: Select User Info Yes or No
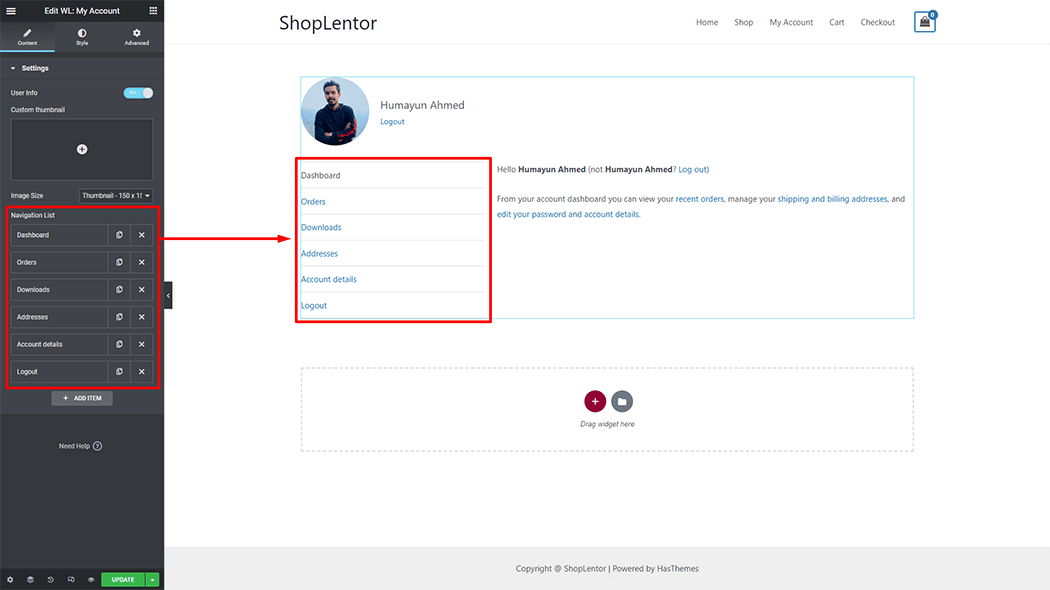
Then get a default list of navigation, by default some navigation menu is added here, and also you can add a menu and add content as per requirement.
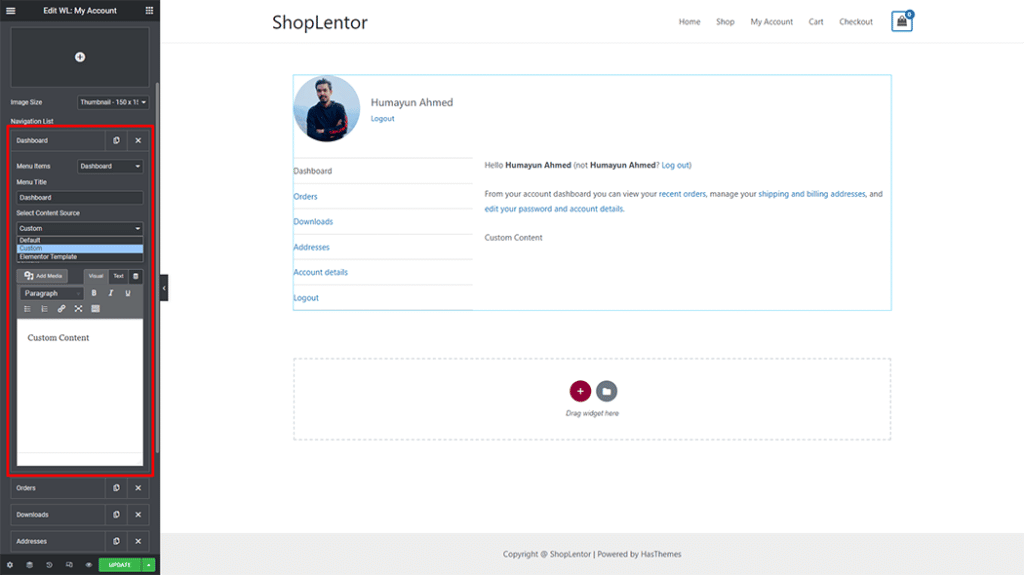
Select the Content Source: Two types of content can be selected here, you can select the content source according to your needs. You can select custom content or Elementor template content as per your preference
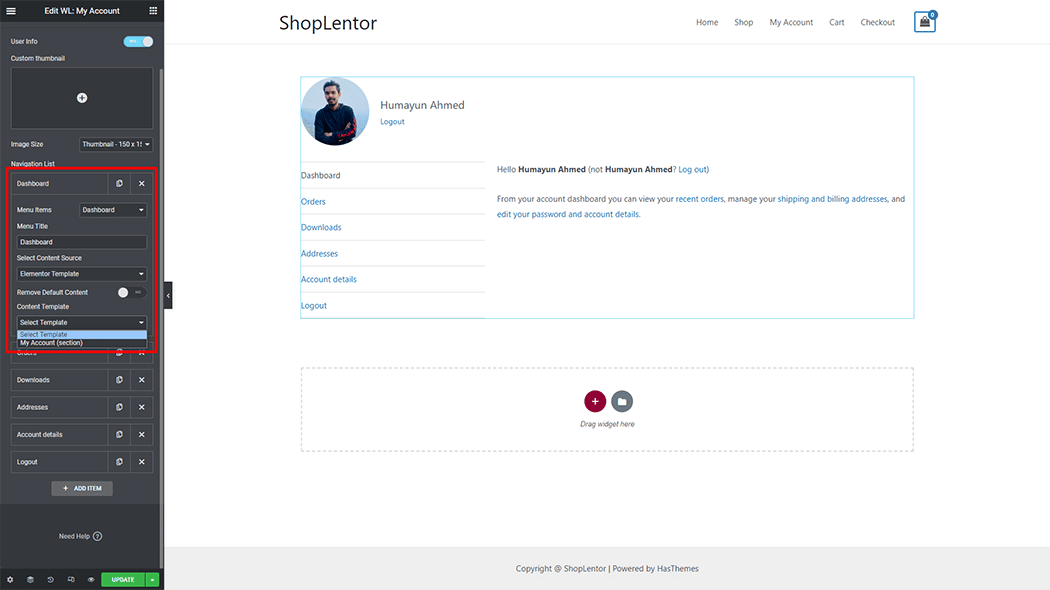
Or choose content source Elementor Template, Select template from the Content Template option.
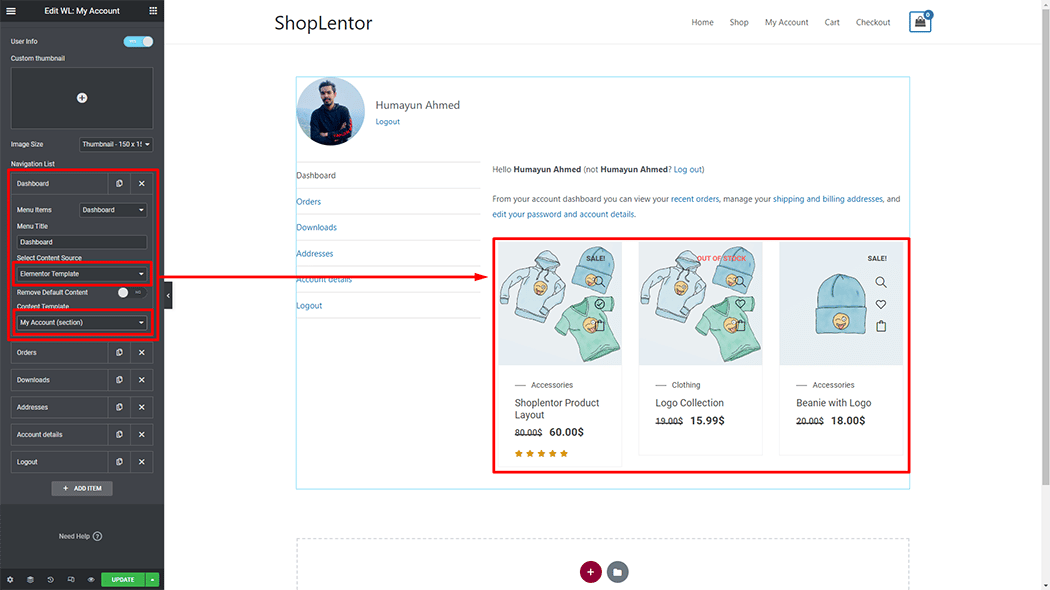
This will change after selecting an Elementor template, depending on what type of template you are selecting.
How to add a custom navigation item added to the My Account page. #
Click the “Add Item” button to create a new Navigation list
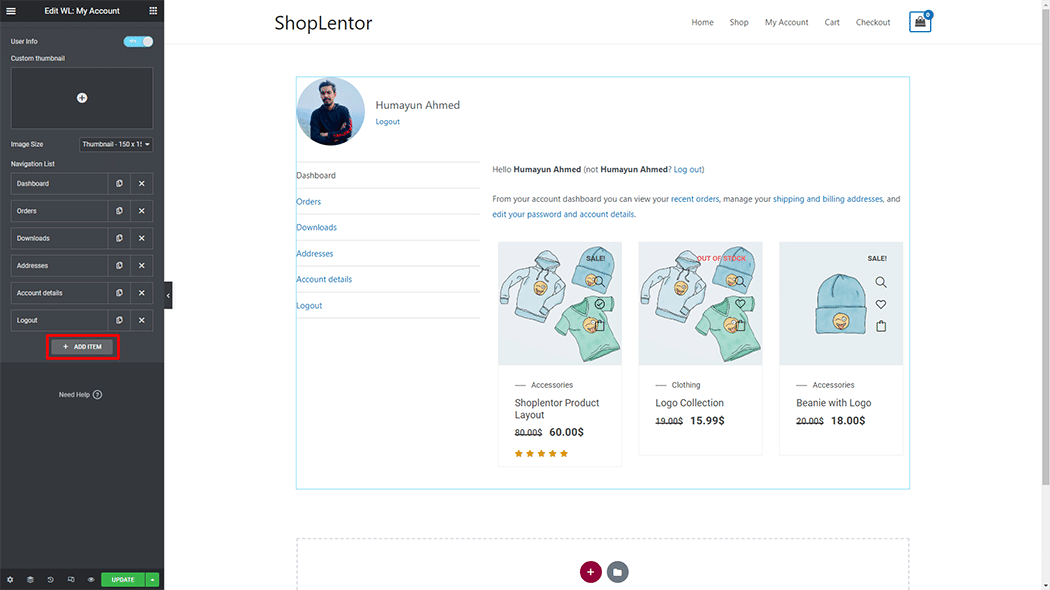
After creating a new menu.
Menu Items: Select Menu items
Menu Title: Enter the Menu Title
Menu Key: Enter the Menu Key
Select Content Source: Select the content source as per your requirement.
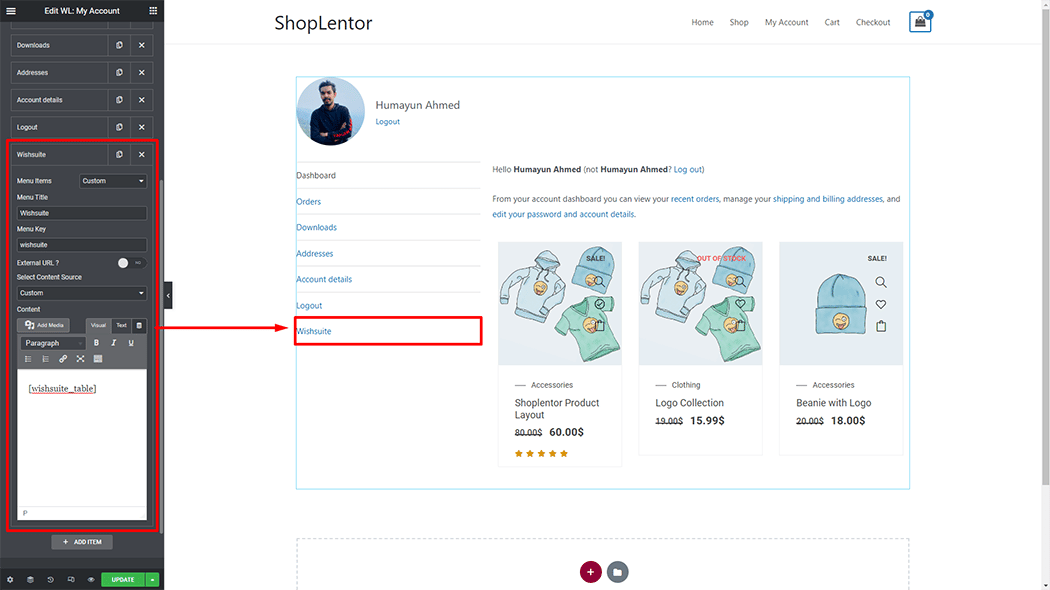
Step 4: View the preview #
Visit the My Account Page Template to preview custom endpoints to the My Account page.
