Product filters play an important role when it comes to adding great value to the overall user experience. It will allow the customers to filter through the products by applying various filter types that help them find the desired product within a few clicks.
Here you will learn how to add product filtering options to your store both vertically and horizontally.
You can check the live preview of the vertical and horizontal filter from our demo site.
Let’s see the video on how to add Product Filters to Your WooCommerce Store for Elementor
How to add product filtering options vertically:
First of all, create a section and select a structure for the section. Make sure you have selected a structure with at least two columns.
Add the “WL: Product Filter†widget to a column of the section.
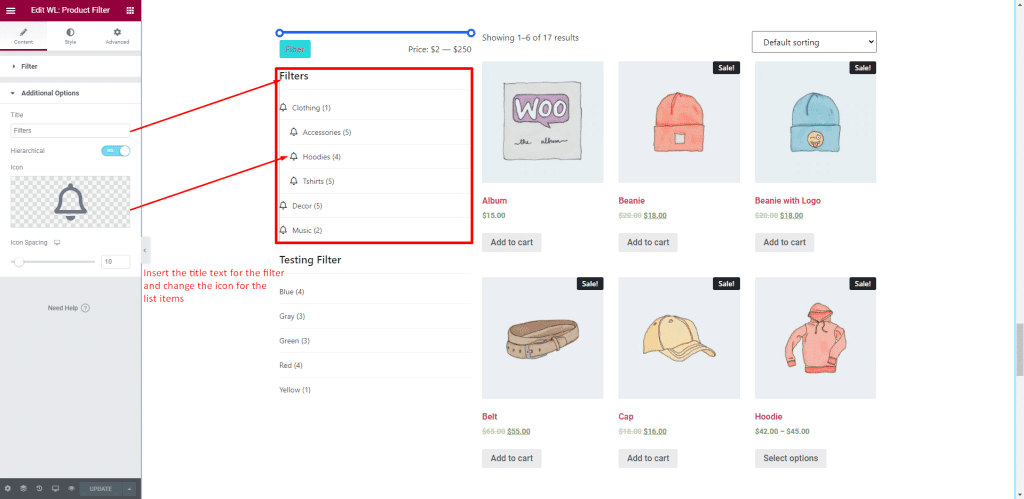
From the “Filter†panel, you can add various product filters using which your customers can easily find the products they are looking for.

In the “Additional Options†panel, you can insert a title text for the filter.
You can choose an icon from here if you want to show icons before the list items.

From the “Style†tab, you’ll get full control over all the necessary styles for every element of this widget.

This is how the vertical filtering options will look once you add some filter types using the “WL: Product Filter” widget.

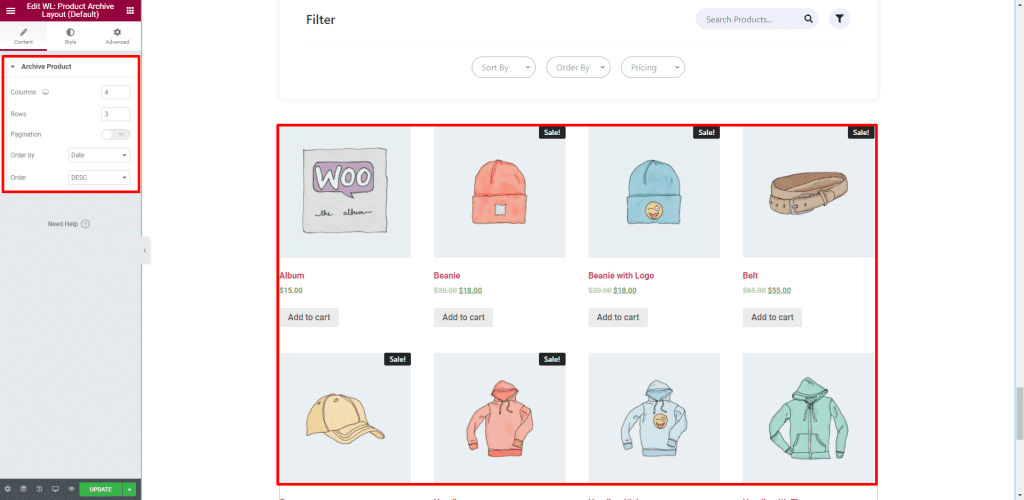
Let’s add another widget to the other column using which we can see the filtered results. Here we have added the “WL: Product Archive Layout (Default)†widget to the other column of this section.

So that’s the way you can add different product filters on your WooCommerce store vertically.
How to add product filtering options horizontally:
To add the product filters horizontally, add the “WL: Product Horizontal Filter†widget to another column of the section.
From the “Filter†panel, you can add many filtering options that will help your customers find what they really want.

In the “Additional Options†panel, you’ll get some other options to control the filters.

Finally add another widget to the section using which you can see the filtered results. Let’s add the “WL: Product Archive Layout (Default)†widget like we did before.
