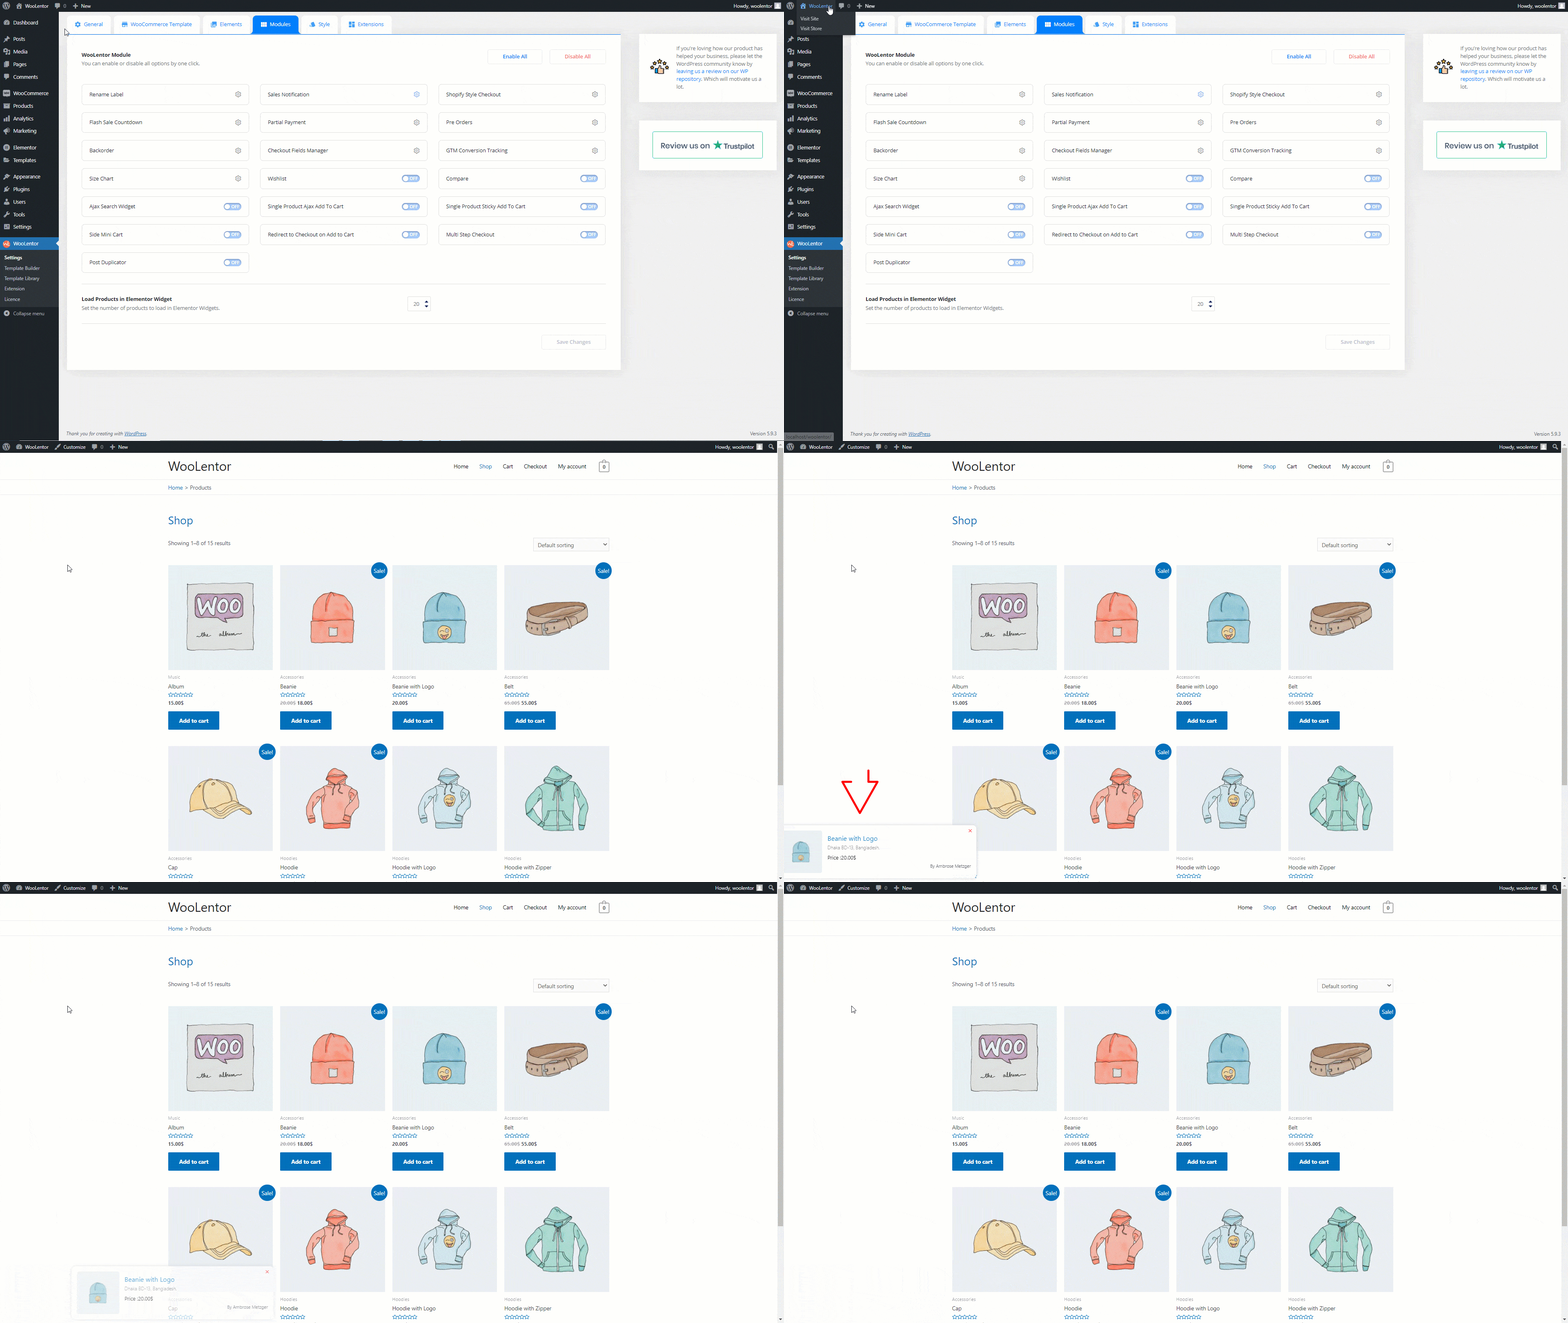
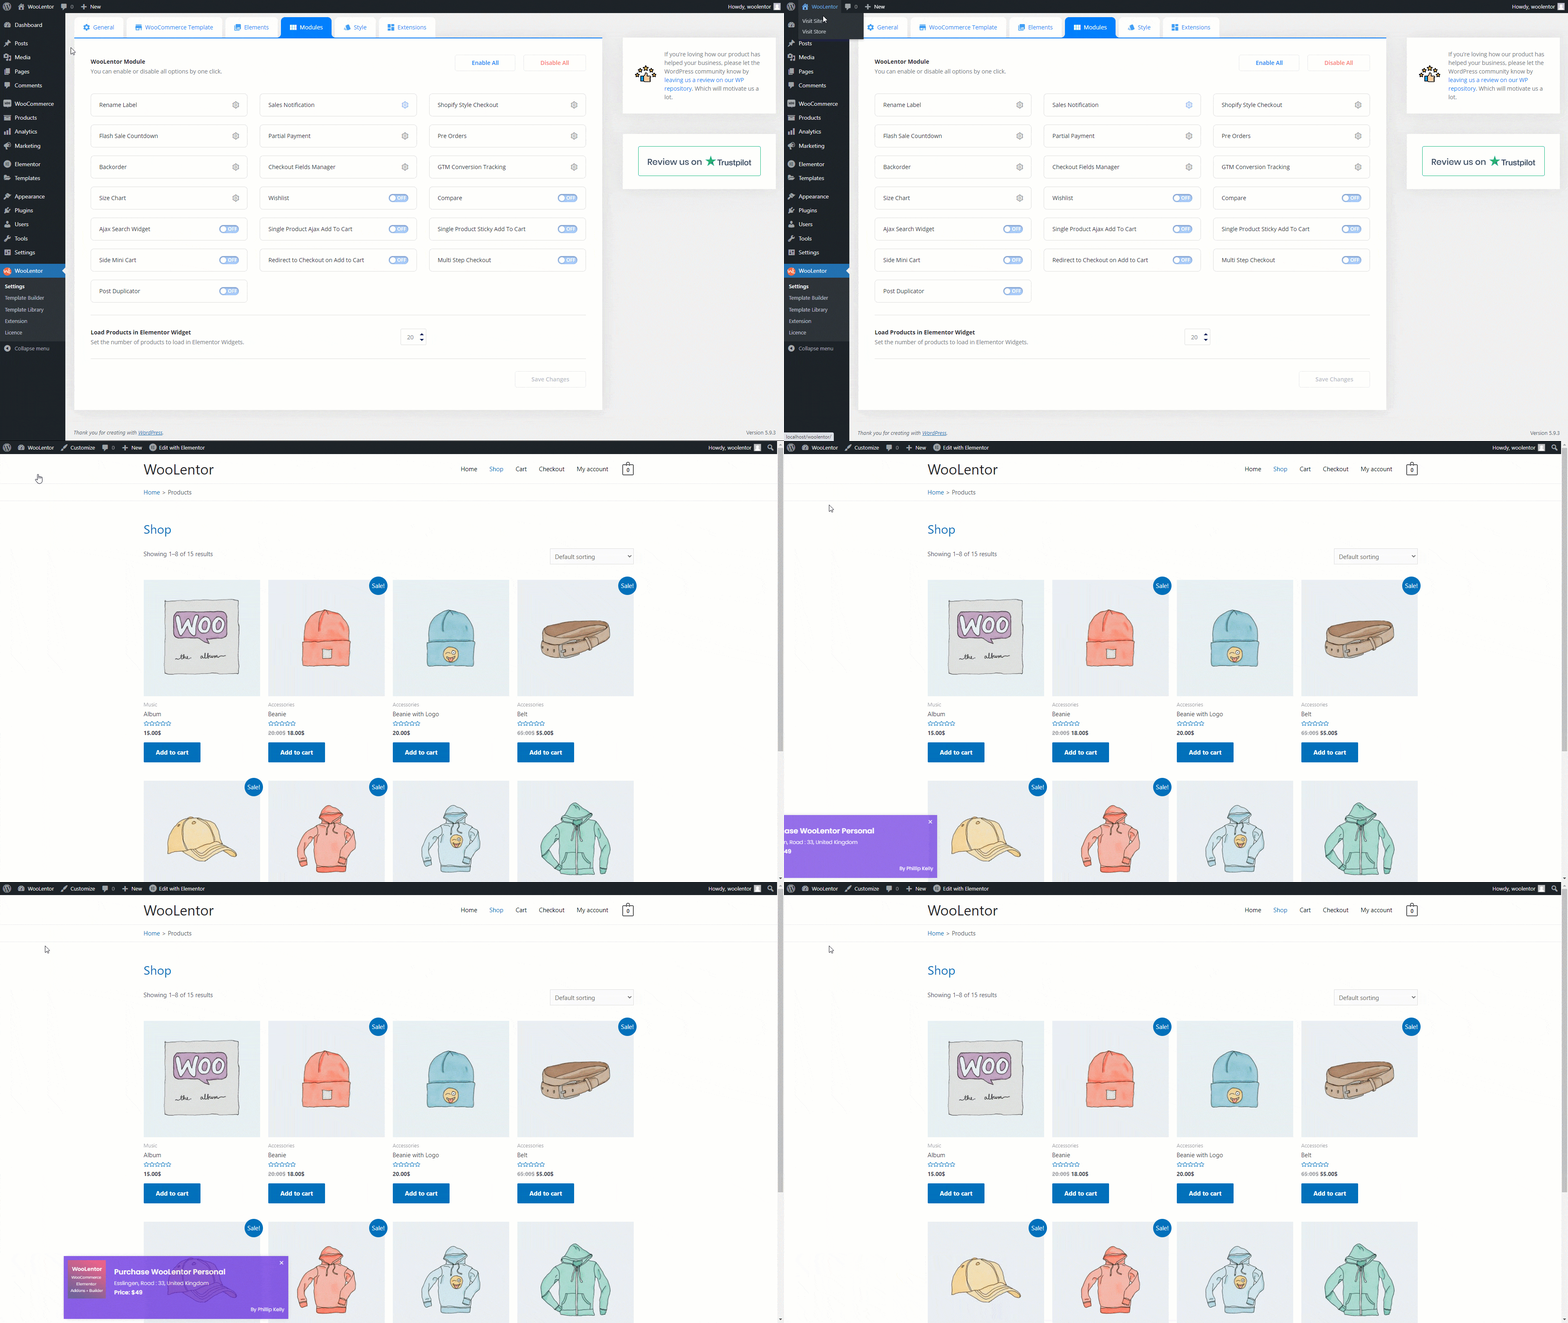
Sales Notification for WooCommerce is a powerful tool that can help to increase customer confidence and drive sales. By displaying real-time notifications about your latest products or ongoing sales, you can keep your customers up to date on the latest developments in your store and encourage them to make purchases. This not only increases customer engagement but also provides an extra layer of transparency that helps keep shoppers feeling confident in making online purchases from your store. So if you’re looking for a way to boost your sales and attract new customers, Sales Notification for WooCommerce is the perfect solution. With its intuitive design and easy customization options, it’s sure to help transform the way you do business online!
Benefits of using Sales Notification for WooCommerce Store #
- Shows the popularity and engagement of customers on your website.
- Promotes trending products on a busy website.
- Significantly enhance conversion rate
- Encourages customers to take immediate action.
- Increases trustworthiness on both ends of transactions
How to enable Sales Notification for WooCommerce? #
WordPress dashboard > WooLentor > Settings > Modules > Sales Notification
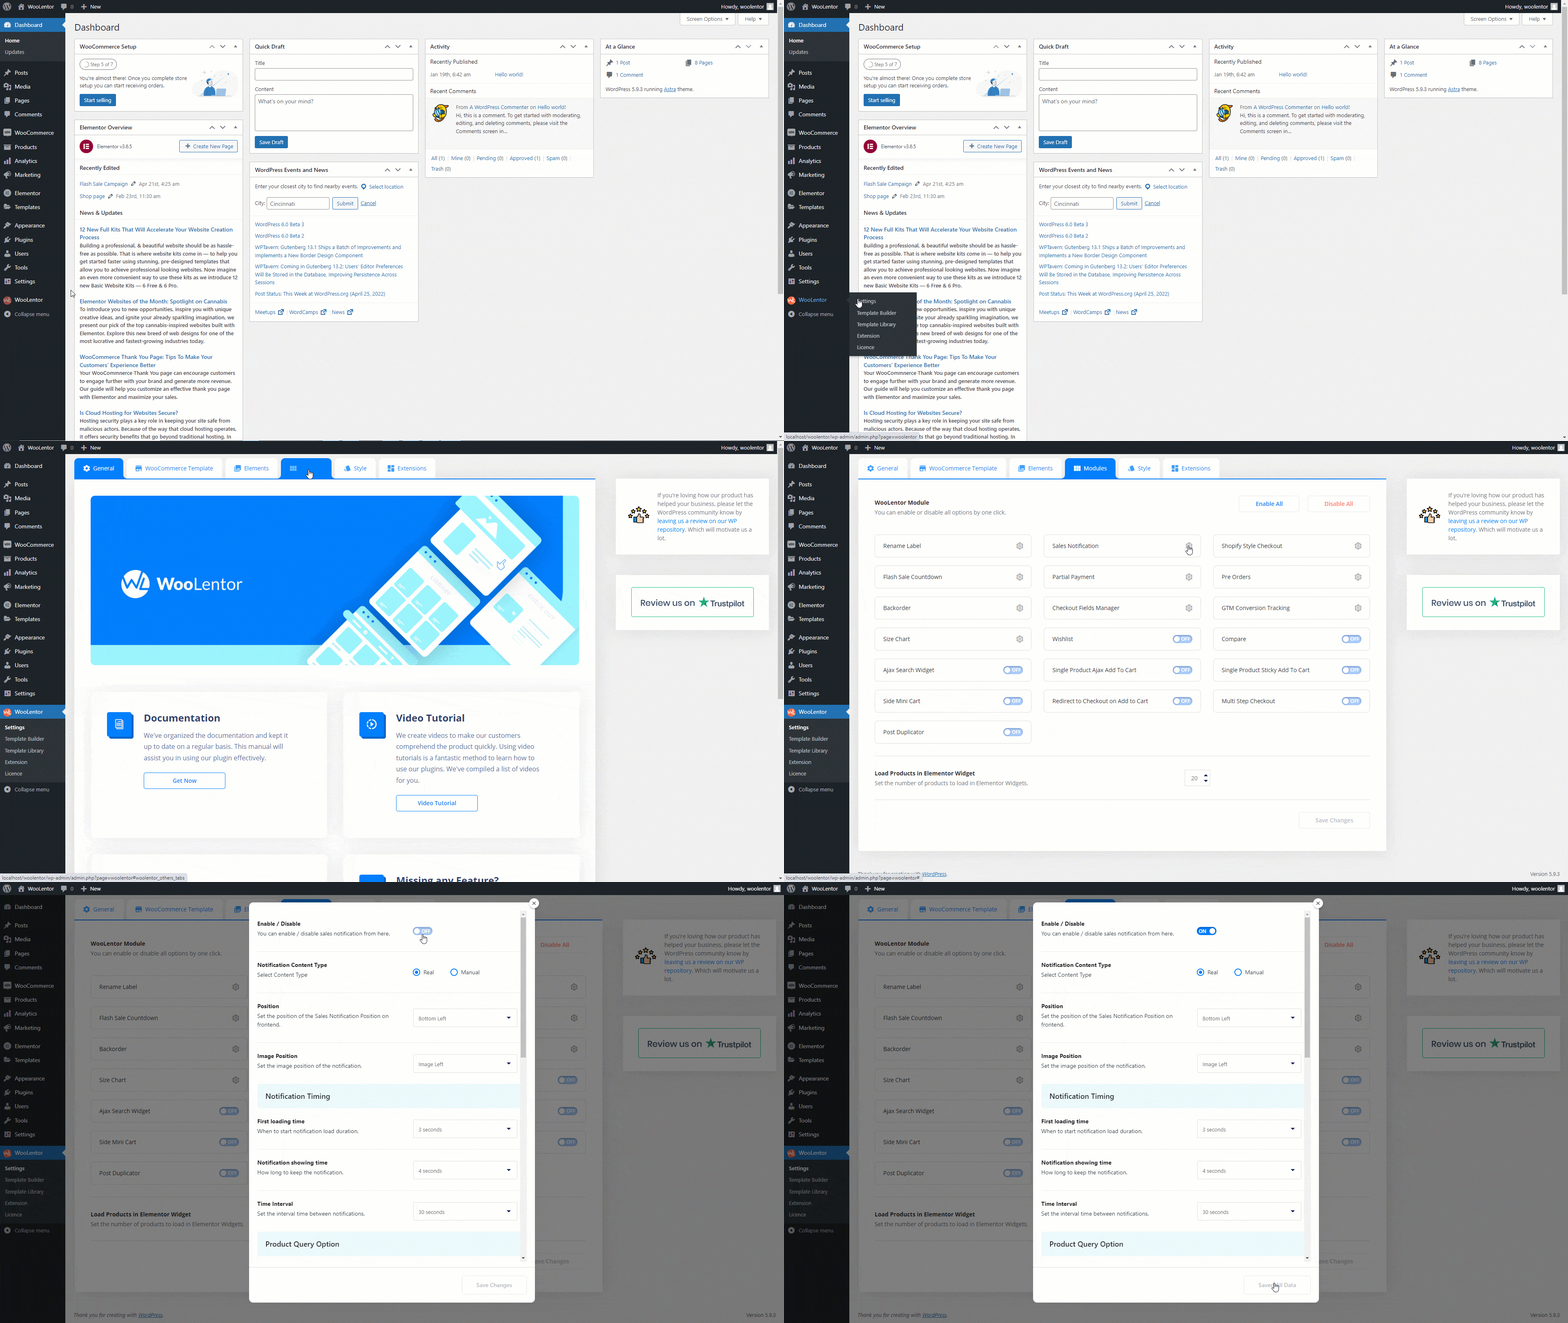
How to add real time Sales Notification using WooLentor #
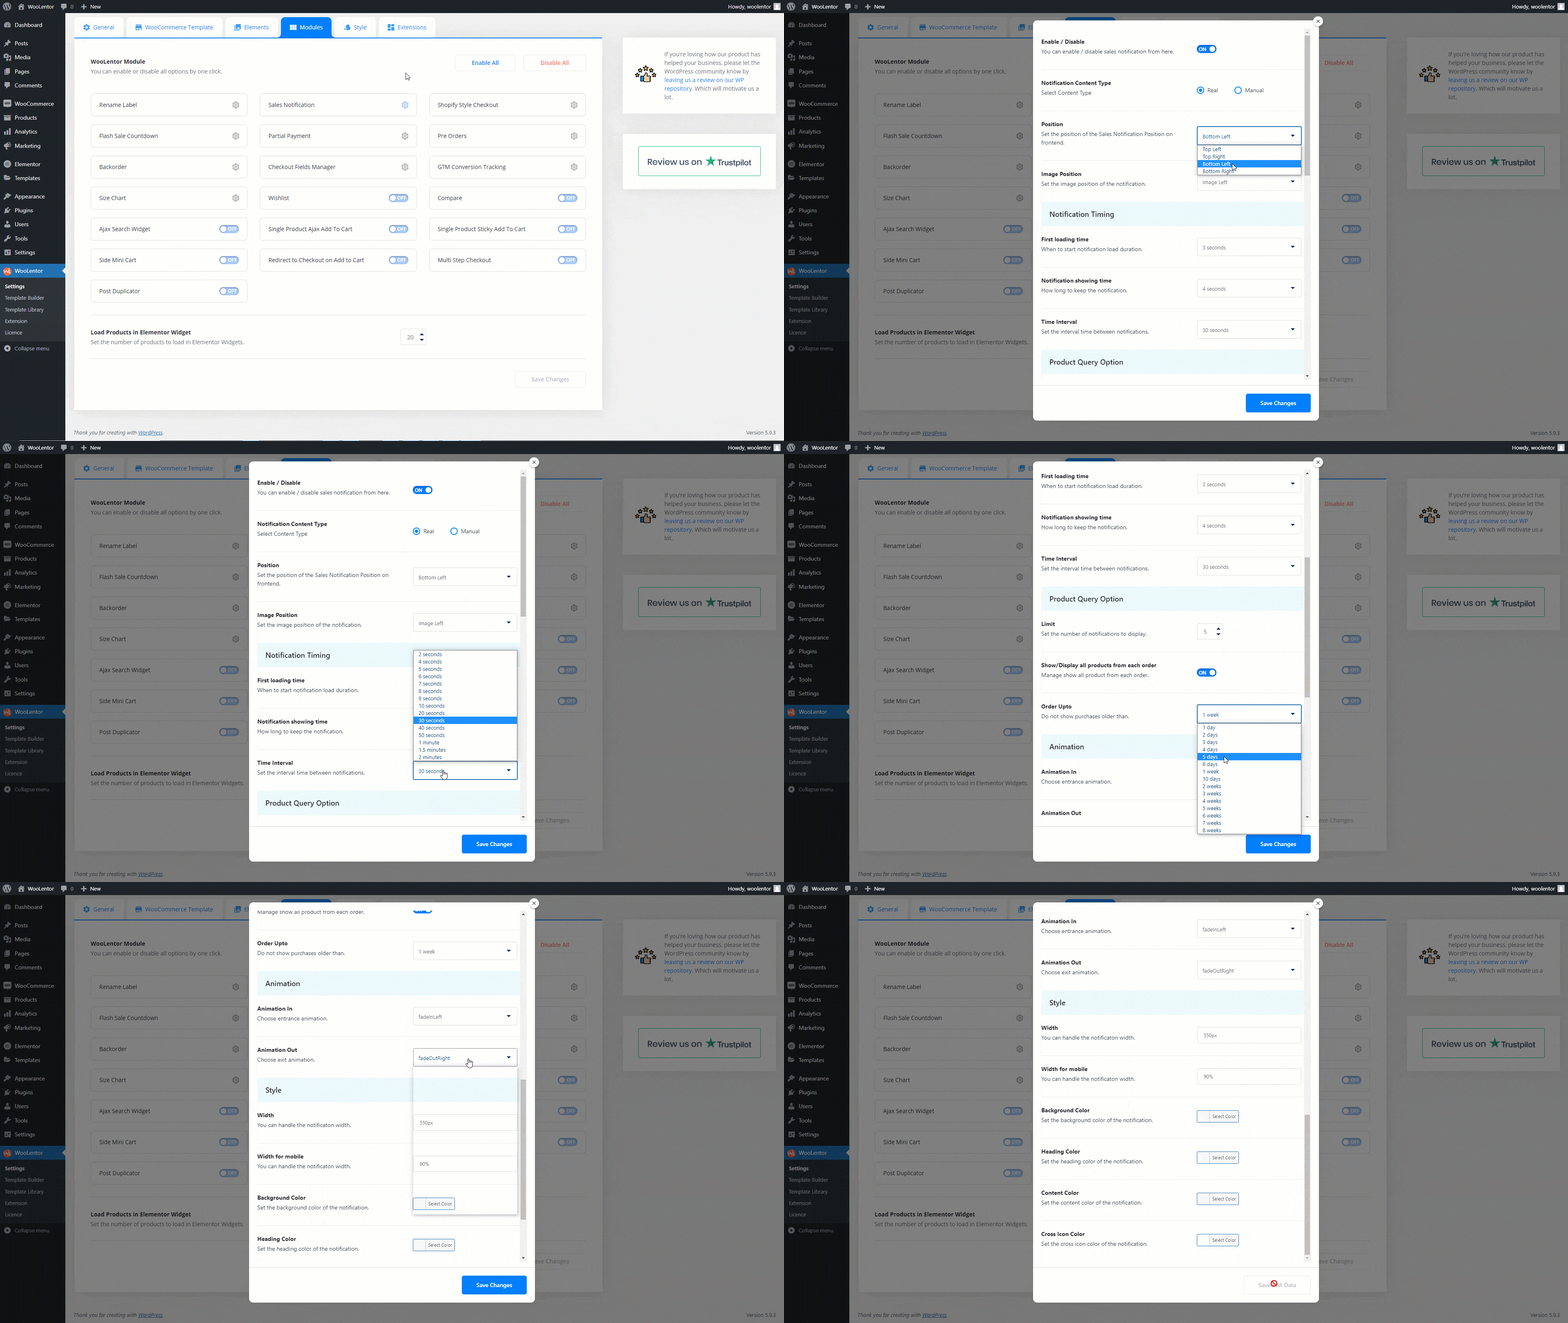
Go to Sales Notification module and select the Notification Content Type: Real then configure the below information
- Position: Set the position of the Sales Notification (Top Left, Top Right, Bottom left, Bottom Right)
- Image Position: Set the image position of the notification (Image Left, Image Right).
- Notification Timing: Set the duration of First loading time, Notification showing time, and Time Interval.
- Product Query Option: Set the Limit of notifications to display, Switcher on if you want to display all products from each order, and Order Upto Value.
- Animation: Select the Notification In and Notification Out animation.
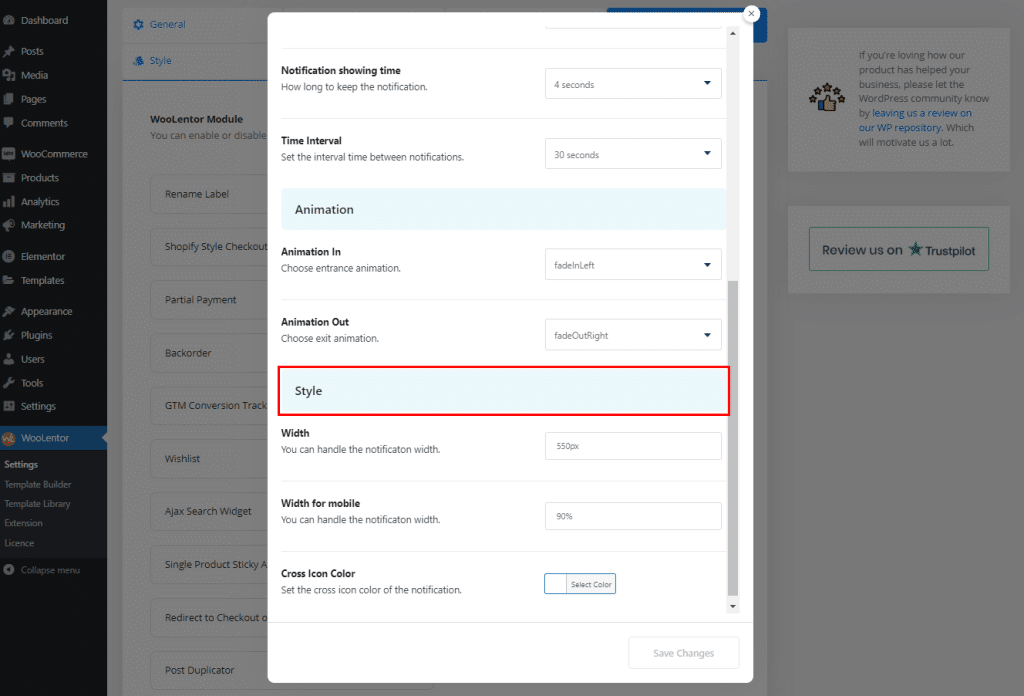
Notification Style #
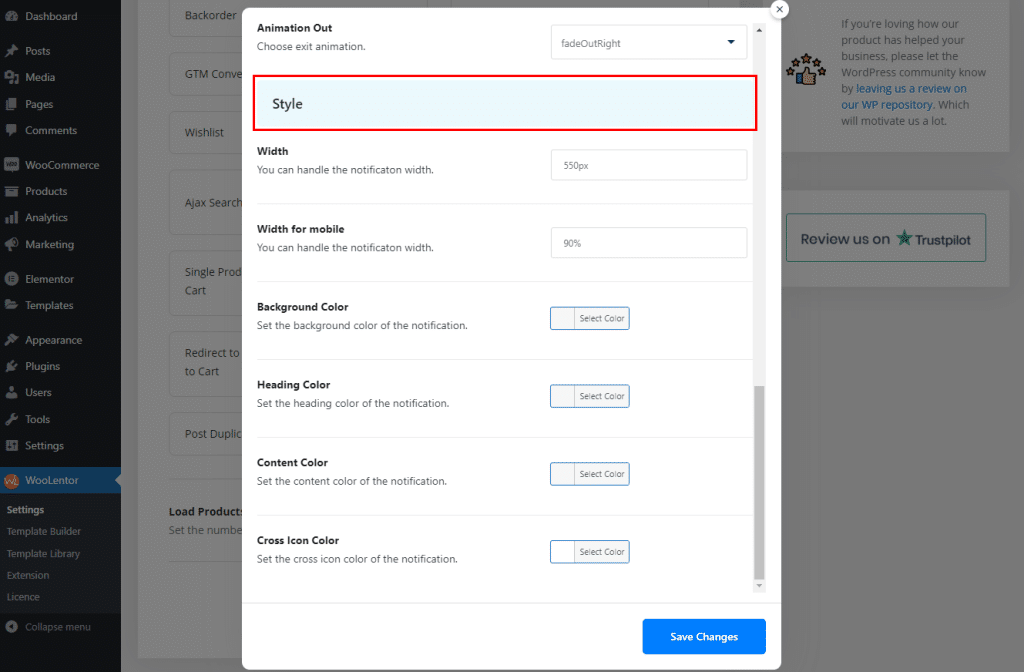
- Width: You can handle the notification box width.
- Width for mobile: You can handle the notification width for mobile devices.
- Background Color: Set the background color of the notification.
- Heading Color: Set the heading color of the notification.
- Content Color: Set the content color of the notification.
- Cross Icon Color: Set the cross icon color of the notification.
How to add manual Sales Notification for WooCommerce using WooLentor #
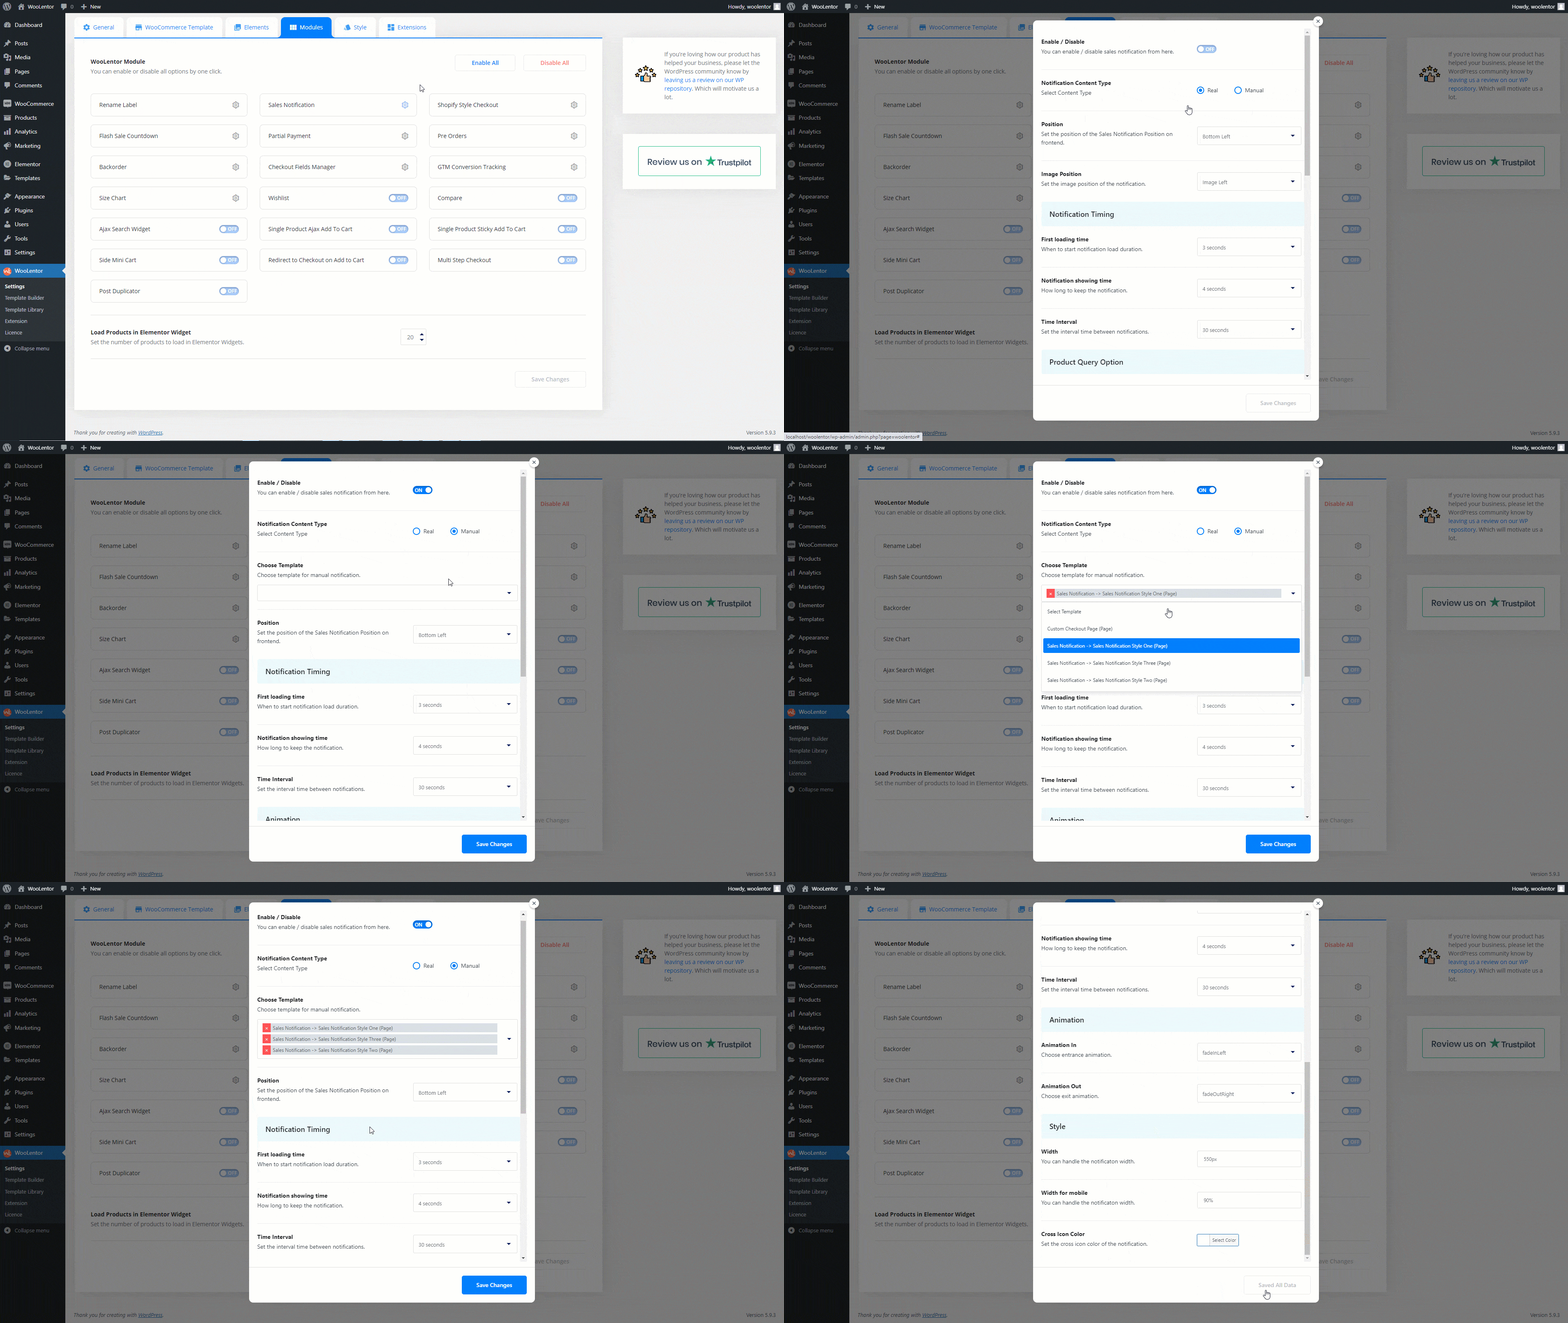
Go to the Sales Notification module and select the Notification Content-Type: Manual then configure the below information
- Choose Template: Need to choose custom notification template for manual notification. To import custom template follow the instruction here
- Position: Set the position of the Sales Notification Position on frontend (Top Left, Top Right, Bottom left, Bottom Right)
- Notification Timing: Set the duration of First loading time, Notification showing time, and Time Interval.
- Animation: Select the Notification In and Notification Out animation.
Notification Style #
- Width: You can handle the notification box width.
- Width for mobile: You can handle the notification width for mobile devices.
- Cross Icon Color: Set the cross icon color of the notification.
