Pre-order for WooCommerce is easy to set up and manage with the WooLentor plugin. Pre-orders give you a good idea of what to expect and predict the demand for certain products, even for items that have yet to be offered. You can see how interested people are in certain items before they’re available. If you’ve ever wanted to offer products in your store that aren’t in stock yet, offering a pre-order option to your customers is a good way to achieve it. Your clients will then be able to purchase those items which will be shipped when they become available.
Benefits of using Pre-Order for WooCommerce #
There are many benefits associated with pre-ordering, both for the business and the consumer. An effective pre-order strategy can help build excitement about upcoming product releases. Here are some benefits of pre-ordering:
- Increase Sales
- Promote the product better
- Predict Product Demand
- Gives you an idea of the market
The major advantage of utilizing a pre-ordering strategy is
that it may boost eCommerce sales.
How to set Pre-order for WooCommerce? #
Using WooLentor, you can enable the WooCommerce Pre Order feature in your WooCommerce store and make the process of buying products easier and faster. Here are the easy steps of adding a WooCommerce Pre Order in a store.
Follow the following steps Setup and Configuration:
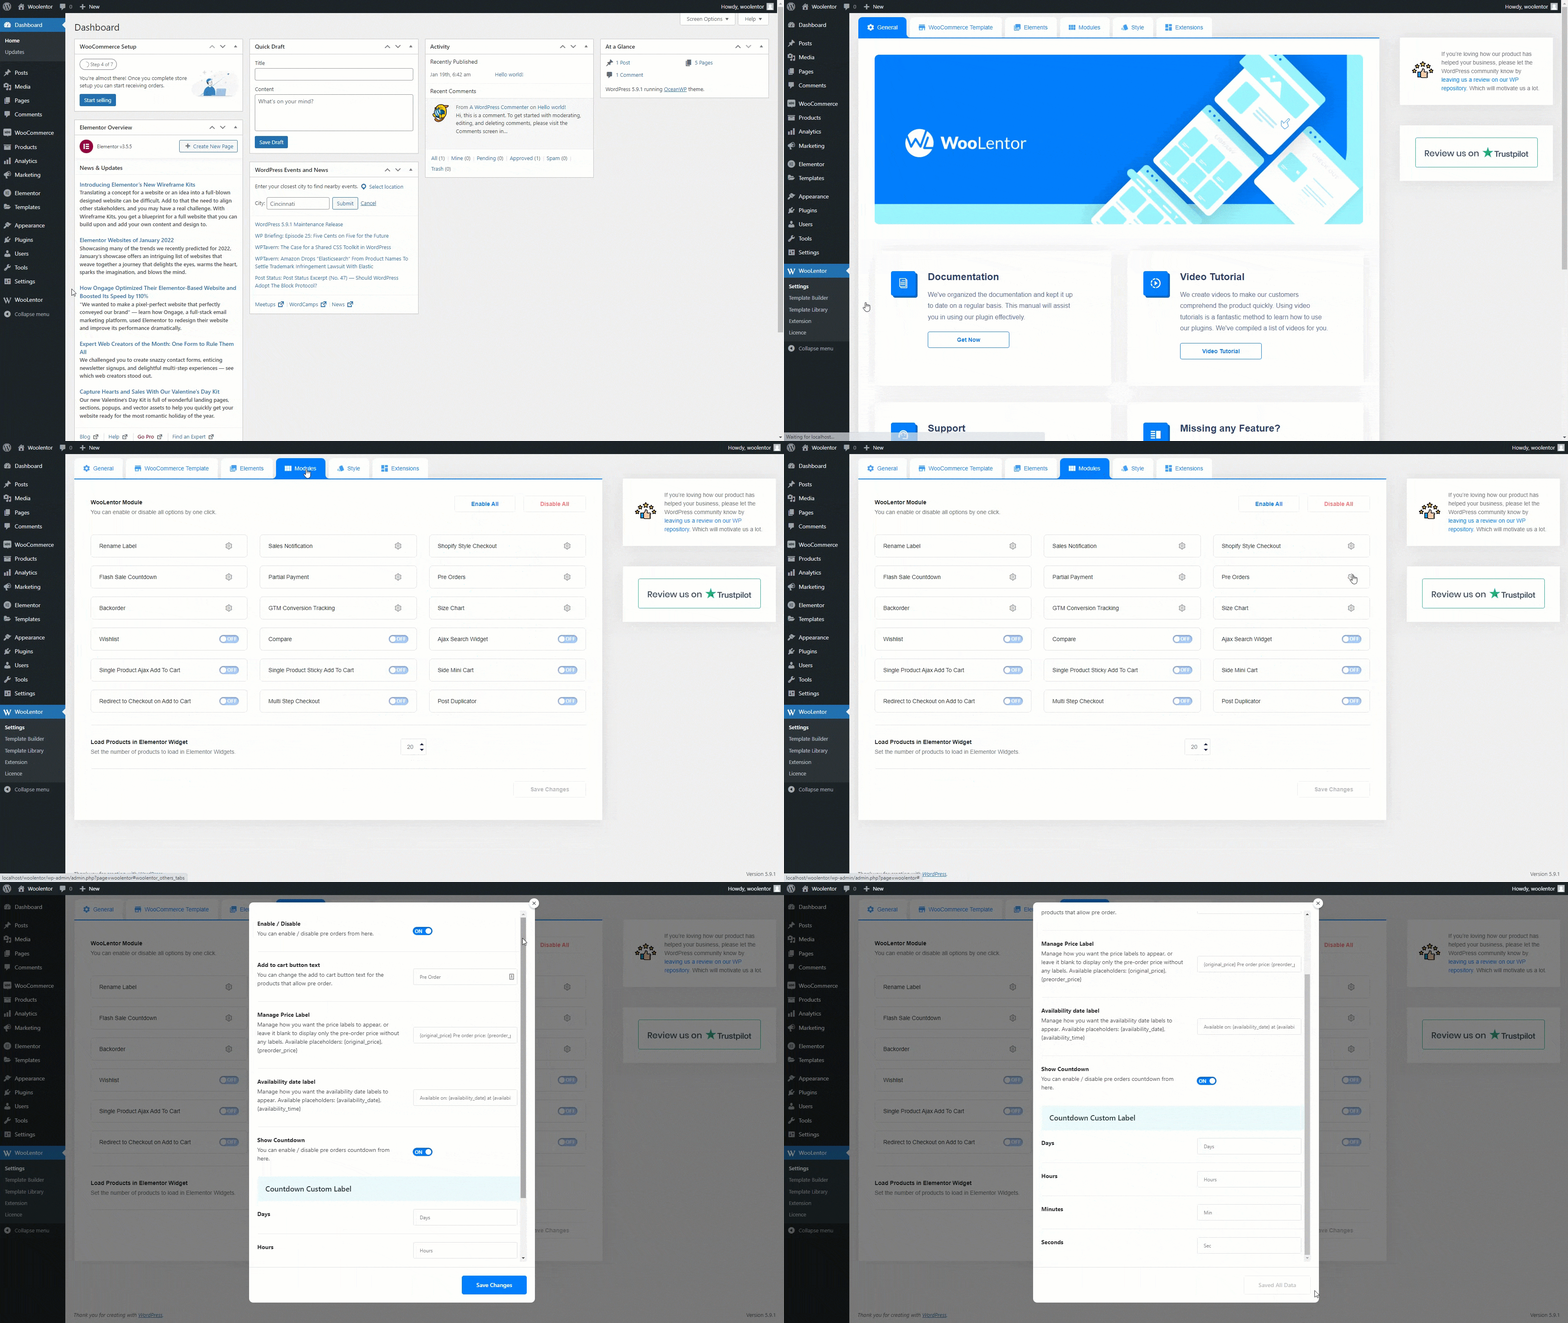
Step 1: Enable the Pre Order module #
WordPress dashboard > WooLentor > Settings > Modules > Pre Orders
After that, enable the module and insert the following information in the gaps:
- Enable/Disable: You can enable/disable pre-orders from here.
- Add to cart button text: You can change the add to cart button text for the products that allow pre-order.
- Manage Price Label: Manage how you want the price labels to appear, or leave it blank to display only the pre-order price without any labels. Available placeholders: {original_price}, {preorder_price}.
- Availability date label: Manage how you want the availability date labels to appear. Available placeholders: {availability_date}, {availability_time}
- Show Countdown: You can enable/disable the pre-orders countdown from here. Then the show Countdown Custom Label option set and customize day time as you want.
- Countdown Custom Label: Days, Hours, Minutes, Seconds

Step 2: Go to Product Edit Page #
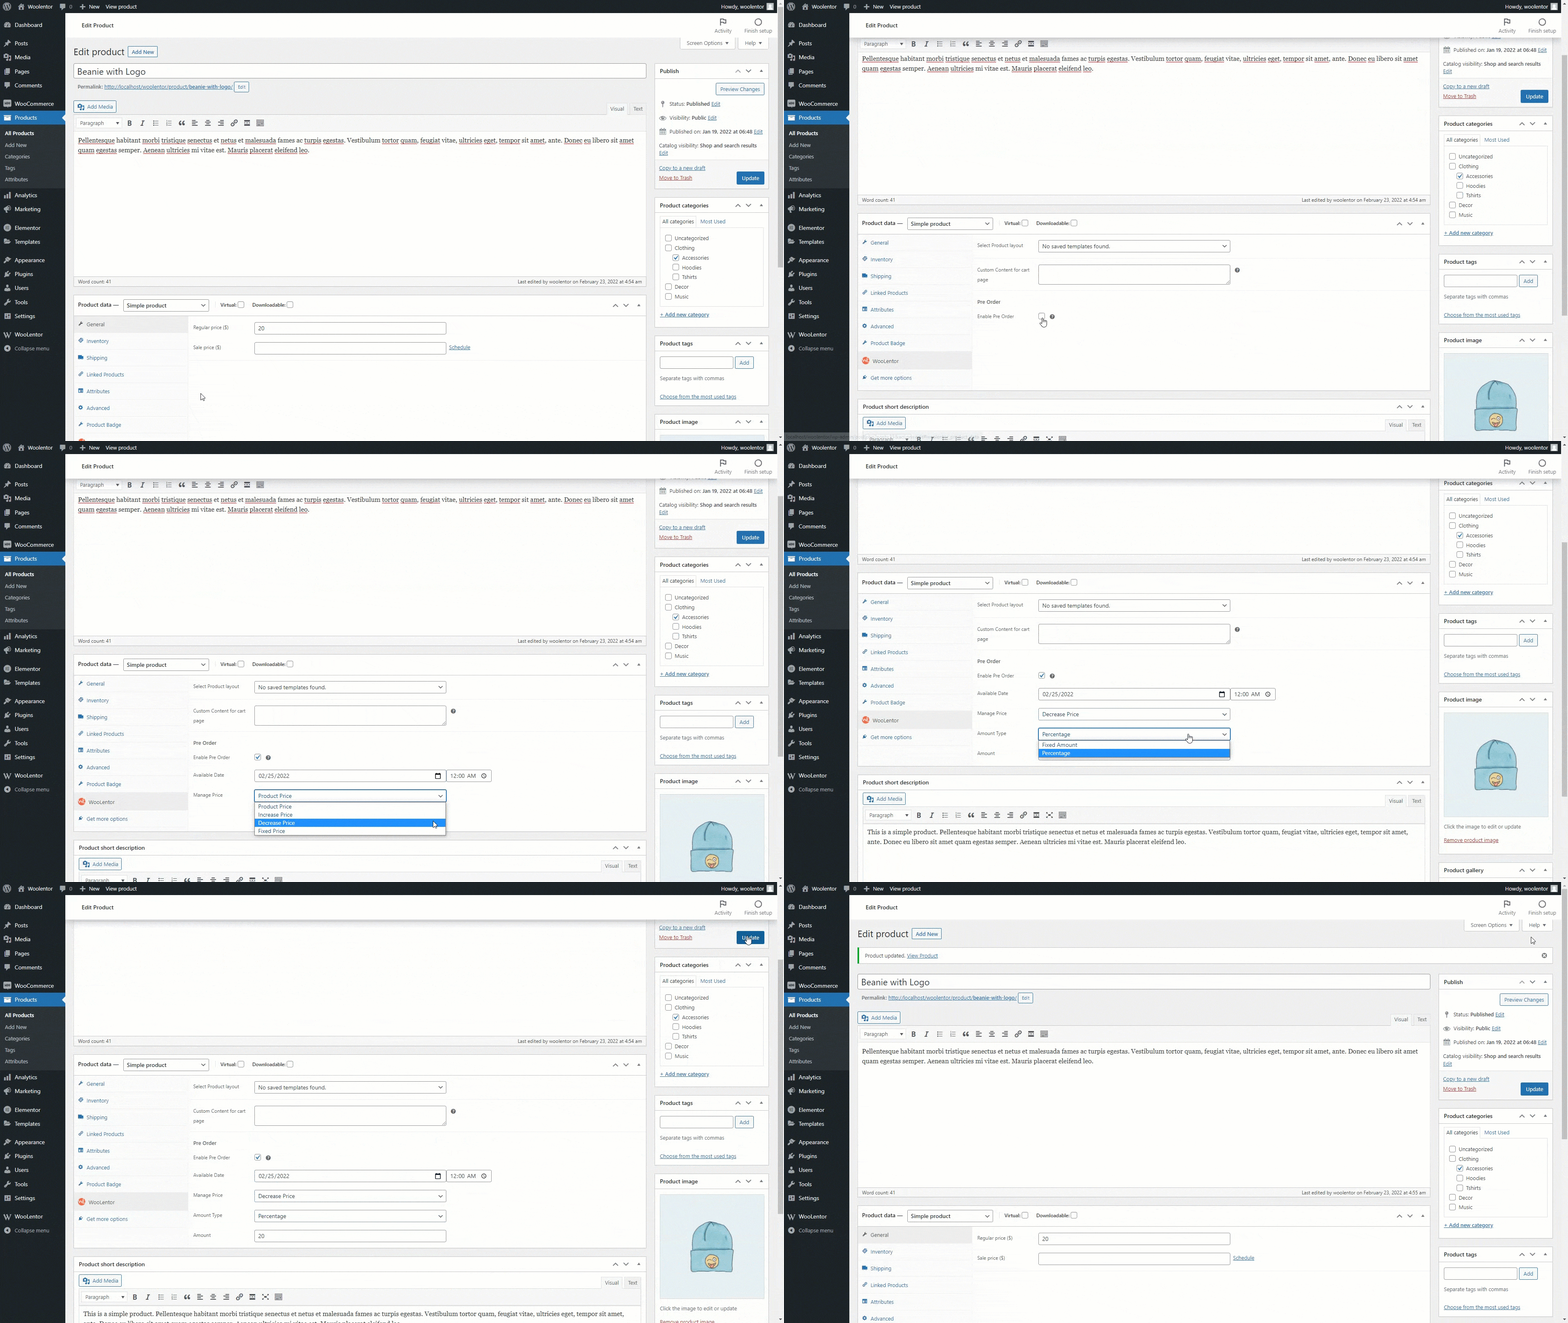
Edit the product for which you want to set the Pre Orders

Step 3: Updating product pre-order configuration #
As shown in the above image, the following fields are available for configuration
- Products > All Products
- Click on the edit option of the product you want to put on Pre Order
- Go to WooLentor
- Enable Pre Order
- Available Date: Set the Available Date
- Manage Price: Set the Manage Price
- Amount Type: Set the Amount Type
- And Press the Update button

Step 4: Check the Product Page from your website #
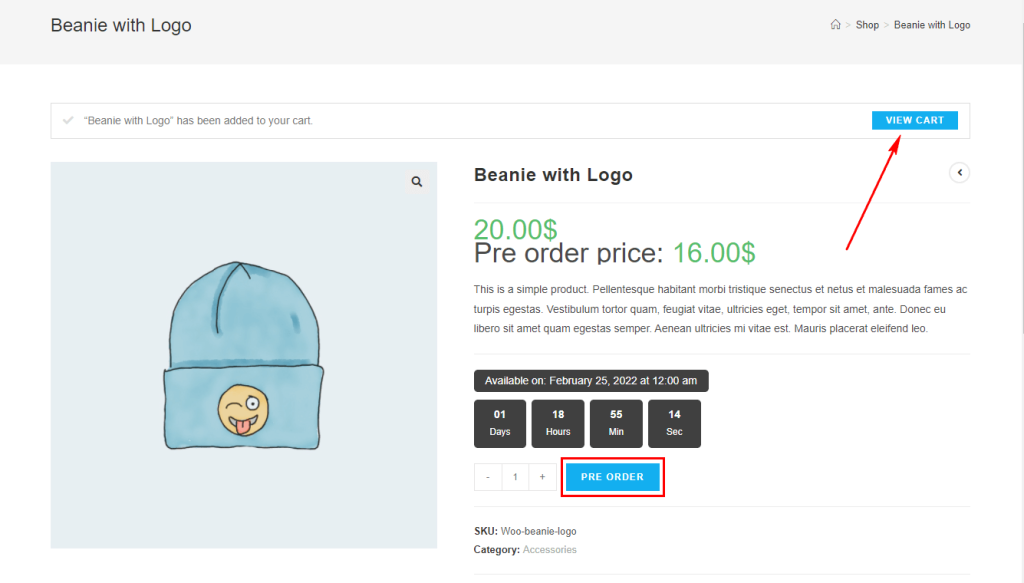
The pre-order notification is now showing on your product page.

Step 5: Check the Pre Order notice on your cart page #
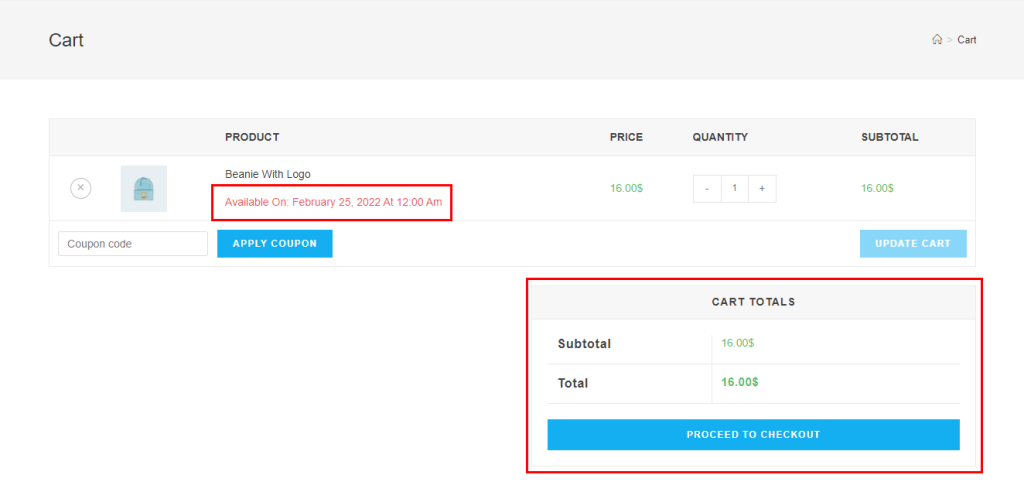
The front end view of the cart page

Step 6: Pre Order Product Status #
View of Pre Order Product Status: WooCommerce -> Order
