If you are running an e-commerce store that sells a wide range of wearable products, then the Product Size Chart for WooCommerce is the ideal extension for you. This powerful tool allows you to create easy-to-use size guides that help your customers select the right product size and make their purchase decisions quickly and easily. Whether you sell shoes, shirts, trousers, or another type of product that requires accurate measurements, the Product Size Chart for WooCommerce can streamline your shopping experience by making it easier for your customers to find the perfect fit. So why wait? Let the Product Size Chart for WooCommerce help you boost your sales and attract more customers today! Product size chart is included in WooLentor’s pro version.
Benefits of Using WooLentor’s Product Size Chart Module For WooCommerce
Variable goods may have numerous variations/options, each of which has its own SKU and price. A piece of apparel, for example, that is available in several sizes or colors. It’s a fantastic method to show size charts for your items and helps customers choose the best size for them. Before purchasing items, clients can quickly look over the sizing chart
Benefits of using Product Size Chart in WooCommerce:
- Since the size chart option removes the issues associated with product sizes, there have been fewer product returns.
- The Size Chart clarifies the size and fitment for clients.
- Before purchasing the items, customers can readily check the sizing chart.
- The size chart option enables you to you will boost the usability and user experience of your eCommerce website.
How to add the Product Size Chart in WooCommerce?
Size is one of the most common variations we encounter for a product (ex: choosing between Small, Medium, Large, or XL). Therefore, below we will outline how to add a product in WooCommerce using WooLentor that has different sizes:
Step 1: Enable the Size Chart module
WordPress dashboard > WooLentor > Settings > Modules > Size Chart.
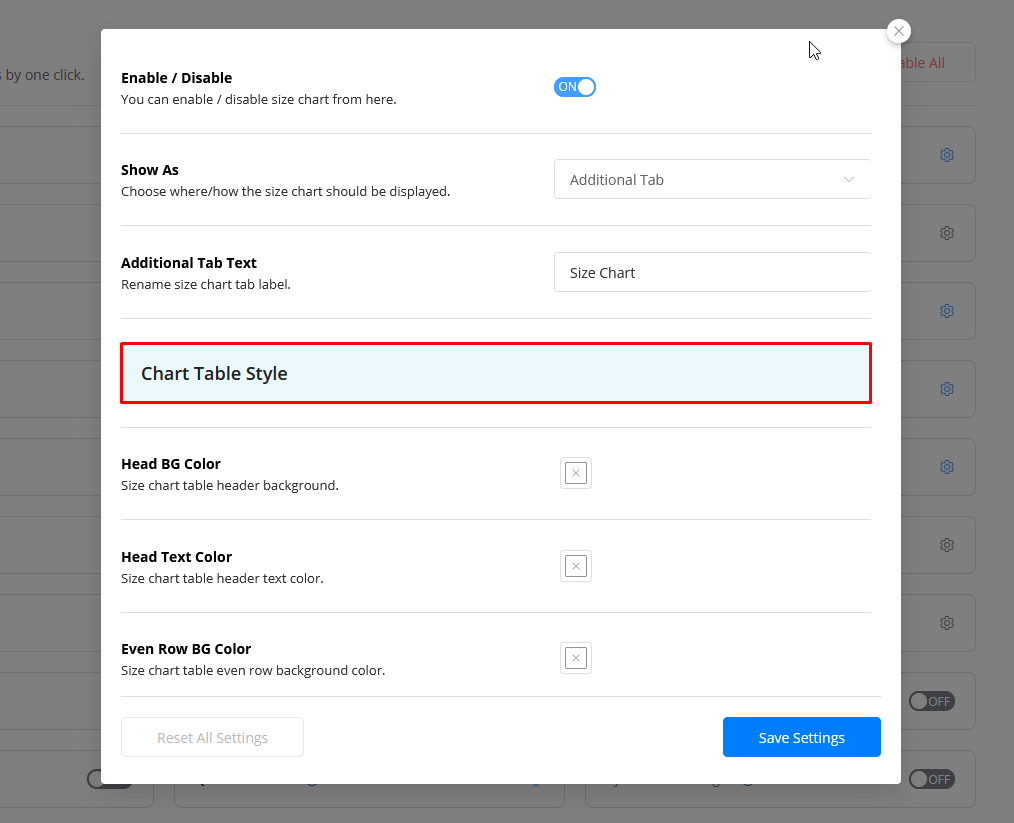
After enabling the module and inserting it, configure the below following information:
- Enable/Disable: You can enable/disable the size chart here.
- Show As: Choose where/how the size chart should be displayed.
- Additional Tab Text: Rename the size chart tab label.
Show As Size Chart Popup Option:
- Button Text: The text appears on the button that opens the popup.
- Button Position: You can popup the button position from here.
- Hide Title: Hide the chart name on the popup title.
- Button Icon: You can manage the size chart button icon.
- Button Margin: You can manage button margin from here.

Chart Table Style:
- Head BG Color: Size chart table header background.
- Head Text Color: Size chart table header text color.
- Even Row BG Color: Size chart table even row background color.
- Even Row Text Color: Size chart table, even row text color.
- Odd Row BG Color: Size chart table odd row background color.
- Odd Row Text Color: Size chart table, odd row text color.

Step 2: Setup Product Size Chart
The product size chart for each product can be set from here. Follow the step below to know how to set a size chart.
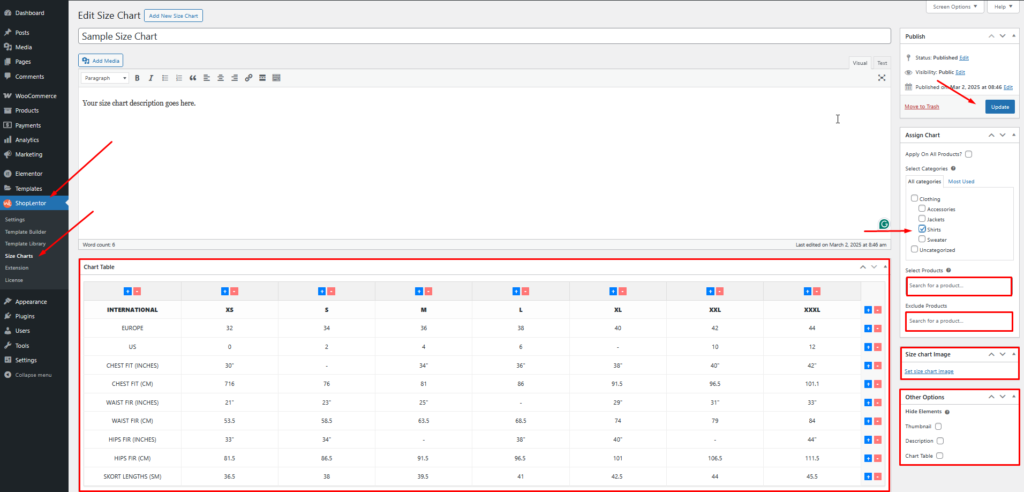
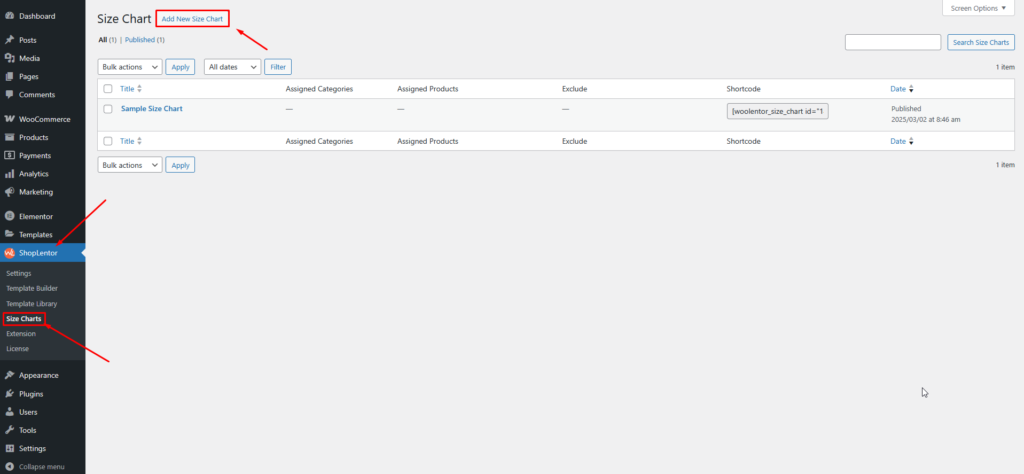
Go to WooLentor > Size Chart
From the size chart list, click on the edit option of the “Sample Size Chart†want to change the size
How to edit Size Chart:
- Title: Enter Size Chart Title.
- Description: Enter Size Chart Description.
- Chart Table: You can customize the Chart Table to your liking or create a new size chart.
- Assign Chart Size Category: Select which Category the chart table will apply.
- Select Products: Select which product the chart table will show.
- Exclude Products: Exclude which product the chart table will show.
- Size Chart Image: Upload size chart if you want.
- Others Option: If you want to hide the options, hide them off from here.
- And Press the Update button.

You can also add a new Size Chart from here, follow the below screenshot

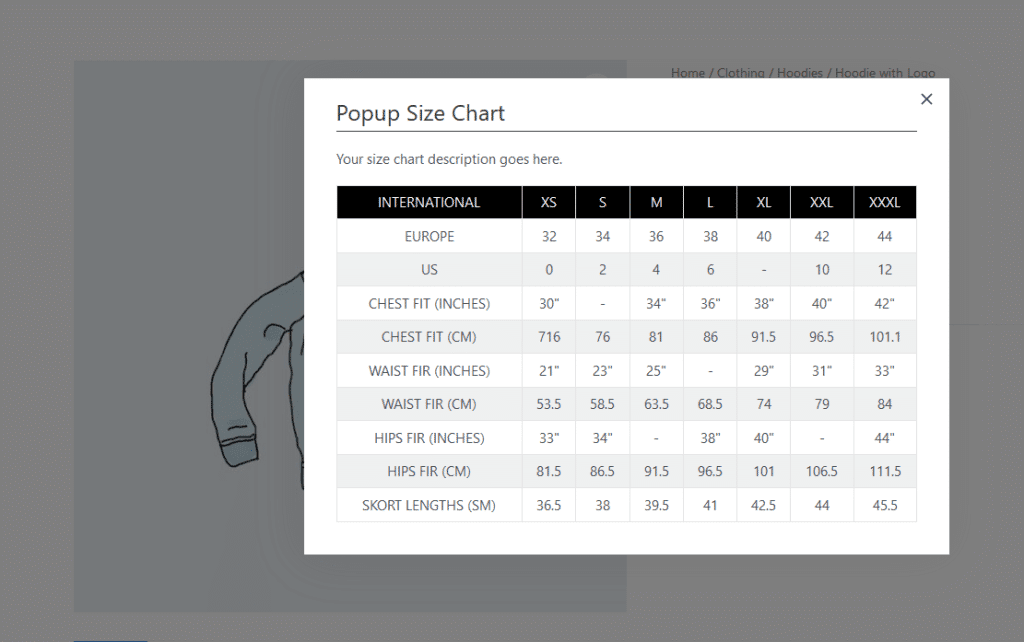
Step 2: Let’s see the preview of the Product Size Chart
Click on the product which set the size chart
Product Additional Tab Size Chart

Product Popup Size Chart
