This comprehensive guide will walk you through the process of implementing and utilizing the Currency Switcher for WooCommerce to enable multi-currency functionality on your WooCommerce store. With the Currency Switcher, you can easily offer different currencies to your customers based on their preferences or location.
In addition to manual currency selection, you can enhance your store’s user experience by enabling geolocation-based currency detection. This feature automatically detects your customers’ locations and sets the appropriate currency for them, providing a seamless, automated experience without requiring any action from the user.
How to Enable Currency Switcher
- Navigate to the ShopLentor menu on your WordPress dashboard.
- Click Settings, then select the Modules tab.
- Locate and click on Currency Switcher, then access its settings.
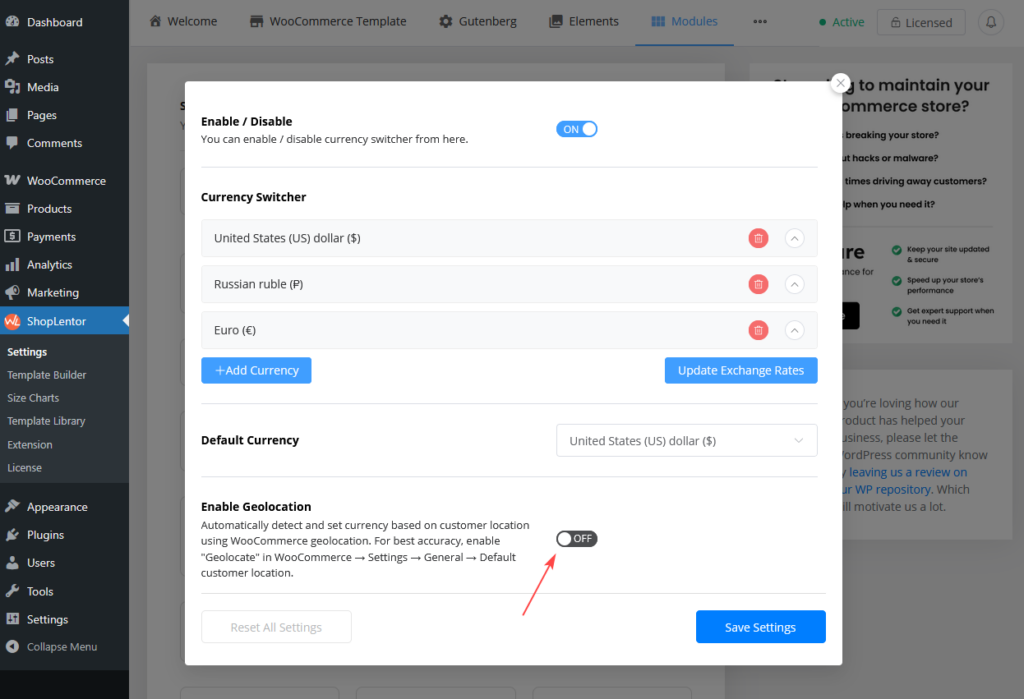
- In the Currency Switcher settings window, enable the feature.
How to add Multiple Currencies
In the Currency Switcher settings window, you’ll find the default currency displayed along with the convenient “+ADD ITEM” button. Simply click on this button to add a new currency. Here’s a detailed overview of the settings you can configure:
- Currency Selection: Choose the currency you want to add to your website.
- Decimal Placement: Specify the decimal placement for the currency.
- Currency Symb: Select the position of the currency symbol: Left, Right, Left Space, or Right Space.
- Exchange Rate: Manually set the exchange rate or effortlessly update it by clicking the “UPDATE EXCHANGE RATES” button for the latest rates.
- Exchange Fee: Set an exchange fee to be added to the original or exchanged rate.
- Payment Method Disables: Disable specific payment methods for this currency if needed.
- Custom Currency Symb: Optionally, add a custom currency symbol. If left blank, the default symbol for the currency will be used.
These settings allow you to tailor the Currency Switcher to match your website’s requirements and provide a seamless multi-currency experience for your users. Experiment with these options to create a currency configuration that best suits your needs.
Set Default Currency
After adding currencies, navigate to the “Default Currency” section. Choose from the list of added currencies to set your preferred default currency for the website. This choice influences the initial currency users see, providing a smooth and user-friendly experience.

How to Enable Currency Switcher with Geolocation
Once you’ve configured your default currency, you can enhance your store’s user experience by enabling geolocation-based currency switching. This allows the currency to be automatically detected based on the customer’s location.
1. Navigate to the ShopLentor Settings:
- Go to ShopLentor → Modules in your WordPress dashboard.
- Click Currency Switcher to open the settings.

2. Enable Geolocation:
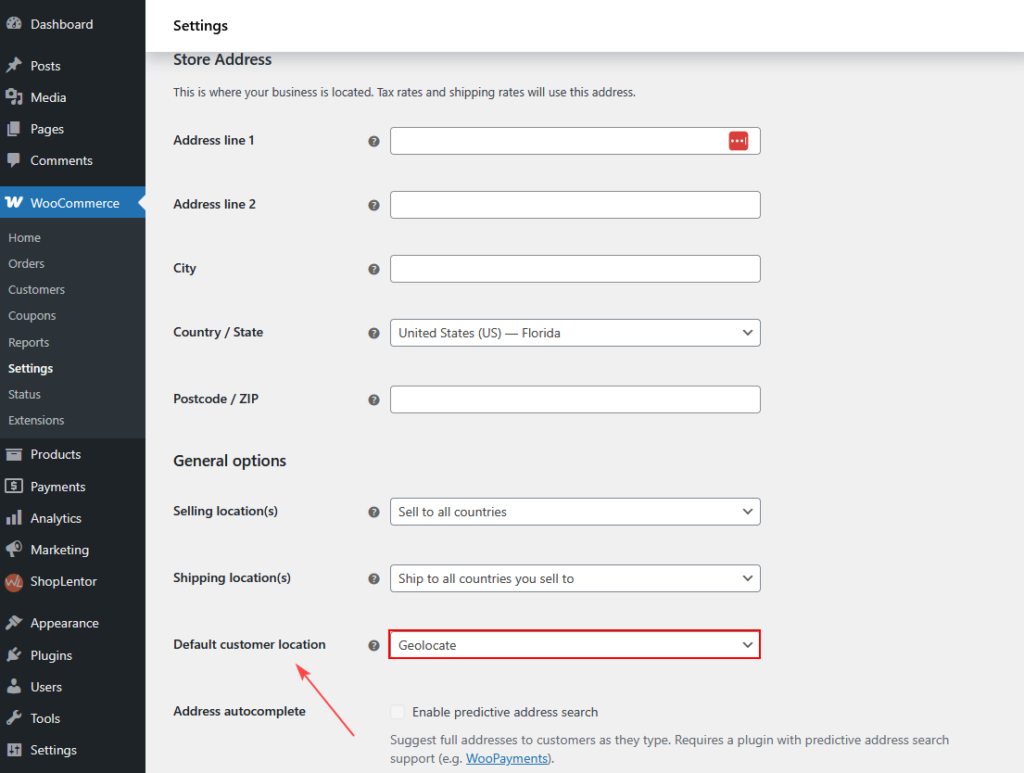
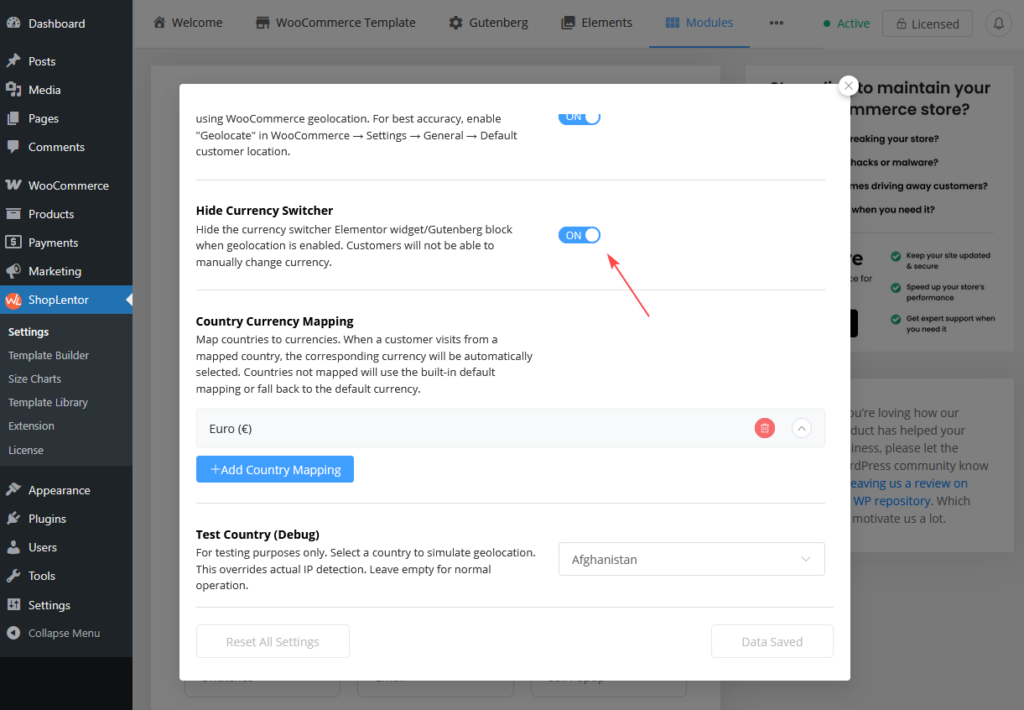
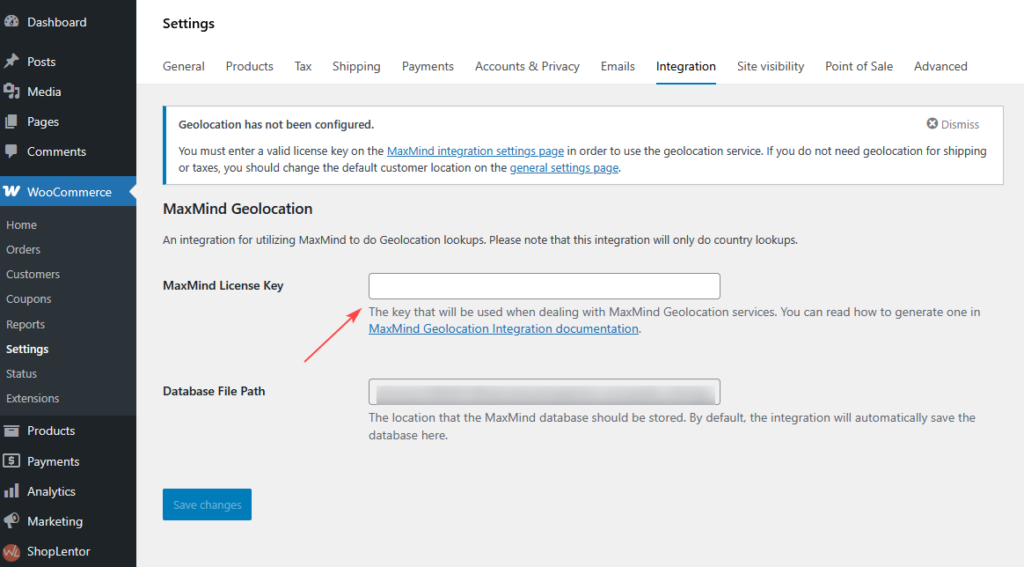
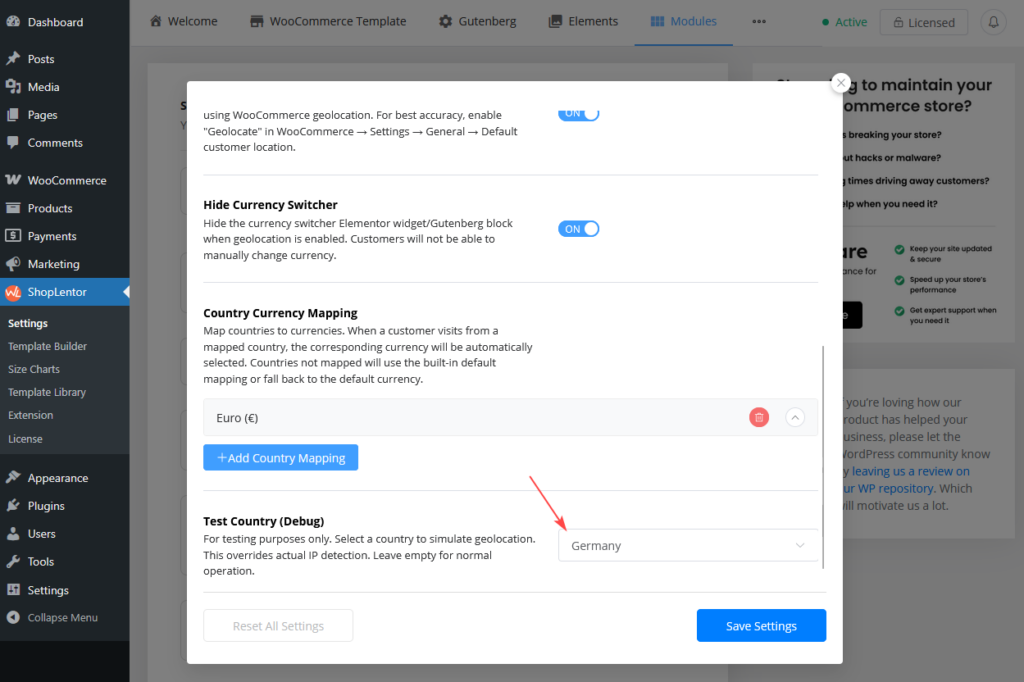
- In the Currency Switcher settings, toggle Enable Geolocation to ON. This feature will automatically detect and set the currency based on the customer’s location using WooCommerce geolocation. For best accuracy, ensure that Geolocate is enabled under WooCommerce → Settings → General → Default Customer Location.
3. Configure Country to Currency Mapping (Optional):
- You can map specific countries to currencies using the Country Currency Mapping feature. This helps automatically select the correct currency based on the customer’s location.
- For instance, map Germany to EUR or USA to USD.
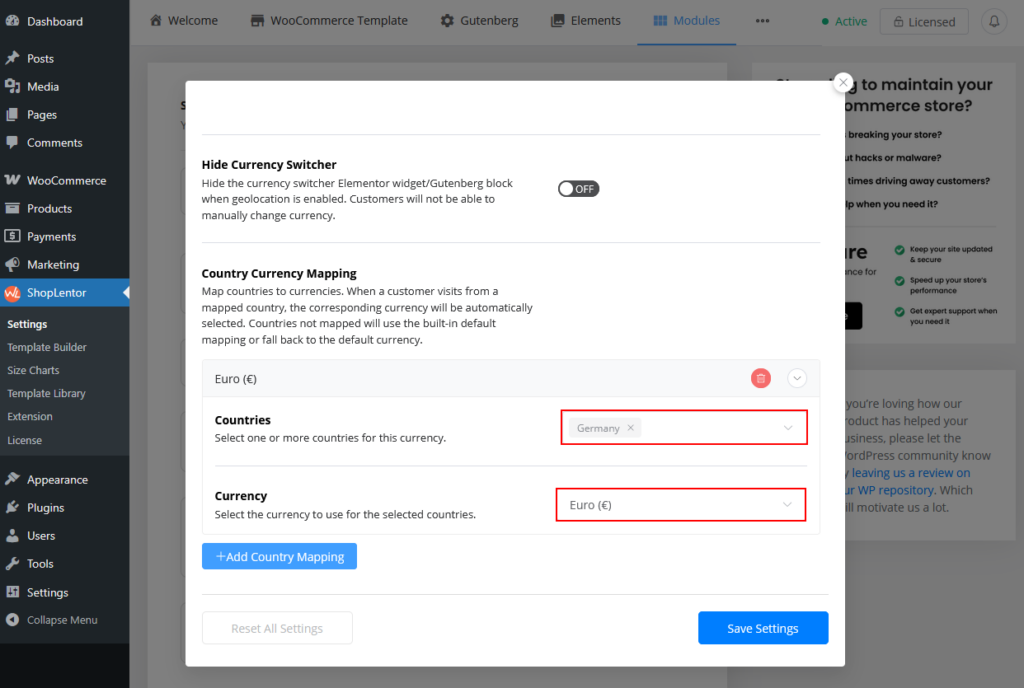
4. Optional – Hide Currency Switcher:
- If you don’t want customers to manually select their currency, enable the option Hide Currency Switcher. When this is activated, the currency switcher widget (for Elementor/Gutenberg) will be hidden, and customers will not be able to manually change the currency.
Step 2: Adjust Geolocation Settings
Google API Key (Required for enhanced geolocation features):
- To use advanced geolocation features, such as country-specific restrictions and autocomplete, you’ll need to enter your Google API Key in the settings. This key is required to use Google’s geolocation and address services.
Step 3: Test the Geolocation Currency Switching
To ensure everything is working:
- Visit the site from different countries (or use a VPN) and check if the currency changes automatically.
- Test with billing and shipping addresses to confirm proper currency detection.
- If the country is not mapped to a currency, the system will default to the main currency set in the system.
How to display the Currency Switcher Using Elementor Widget
After configuring the multi-currency settings, the next step is to display the currency switcher on your website. So customer can change to their desired currency. Follow these simple steps:
- Navigate to your preferred page.
- Edit the page using Elementor.
- Search for the “Currency Switcher” Elementor widget.
- Drag and drop the widget onto your desired section.
It’s that easy! The Currency Switcher will now be seamlessly integrated into your Elementor-designed page, allowing users to switch between currencies effortlessly.
How to display the Currency Switcher Using Shortcode
[woolentor_currency_switcher]This shortcode makes it simple to showcase the currency switcher. It comes with several parameters, and as with other shortcodes, each one should be enclosed in double quotation marks, “like this”.
- style: Pick the style for displaying the currency switcher. Choose between “list” and “dropdown”.
- flags: Decide whether the currency switcher should include flags. Options are “yes” and “no”.
- flag_style: Select the style for displaying the currency switcher with flags. Options include “square” and “circle”.
Example
[woolentor_currency_switcher flags="yes" style="dropdown" flag_style="square"]Contact Support for Further Assistance
If you encounter any issues while adding currency or have queries not addressed in this documentation, feel free to reach out to our support team for assistance.