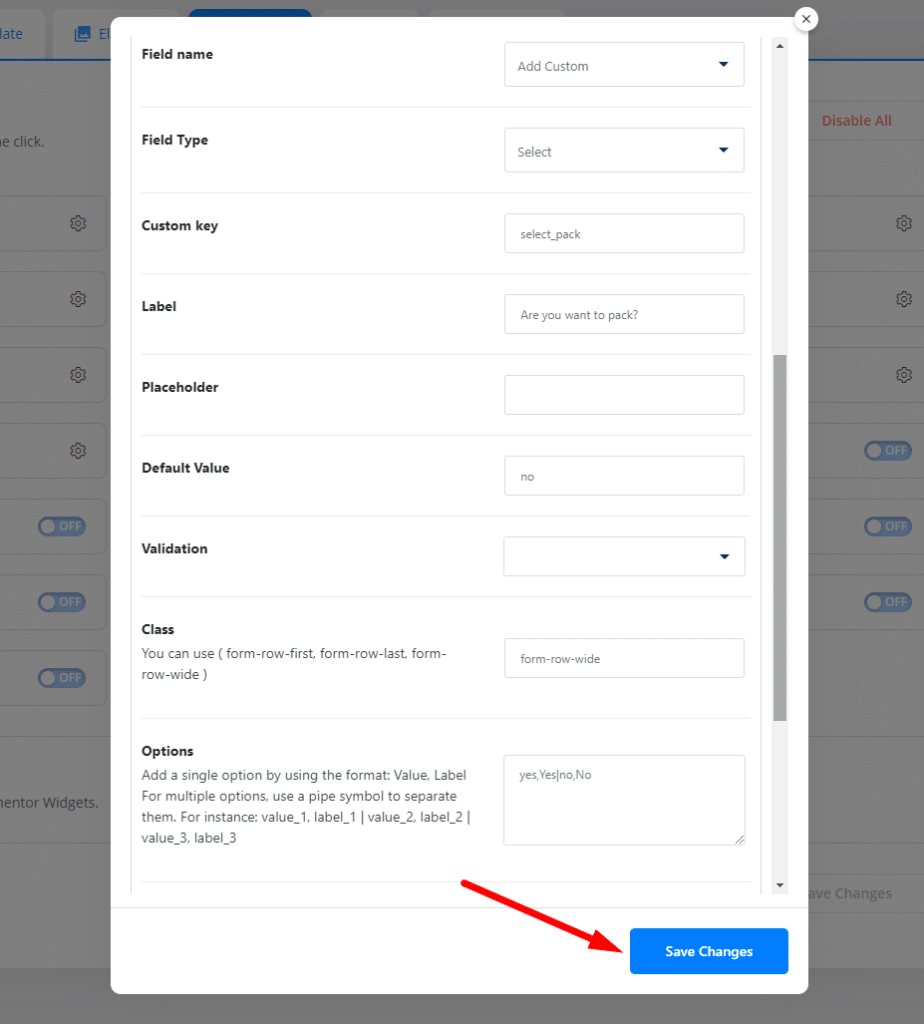
The checkout process is one of the most important steps in running a successful online store. If you’re not careful, it can be easy to lose potential customers during this crucial step. That’s why it’s important to have a checkout process that is streamlined and easy to use. With the WooLentor Checkout Field Editor/ Manager Module, you’ll be able to easily manage and customize all of your checkout fields. This powerful module gives you complete control over every field on your checkout form, so you can create a checkout process that is perfect for your business. Plus, the WooLentor Checkout Field Manager Module is easy to use, so you’ll be able to get started quickly and easily.
Benefits of using Checkout Field Editor #
Check a few advantages of using the checkout field Manager for the WooCommerce module by helping your customers with a clean and simple checkout process.
- Remove the unnecessary checkout fields.
- Manage checkout fields.
- Make the checkout process faster and Increase overall conversions.
How do I use WooCommerce checkout field editor? #
Here, we will show you how to use WooCommerce checkout field editor module.
Step 1: Remove the unnecessary checkout fields. #
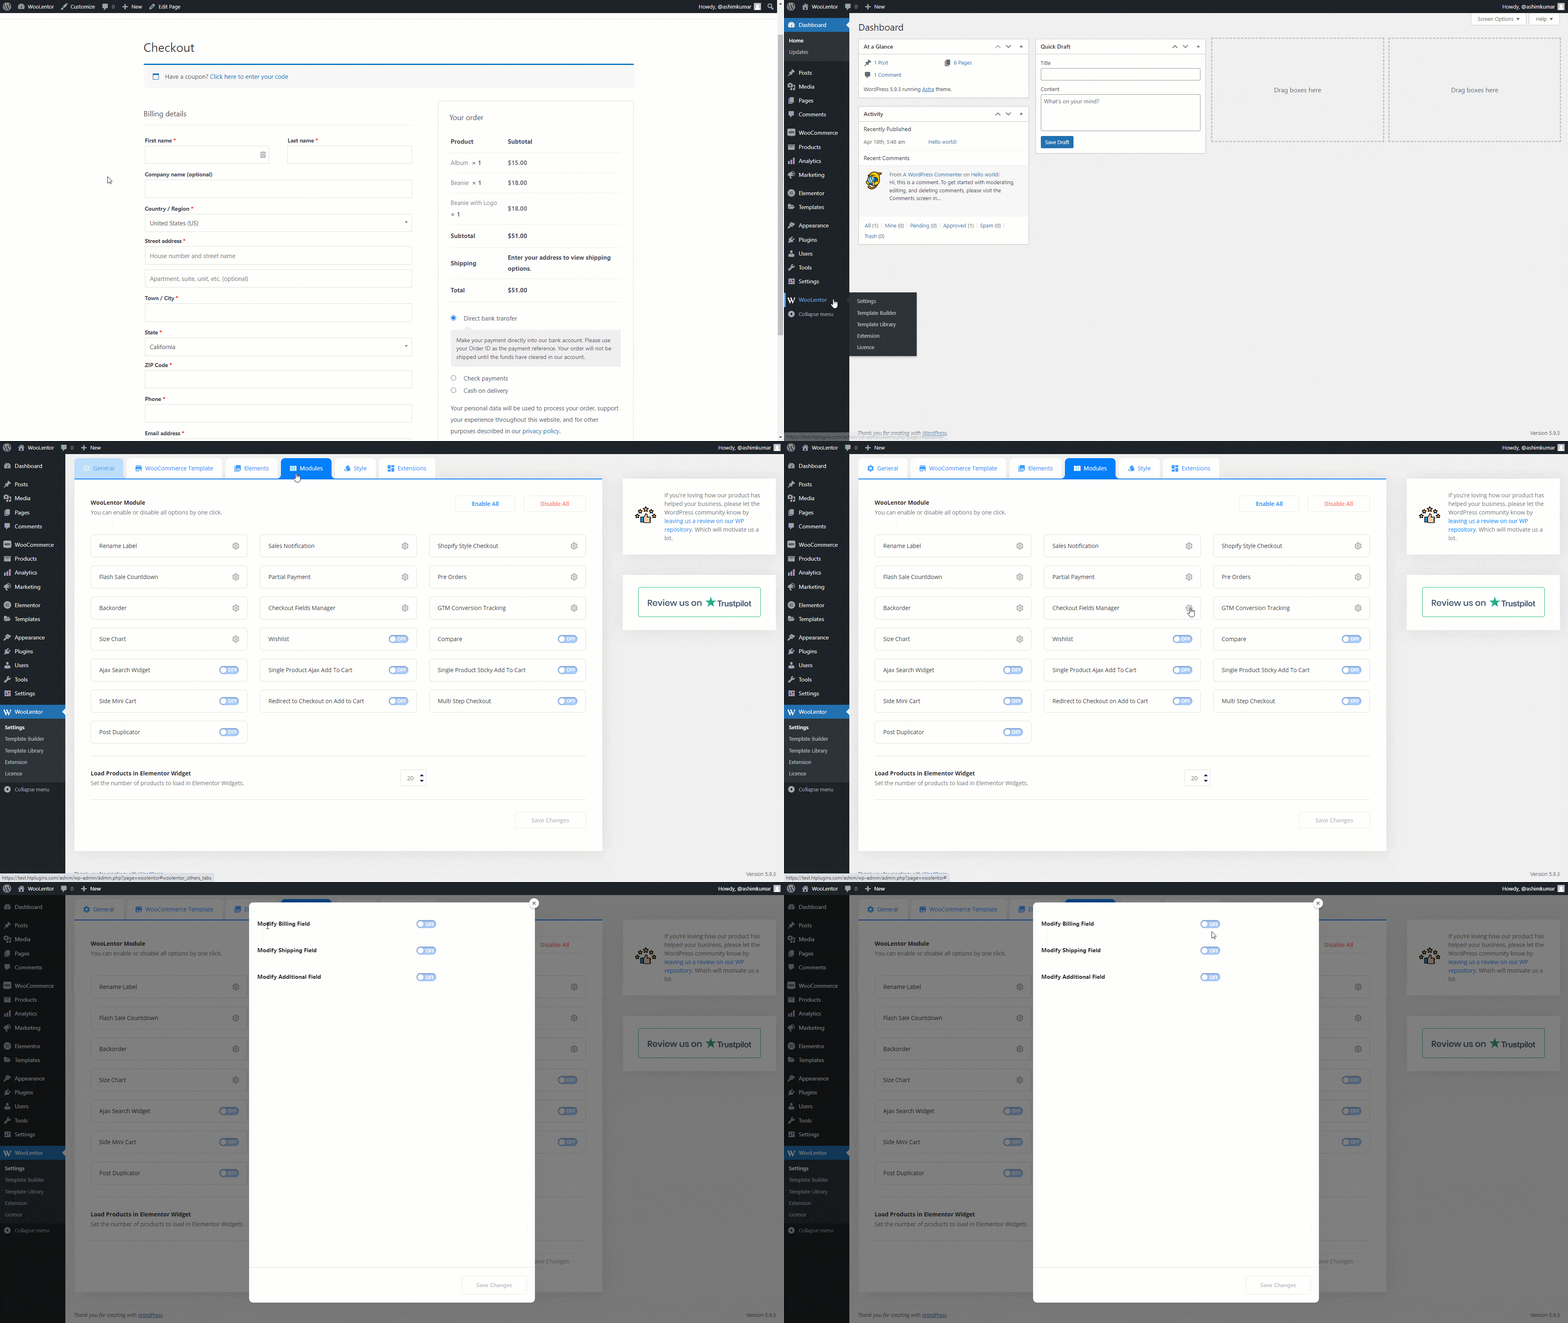
Once you enable the option (Modify Billing Field), all the checkout fields will appear. Now, if you want to remove any fields, simply click on the cross icon of those corresponding fields.
WordPress Dashboard > WooLentor > Settings > Modules > Checkout Fields Manager > Modify Billing Field.
Step 2: Add the checkout field you need. #
Add custom field #
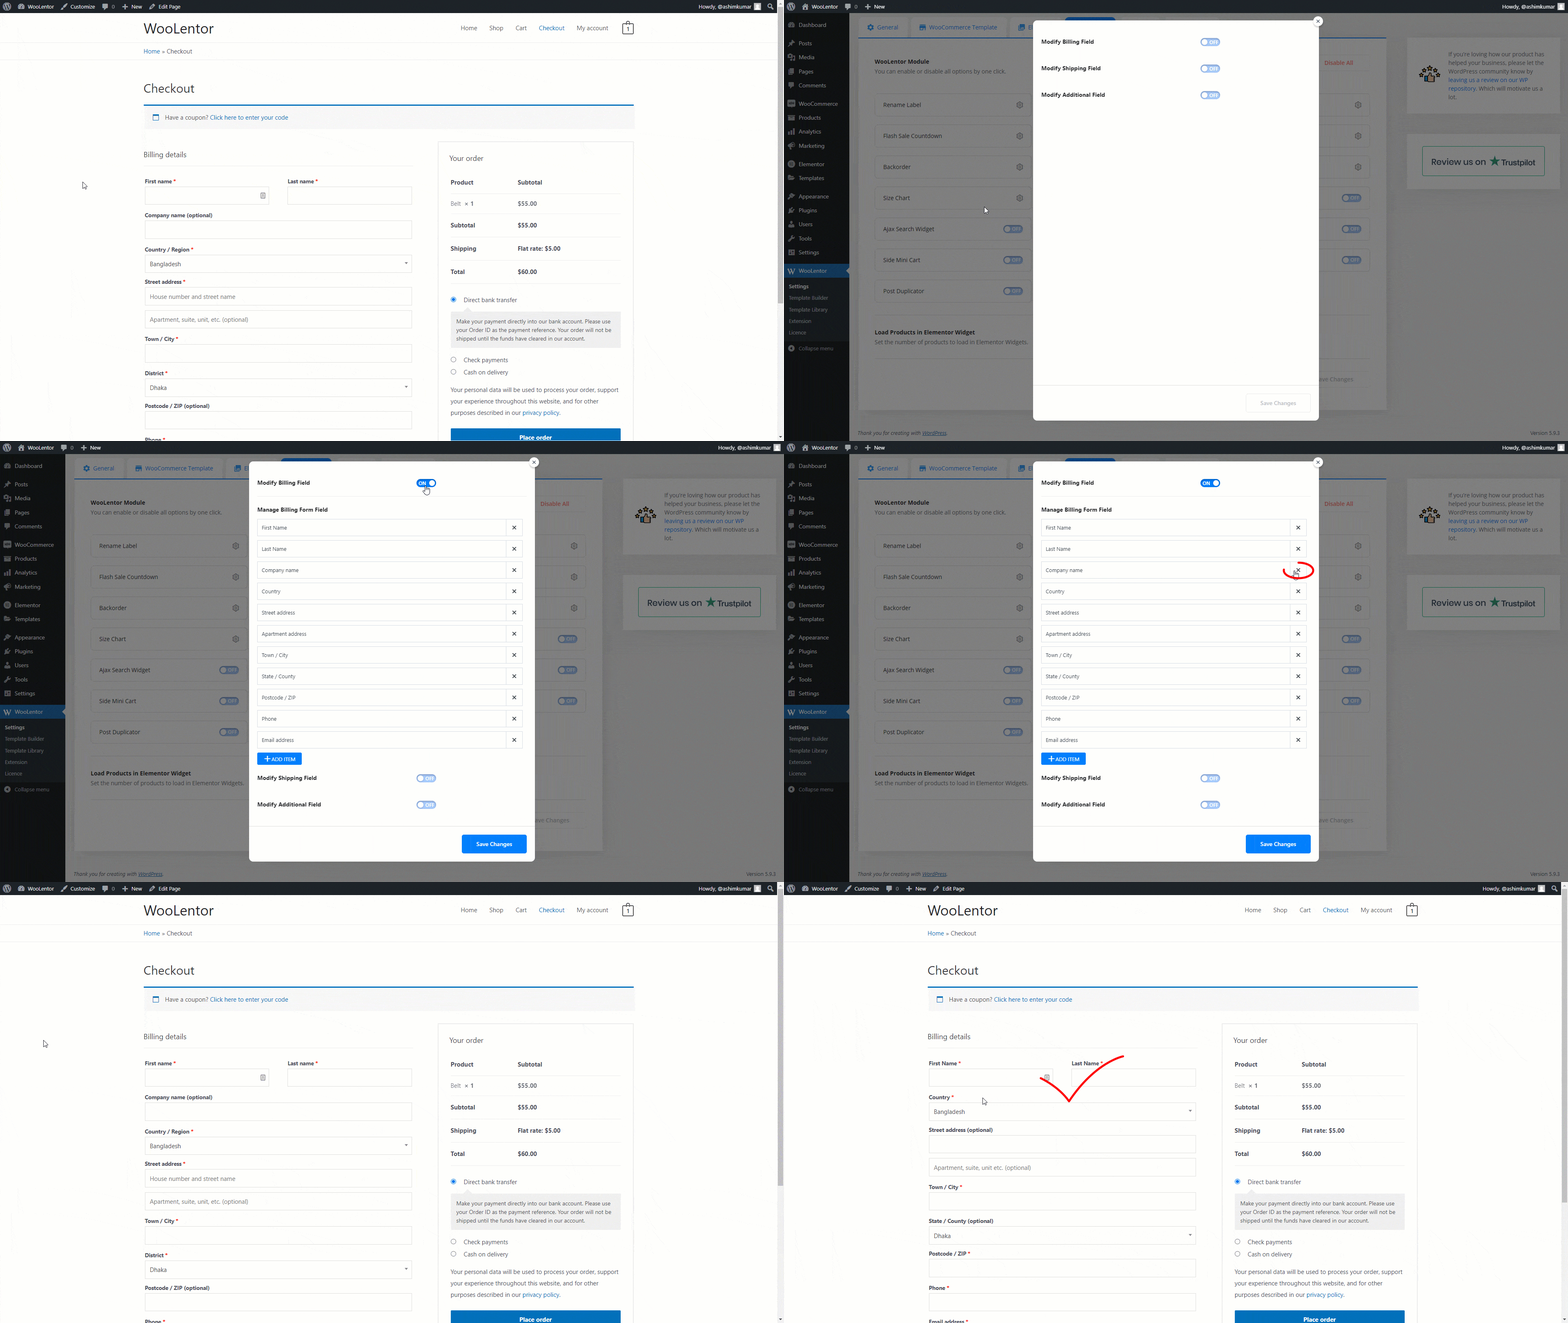
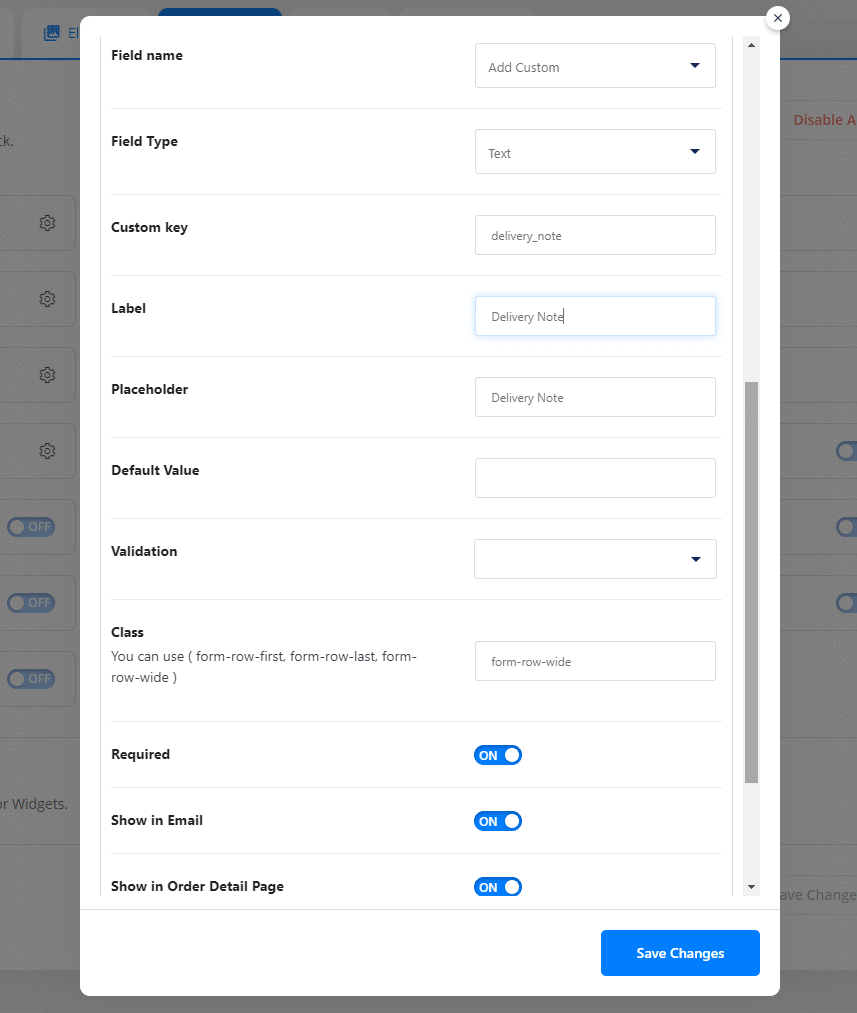
To add any form field click the “+ADD ITEM” item and add the following field:
- Field name: Select a field name
- Field Type: Select a field type.
- Custom Key: Give a custom key. Make sure there is no gap between the words and that no special characters are used. Also, make sure that each field you create has a distinct name.
- Label: Fill in the label title here.
- Default Value: Fill in the blanks for the Default Value.
- Validation: Select which validation rules you want to apply based on the input field type.
- Class: If you need, you can add any custom CSS class here.
- Required: If you want to make this field required or not.
- Show in Email: If you’d like this field to be sent to your client’s order email, enable the box.
- Show in Order Details Page: If you’d like this field to be shown on the order details page.
Select Option Value #
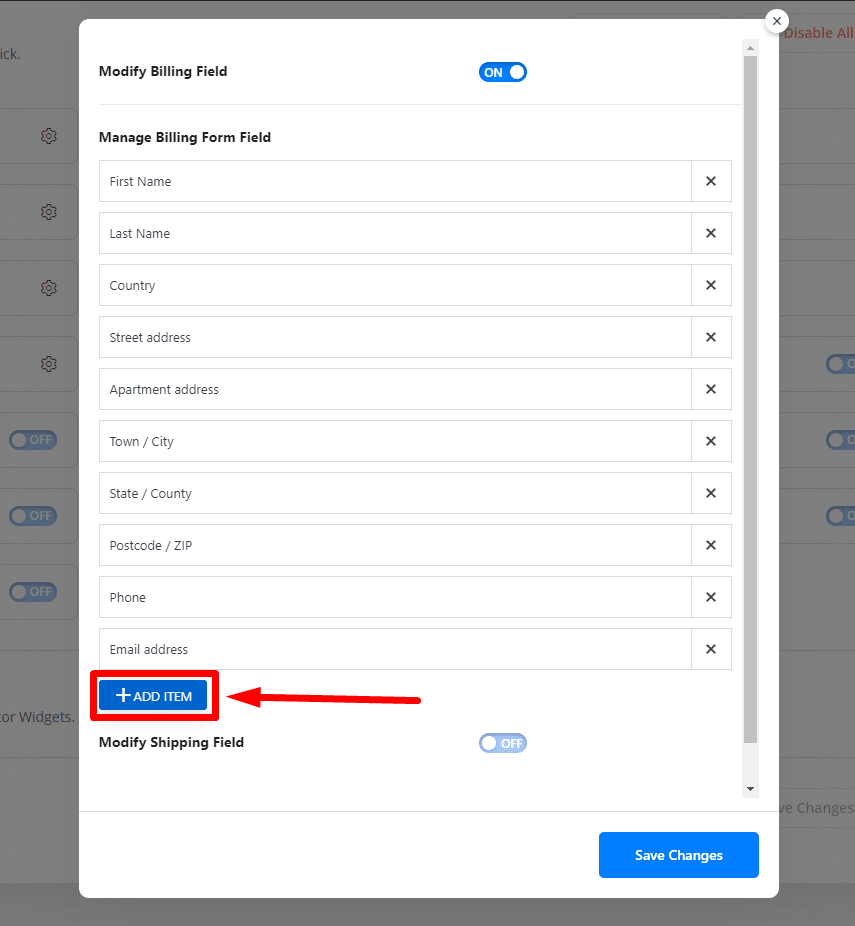
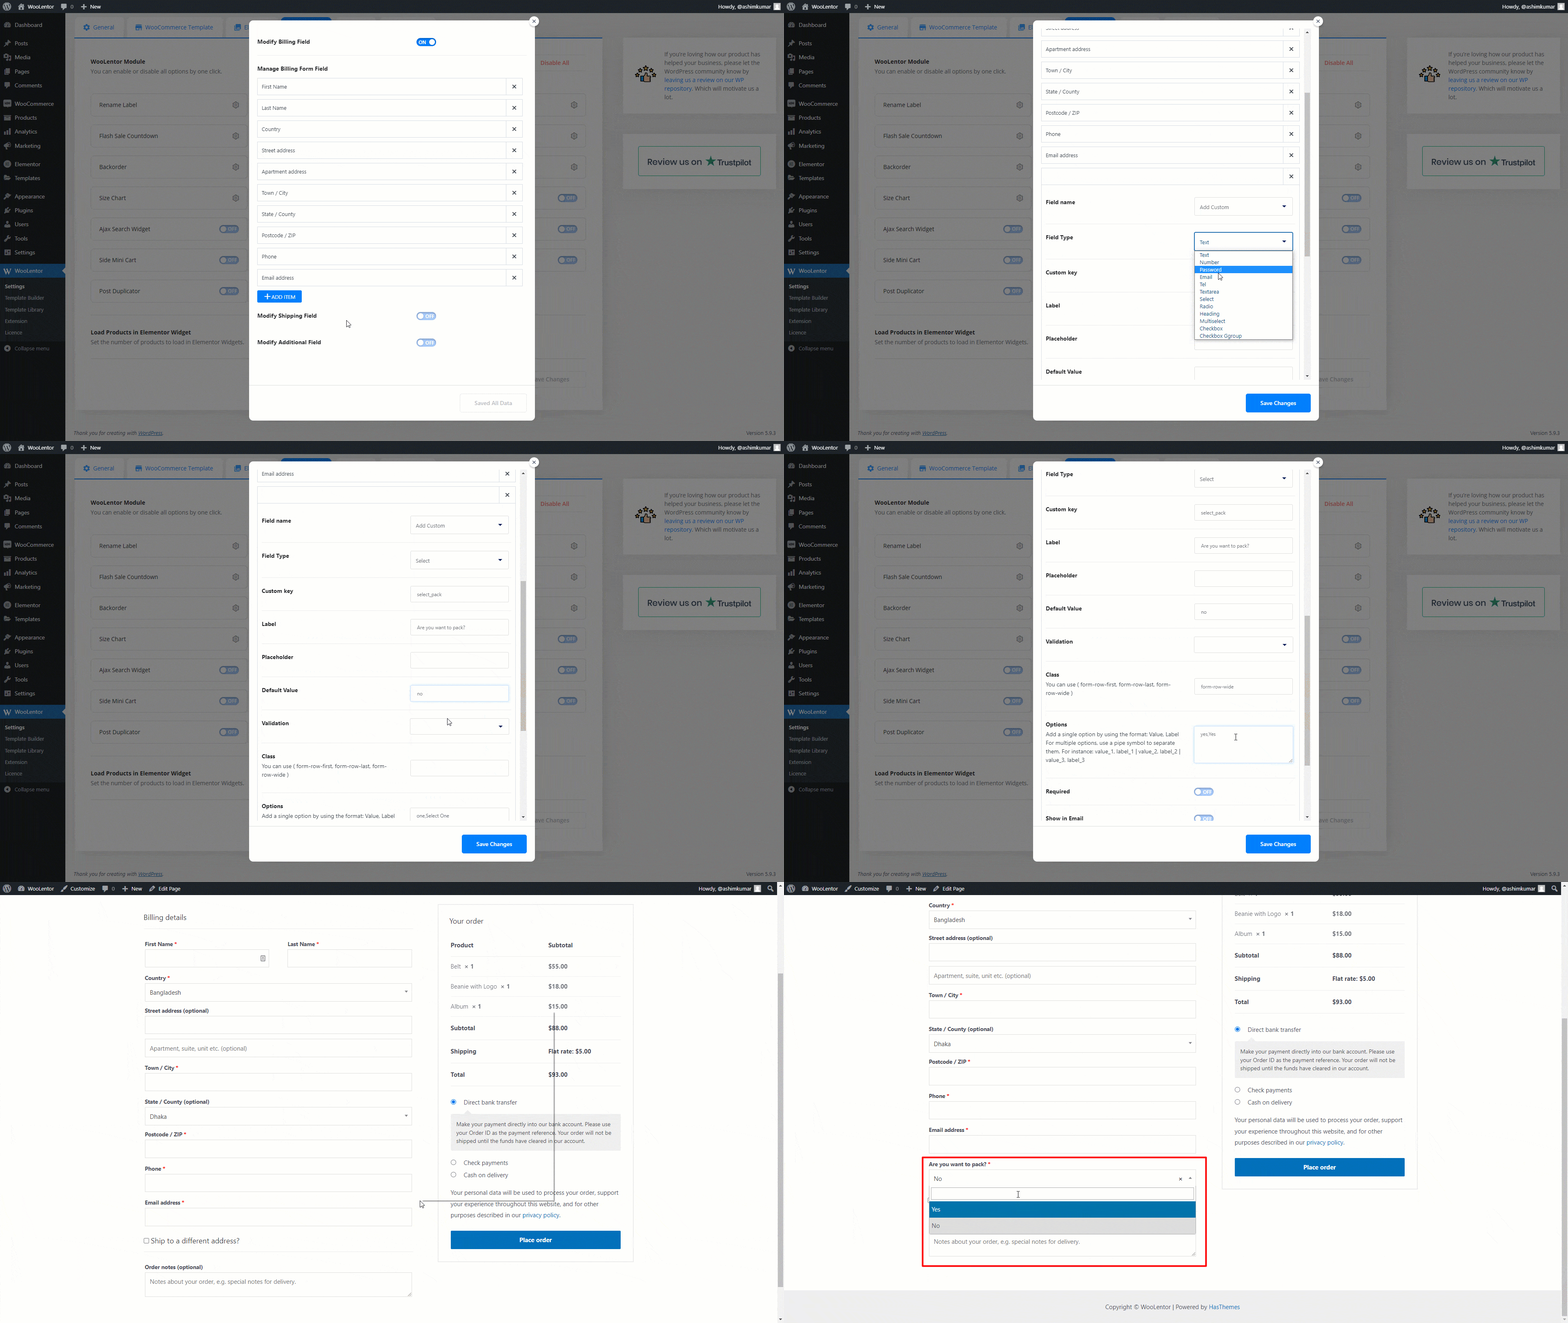
If you choose Field Type -> “Select, Radio, Multiselect, Checkbox Group” then you will see an option value input field. Add a single option by using the format: Value, Label.
For multiple options, use a pipe( | ) symbol to separate them. For instance: value_1, label_1 | value_2, label_2 | value_3, label_3
Validation #
Select which validation rules you want to apply based on the input field type. There are five types of validation:
Email: Email validation.
Phone: Phone validation.
Postcode: Postcode validation, work only when the country field is enabled and uses country-specific validation rules.
State: State validation.
Number: Number validation.
