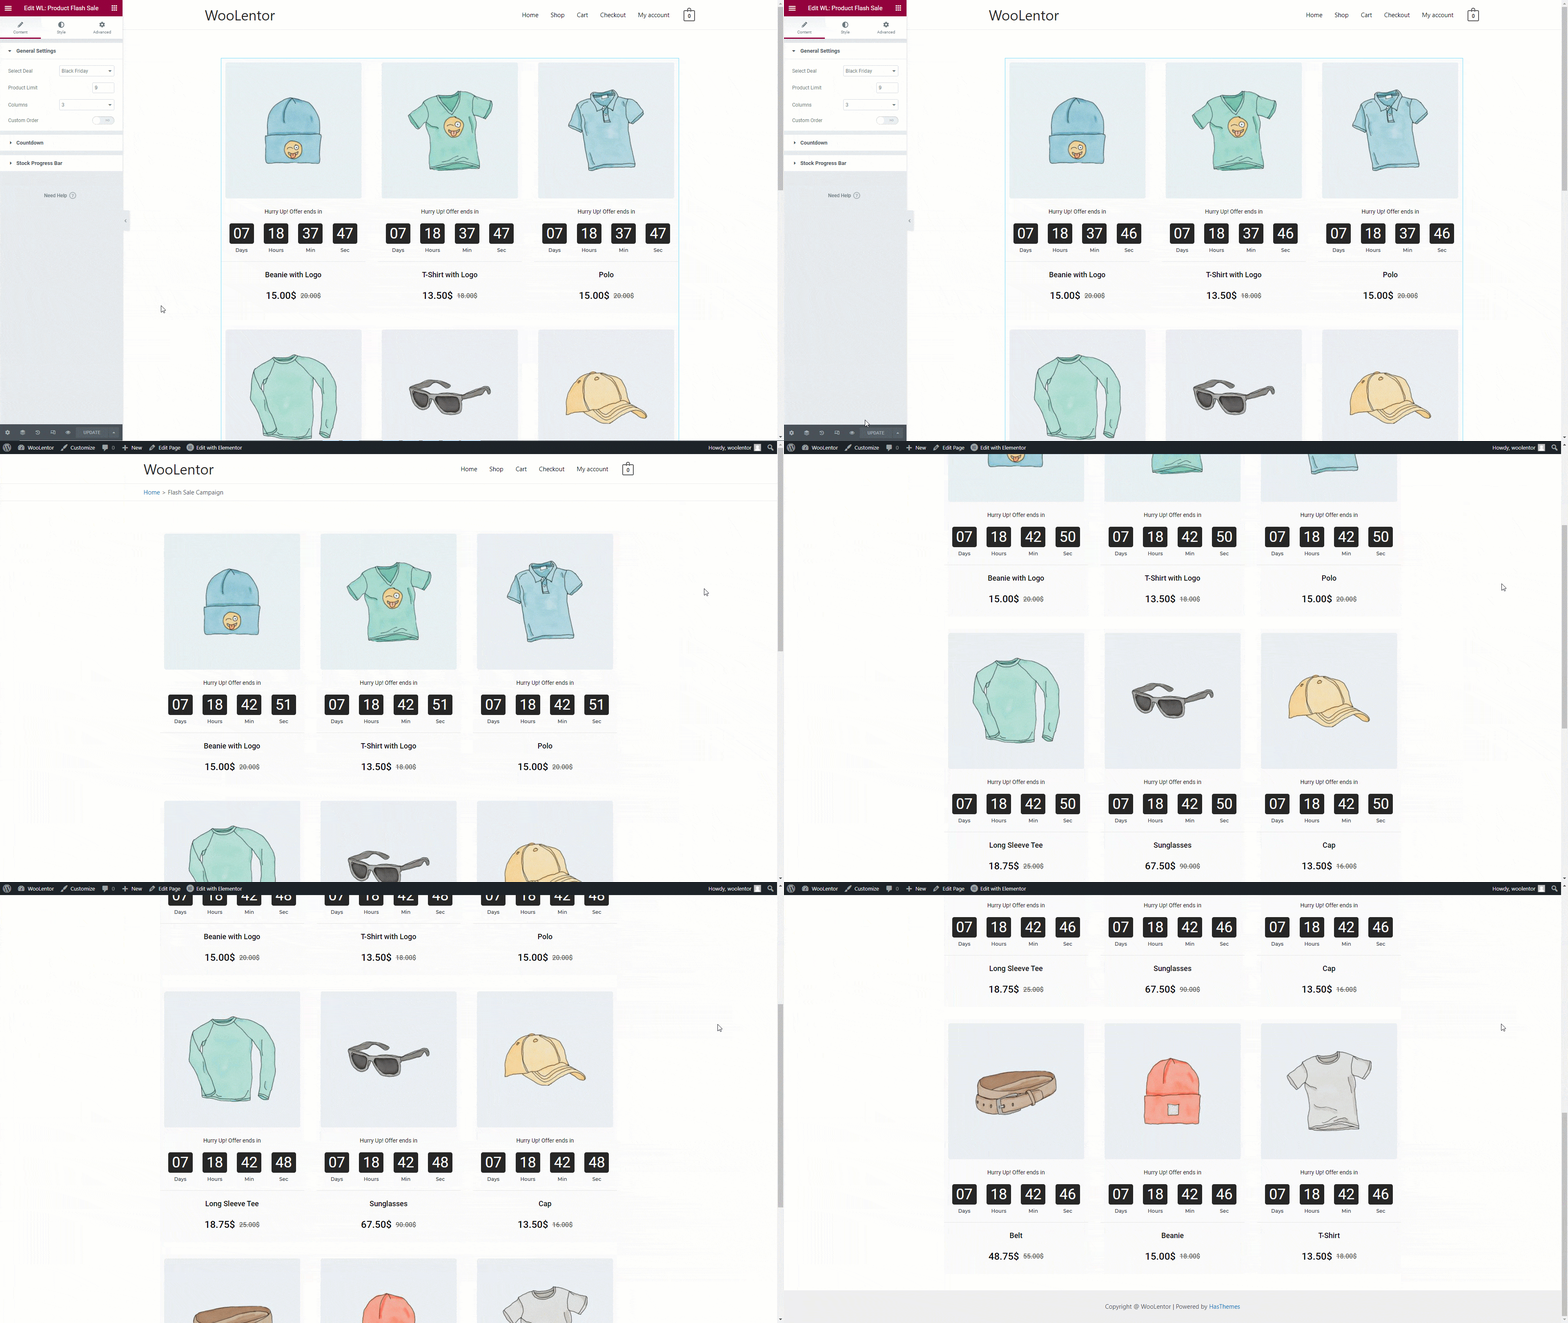
Sales Countdown Timer in WooCommerce is the perfect WooLentor module to help you boost your sales and increase conversions. For example, you can set a countdown timer to create a sense of urgency, and offer discounts to encourage customers to purchase. In a word, it is an excellent tool for any store owner looking to increase sales and conversions. Sales Countdown Timer in WooCommerce is an essential tool for any online store during the holiday season. So, if you are looking to increase sales and conversion rates this holiday season, Sales Countdown Timer in WooCommerce is the perfect solution. WooLentor‘s Sales Countdown Timer in WooCommerce is easy to use and highly effective, so there’s no reason not to try it out today!
Benefits of using Sales Countdown Timer in WooCommerce Store
- Display sales timers and show quantity countdowns
- Apply multiple discounts on specific products and categories
- Show sales timer on the homepage and on individual product pages
- Display timers in various position
- Discount type in fixed discount, a percentage discount, and fixed price
- Surprise your Customers with Dynamic Pricing and Discounts
- It brings a product/value to the customer’s attention
- It motivates a customer to make a purchase, quickly
How to enable Sales Countdown Timer in WooCommerce?
You can easily add a flash sale countdown by following the steps below
Step 1: Enable the Flash Sale Countdown module on Product and Shop pages.
WordPress dashboard > WooLentor > Settings > Modules > Flash Sale Countdown
After enabling the module configure the below information:
- Enable/Disable: You can enable/disable the Flash Sale Count down module from here.
- Sale Events: Add a Sale Event item.
- Event Name: Add an event name as you like.
- Enable: You can also individually enable/disable the sale event.
- Valid From: Set the event start date. Set time-based on your server time settings.
- Valid To: Set the event end date.
- Apply On All Products: To set the event for all the products, enable the switcher.
- Select Categories: Select the categories in which products the discount will be applied.
- Select Products: You can also select individual products to set discounts.
- Exclude Products: You can also select exclude products from the discount list which you want not to set discount price.
- Discount Type: Select the discount type from the list(fixed discount, percentage discount, and fixed price).
- Discount Value: Add discount value according to discount type.
- Manage Price Label: You can also add the custom price label using the placeholder. Available placeholders: {original_price}, {flash_sale_price}
- Override Sale Price: To override the sale price according to the discount price, enable the switcher.
- Show Countdown On Product Details Page: After enabling the switcher you will get the Countdown Style, Countdown Position, and Countdown Timer Title option to set on the product details page.
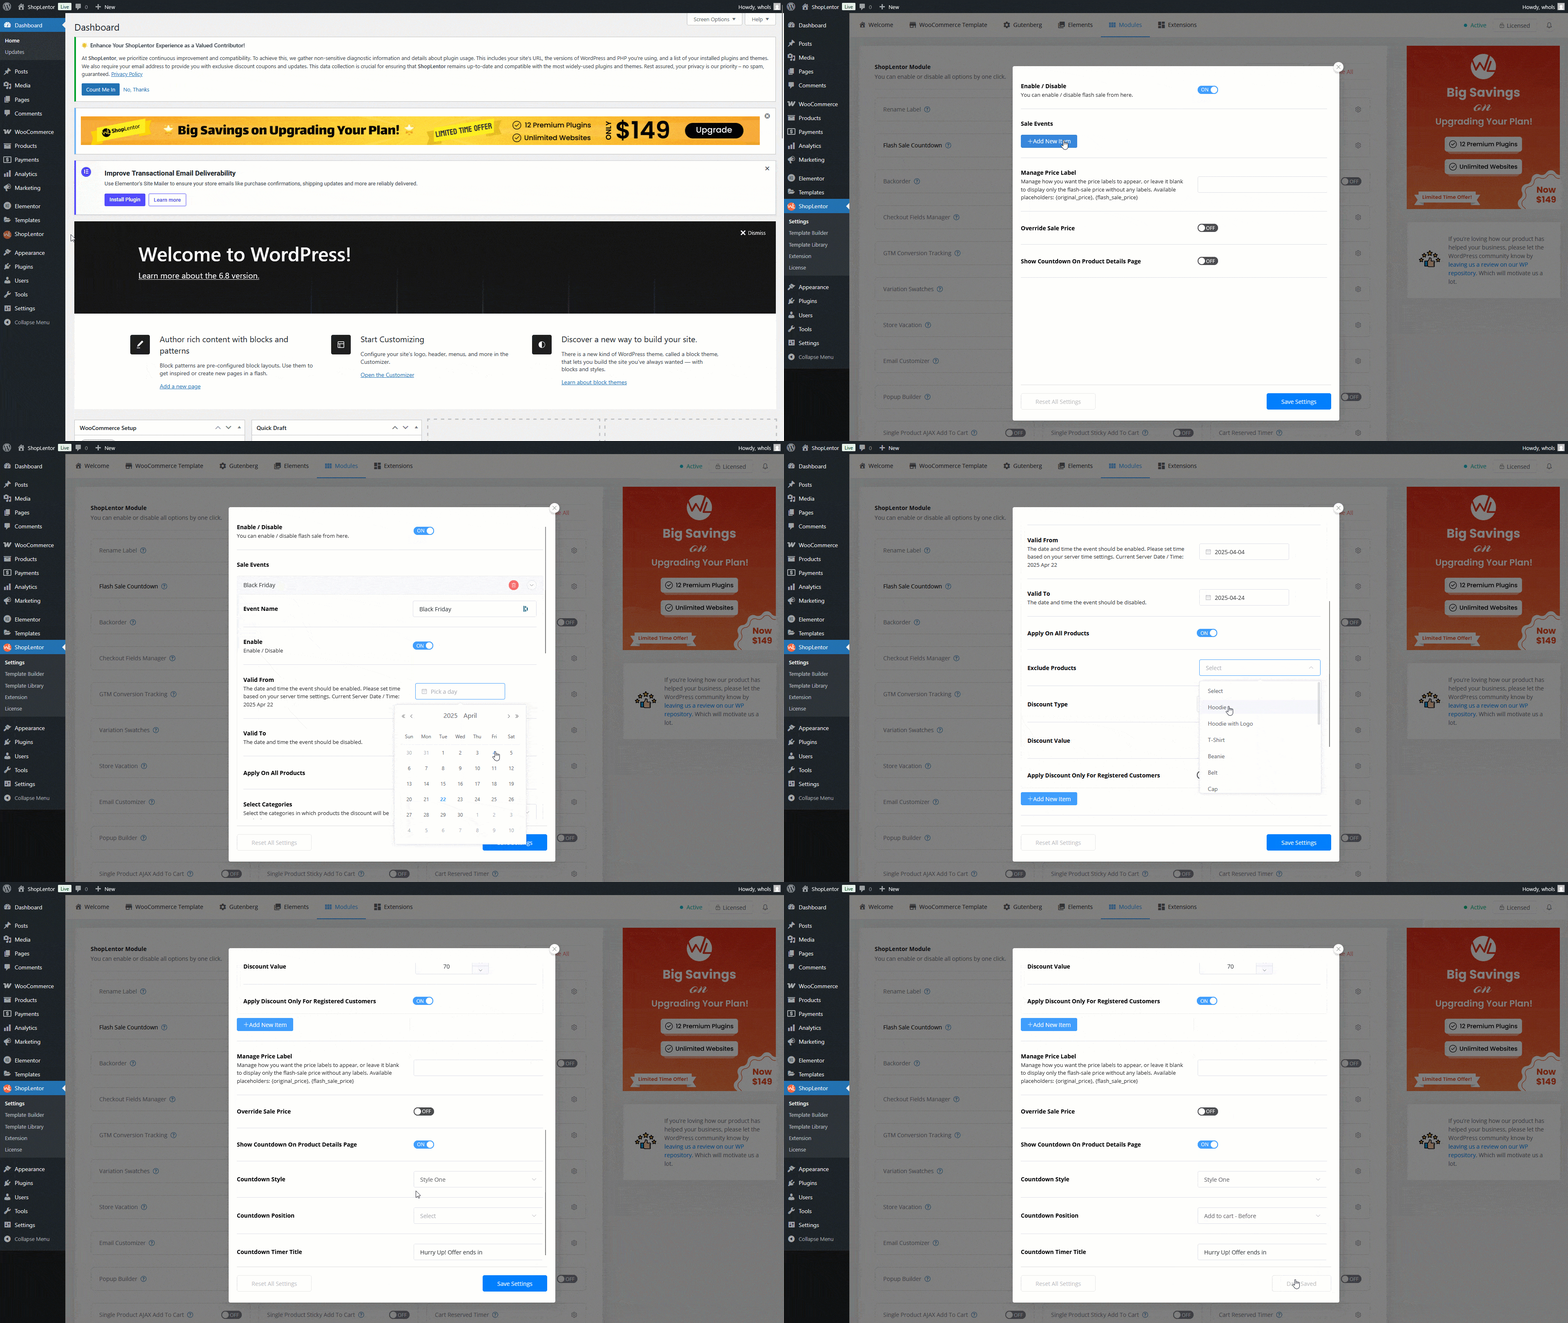
Set the event information and hit the Save Changes button
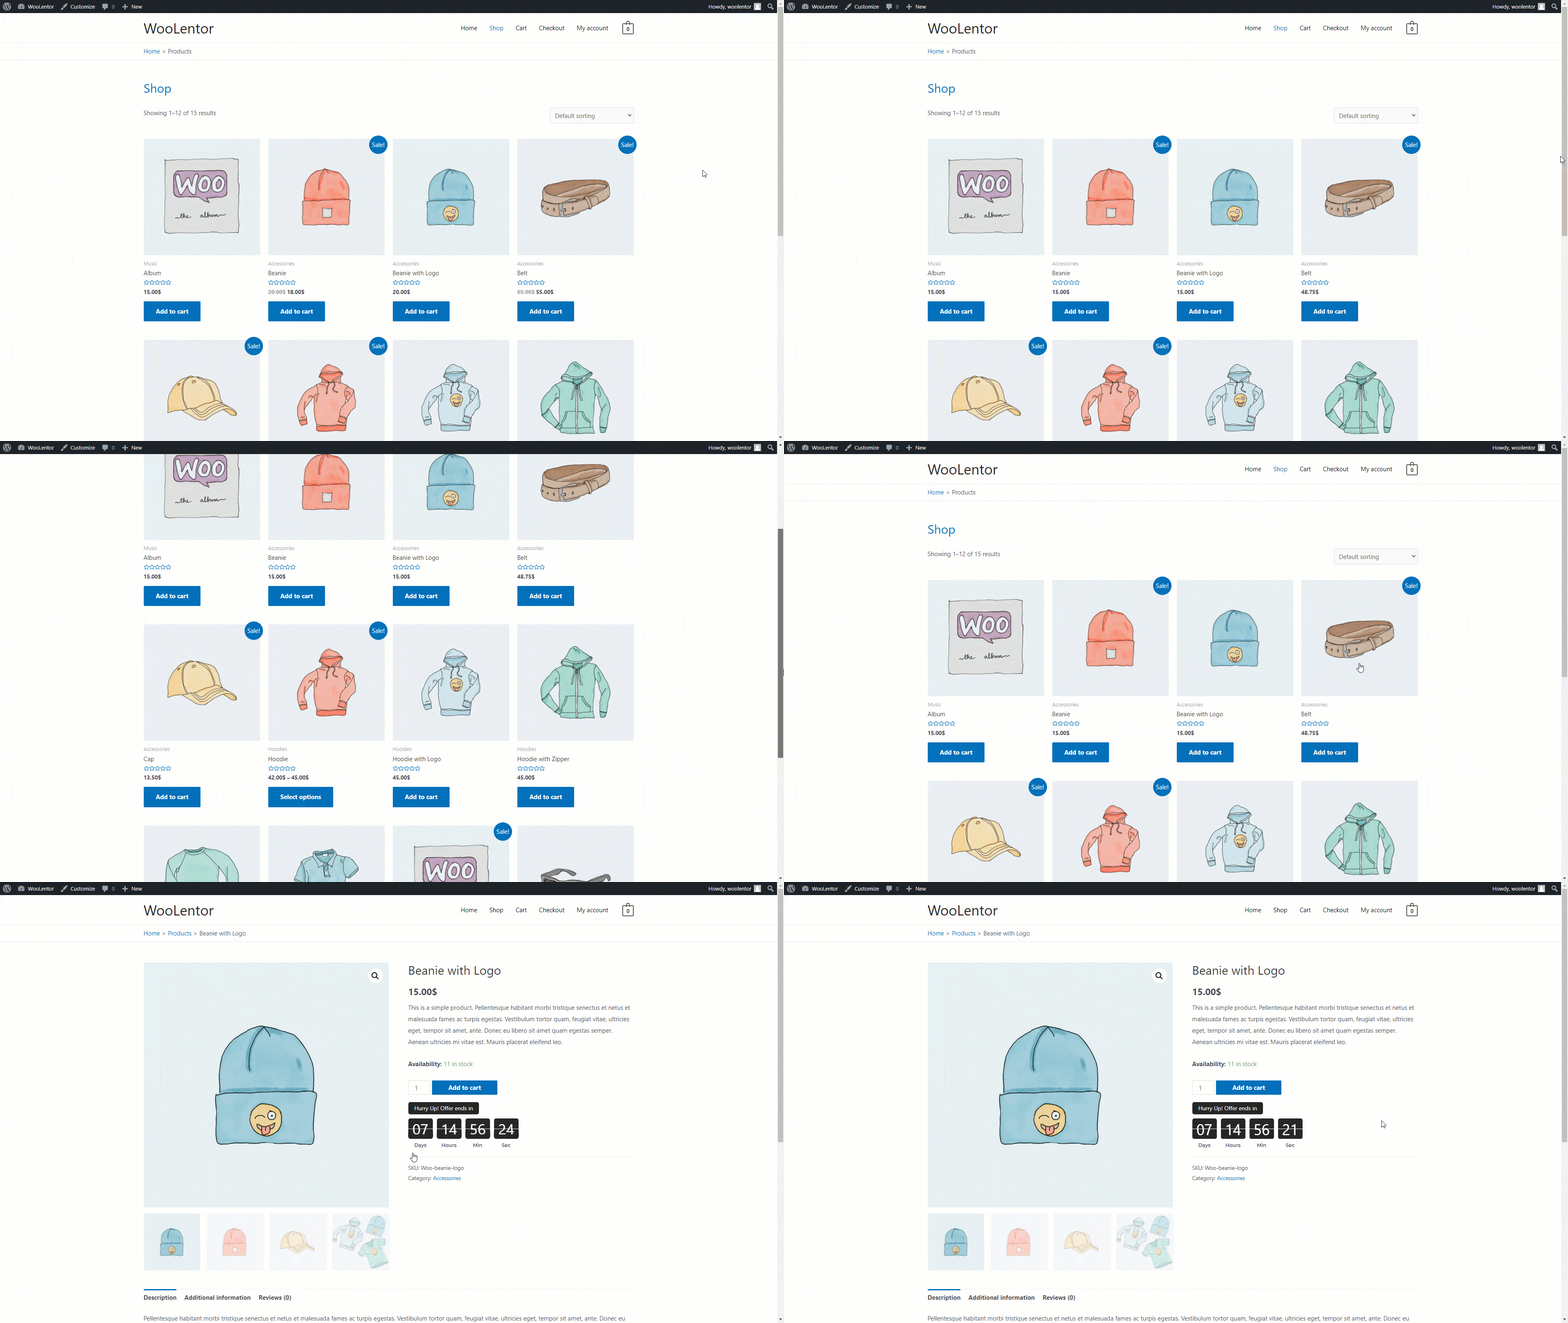
Step 2: Go to the shop page and let’s see the result
How to add flash sale products on a custom page
To add flash sale products to the custom page, follow the step below:
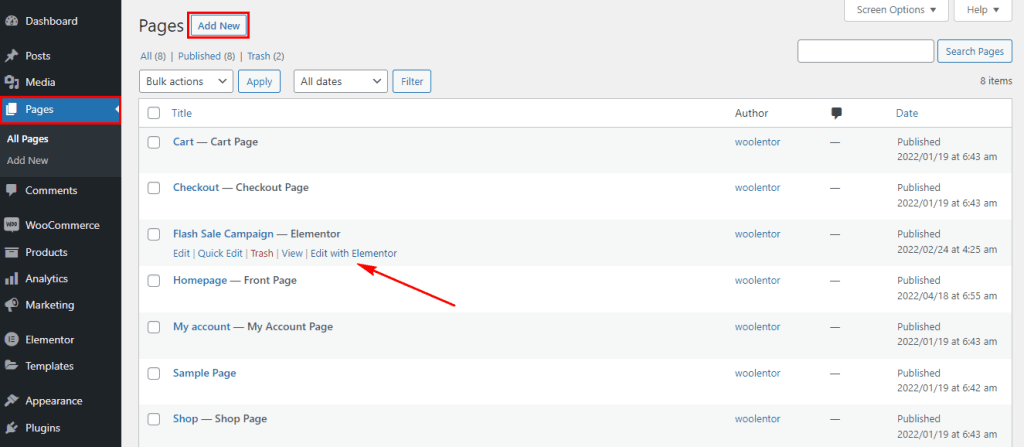
Step 1: Create a new page or open the existing page with Elementor Editor
Step 2: Drag and drop the product flash sale widget
Search by “Product Flash Sale†then drag and drop the widget that has the “WL†Badge
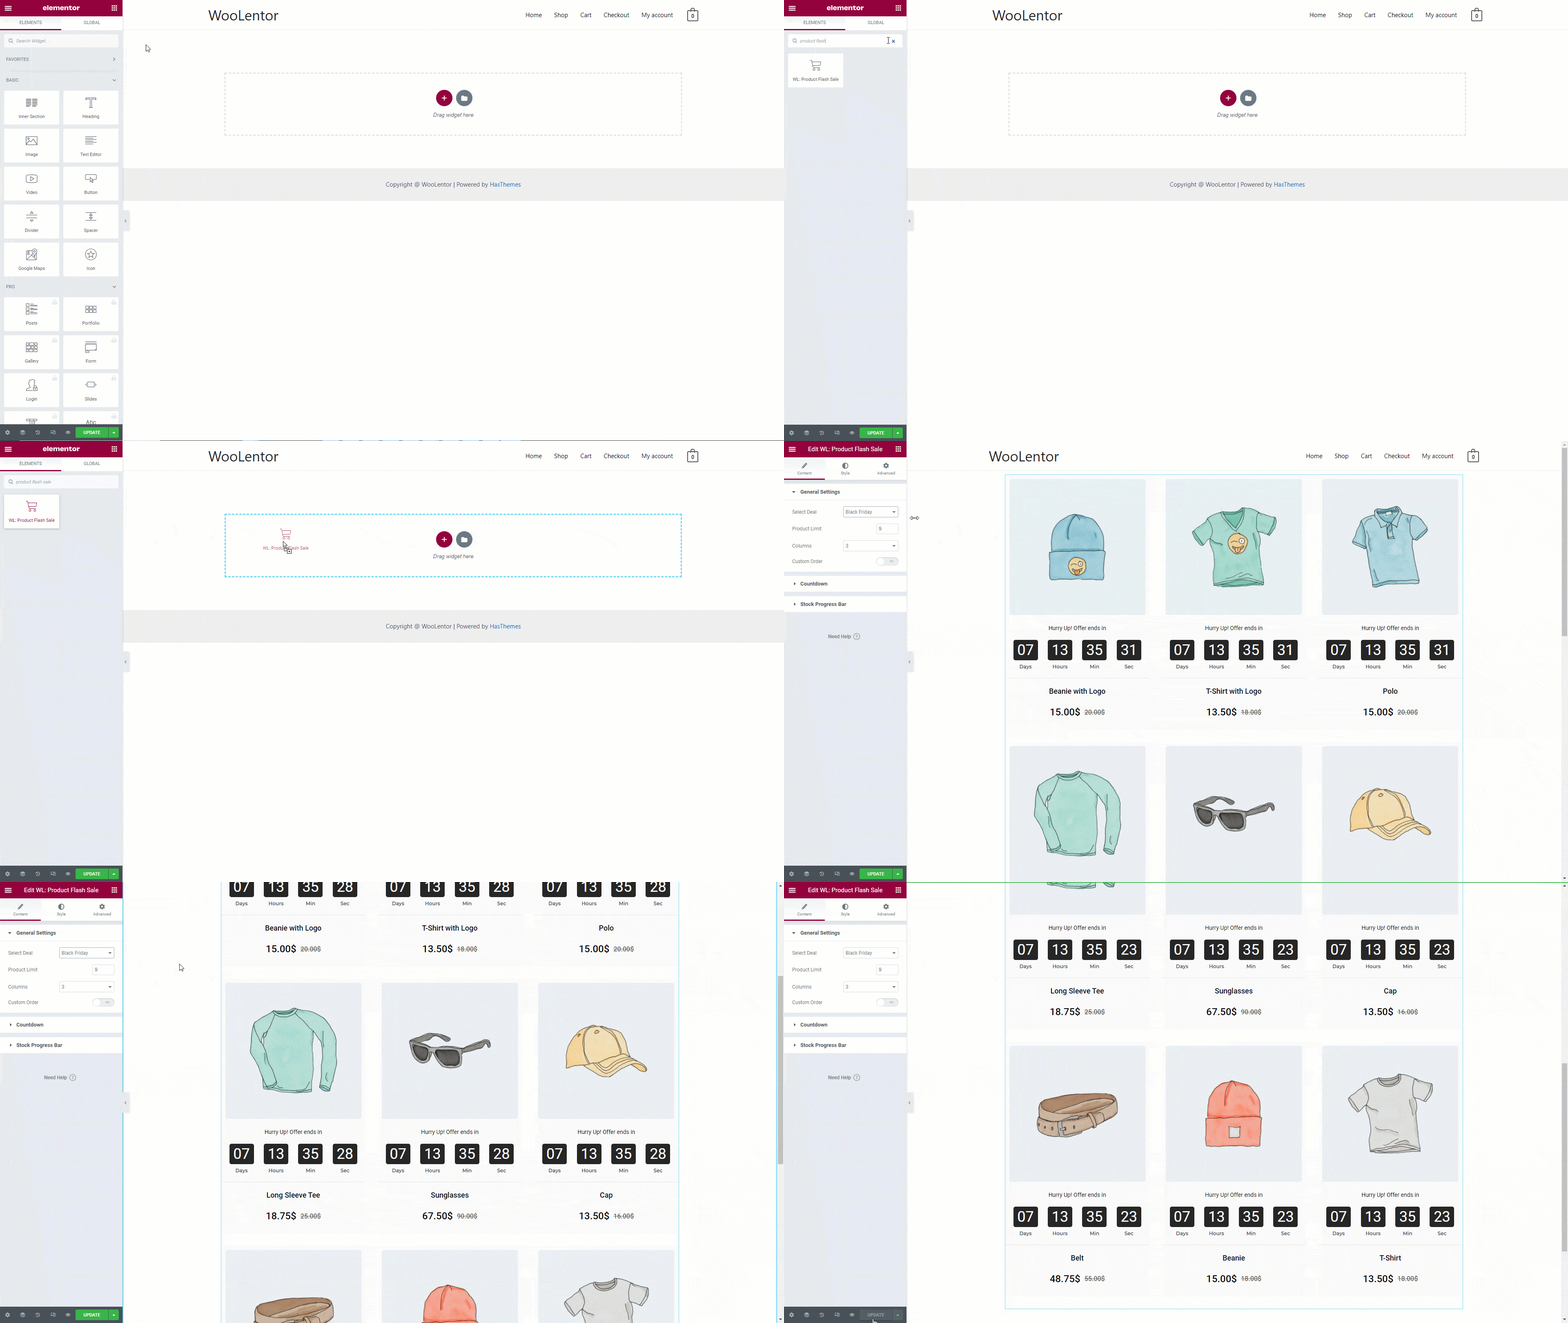
Step 3: Let’s see the result
Click on the preview to see the page
