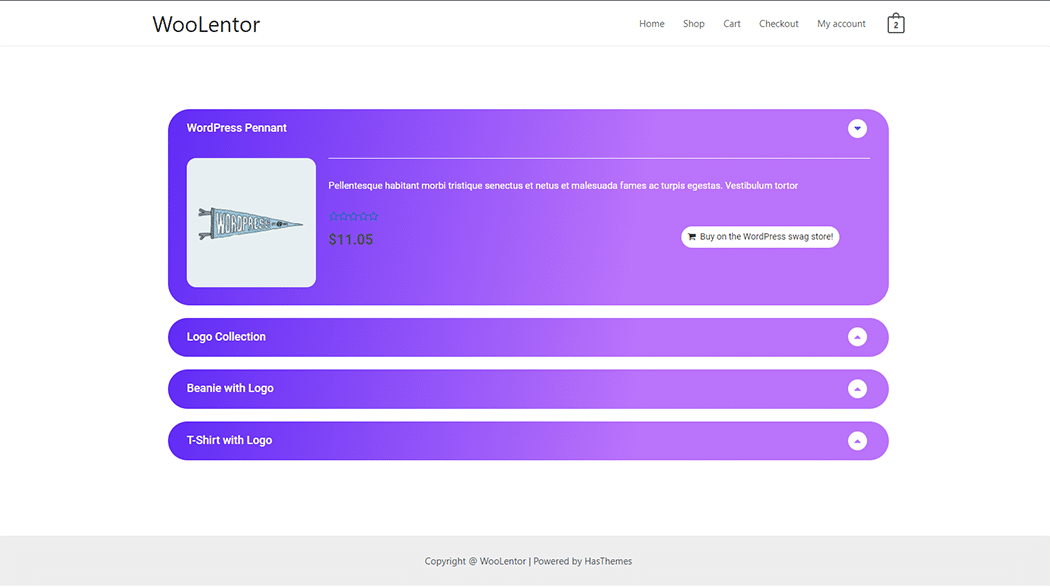
The “Product Accordion” Tabs help you organize content on your product and store pages into tabs or accordions. All you need is a few moments and you will be able to add a Product Accordion to your store that looks great and functions effectively.
Why Product Accordion is used? #
On the Page, the “Product Accordion” widget is used to view products on the Page on WooCommerce. The “Product Accordion” widget is mainly designed for the Page.
Steps of adding Product Accordion #
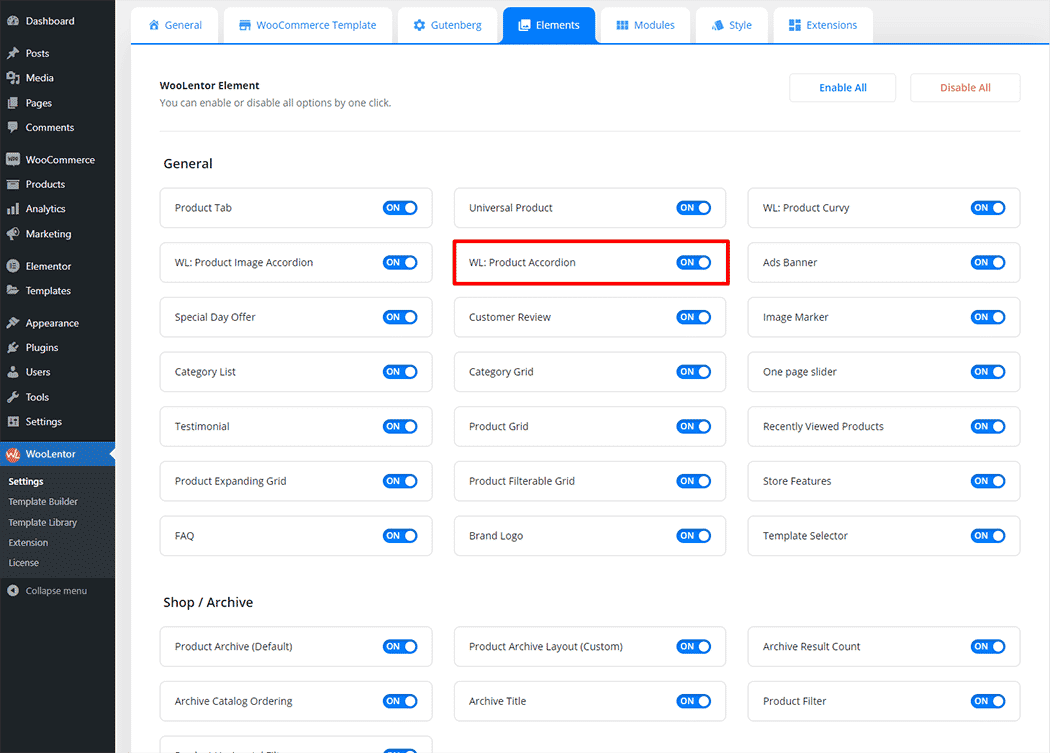
Go to WordPress Dashboard > WooLentor > Settings > Elements. From the list of Elements, turn ON the “WL: Product Accordion” widget.
- You need to use the “WL: Product Accordion” widget to view your Page.
- To add a WL: Product Accordion widget, Drag and drop the “WL: Product Accordion” widget onto the Page.
Step 1: How to Enable Product Accordion Widget? #
Go to Dashboard > WooLentor > Settings > Elements. From the list of Elements, turn ON the WL: Product Accordion widget.
Step 2: How to use the Product Accordion Widget? #
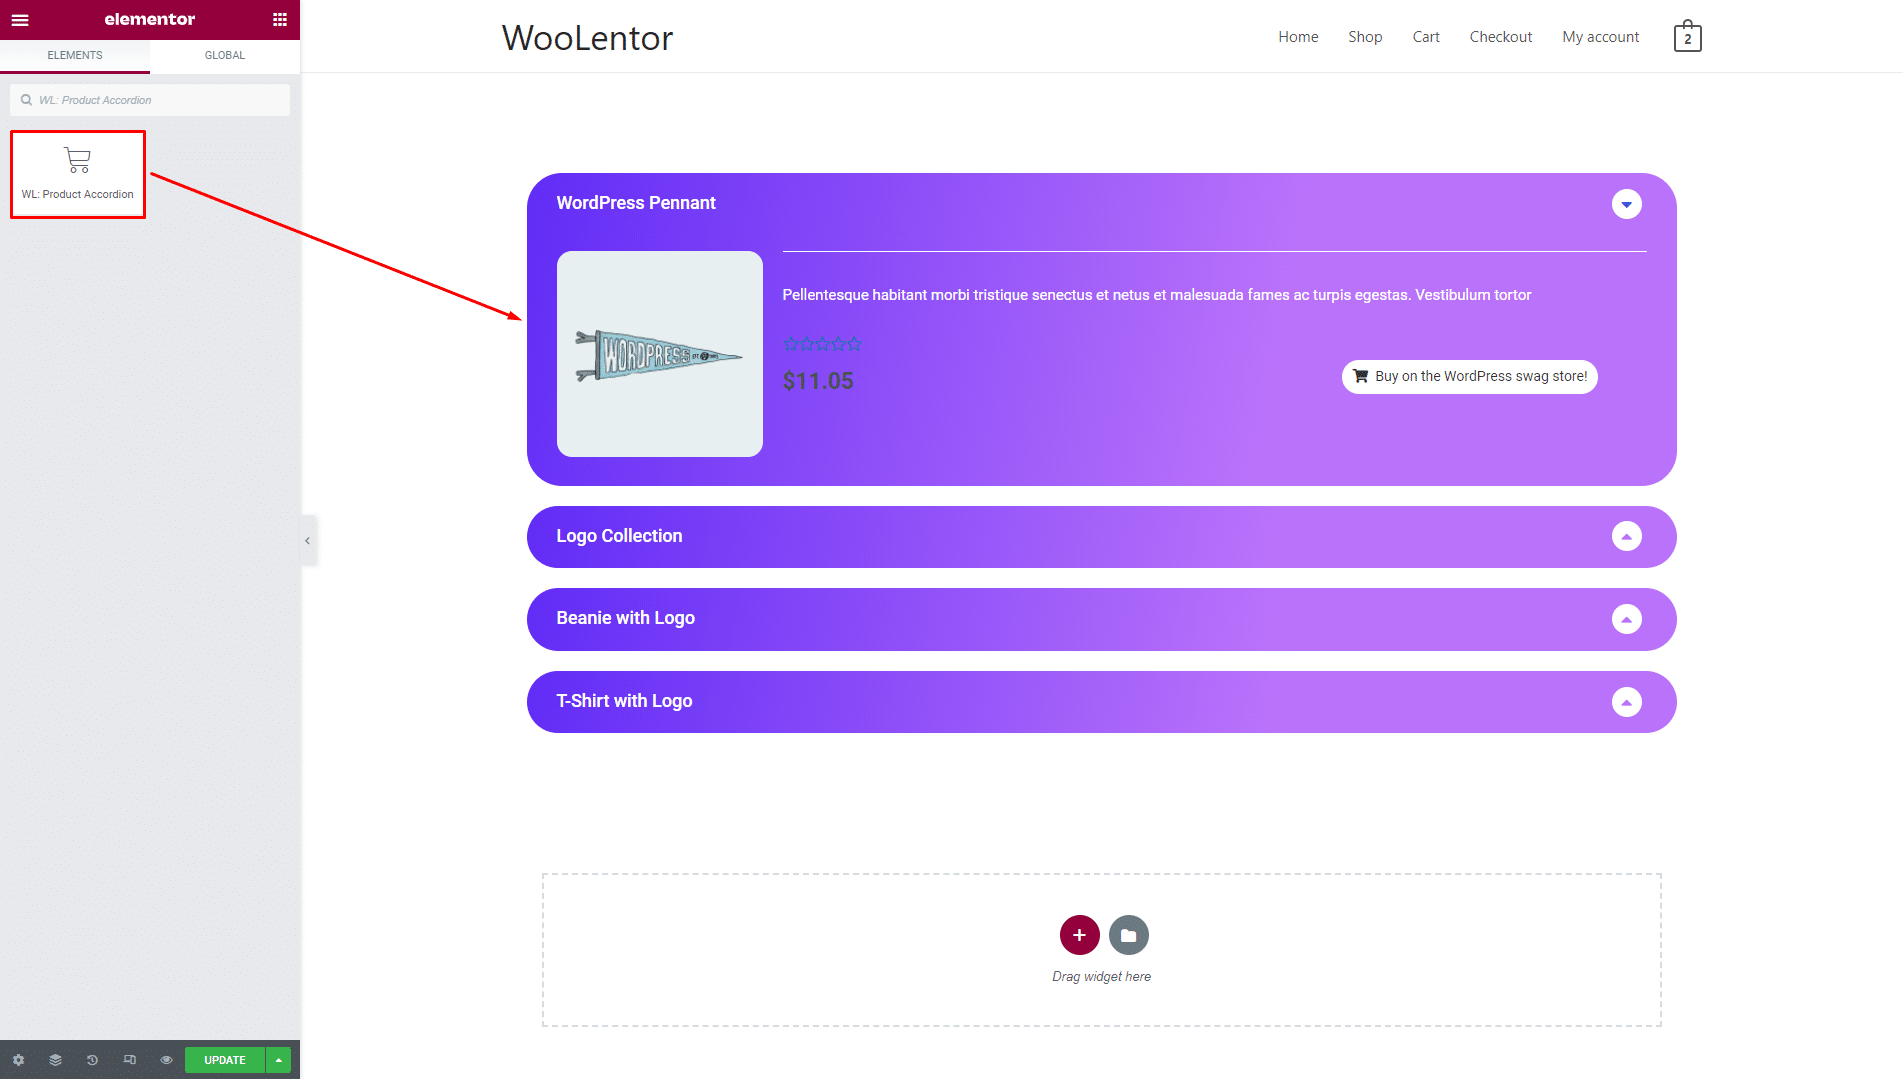
If you want to leverage the Product Accordion feature on your WooCommerce store, you will need to use a widget named “WL: Product Accordion“. To do so, simply search the widget in the Elementor widget panel, and use it on the corresponding template that you have created for the Page.
To add the Product Accordion widget, search by “Product Accordion” and use the widget that has the “WL Badge”.
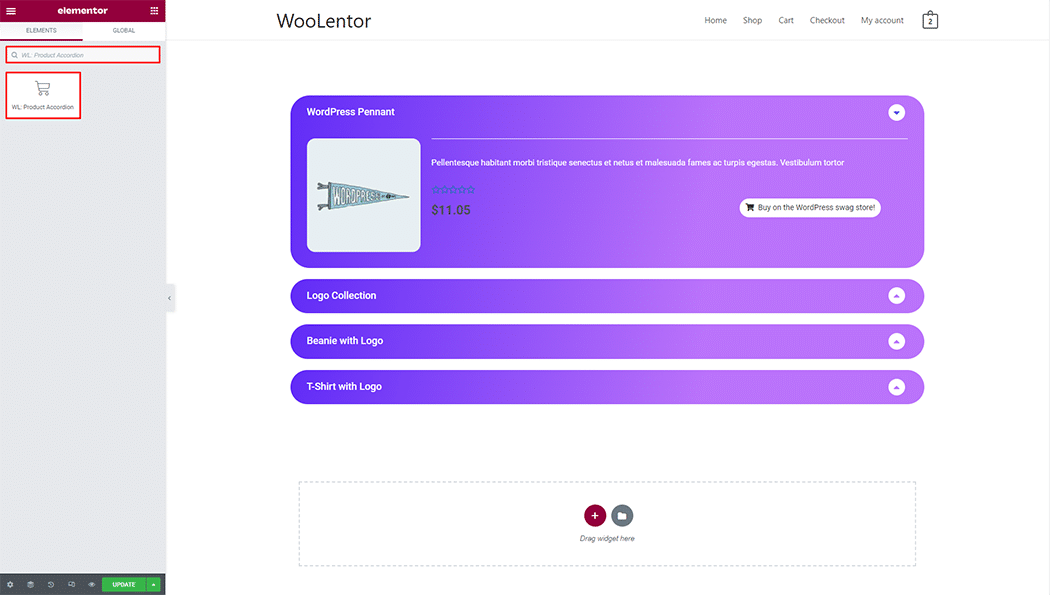
Drag and drop the WooLentor WL: Product Accordion widget onto the Page.
Step 3: How to customize the Product Accordion Widget? #
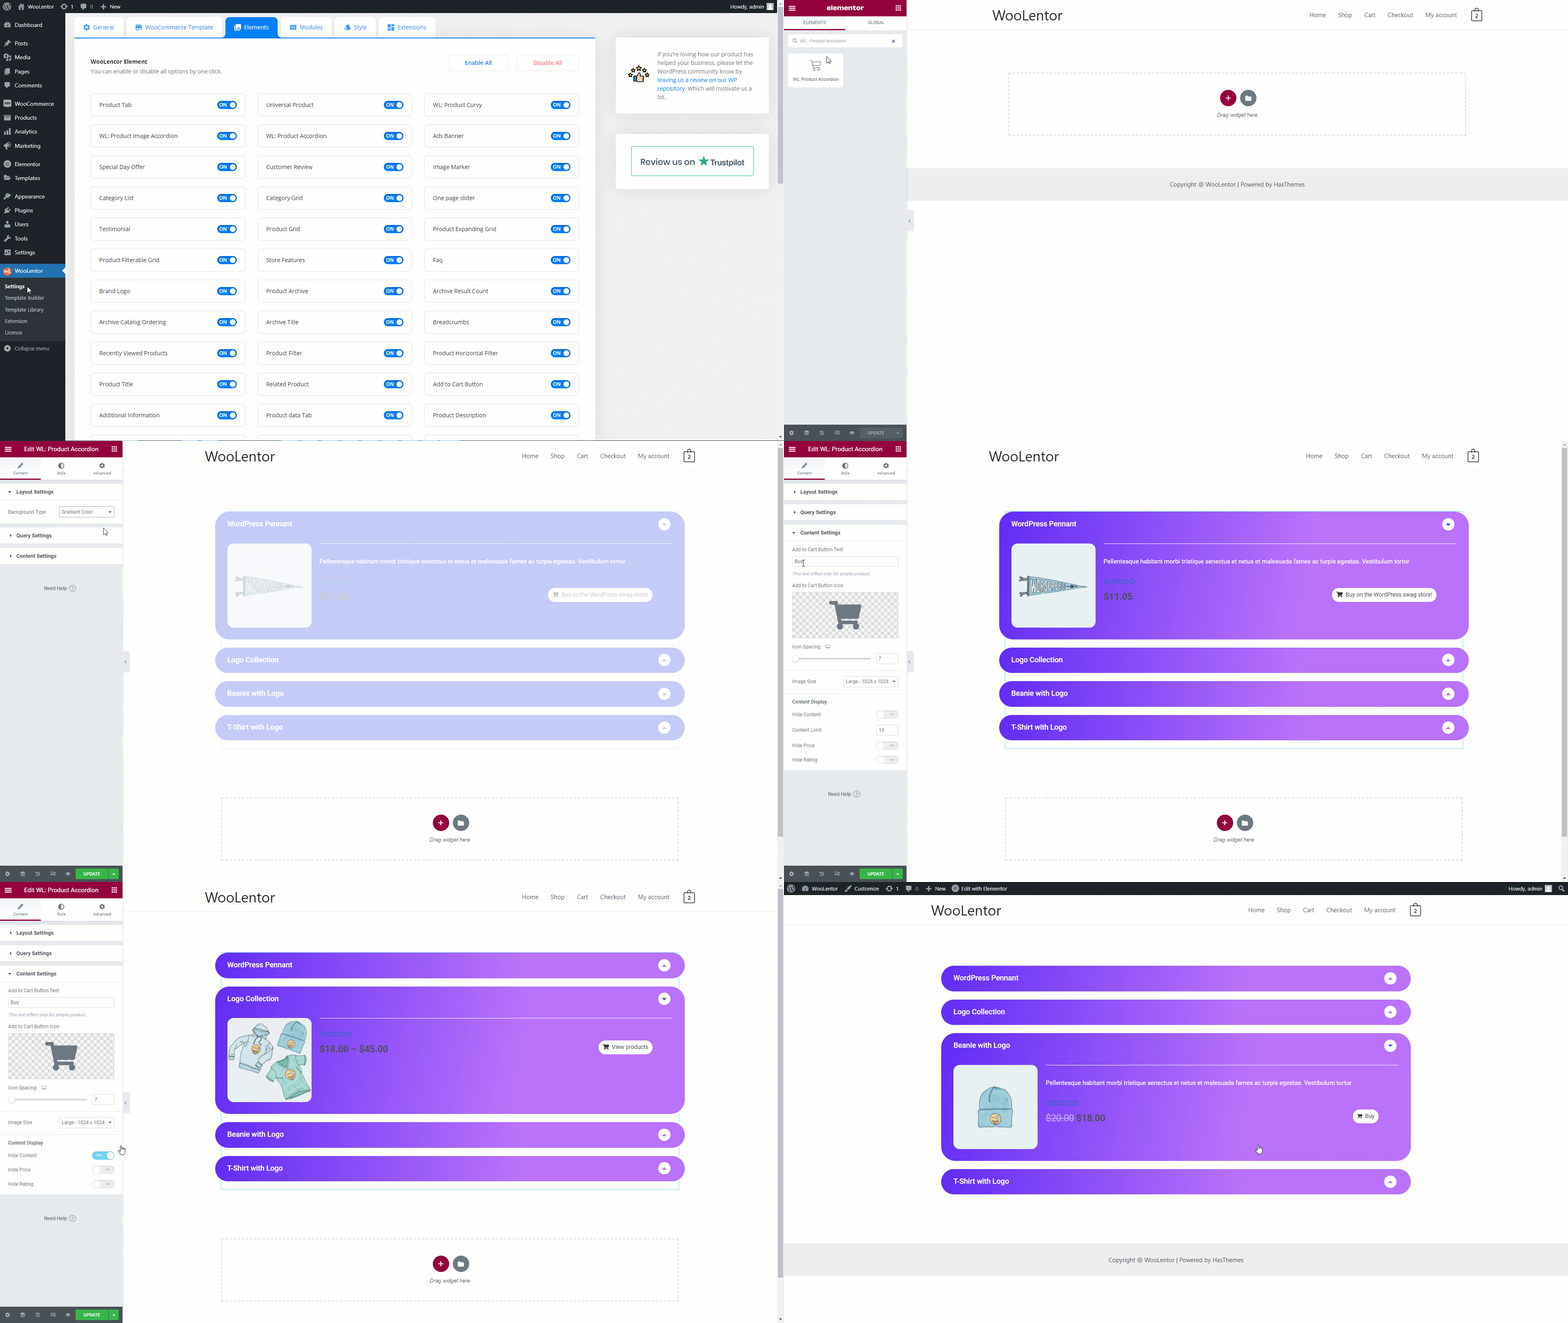
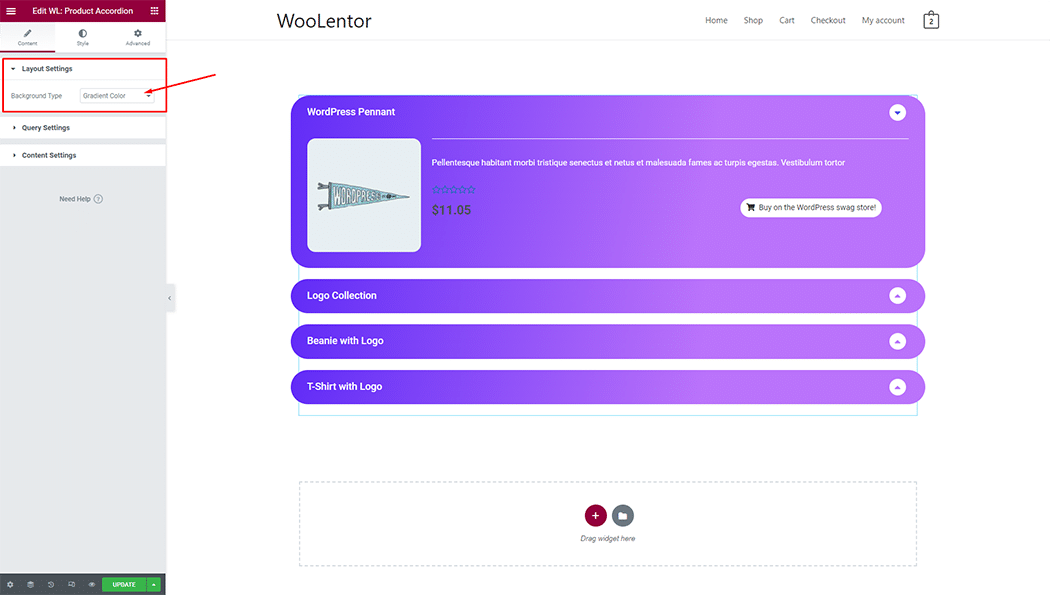
Layout Settings: You can set Solid and Gradient colors.
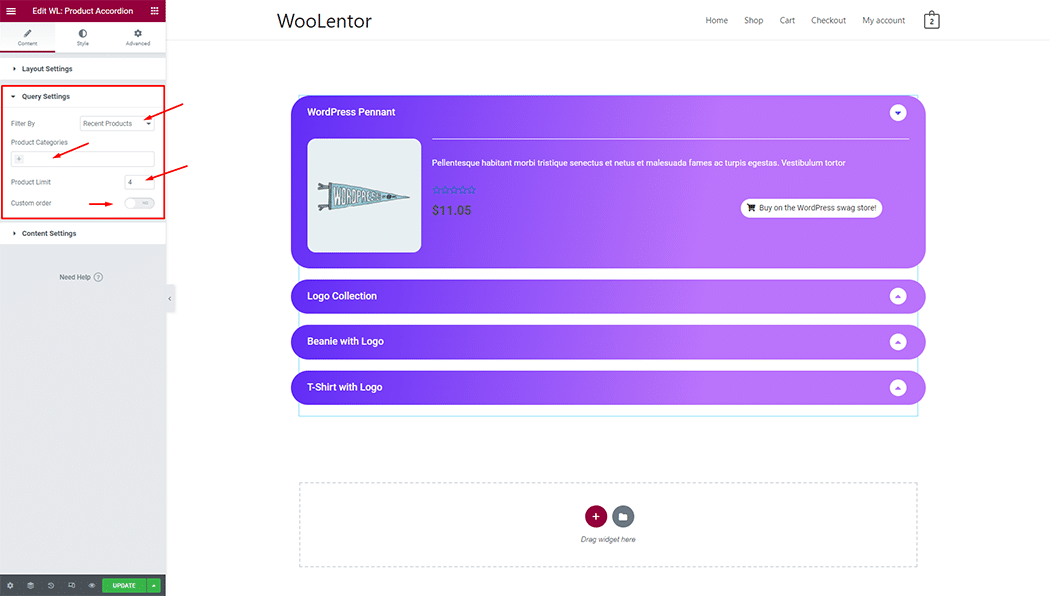
Query Settings: You can set product filters, limits, and display products tag-wise. You can also set a custom order.
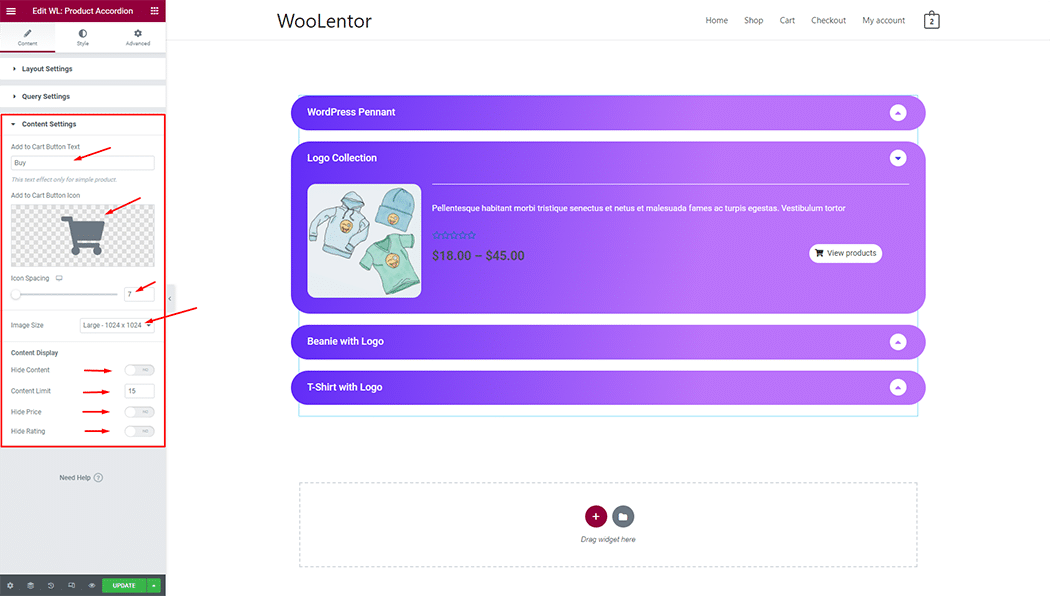
Content Settings: You can set different Cart icon, Image size, and also can hide content.
How to customize the Product Accordion style #
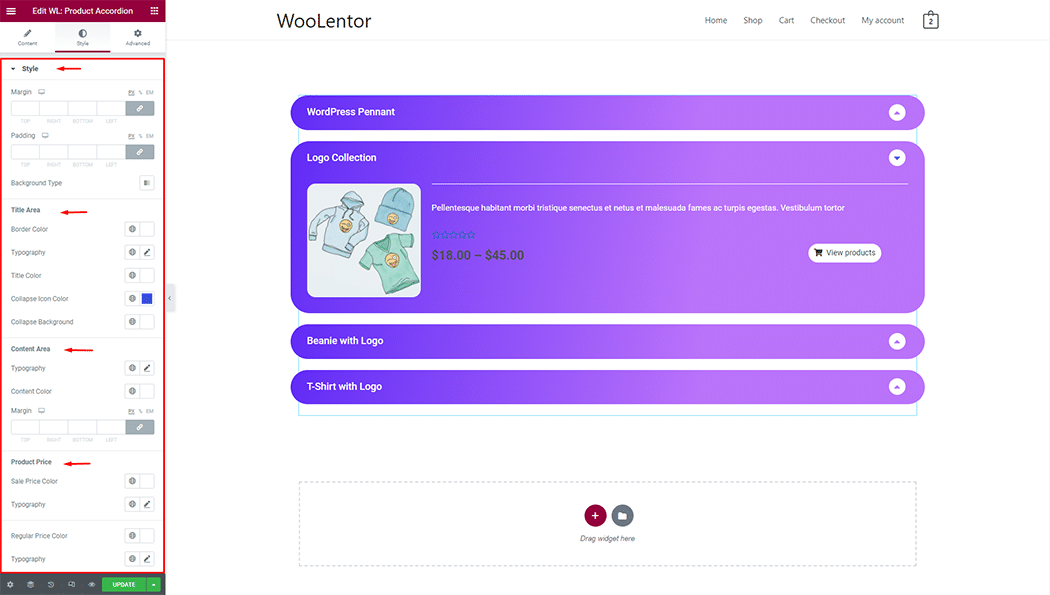
You can change the typography, text color, border color, padding, and margin style of the Product Accordion as needed.
Step 4: Now visit the site #
Visit the Page to Preview.
