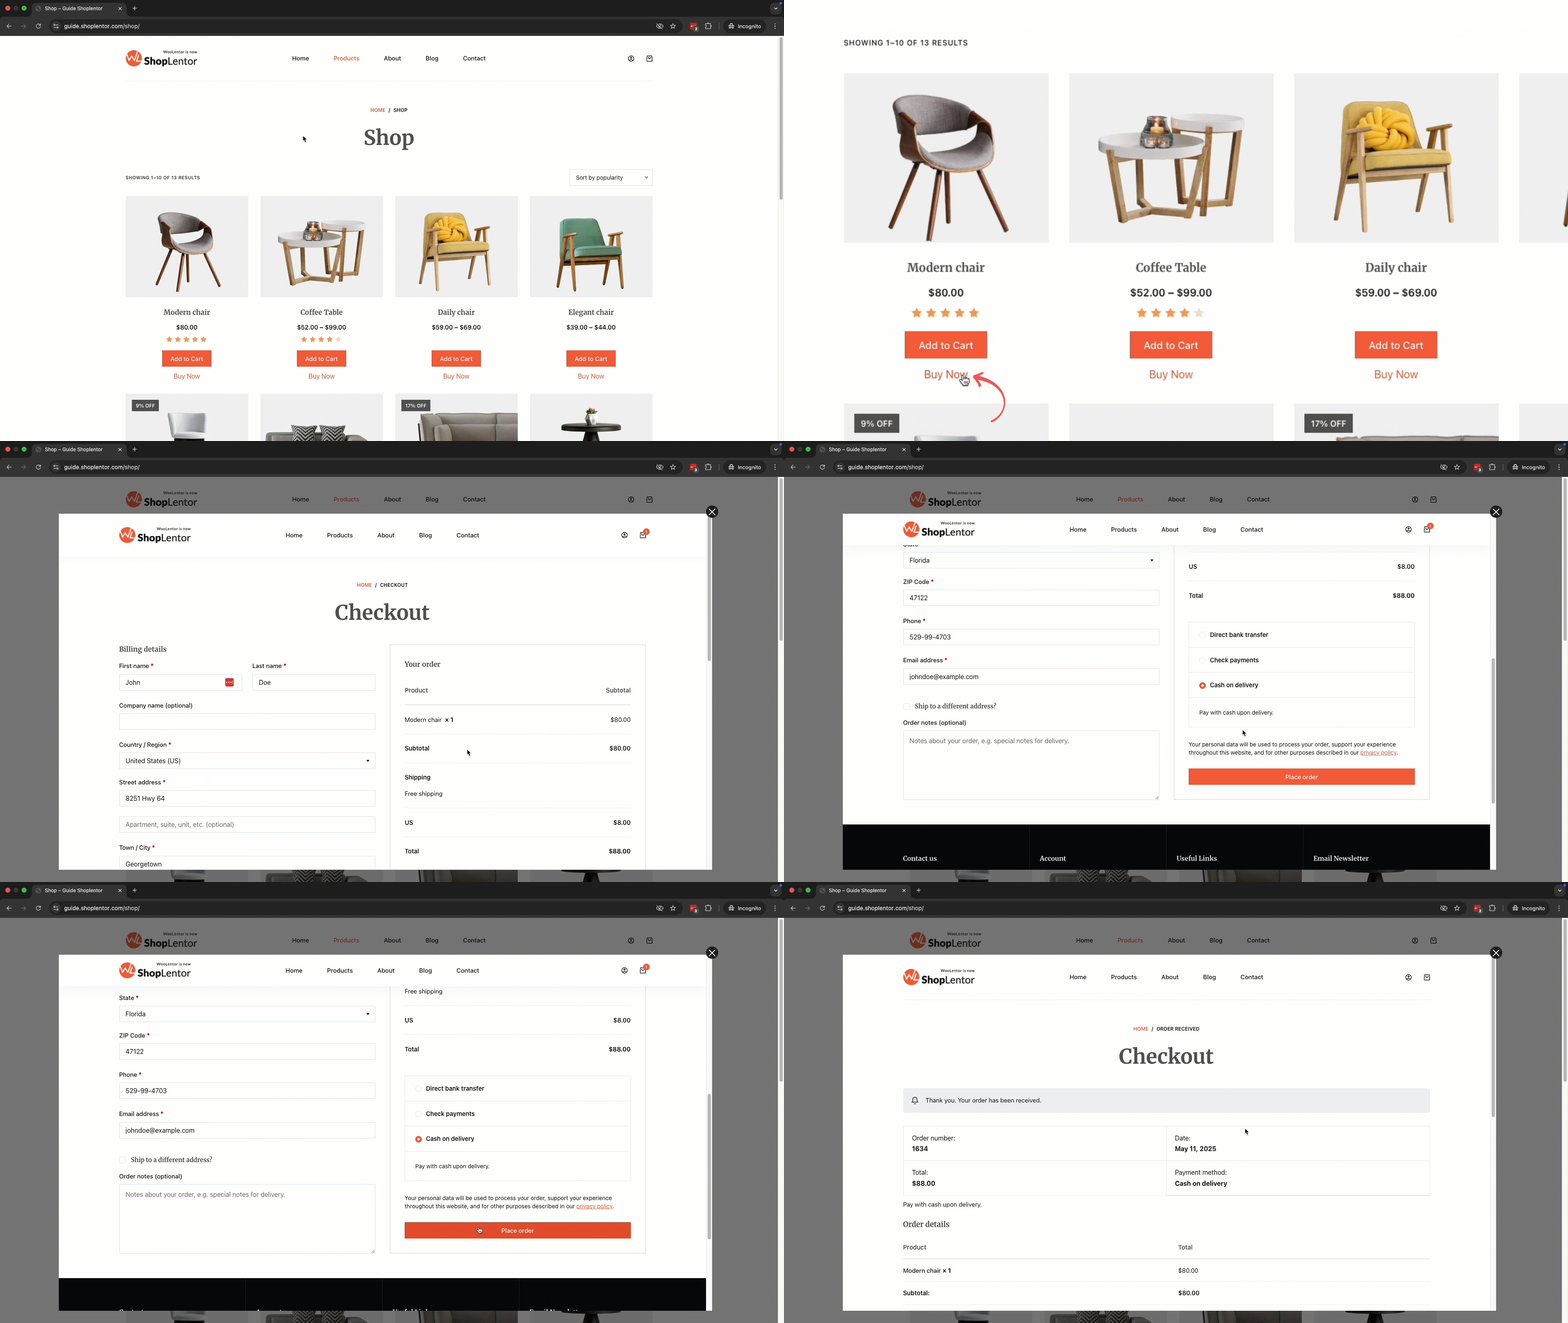
The Quick Checkout module in ShopLentor is designed to simplify the purchasing process by offering a direct checkout option from the product list pages. By placing a Quick Checkout button on Shop, Archive, or Single Product pages, users can quickly proceed to checkout without unnecessary navigation steps, leading to higher conversions and faster purchases.
How Quick Checkout Works
When the Quick Checkout module is enabled, an additional button appears near the default “Add to Cart†button. You can position it before/after the button, on the product image, or via shortcode. Clicking this button will either open a Quick Checkout popup or redirect users to the Checkout page, streamlining the purchase process.
Enable Quick Checkout Module
This option allows you to enable or disable the Quick Checkout Module for your WooCommerce site. To activate it:
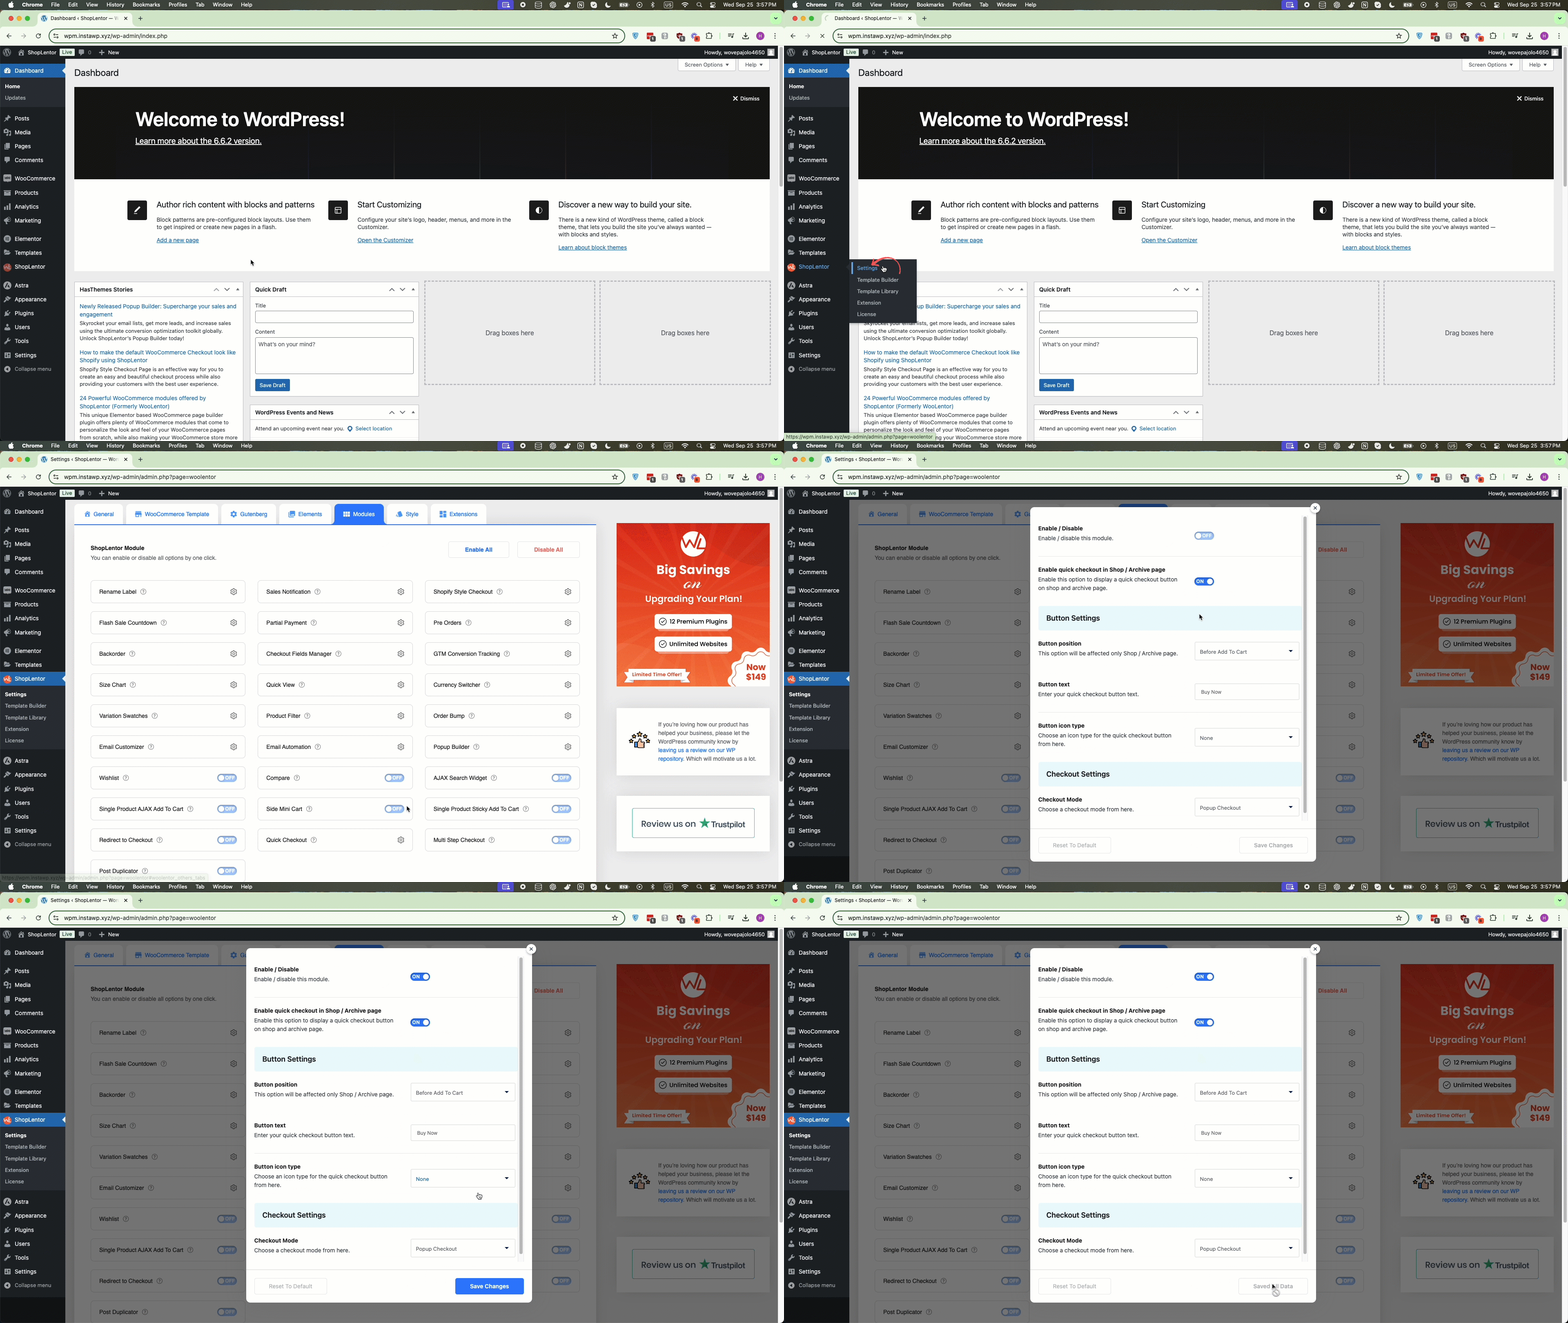
Go to WordPress Dashboard > WooLentor > Settings > Modules. From the list of modules, toggle the Quick Checkout switch to ON.
Enable/Disable: Use this switch to activate or deactivate the Quick Checkout Module.
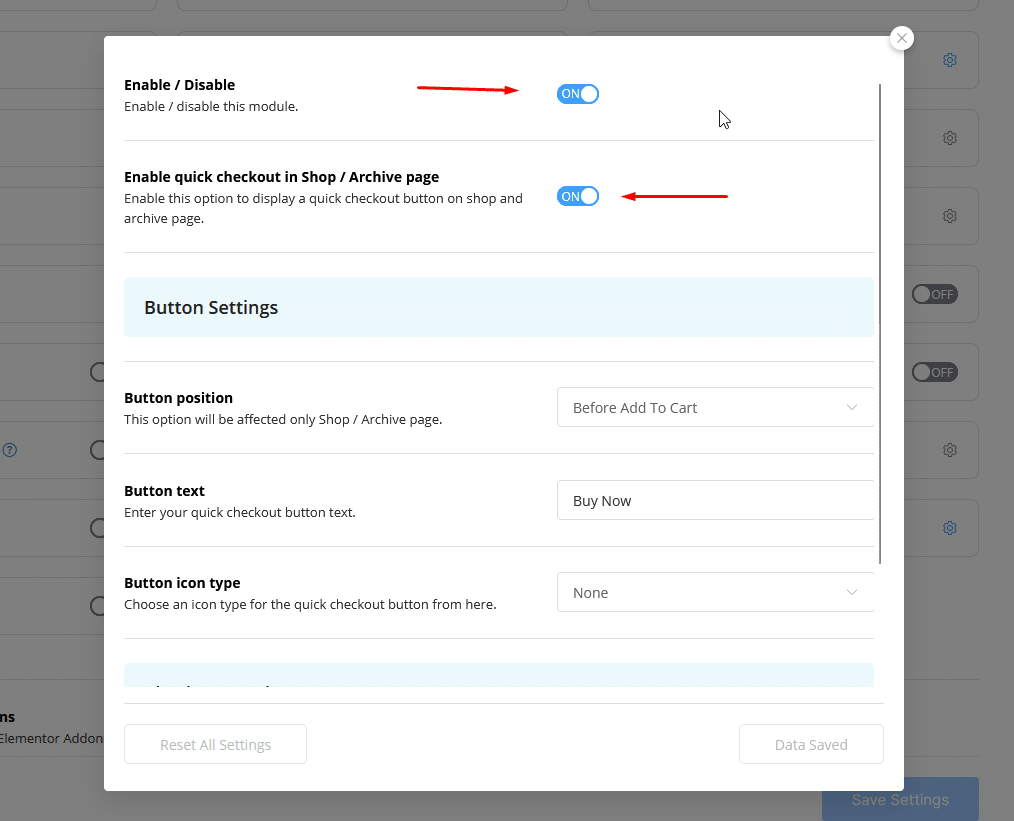
Enable Quick Checkout in Shop/Archive Page
Activating this option allows the Quick Checkout button to be displayed on Shop and Archive pages. This feature enhances usability, enabling quick purchases from the product listing without visiting individual product pages.
Button Settings
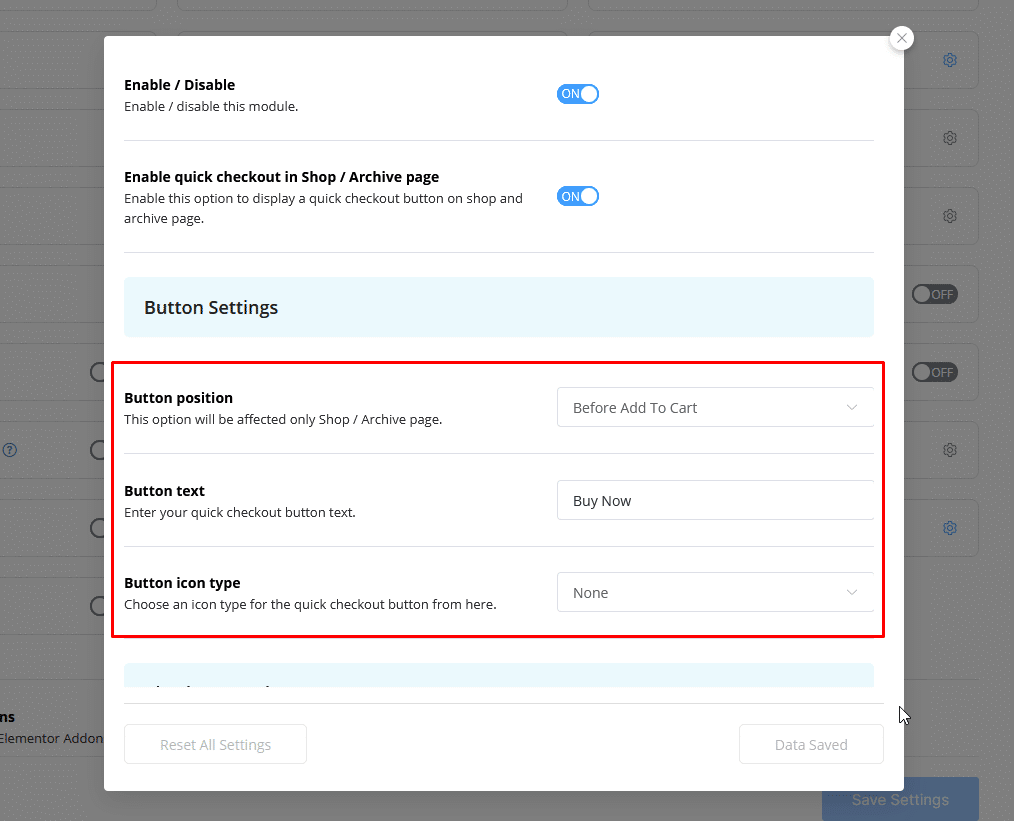
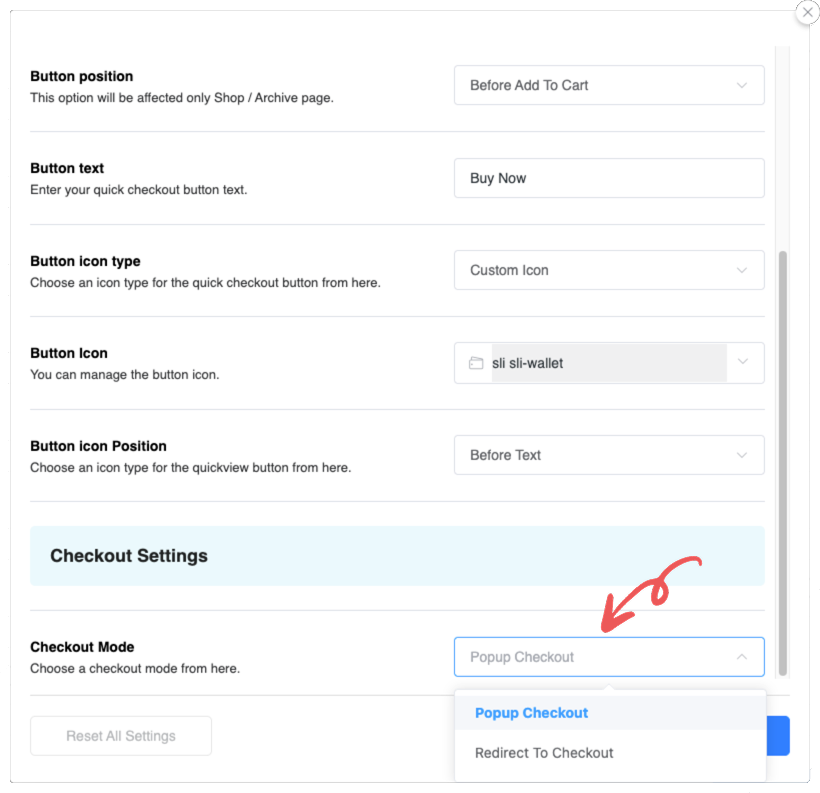
Customize the quick checkout button with various configuration options. These settings allow you to determine the button’s position, text, and icon.
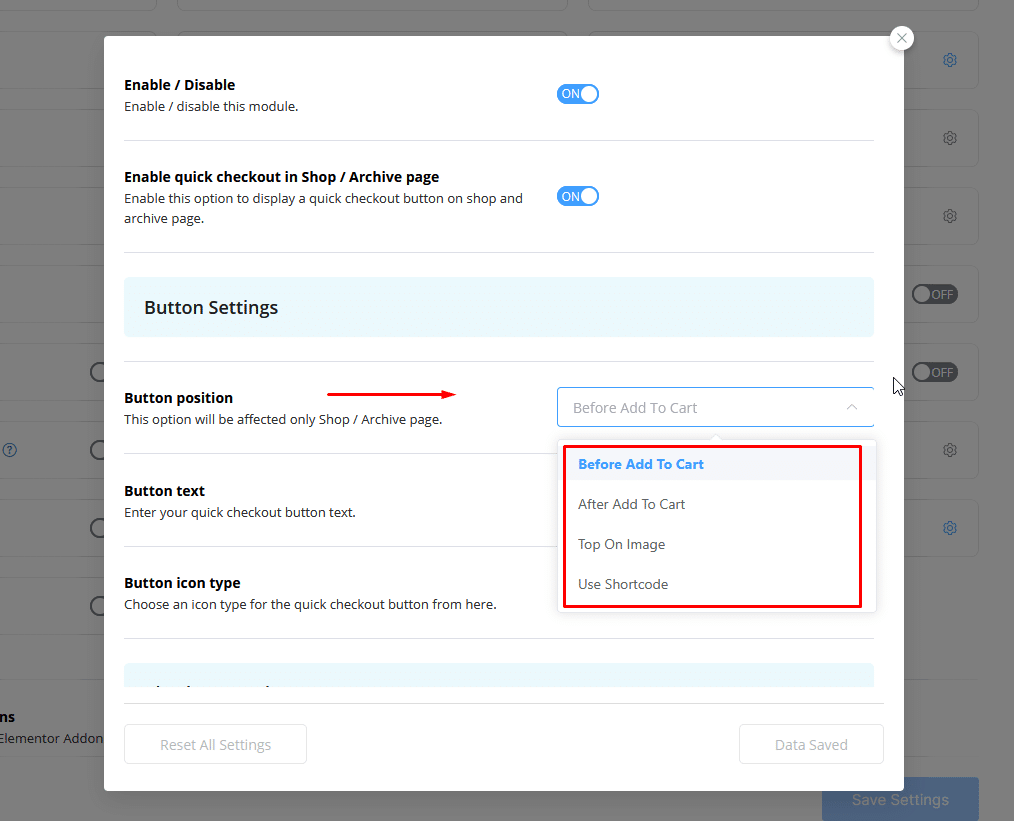
Button Position
This setting is applicable only to the Shop/Archive pages. You can place the Quick Checkout button:
Button position: Select one of the following options:
- Before Add to Cart: The Quick Checkout button will appear before the “Add to Cart” button.
- After Add to Cart: The Quick Checkout button will appear after the “Add to Cart” button.
- Top on Image: The Quick Checkout button will appear on top of the product image.
- Use Shortcode: Use the shortcode [woolentor_quick_checkout_button] to place the Quick Checkout button within the product loop.
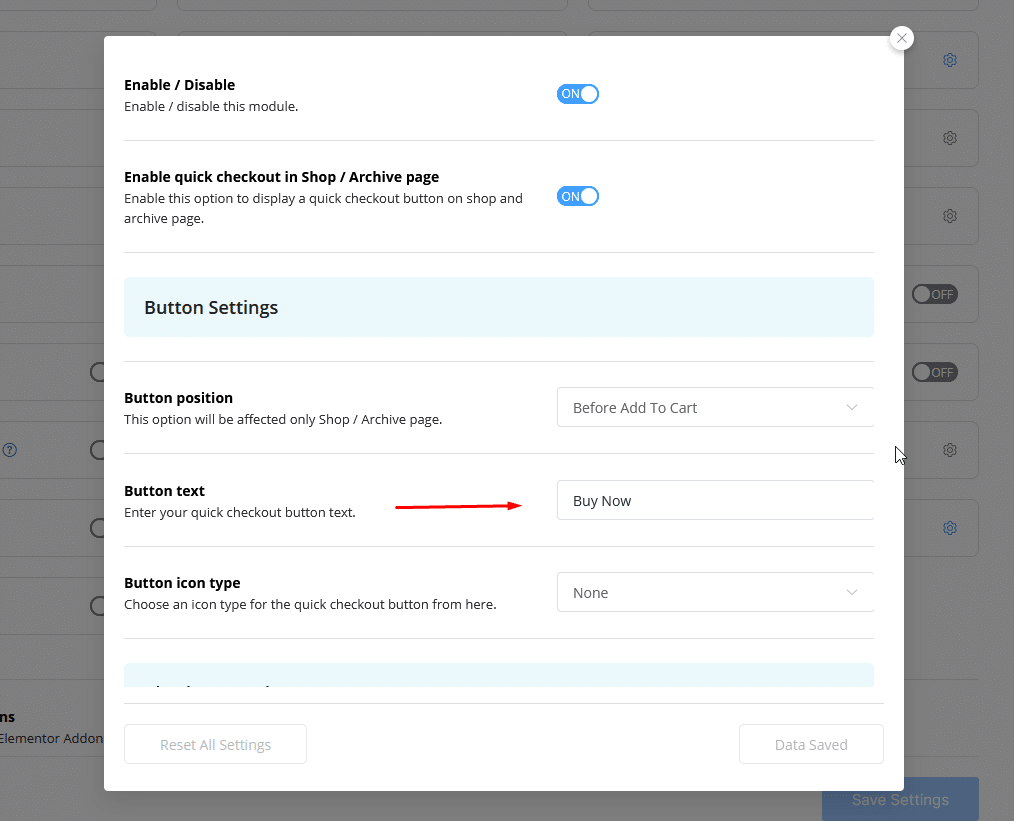
Button Text
Modify the text on the Quick Checkout button, such as changing it to “Buy Now†or any preferred label.
- Button text: Enter your preferred button text (e.g., “Buy Now”).
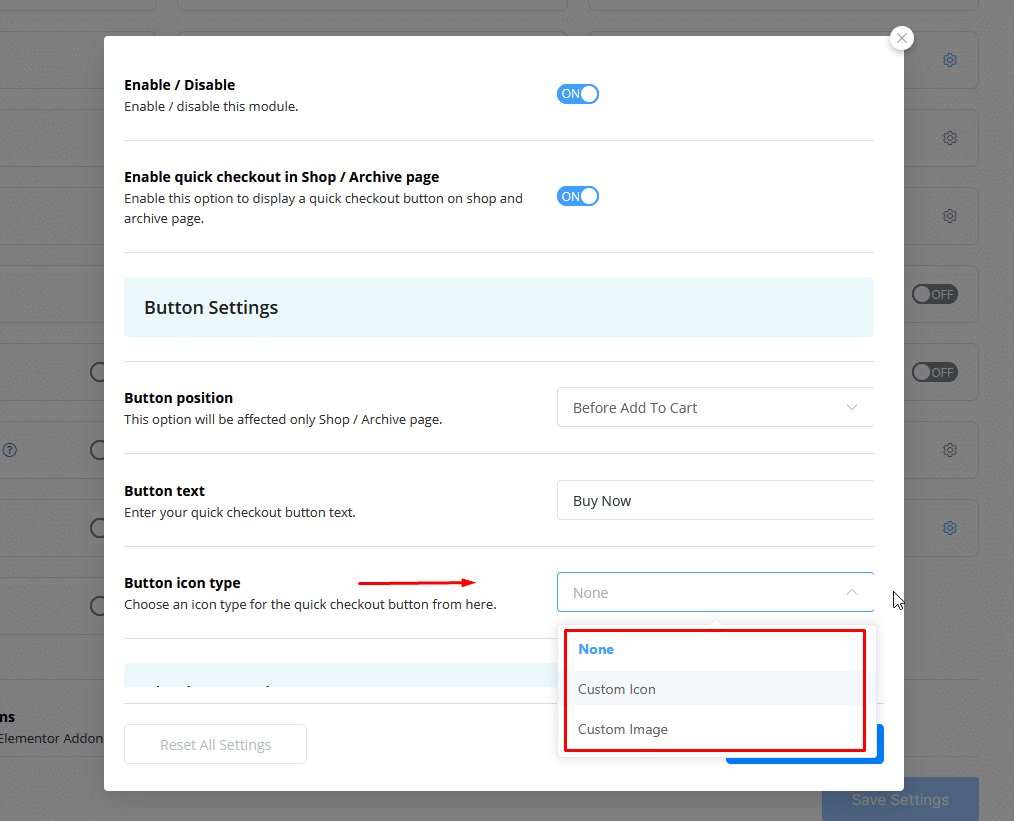
Button Icon Type
Choose an icon/image type for the button
Button icon type: Select from the following options:
- None: No icon or image will be displayed.
- Custom Icon: Select a custom icon from the available options to accompany the button.
- Custom Image: Upload a custom image to use as the button’s icon.
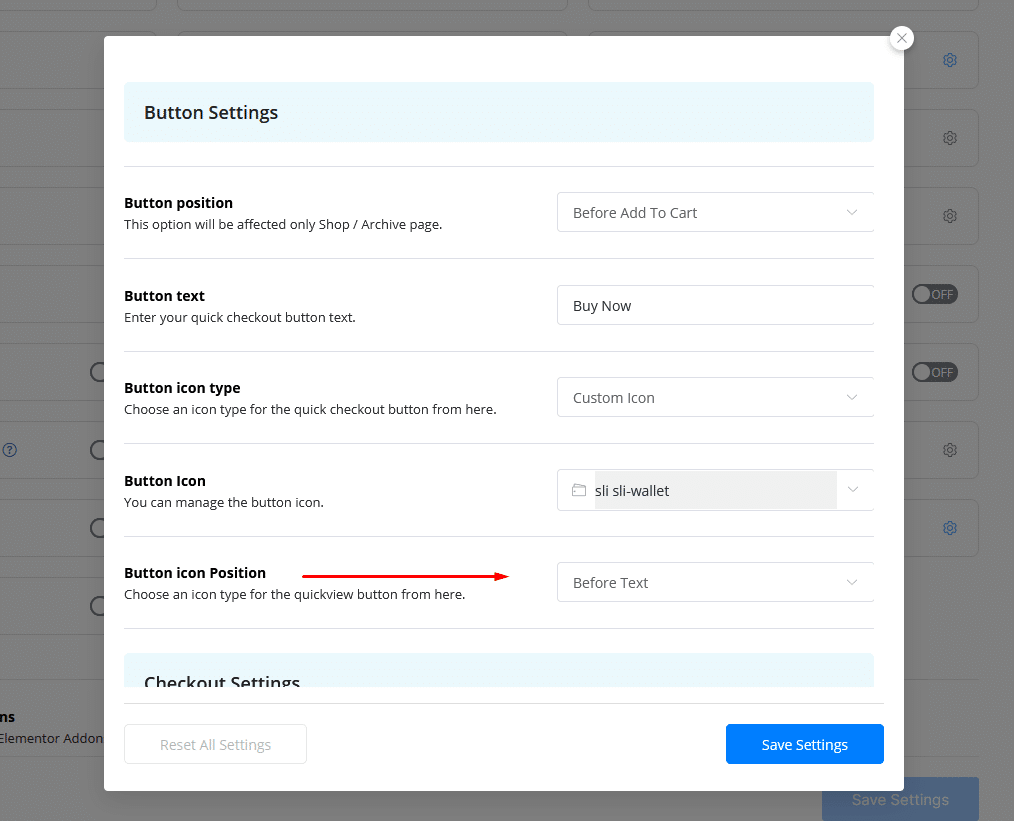
Button Icon Position
Define where the icon or image will appear in relation to the button text:
- Before Text: Select this option to place the icon before the button text.
- After Text: Select this option to place the icon after the button text.
Checkout Mode
Choose how the checkout process should work for your users:
- Popup Checkout: Opens a quick checkout page in a popup window, allowing users to stay on the same page while completing their purchase.
- Redirect to Checkout: Immediately redirects users to the checkout page upon clicking the button.
Preview of the quick checkout
The advantage of Quick Checkout is that it allows customers to complete the checkout process directly from the Shop/Archive page, helping to boost sales.
