The Store Vacation module is an essential tool for WooCommerce store owners to manage their store during temporary closures. Whether you’re taking a break, performing maintenance, or pausing operations for any reason, this module allows you to communicate effectively with your customers while maintaining your store’s professionalism.
Benefits of Using the Store Vacation Module
- ⏳ Automated Scheduling: Effortlessly set start and end dates for your store vacation.
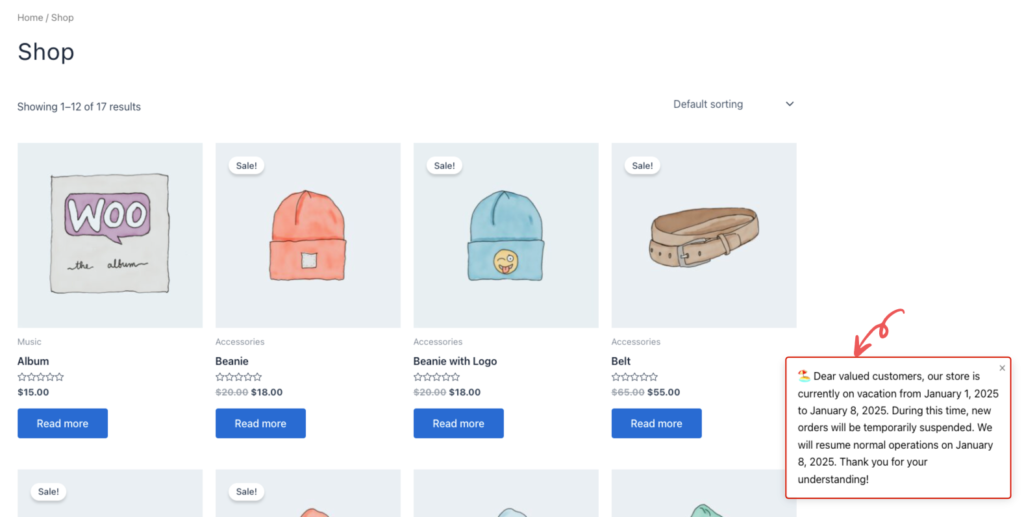
- 📄 Customer Communication: Display professional notices to inform visitors.
- 🔧 Customizable Notices: Personalize messages to align with your brand.
- ❌ Restrict Purchases: Disable “Add to Cart” options during vacation periods.
- 📊 SEO-Friendly Options: Pro users can ensure search engine visibility during closures.
Features Overview
Free Features
- Basic vacation scheduling with start/end dates
- Customizable vacation notice messages
- Option to hide “Add to Cart” buttons during vacation
- Multiple notice display positions
- Basic availability status management
- Shortcode support for displaying notices anywhere
- Dynamic message placeholders ({start_date}, {end_date}, {days_remaining})
Pro Features
- Multiple vacation schedules with recurring options
- Category-specific vacation mode
- Advanced notice display options:
- Floating notices
- Customizable positions (top-left, top-right, bottom-left, bottom-right)
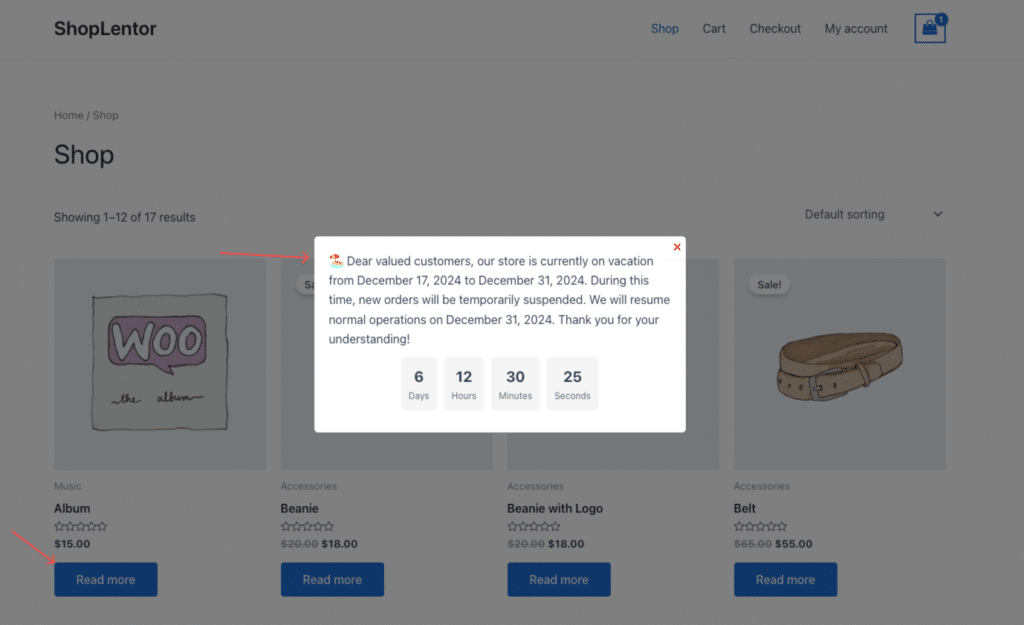
- Countdown timer for vacation end
- Access control for specific user roles and IPs
- SEO management during vacation periods
Step-by-Step Guide to Setting Up the Store Vacation Module
Step 1: Enable the Module
- Navigate to your WordPress Dashboard.
- Go to ShopLentor → Settings → Modules.
- Locate the Store Vacation module and toggle it ON.
- Click Save Changes to activate the module.
Step 2: Configure Basic Settings
Step 2.1: Set Vacation Period
- Go to ShopLentor → Settings → Store Vacation
- Specify the vacation period:
- Start Date 📅
- End Date 📅

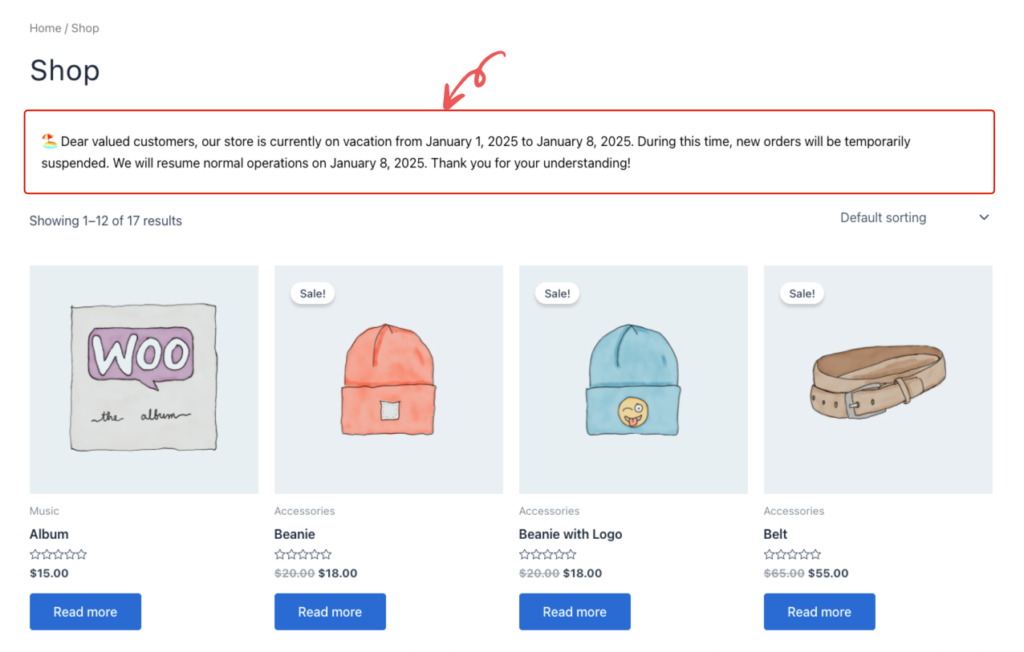
Step 2.2: Choose Notice Display Location
- Select where the notice will appear:
- Before Shop Loop: Displays on shop/archive pages.
- Before Single Product: Displays on individual product pages.
- Before Cart: Displays on the cart page.
- Shop & Single Product: Displays on both shop/archive and product pages.
- Alternatively, use a shortcode or Elementor widget to display the notice anywhere on your site.
[woolentor_vacation_notice]

Step 2.3: Customize Notice Message
- Add a custom vacation message to inform your customers.
- Use dynamic placeholders for personalized notices:
- {start_date}: Automatically inserts the start date.
- {end_date}: Displays the end date.
- {days_remaining}: Shows the remaining days/time until the store reopens.
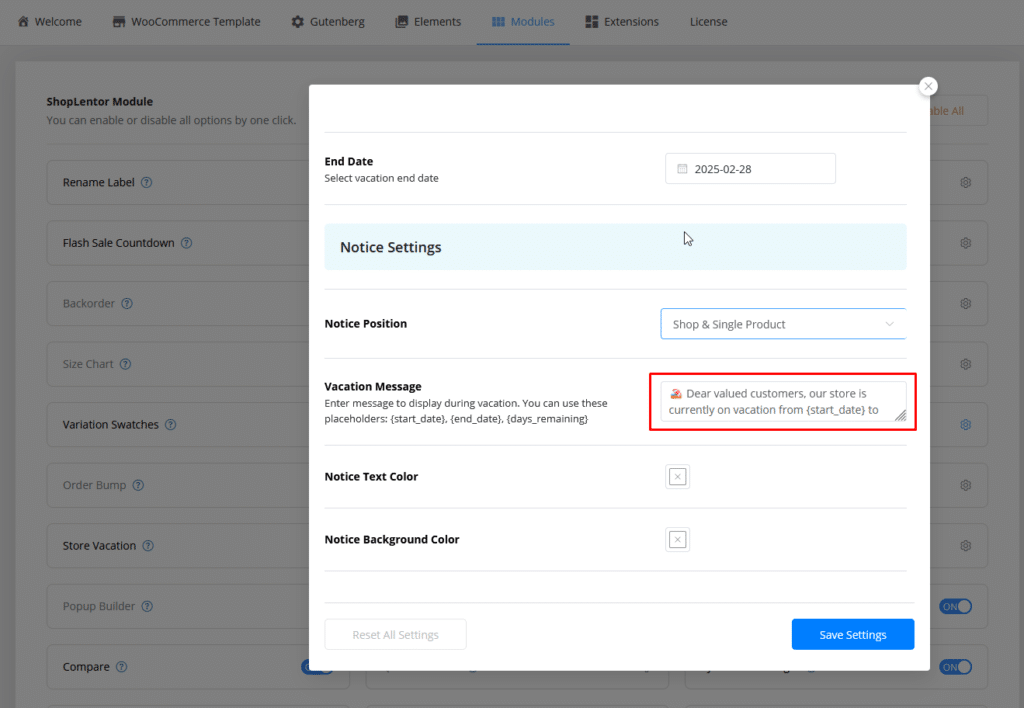
Step 3: Customize Notice Appearance
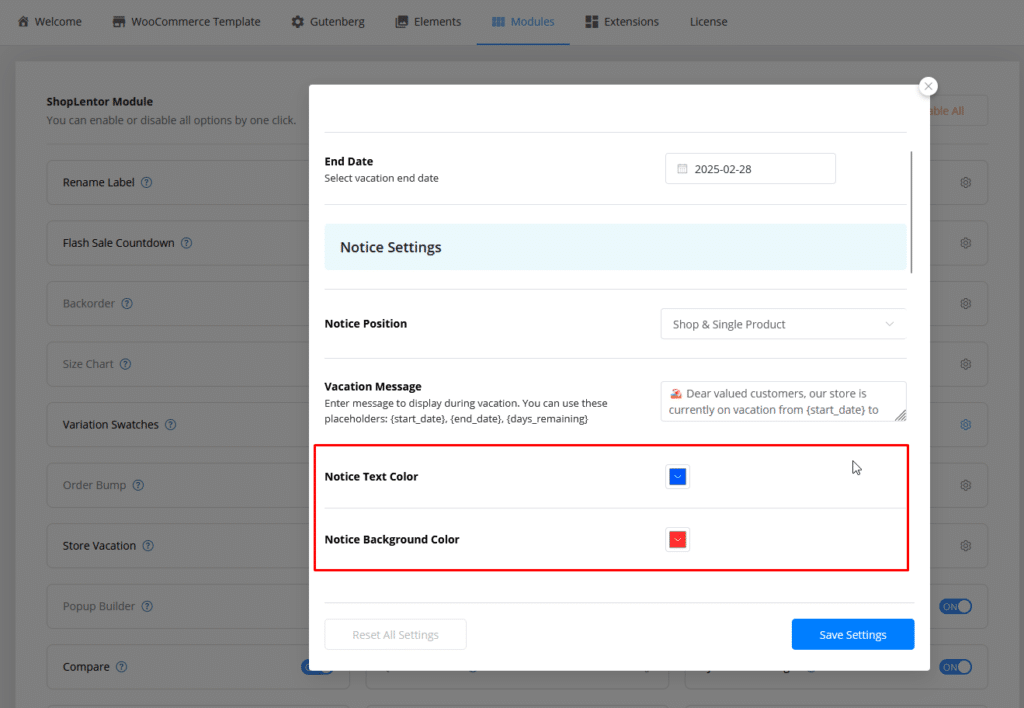
- Adjust the notice text color of your notice to match your store’s branding.
- Adjust the Notice Background color of your notice to match your store’s branding.
Step 4: Product Settings
- Enable the Turn Off Purchases option to restrict the “Add to Cart” button during vacation dates.
- Customize the Product Availability Text, which will replace the “Add to Cart” button with a message (e.g., “Available after vacation”).
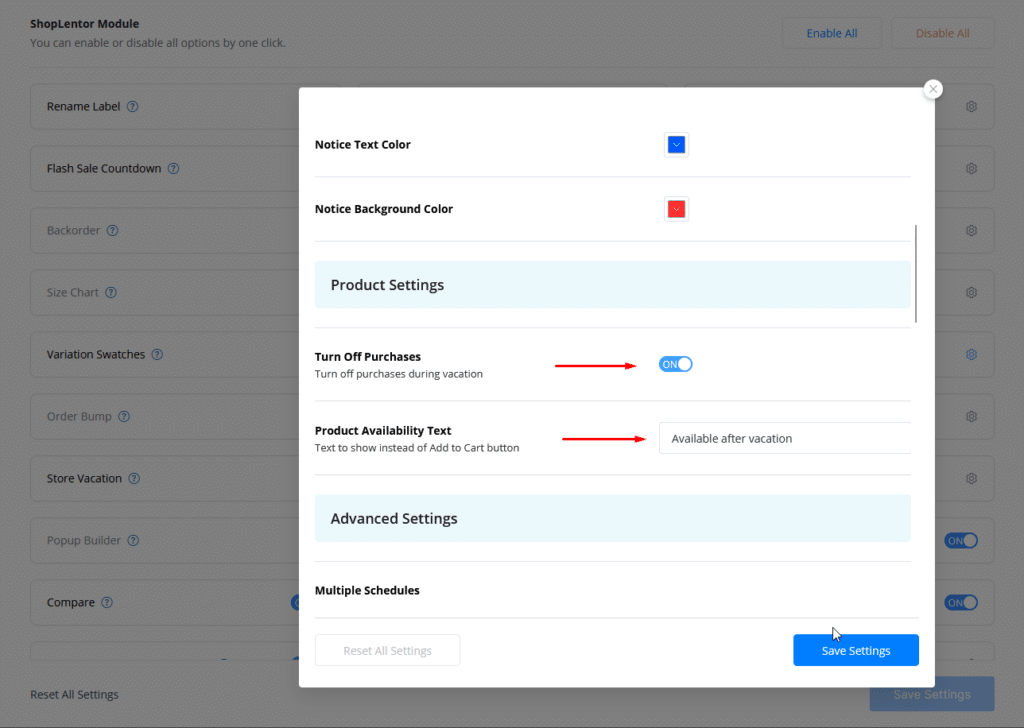
Step 5: Advanced Settings
- Manage and configure multiple schedules by clicking + Add Item.
- Set recurring schedules:
- None: No recurrence, works for one-time vacations.
- Weekly: Recurs weekly.
- Monthly: Recurs monthly.
- Yearly: Recurs yearly.

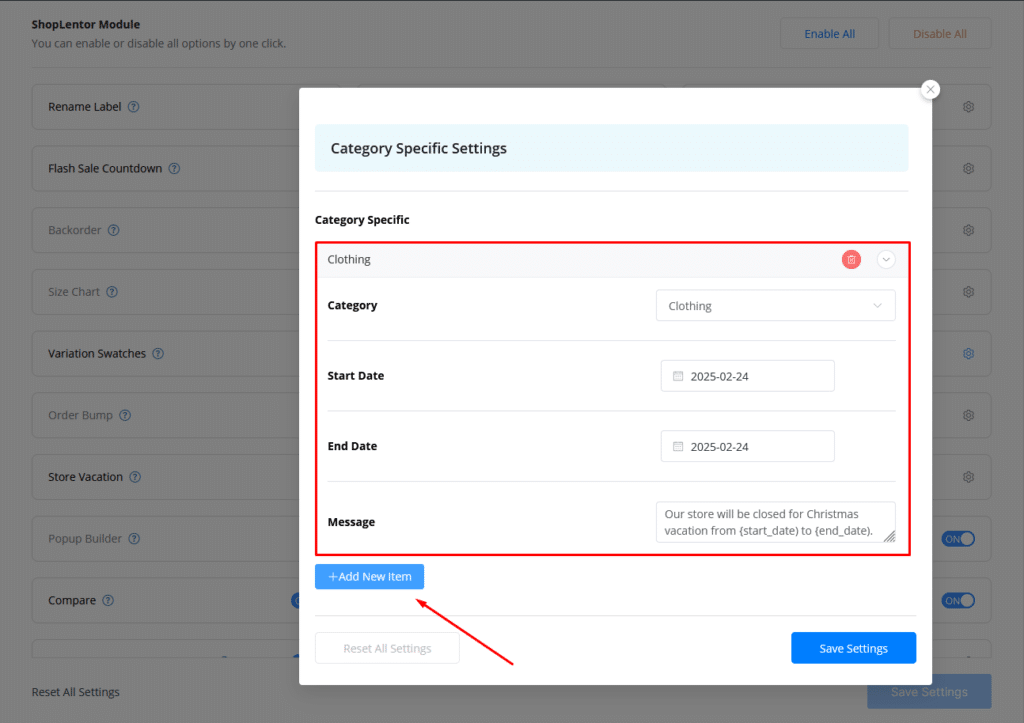
Step 6: Category-Specific Settings
- Assign vacation notices to specific categories for targeted communication.
- Configure individual settings for each category:
- Category: Select the relevant category (only one category per notice).
- Start Date: Specify the start date for the category-specific vacation.
- End Date: Specify the end date.
- Message: Add a custom message for that category.
Step 7: Notice Customization
- Select the style of the notice:
- Banner: Displays a banner at the top of the page.
- Popup: Opens a popup notice with customizable content and a countdown timer.
- Floating: Shows a floating notice in one of the four corners:
- Top-left
- Top-right
- Bottom-left
- Bottom-right
- Customize the notice’s appearance, including colors, fonts, and animations.
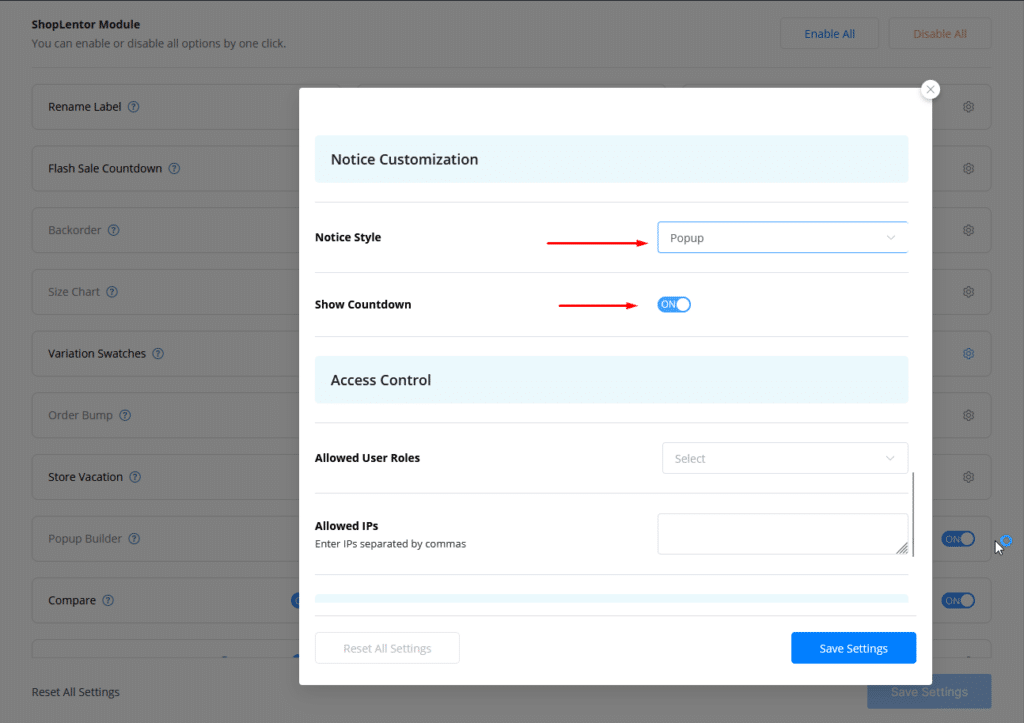
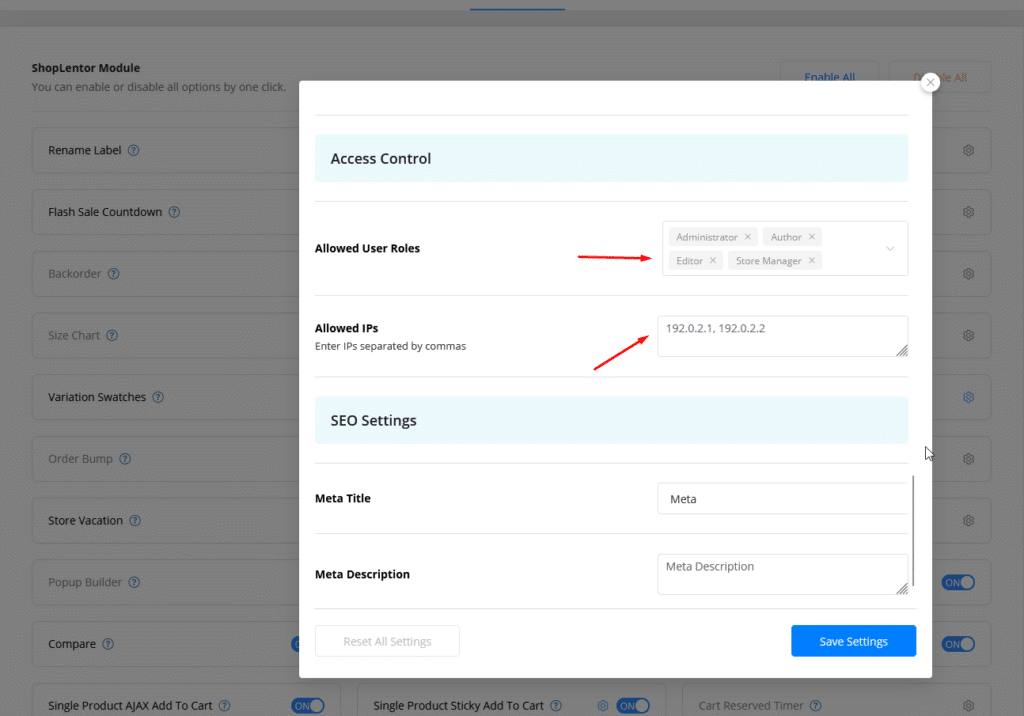
Step 8: Access Control
- Restrict access to the store for specific user roles (e.g., administrators, authors).
- Limit access by IP addresses. Add multiple IPs separated by commas (e.g., “192.0.2.1, 192.0.2.2”).
Step 9: Test and Review
- Preview how the vacation notice appears on your store’s pages.
- Test the notice and functionality by visiting your store as a customer.
- Verify that purchase options are appropriately restricted and notices are displayed correctly.
- Adjust settings as needed to ensure optimal performance.
Best Practices for Using the Store Vacation Module
- Plan Ahead:
- Schedule vacations well in advance to avoid last-minute issues.
- Craft Clear Messages:
- Include clear information about the vacation duration and reopening date.
- Test Thoroughly:
- Verify notice functionality and appearance on all device types.
- Use Categories Wisely:
- Apply category-specific notices to ensure clarity for specific products.
Frequently Asked Questions (FAQ)
Can I schedule multiple vacation periods?
Yes! Use the advanced settings to add multiple schedules with recurrence options.
Will this affect my existing orders?
No, this module only restricts new purchases during the vacation period.
Can I customize the notice design?
Absolutely! Both free and Pro versions offer customization options, with advanced styling available in the Pro version.
How does this affect SEO?
Pro users can manage SEO settings to ensure the store remains visible in search results during vacation periods.
Upgrade to Pro for Advanced Features
Unlock the full potential of the Store Vacation module with Pro features:
- Multi-schedule management with recurrence options.
- Advanced styling and floating notice options.
- SEO management during store closures.
- Access control by user roles and IP addresses.
ShopLentor- WooCommerce Builder for Elementor & Gutenberg
A versatile page builder to build modern and excellent online stores with more than 100k+ Active Installations.