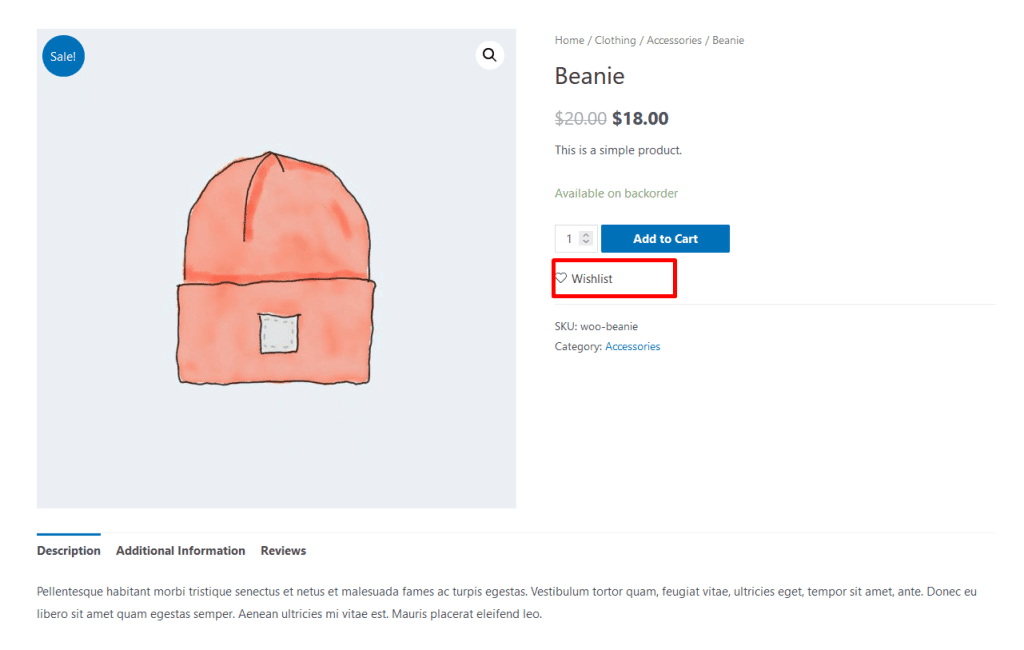
Wishlist for WooCommerce is an essential feature for modern WordPress e-commerce platforms. By allowing customers to save desired products to their user accounts, these wishlists allow shoppers to signify interest without immediate intent to purchase. This makes them a powerful tool for online retailers, as it enables customers to easily find products they may wish to buy in the future. Whether browsing the site on their own or using the wishlist as a wish list for friends and family members, customers can easily keep track of all their favorite products in one convenient place. In addition, many e-commerce platforms also offer special promotions and coupons related to products on wishlists, resulting in even greater sales potential for retailers. So if you’re looking for a way to boost your online sales, consider adding wishlist functionality to your e-commerce platform today!
If your customers are interested in a product but not quite ready to hit purchase, a wishlist plugin can help you keep those sales
Benefits of using Wishlist for WooCommerce
- Increase sales.
- Share wishlist products via various social media platforms
- Building customer brand attachment.
- Allow your customers to save their desired products to their wishlists, so they can purchase later.
How to Add Wishlist for WooCommerce
Using WooLentor, you can enable the WooCommerce “Wishlist” feature in your WooCommerce store and make the process of buying products easier and faster. Here are the easy steps of adding a WooCommerce “Wishlist” in a store.
Follow the following steps:
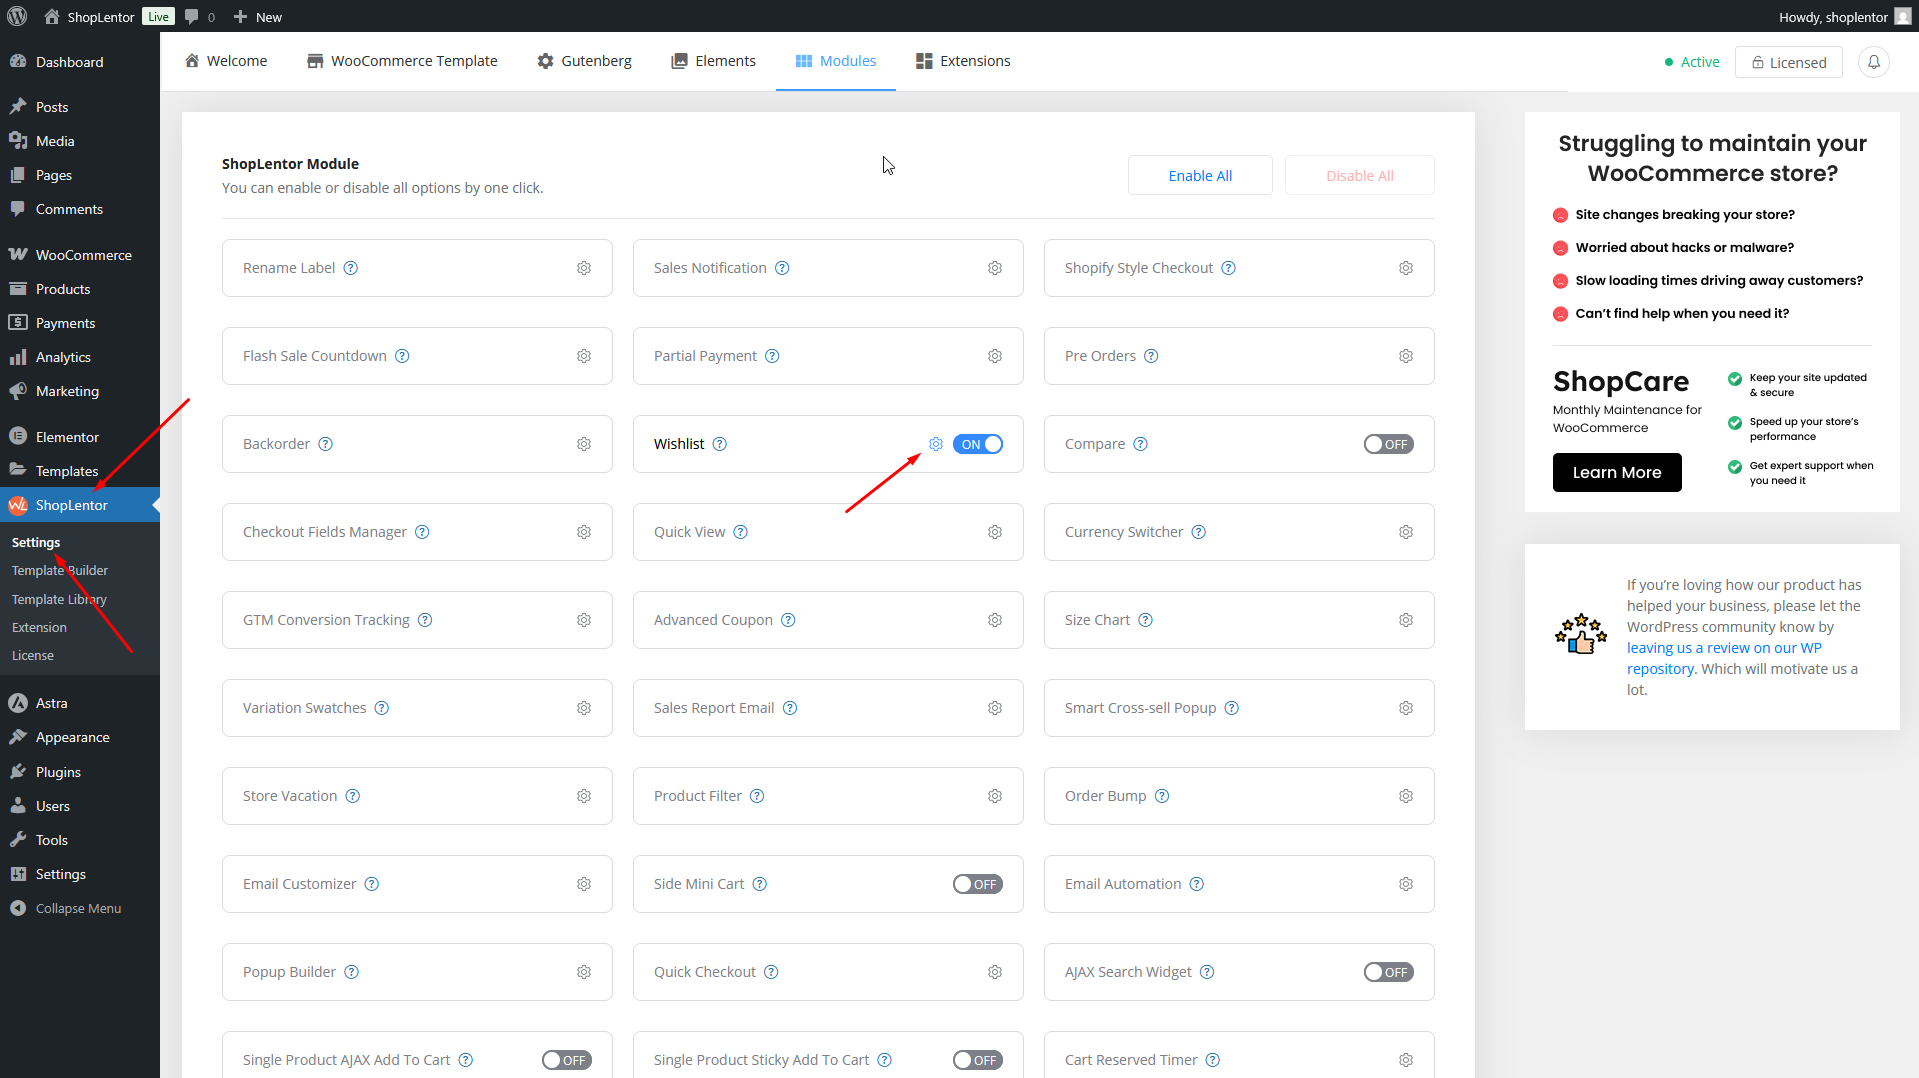
Step 1: Enable the Wishlist for WooCommerce module
WordPress dashboard > WooLentor > Settings > Modules > Wishlist
After that, enable the module
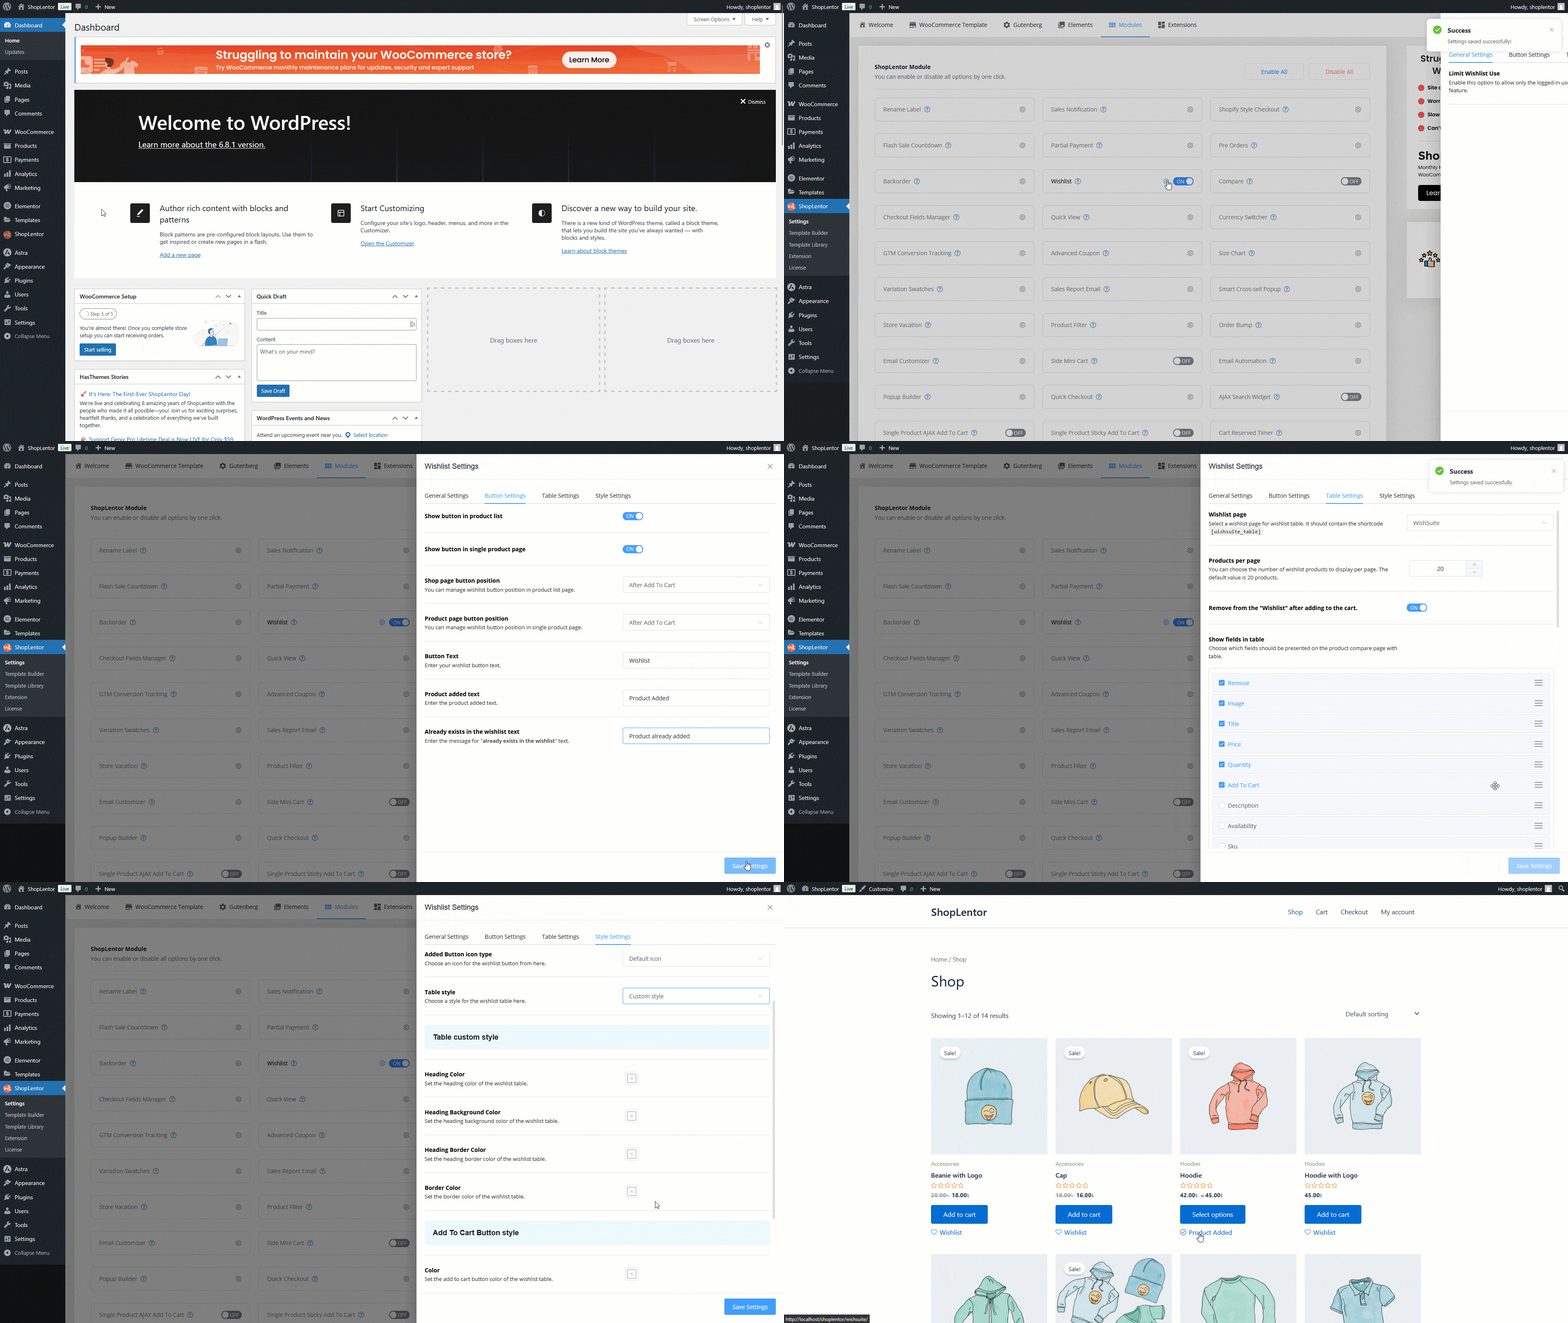
Step 2: Setup Wishlist for WooCommerce
WordPress dashboard > WooLentor > Settings > Modules > Wishlist
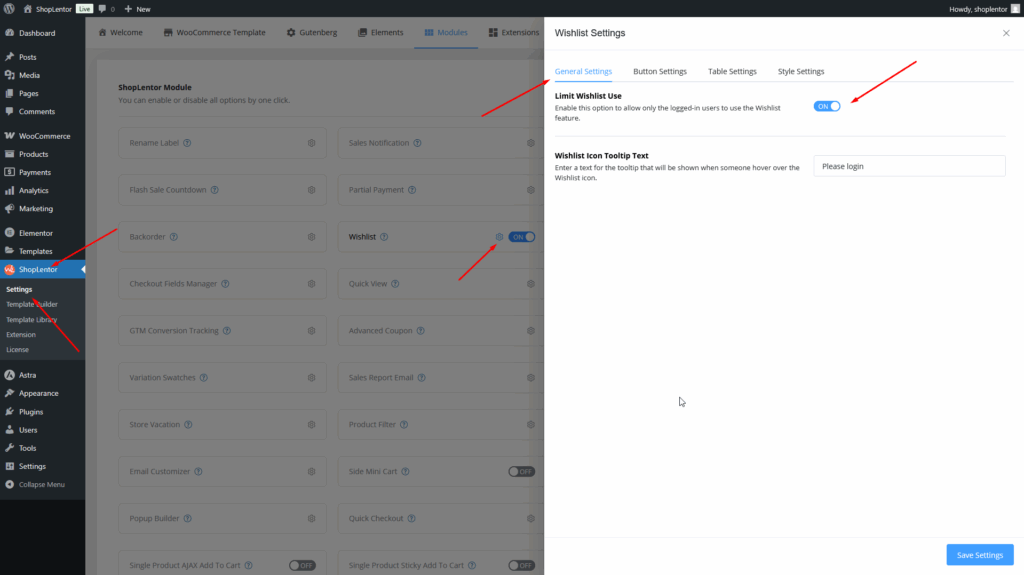
Step 3: General Settings for Wishlist
General Settings:
- Limit Wishlist Use: Enable this option to allow only the logged-in users to use the Wishlist feature. Enable this option to allow only the logged-in users to use the Wishlist feature.
- Wishlist Icon Tooltip Text: Enter a text for the tooltip that will be shown when someone hovers over the Wishlist icon.
Button Settings:
- Show button in product list: Enable this option to show the wishlist button product list.
- Show button in single product page: Enable this option to show the wishlist button in single product page.
- Shop page button position: You can manage wishlist button position in product list page.
- Product page button position: You can manage wishlist button position in single product page.
- Button Text: Enter your wishlist button text.
- Product added text: Enter the product added text.
- Already exists in the wishlist text: Enter the message for “already exists in the wishlist” text.
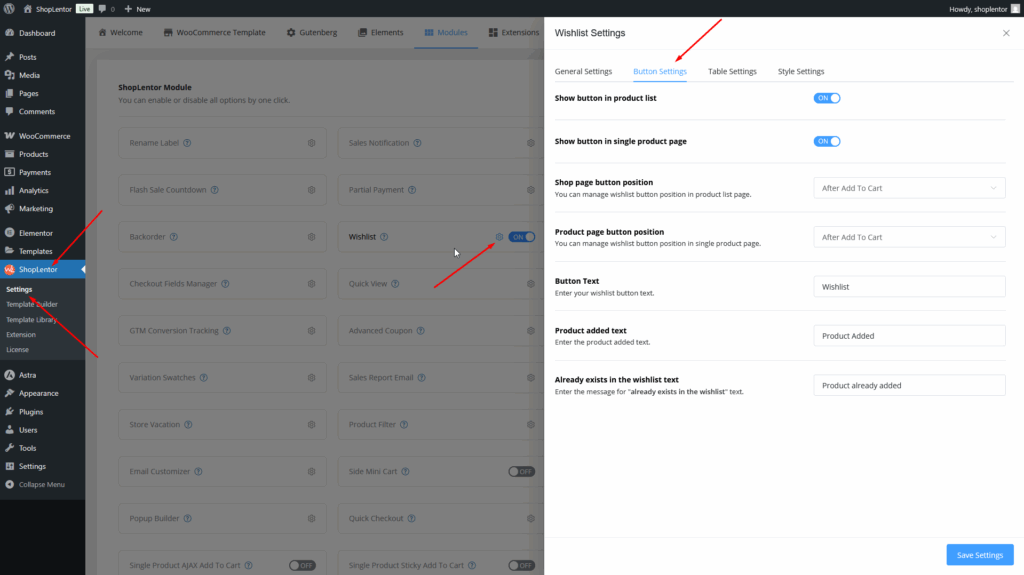
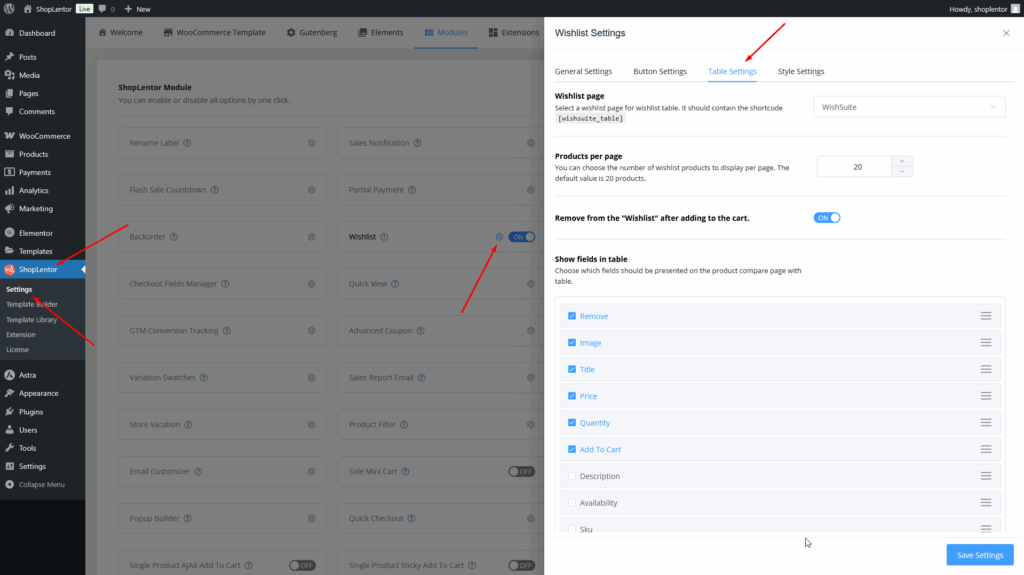
Table Settings:
- Wishlist page: Select a wishlist page for wishlist table. It should contain the shortcode [wishsuite_table]
- Remove from the “Wishlist” after adding to the cart: Enable this option to remove from wishlist after adding to the cart.
- Show fields in table: Field shows can be made as desired, All field shows can be done at once and field shows can be done by selecting them separately. Also, you can change field position by drag & drop.
- Table heading text: You can change table heading text from here.
- Empty table text: Text will be displayed if the user doesn’t add any product to the wishlist.
- Image size: Enter your required image size.
- Image Hard Crop: Enable option this for image hard crop.
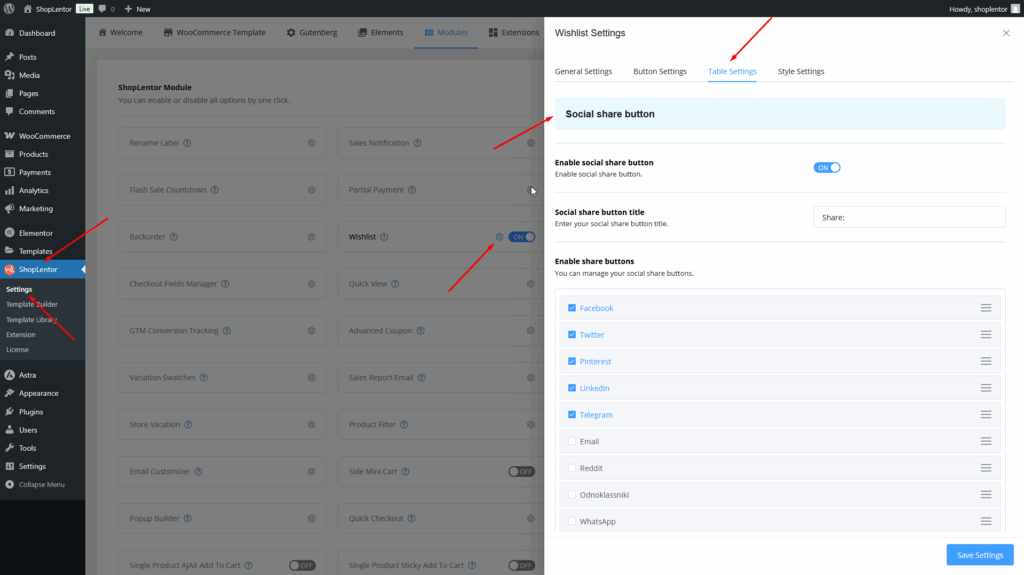
Social share button
- Enable social share button: Enable this option to show social share button.
- Social share button title: Enter your social share button title.
- Enable share buttons: You can manage your social share buttons. Field shows can be made as desired, All field shows can be done at once and field shows can be done by selecting them separately. Also, you can change field position by drag & drop.
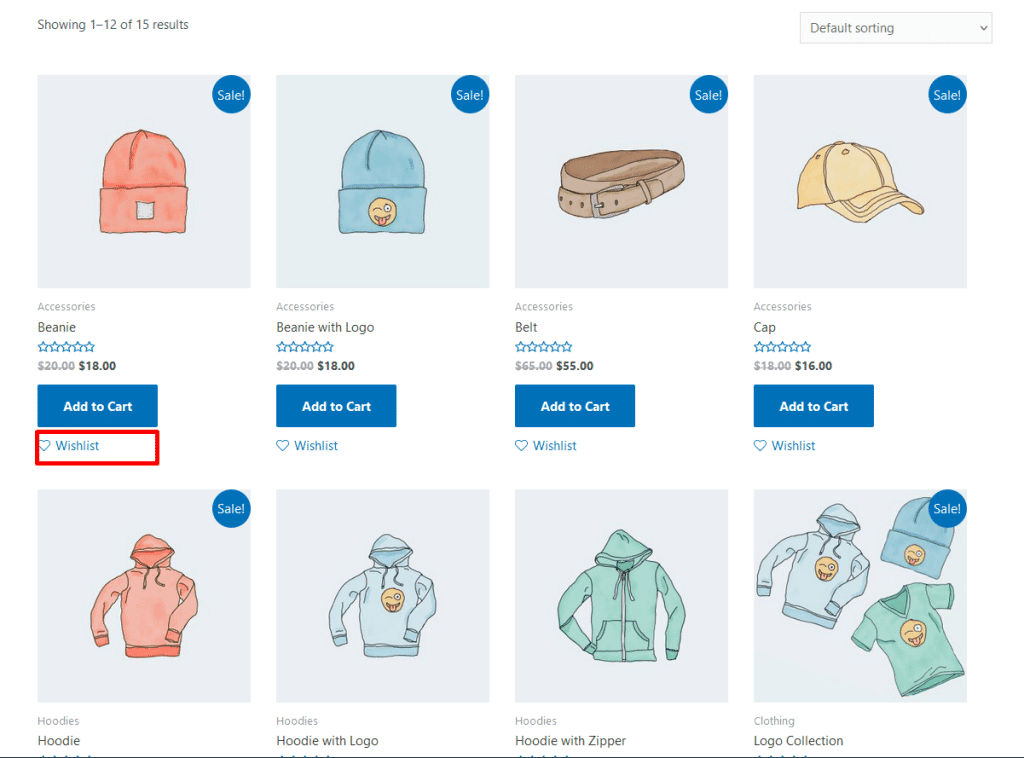
Step 4: Visit your site’s product list & product page.
The “Wishlist” button is now showing on your product list page.
“Wishlist” button is showing on your product page.
