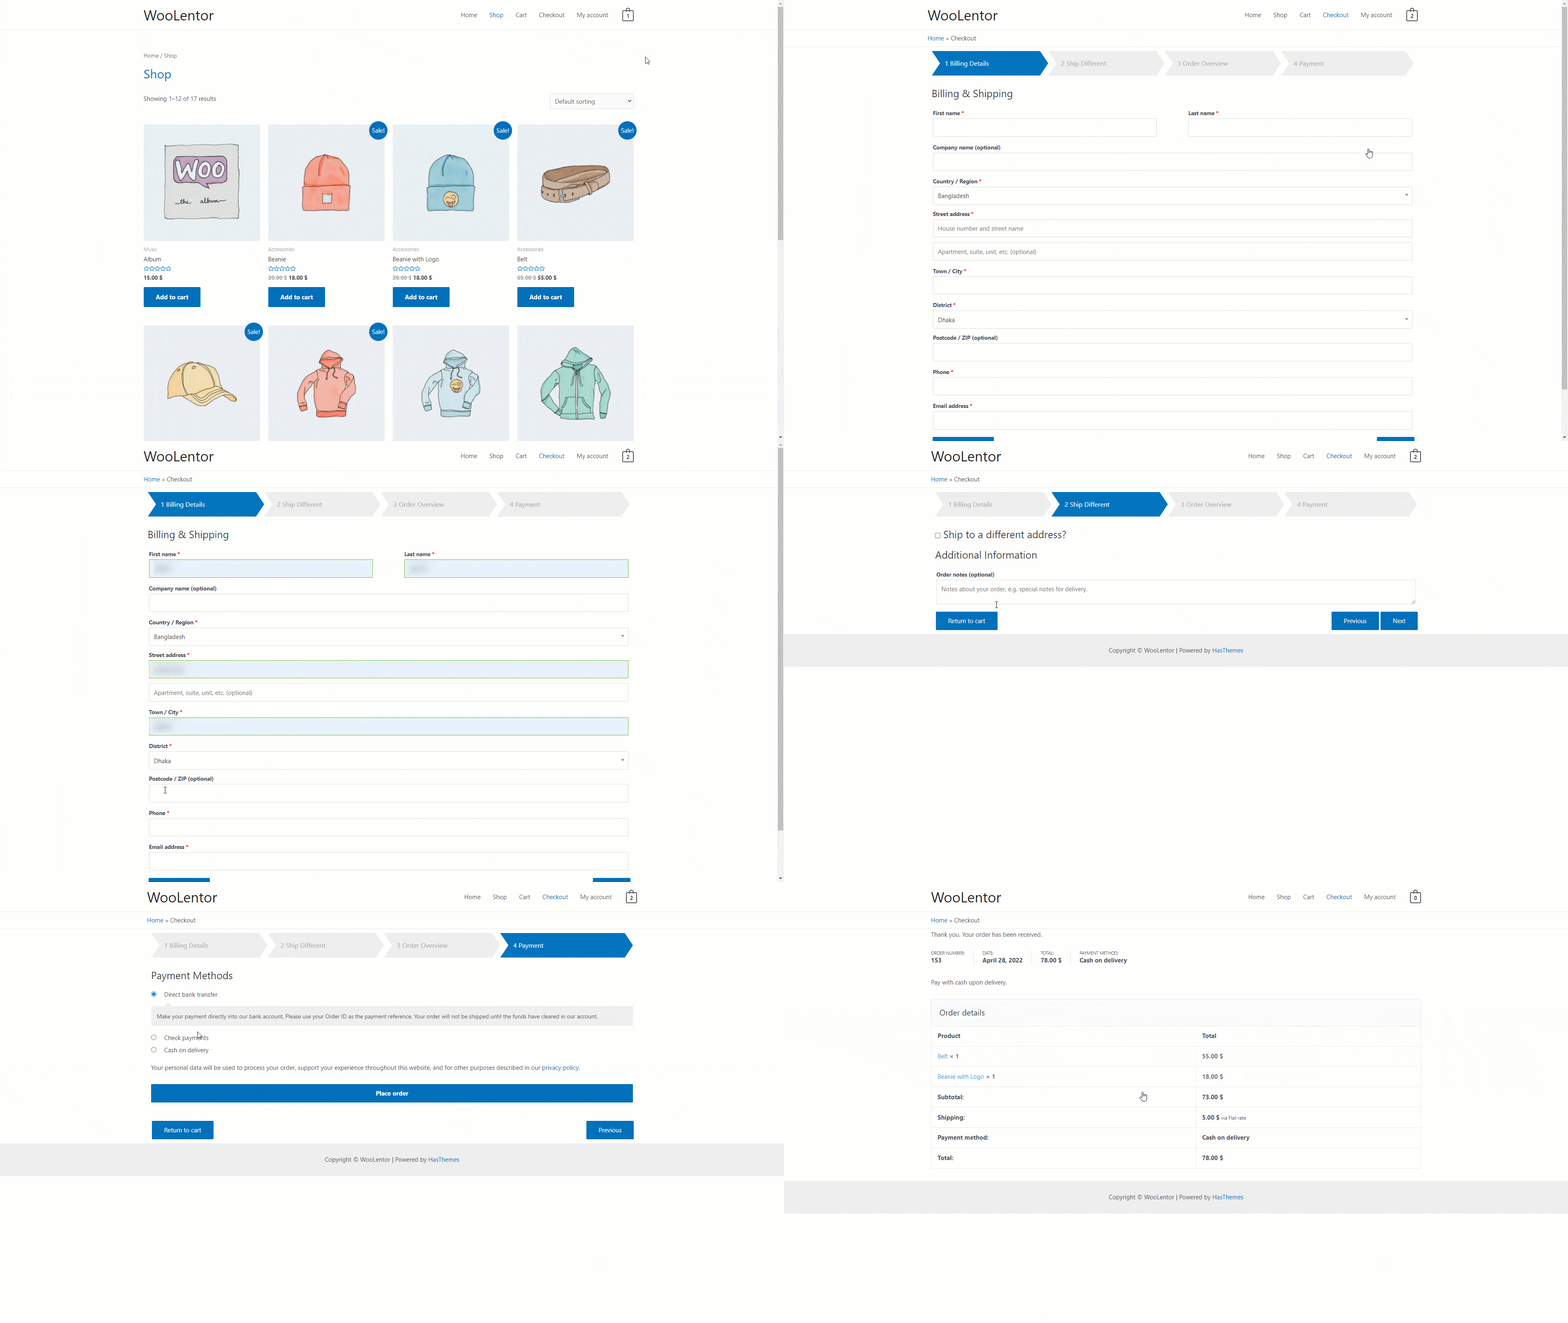
Whether you are an online retailer looking to streamline your checkout process or simply want to enhance the user experience of your WooCommerce site, the WooCommerce Multi Step Checkout module is the perfect solution. With its clean, simple layout and easy-to-follow steps, this WooCommerce checkout functionality provides a simple and straightforward way for customers to complete their purchases. Moreover, thanks to its responsive design, Multistep Checkout for WooCommerce looks great on all devices, from desktops and laptops to tablets and smartphones. So if you want to make it easier and more enjoyable for your customers to check out on your WooCommerce site, look no further than the WooCommerce Multi Step Checkout module!
Advantages of WooCommerce Multi Step Checkout
- Unique and clean checkout page.
- Easy to use this module.
- Better user experience.
How to add WooCommerce Multi Step Checkout
In this article, we will learn how to add WooCommerce Multi Step Checkout to a WordPress site.
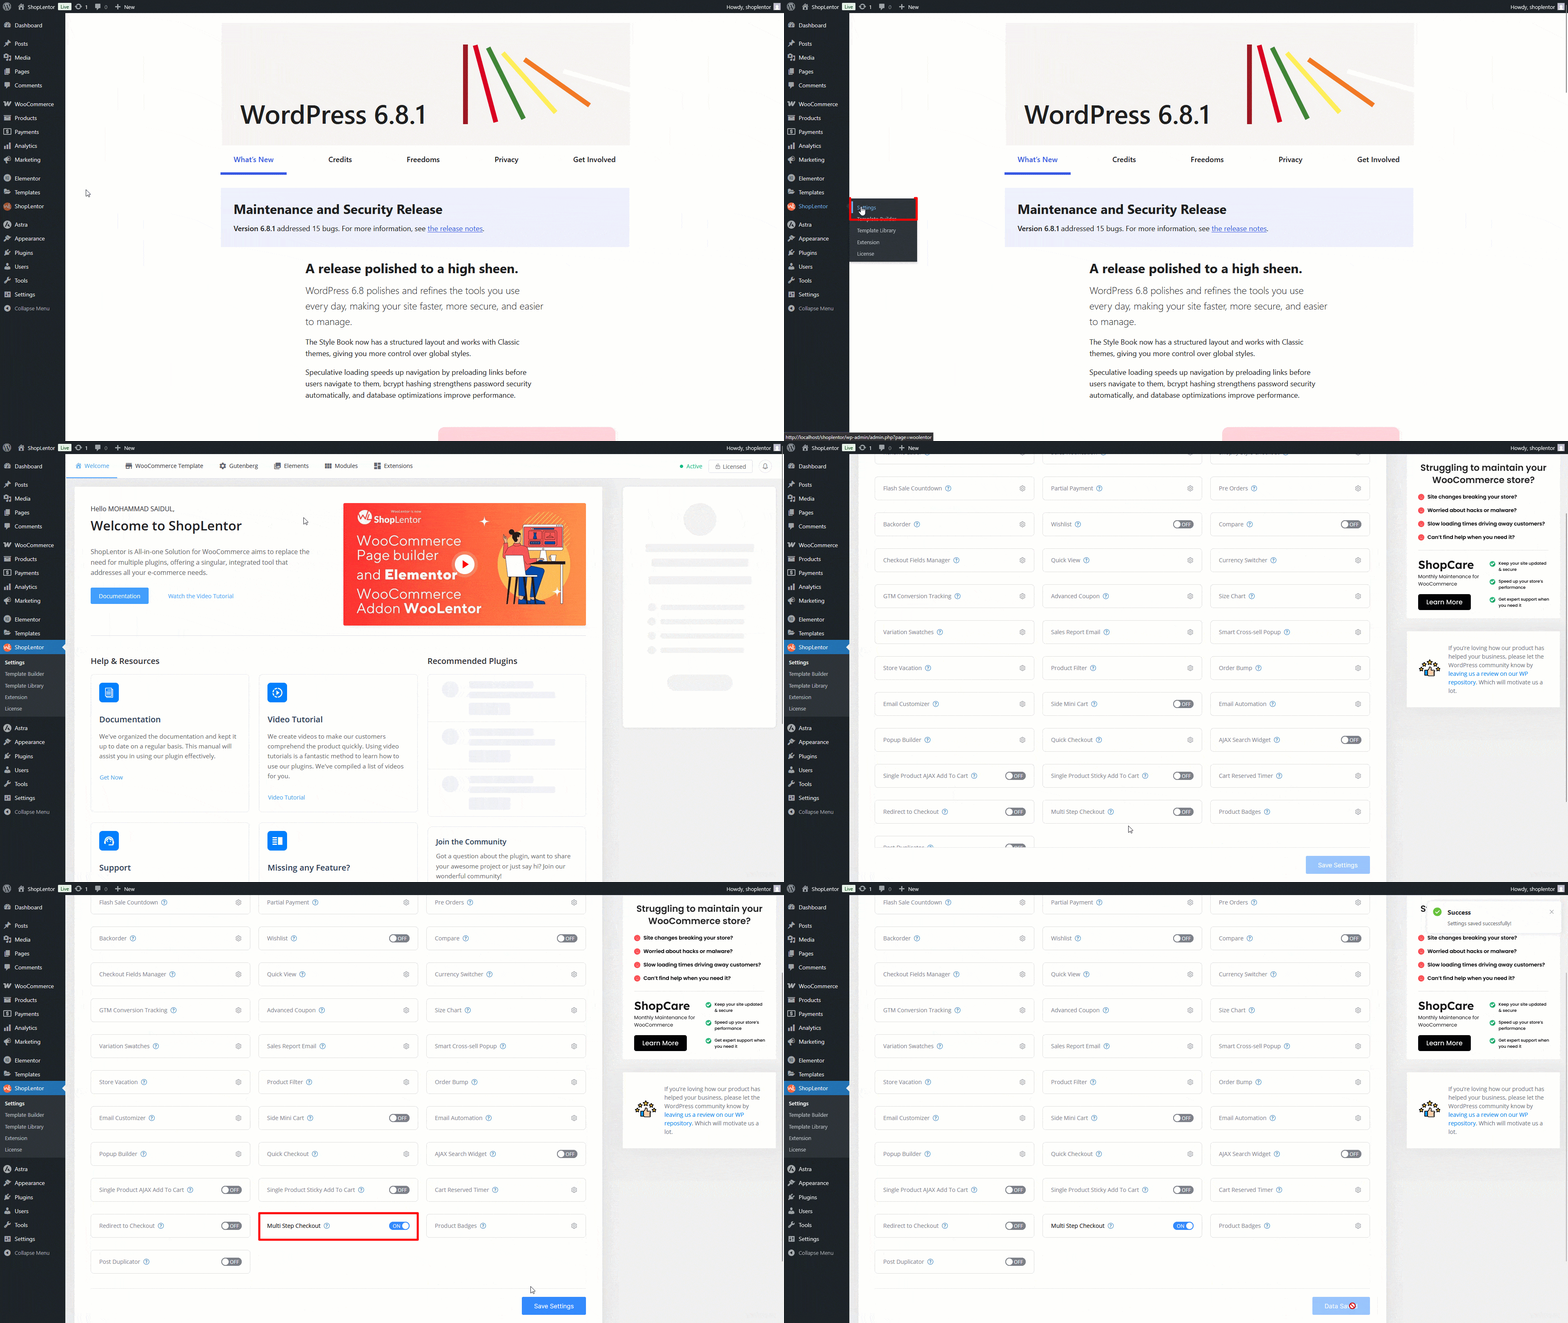
Step 1.1: Enable the Multi-Step checkout Module.
If you want to use this module then you need to go to your WordPress Dashboard > WooLentor > Settings > Modules > Multi Step Checkout
Step 1.2: Multi-Step Checkout Template Builder
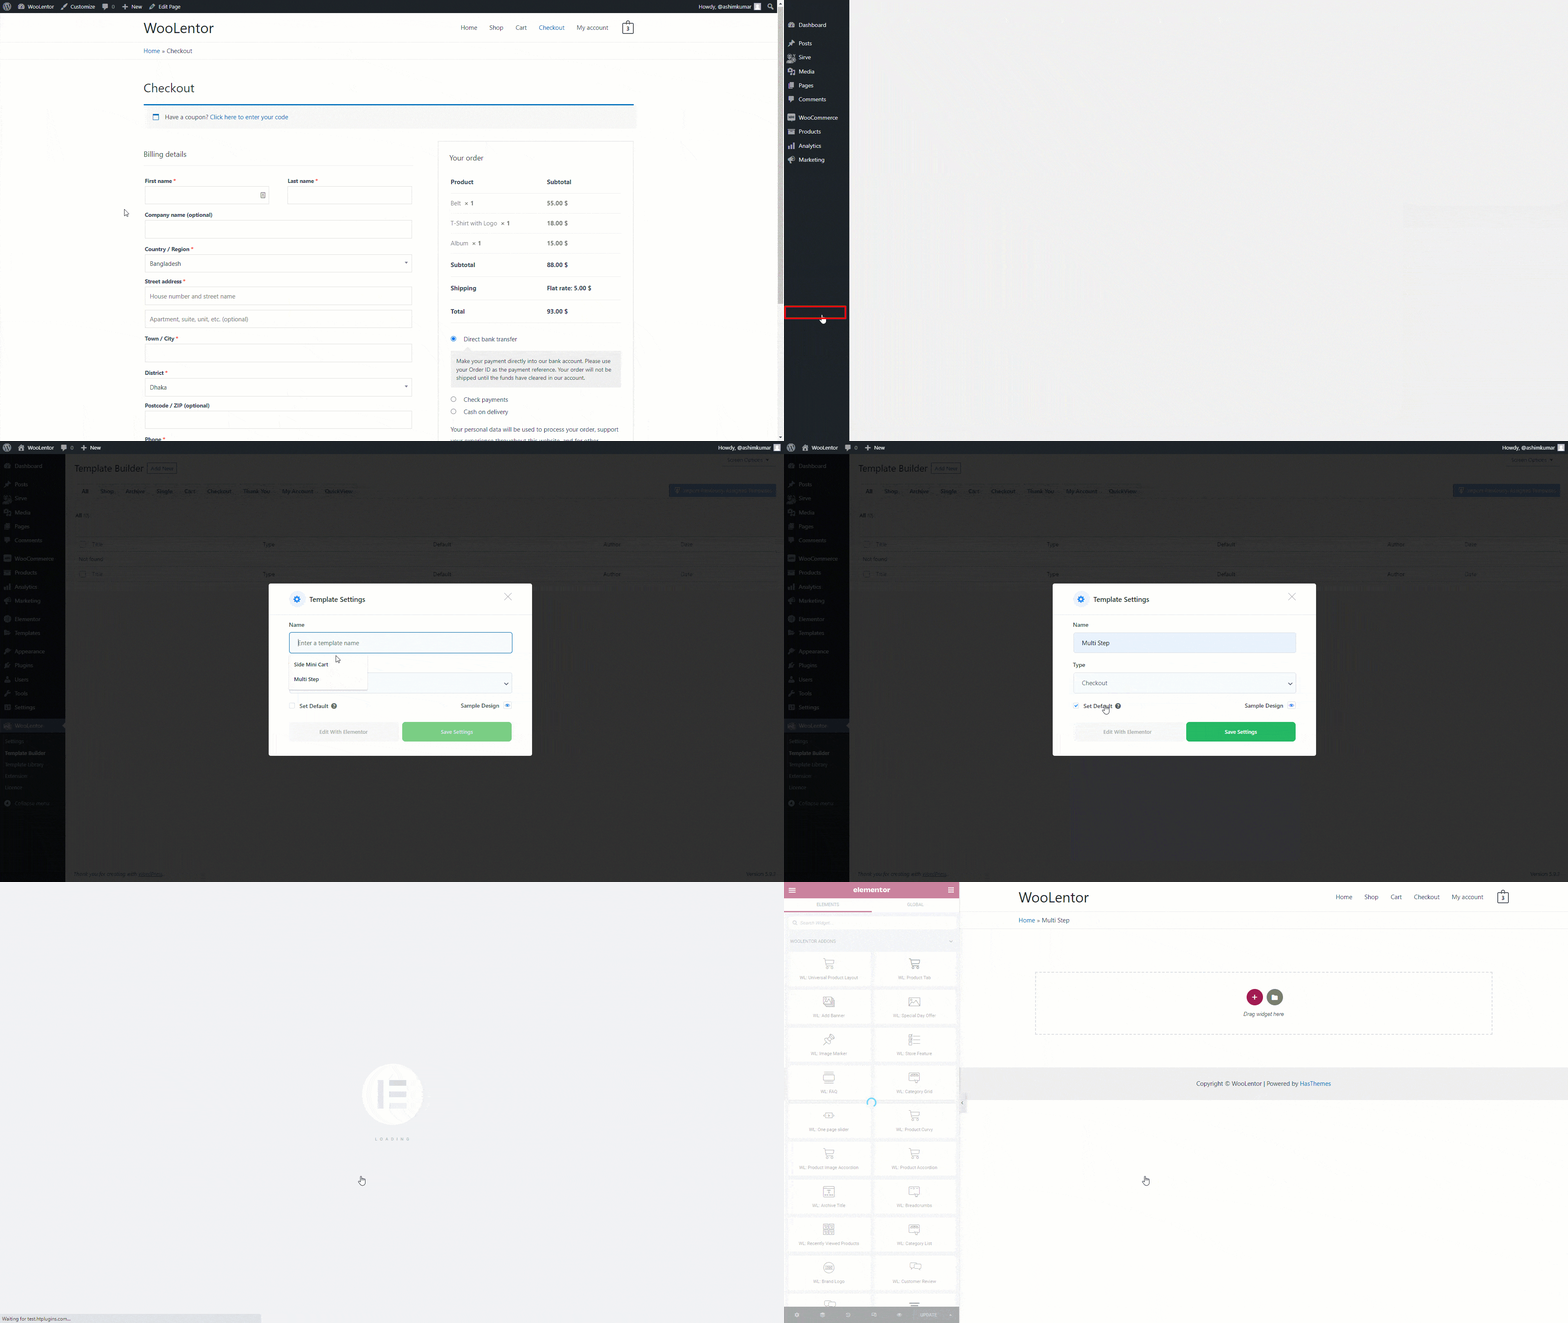
Back to Template Builder under WooLentor Menu. Add new Template > Set the Template Name > Select the template type “Checkout” > Check Set Default > Save Settings. Now click the Edit With Element Button.
Step 1.3: Drag WL: Multi-Step Checkout widget
Use the widget “WL: Multi-Step Checkout” for the Multi-Step checkout page.
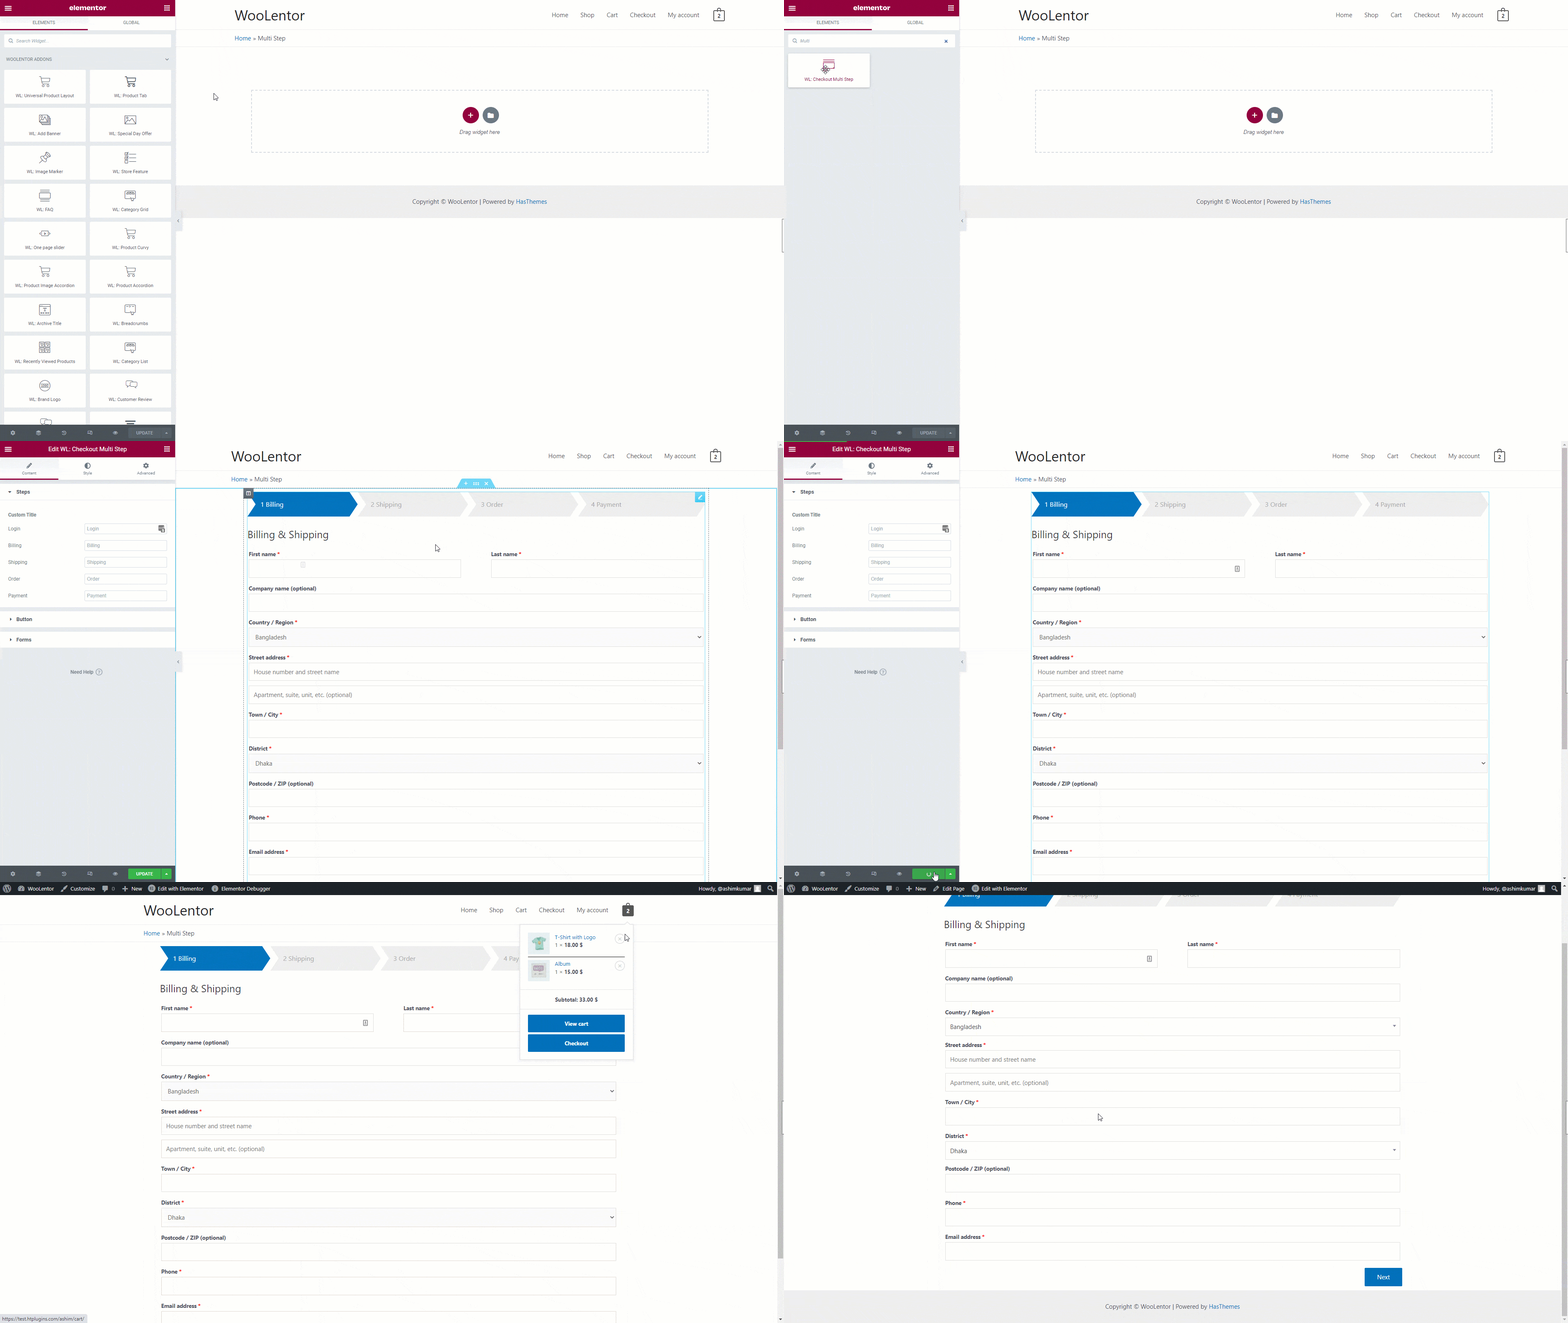
WL: Multi Step Checkout addons usage.
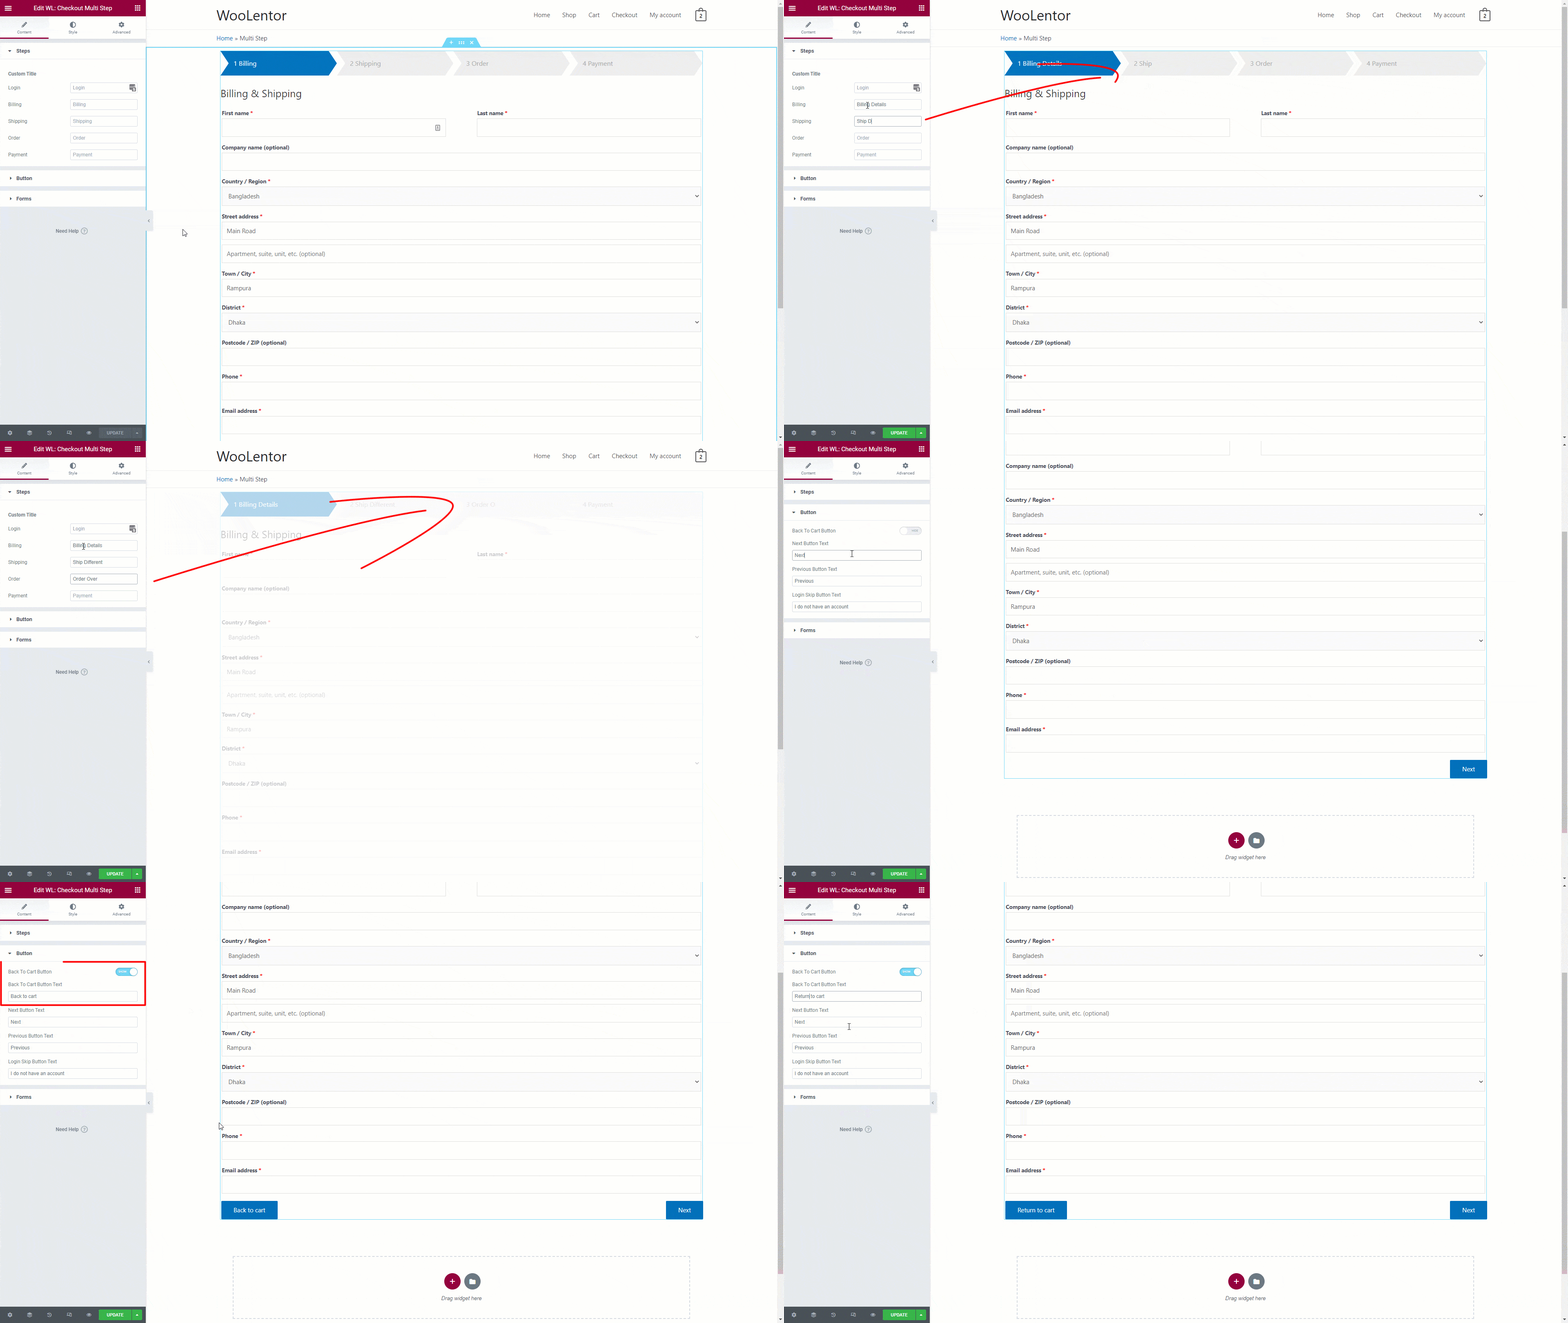
If you use this widget, the checkout page has some default text that you can modify to your liking.
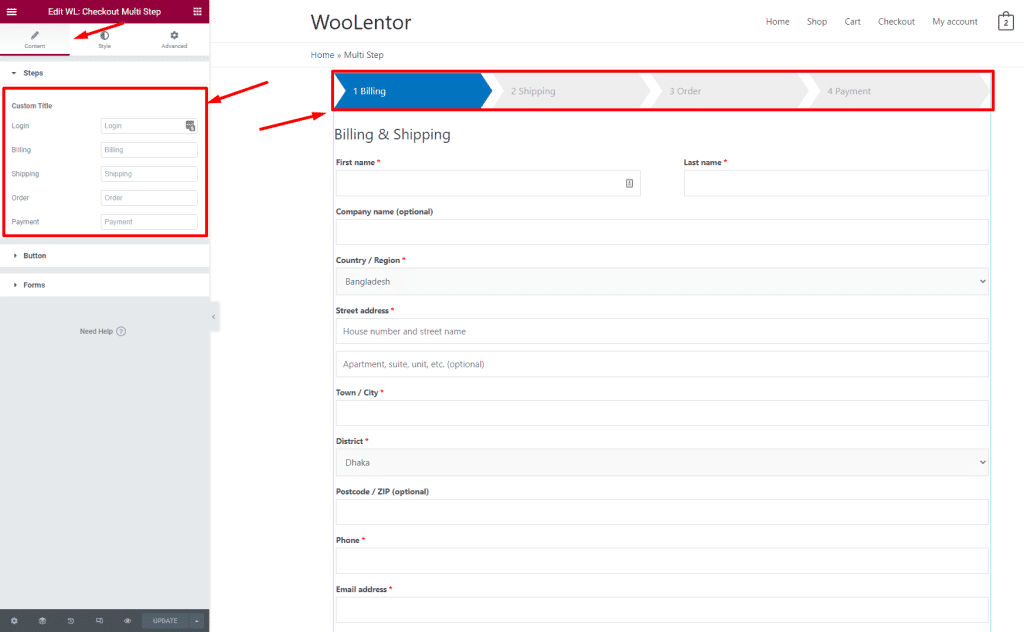
Step 2.1: Step label options.
If you want to change the step label then you can do it. So first of all please go to the WL: Multi-Step Checkout addon > Content > Steps. Here you can change the Step label name.
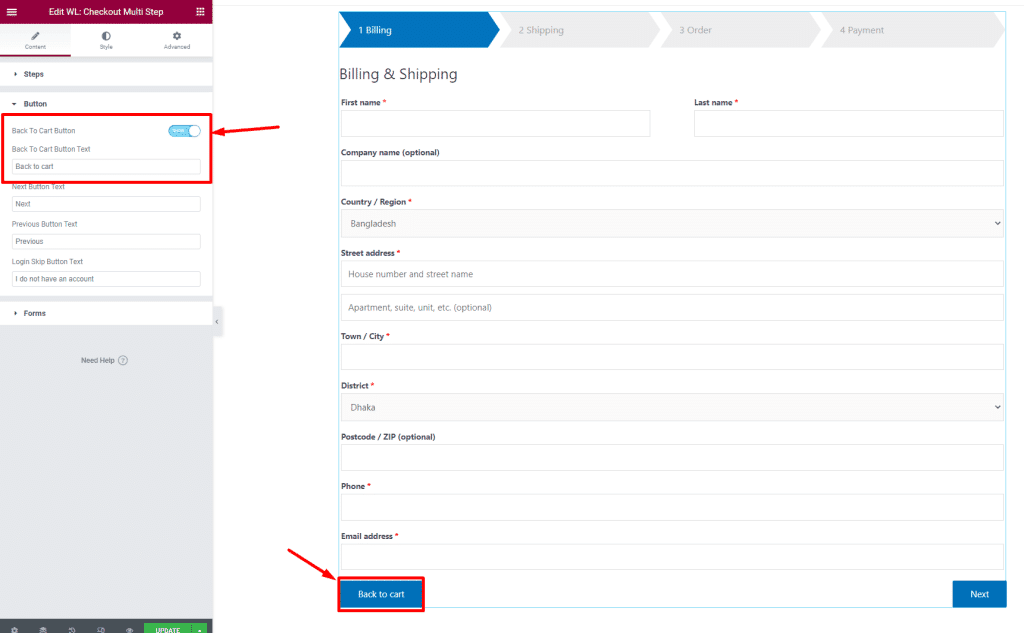
Step 2.2: Back To Cart Button.
For button text changes go to the “Button” option. Here is the first option name “Back To Cart Button“, if you enable this option then you can see a button appear on the checkout page’s left side called “Back To Cart”. You can also change the button name and style.
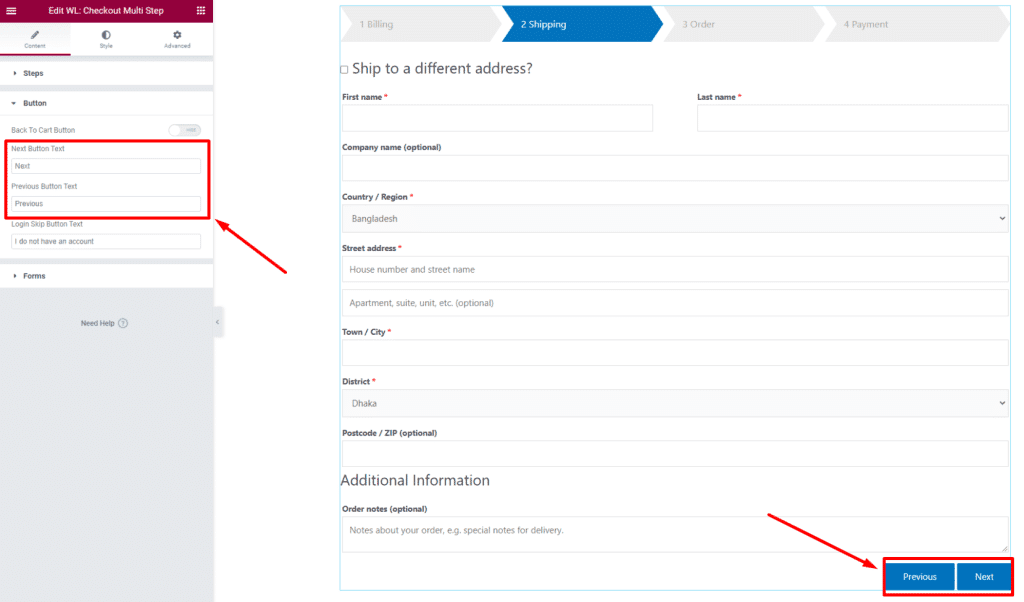
Step 2.3: Next-Previous Button.
If you want to change the next-previous button then you can change the text and also the button style
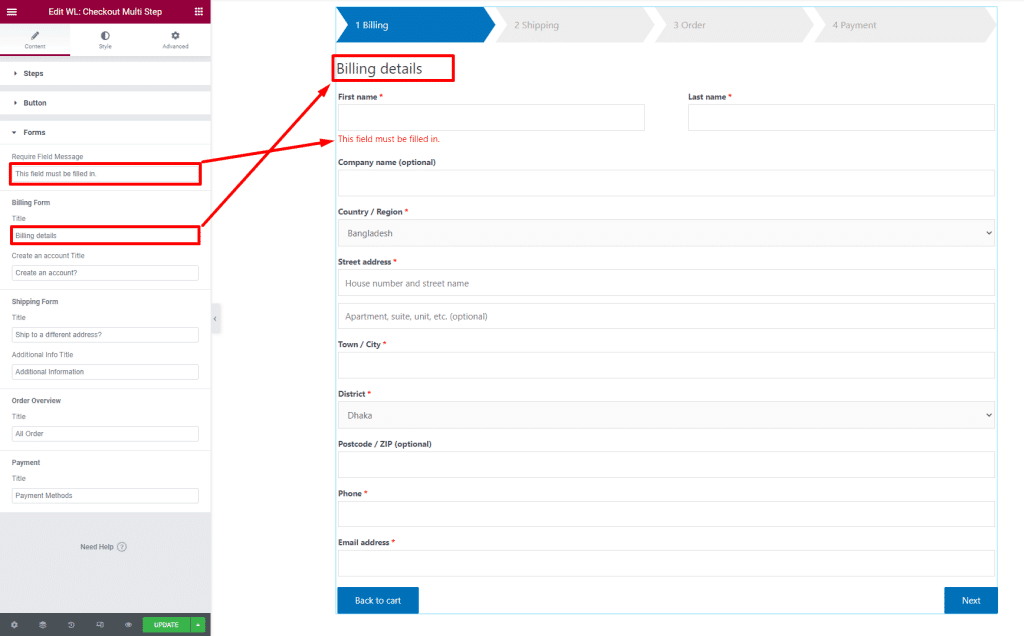
Step 2.4: Shipping Form Title.
If you want to change the Required Field Message and Billing Form title then you can change it.
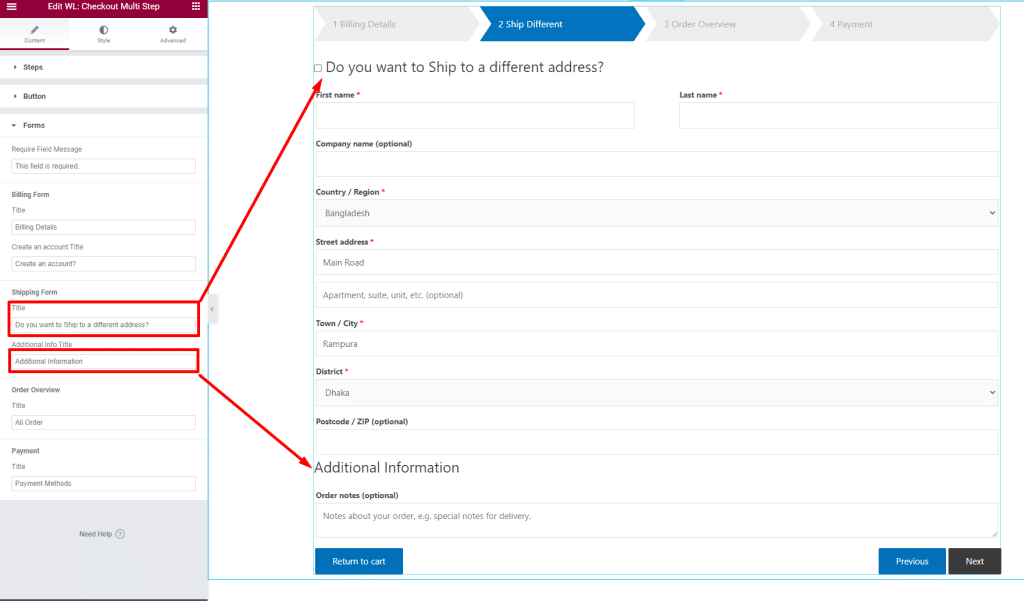
Step 2.5: Shipping Form Titles.
If you want to change the Shipping Form title and Additional Info Title then you can change it.
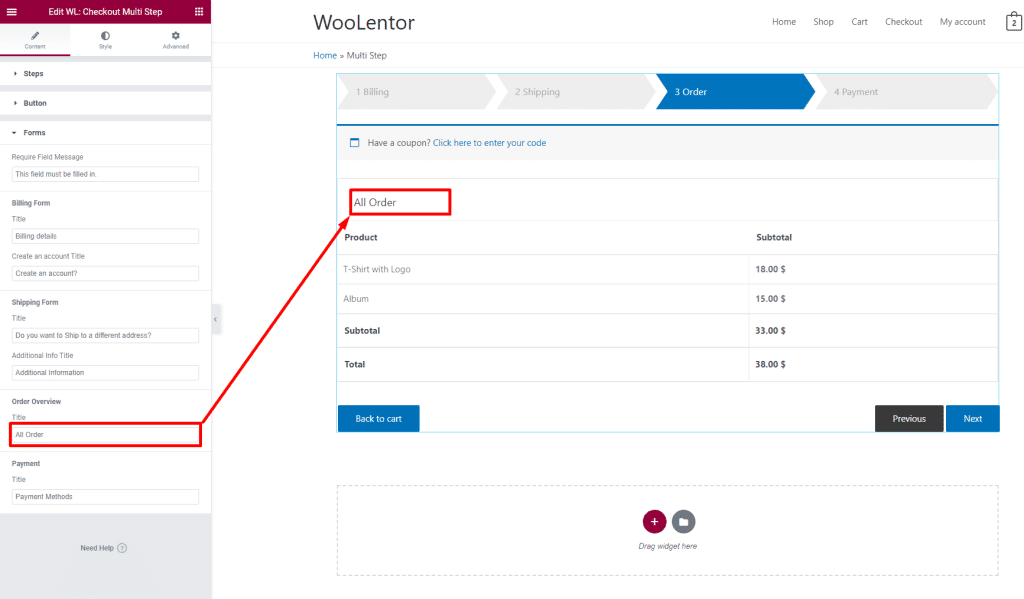
Step 2.6: Order Overview Title.
If you need to change the title of the Order Overview, you can change it
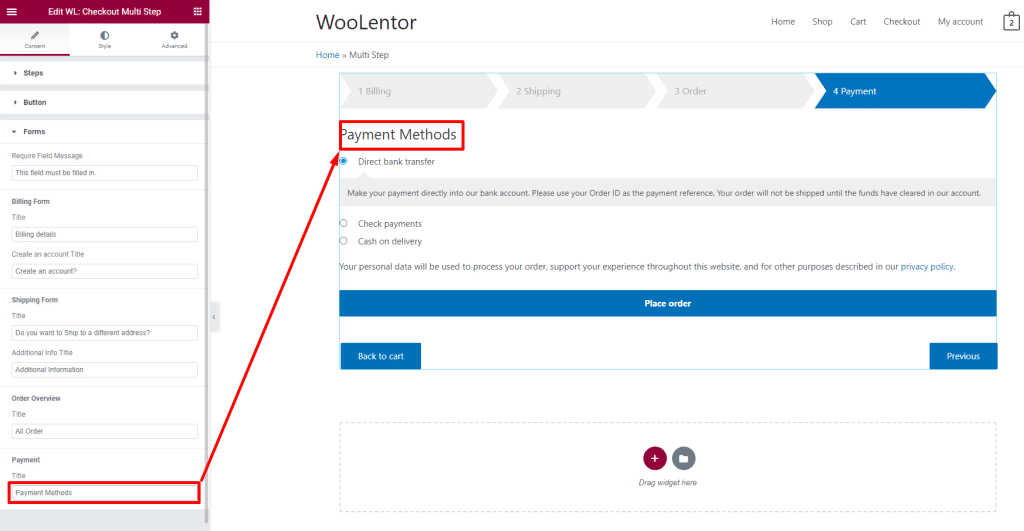
Step 2.6: Payment Title.
If you need to change the title of the Order Overview, you can change it
Let see how it’s works
