The “My Account Dashboard†Block is designed to display the My Account Page Template on WooCommerce. It’s a great way to showcase the account dashboard and can be easily customized.
Steps for adding My Account Dashboard
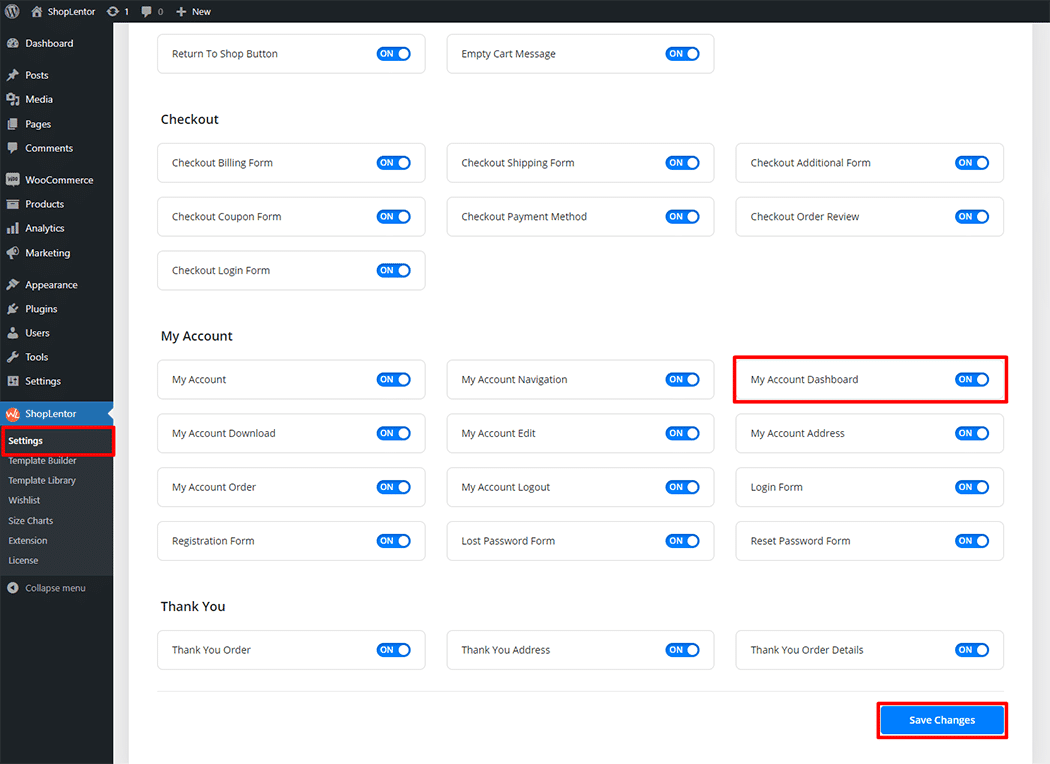
Go to WordPress Dashboard > WooLentor > Settings > Gutenberg. From the list of Gutenberg, turn ON the “My Account Dashboard†Block.
Step 1: How to Enable My Account Dashboard?
Go to Dashboard > WooLentor > Settings > Gutenberg. From the list of Gutenberg, turn ON the My Account Dashboard Block.
Step 2: How to use the My Account Dashboard Block?
You need to use the My Account Template to add a “My Account Dashboard†Block.
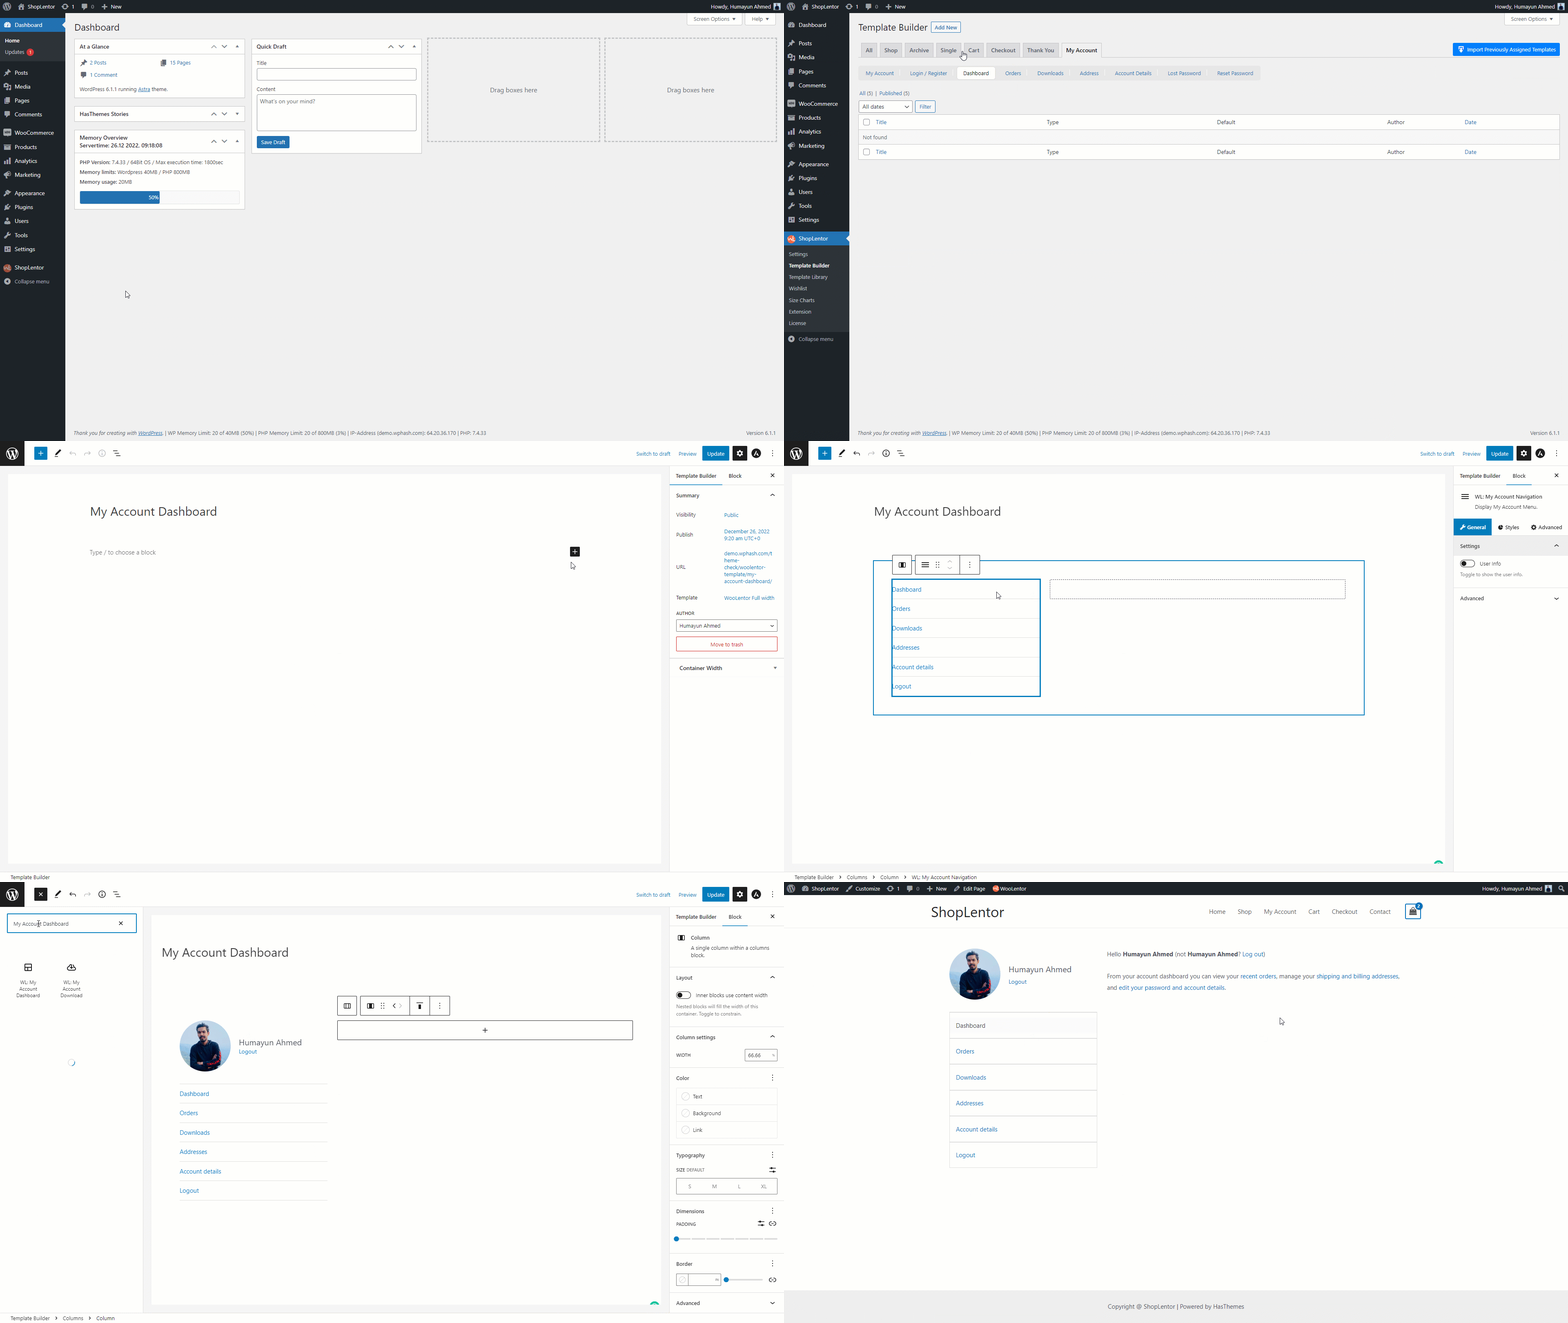
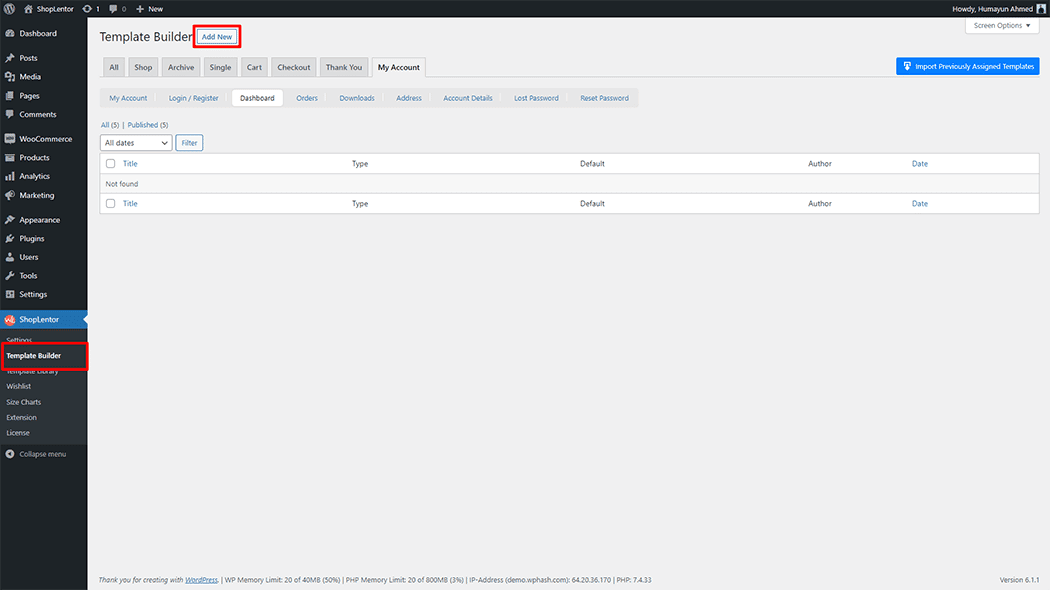
Go to Dashboard > WooLentor > Template Builder. Click the “Add New†button on the top right beside the text “Template Builder†to create a My Account page Template
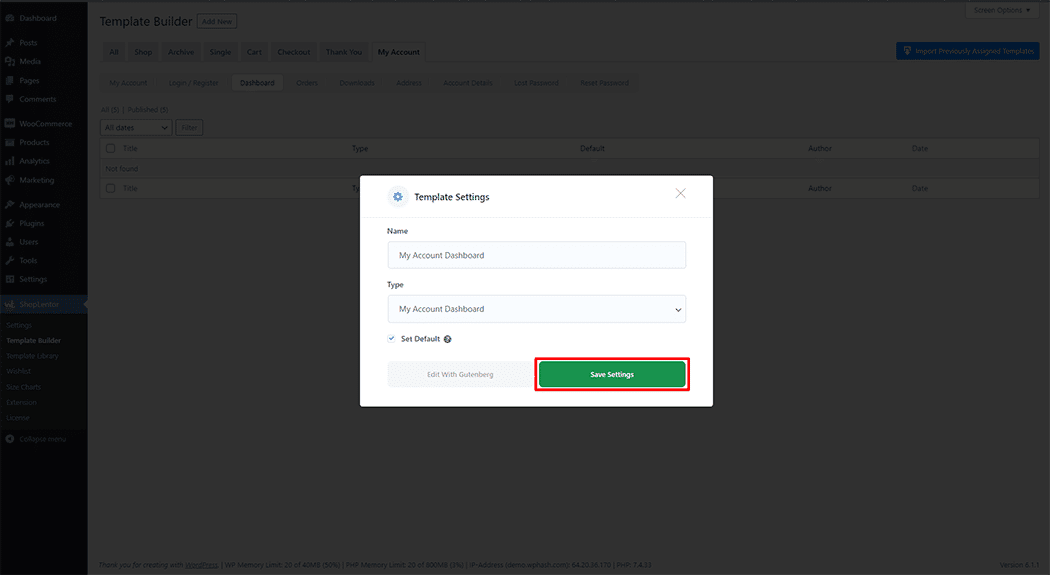
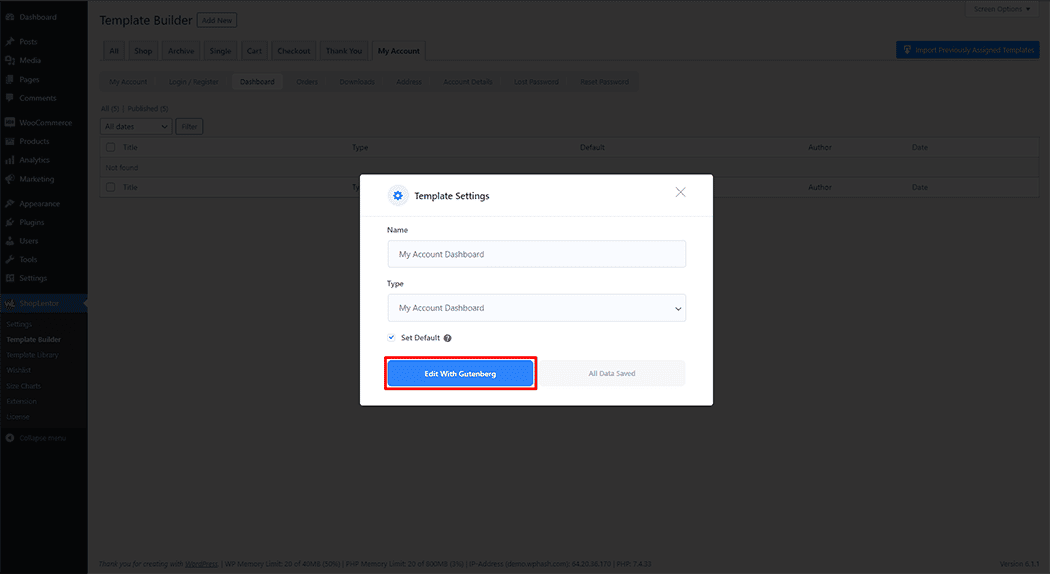
First, set the name of your Template and select it in the popup box for template settings. Select “My Account Dashboard†from the dropdown type list. check the Set Default and save the settings by clicking the Save Settings button.
To add the My Account Dashboard Block, click the “Edit with Gutenberg“ button to edit the My Account Dashboard Template
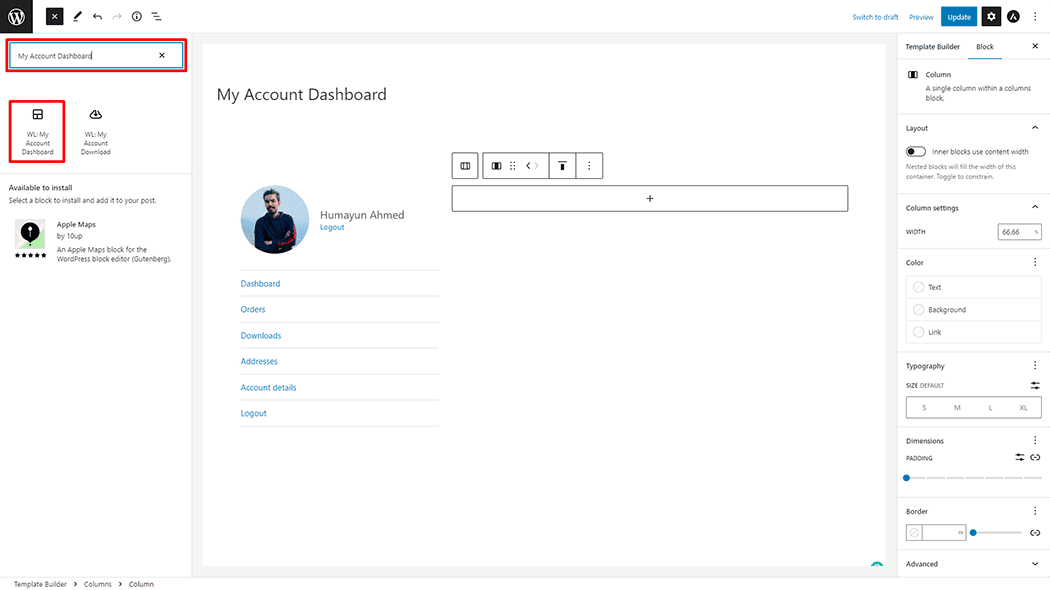
To add a My Account Dashboard Block, search by “My Account Dashboard†and use the Block that has the “WL Badgeâ€.
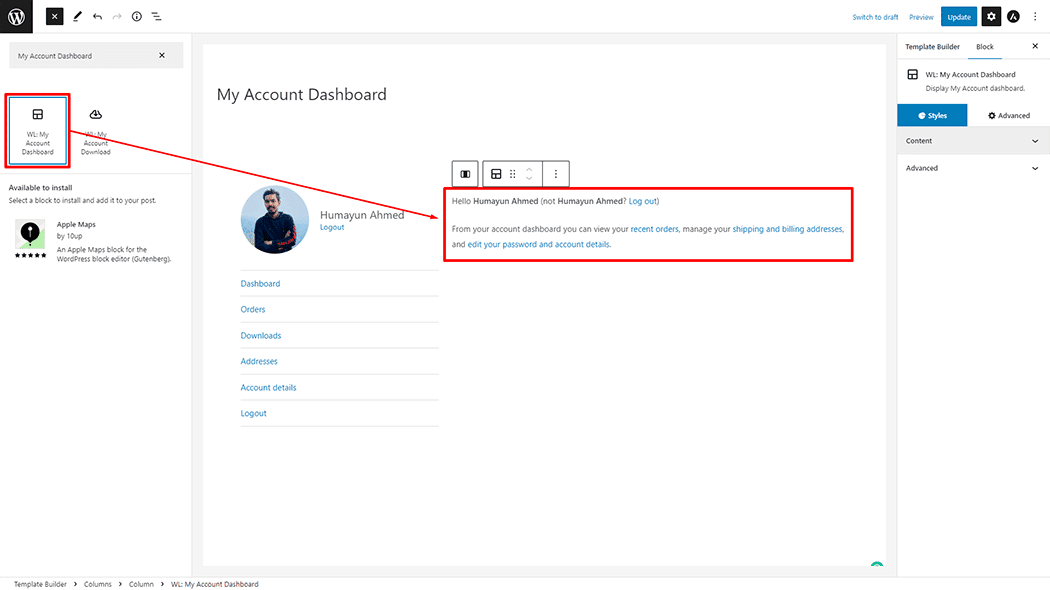
Drag and drop the WooLentor “My Account Dashboard†Block onto the My Account Template.
Step 3: How to customize the My Account Dashboard Block?
How to customize the My Account Dashboard Style
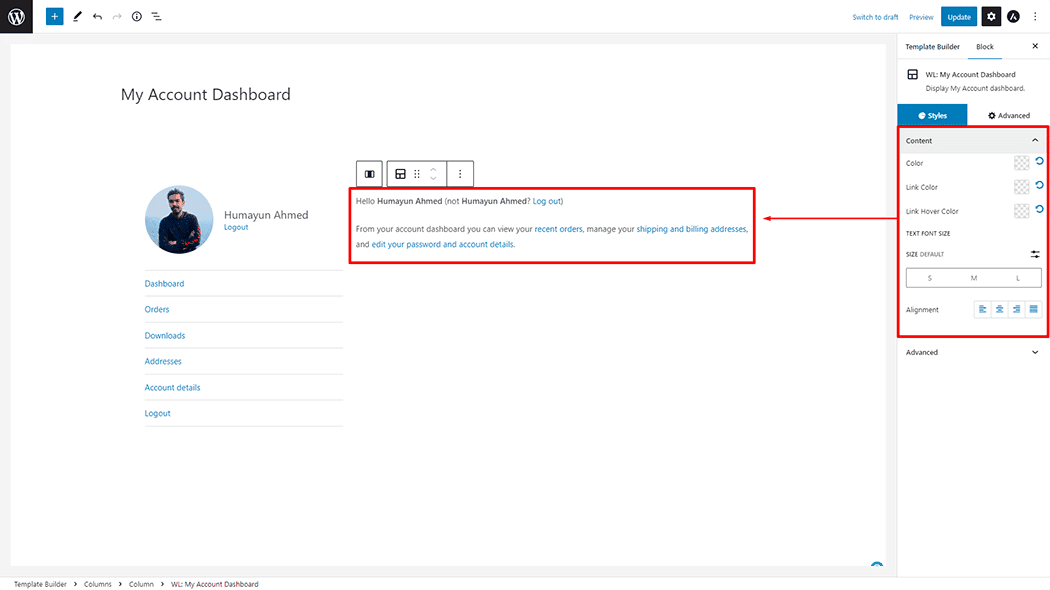
User Info: You can change the Color, Link Color, Link Hover Color, Text font Size, Border Type, Border Radius, and Alignment style My Account Dashboard as needed.
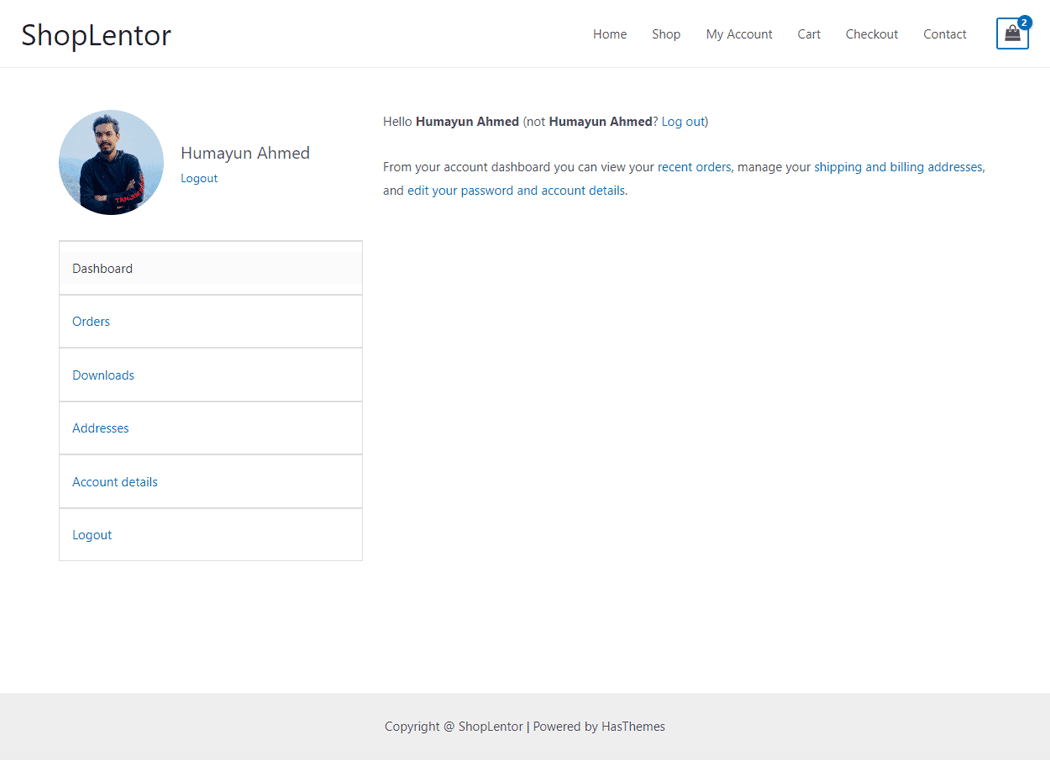
Step 4: Now see the preview
Visit the My Account Dashboard Template to Preview.
Do you want to use the My Account Dashboard Widget for Elementor? Click Here