The “Product Cart Table†Block is useful if you want to present your items in a professional-looking table style on the cart page. It lets you display your products on the cart page beautifully with all the convenient customization options available.
Why Product Cart Table is used?
On the Cart Page Template, the “Product Cart Table†Block is used to view the Cart Page Template on WooCommerce. The “Product Cart Table†Block is mainly designed for the Cart Page Template.
Steps of adding Product Cart Table
Go to WordPress Dashboard > WooLentor > Settings > Gutenberg. From the list of Gutenberg, turn ON the “Product Cart Table†Block.
- You need to use the “Product Cart Table†Block to view your Cart Page Template.
- To add a Product Cart Table Block, Drag and drop the “WL: Cart Table†Block onto the Cart Page Template.
Step 1: How to Enable Product Cart Table Block?
Go to Dashboard > WooLentor > Settings > Gutenberg. From the list of Gutenberg, turn ON the Product Cart Table Block.
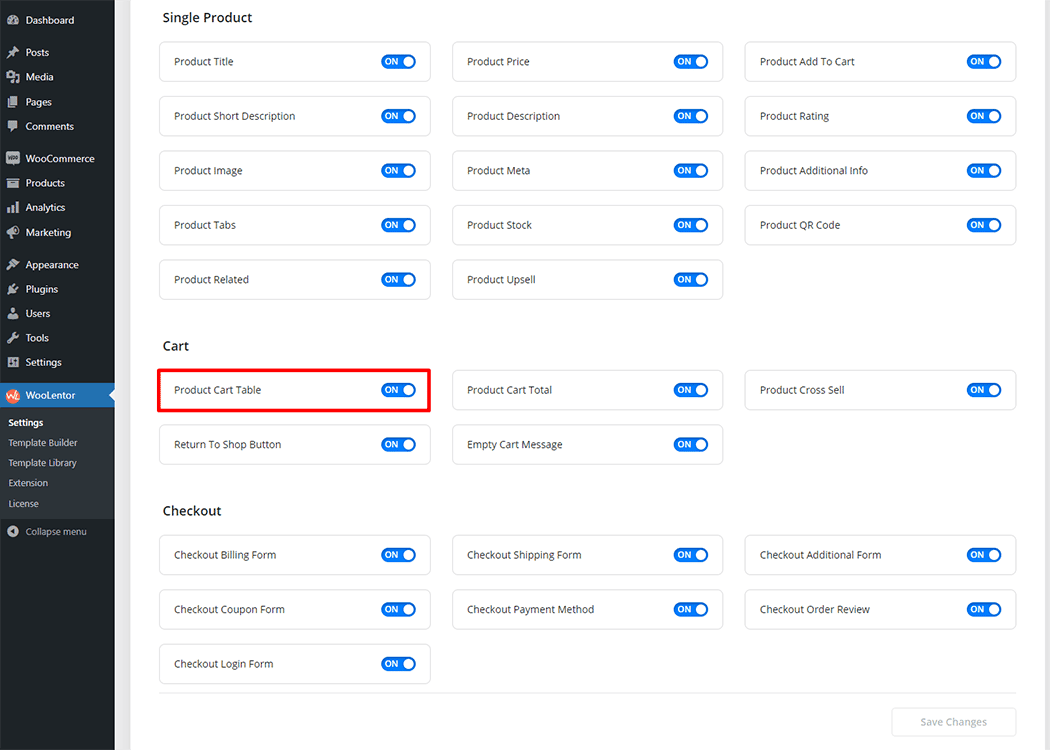
Step 2: How to use the Product Cart Table Block?
Check out the process to easily understand how to add a “Product Cart Table†Block see the GIF image or follow the manual steps below.
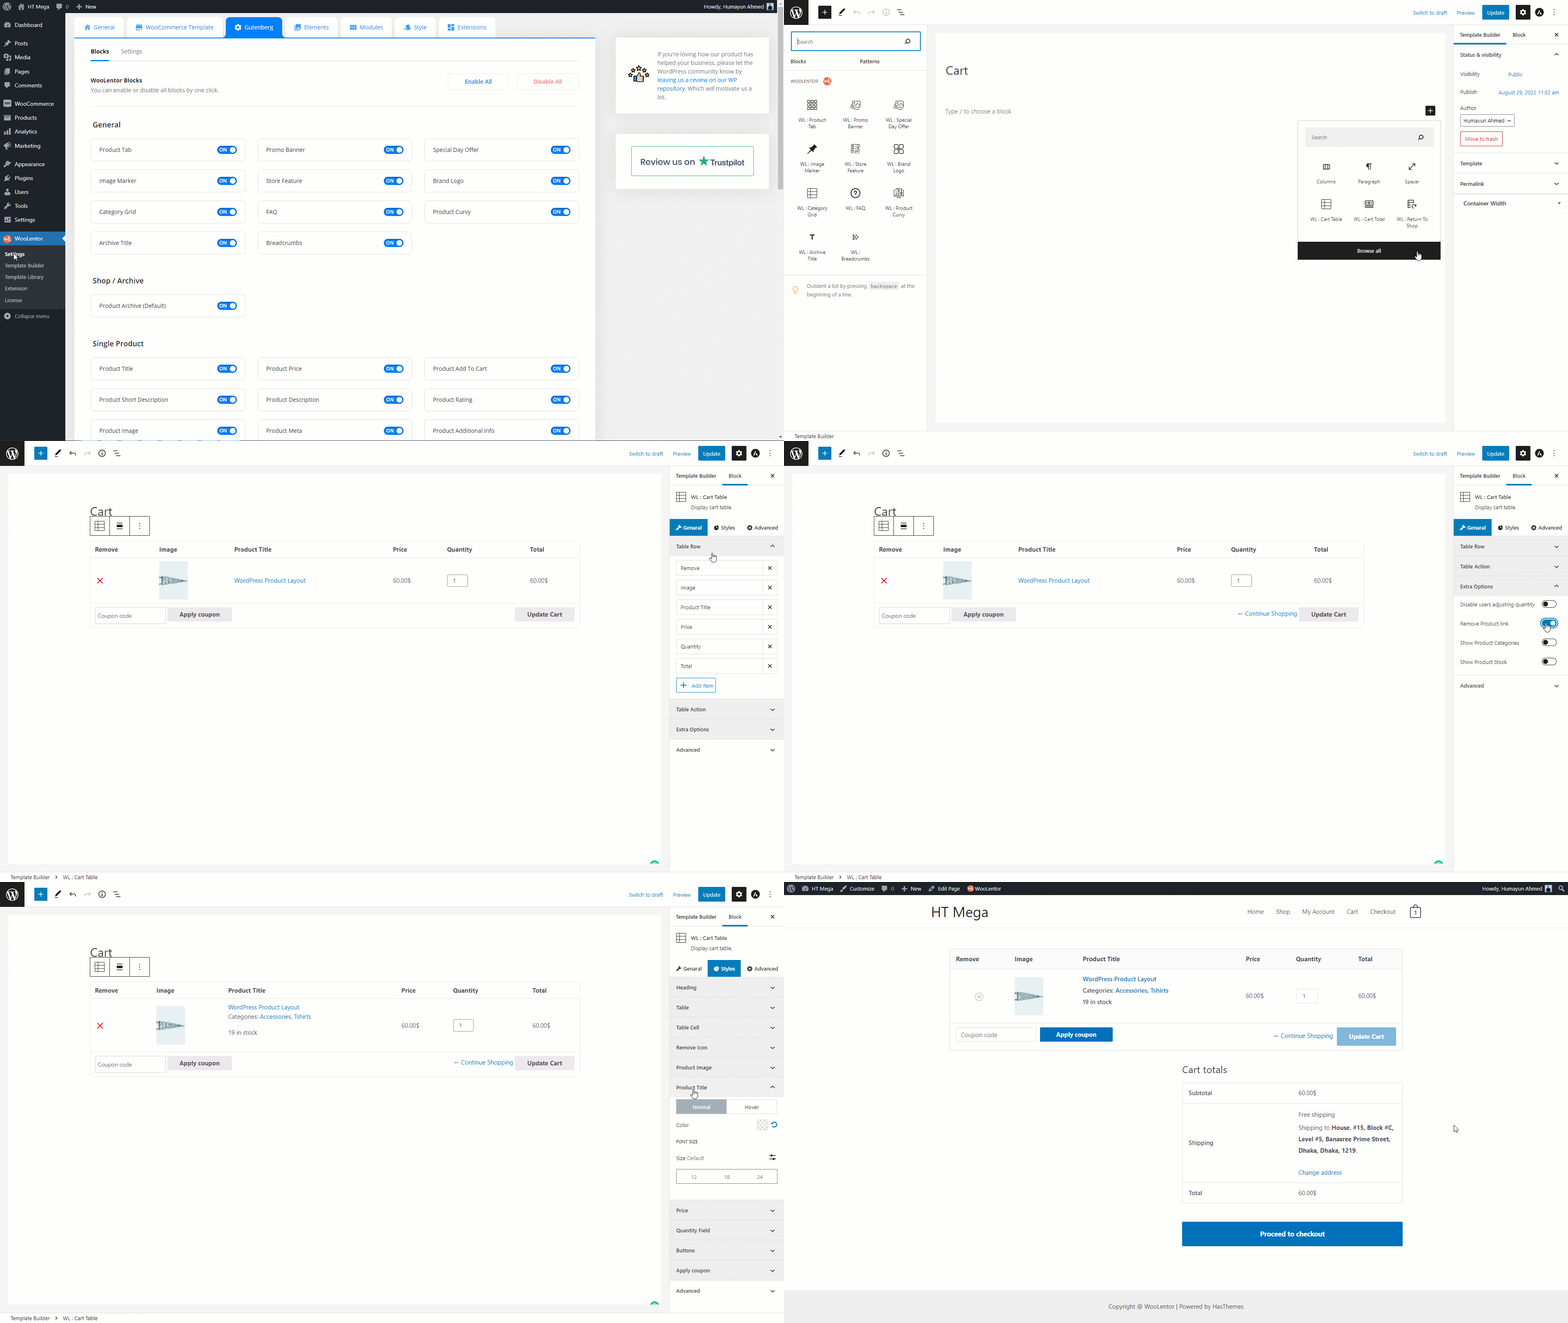
How to create the Cart Page Template
Go to Dashboard > WooLentor > Template Builder. Click the “Add New†button on the top right beside the text “Template Builder†to create a Cart Page Template

First, set the name of your Template and select it in the popup box for template settings. Select “Cart†from the dropdown type list. check the Set Default and save the settings by clicking the Save Settings button.

To add the Product Cart Table Block, click the “Edit with Gutenberg†button to edit the Cart Page Template

To add the Product Cart Table Block, search by “WL: Cart Table†and use the Block that has the “WL Badgeâ€.
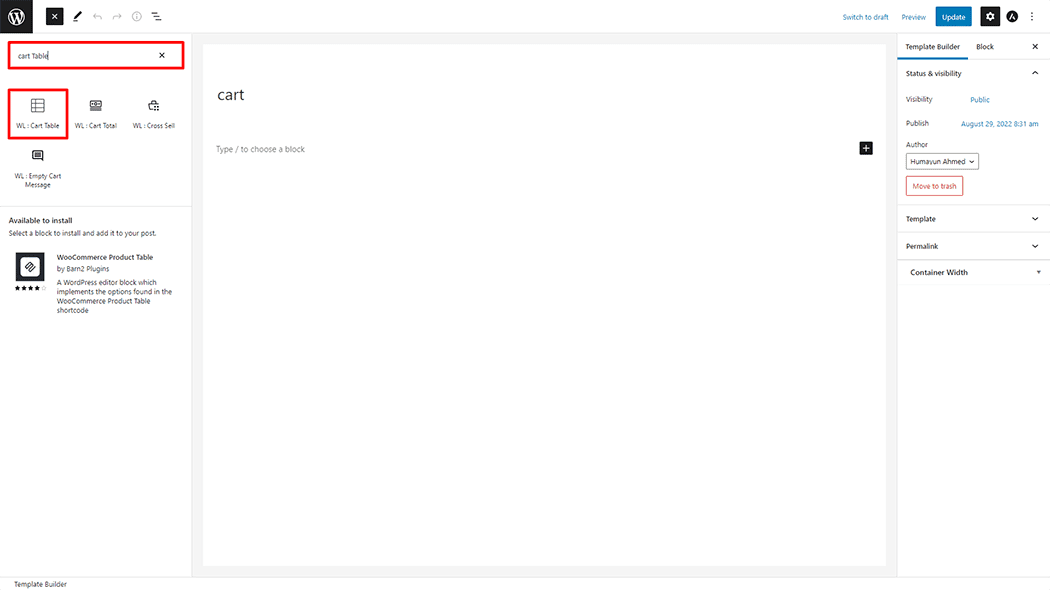
Drag and drop the WooLentor Cart Table Block onto the Cart Page Template.
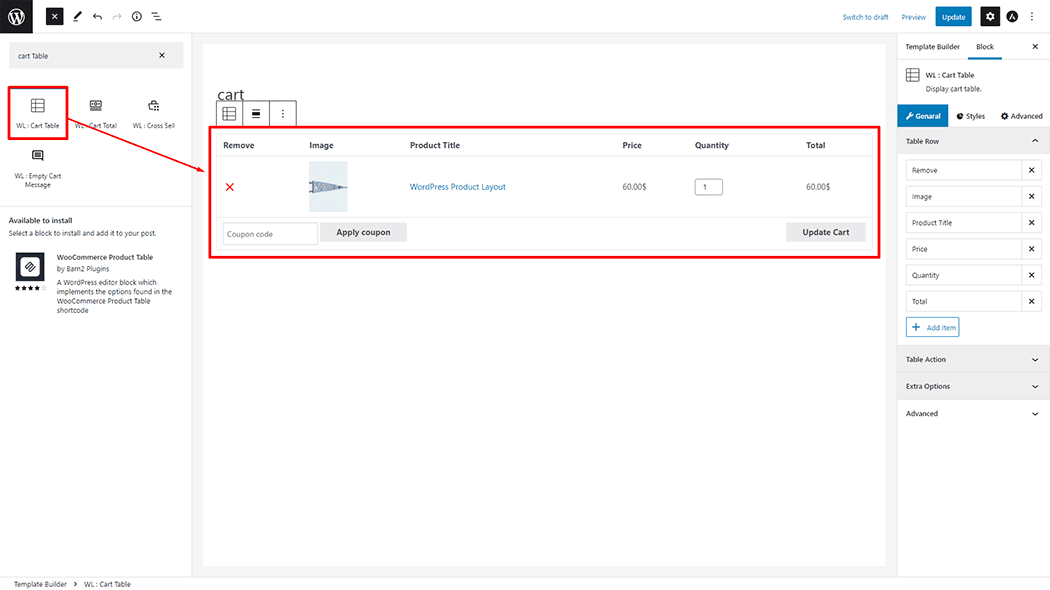
Step 3: How to customize the Product Cart Table Block?
Table Row: You can easily add or remove any table row, and also can be changed the Table Item type, heading title, and column width.
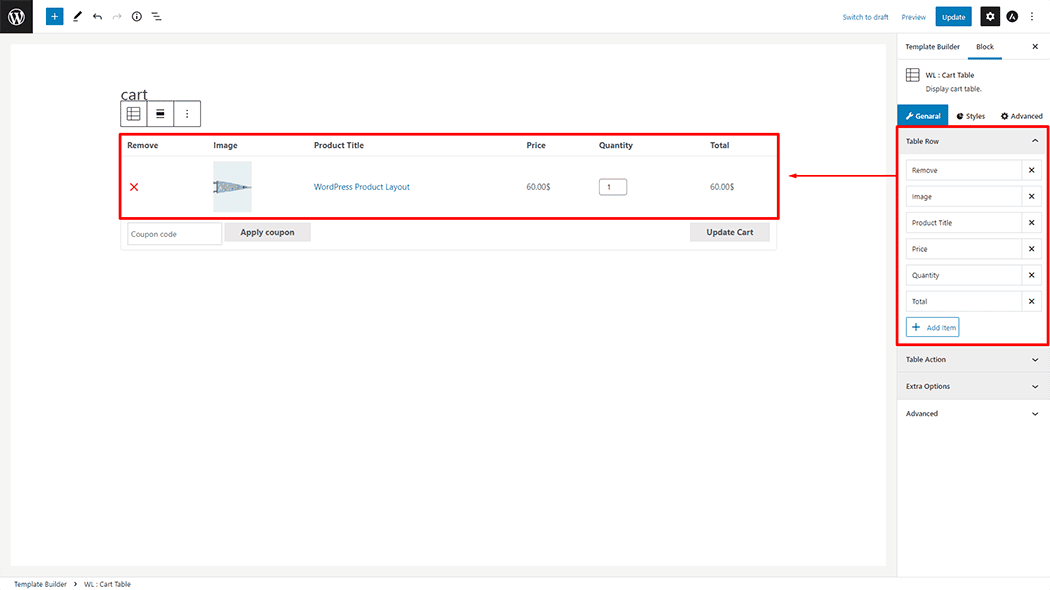
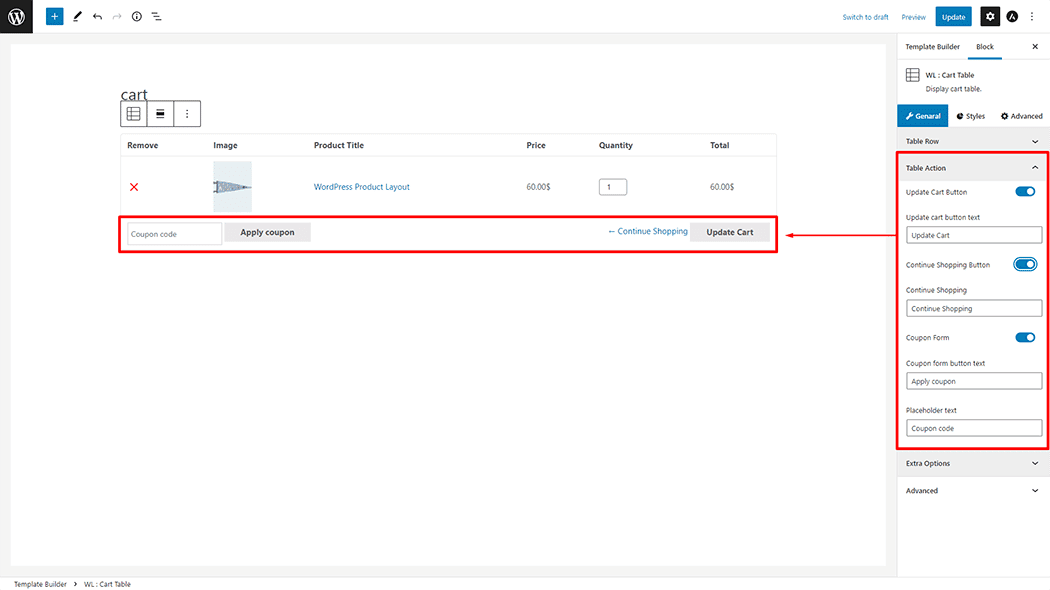
Table Action: You can easily On/Off and edit the “Update Cartâ€, “Continue Shoppingâ€, and “Coupon Form†buttons.
Extra Options: You can easily On/Off the Disable users by adjusting the quantity, Remove Product links, Show Product Categories, and Show Product Categories.

How to customize the Product Cart Table style
Heading: You can change the Heading Color, Font Size, Border Type, Padding, Alignment, and Background Color style as you need
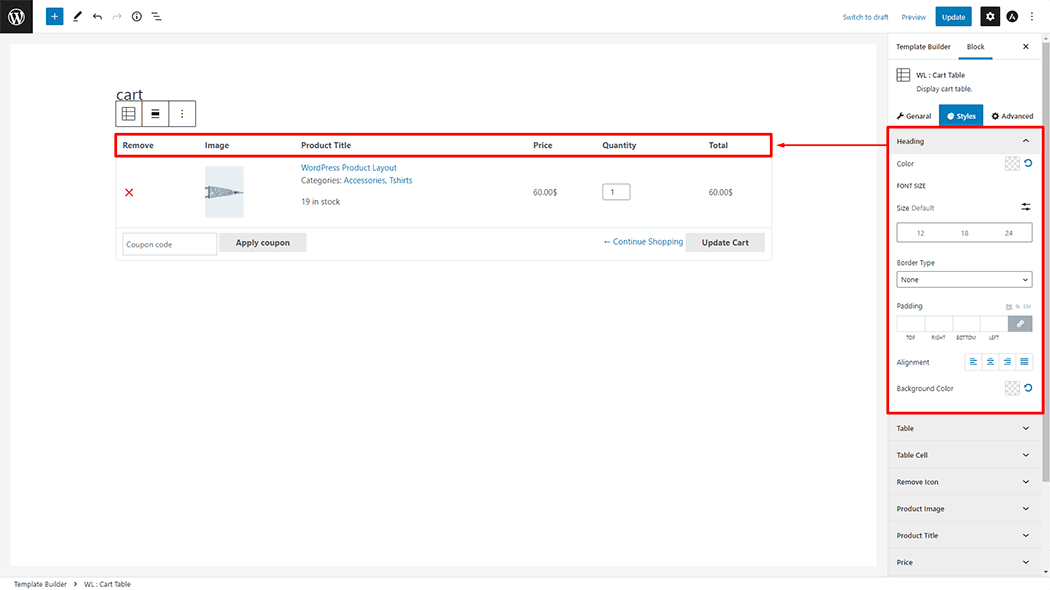
Table: You can change the Table Border Type, Border Width, Border Color, and Padding style as you need
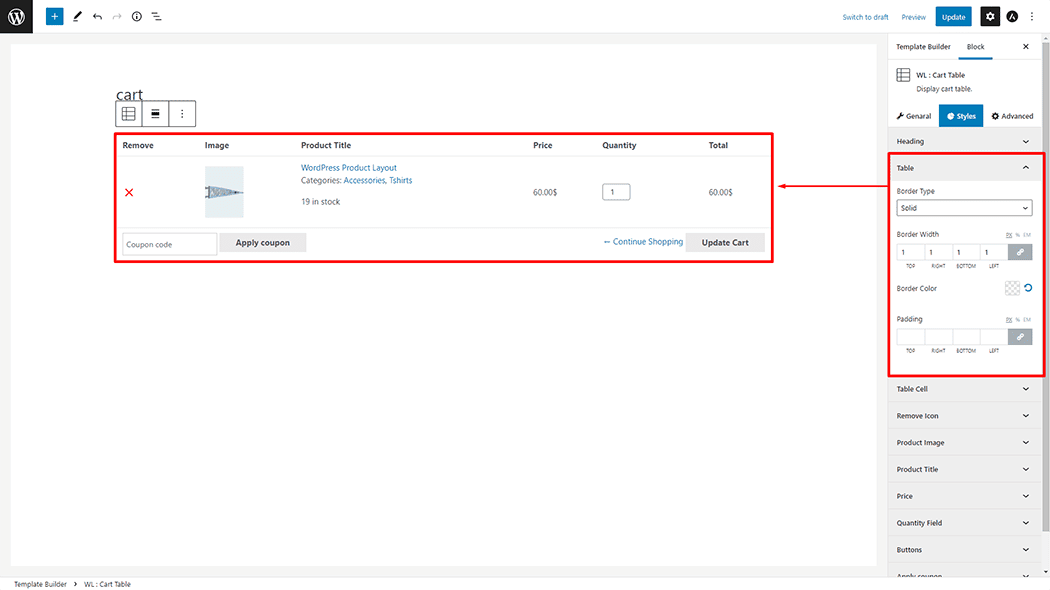
Table Cell: You can change the Table Cell Border Type, Padding, Alignment, and Background Color style as you need
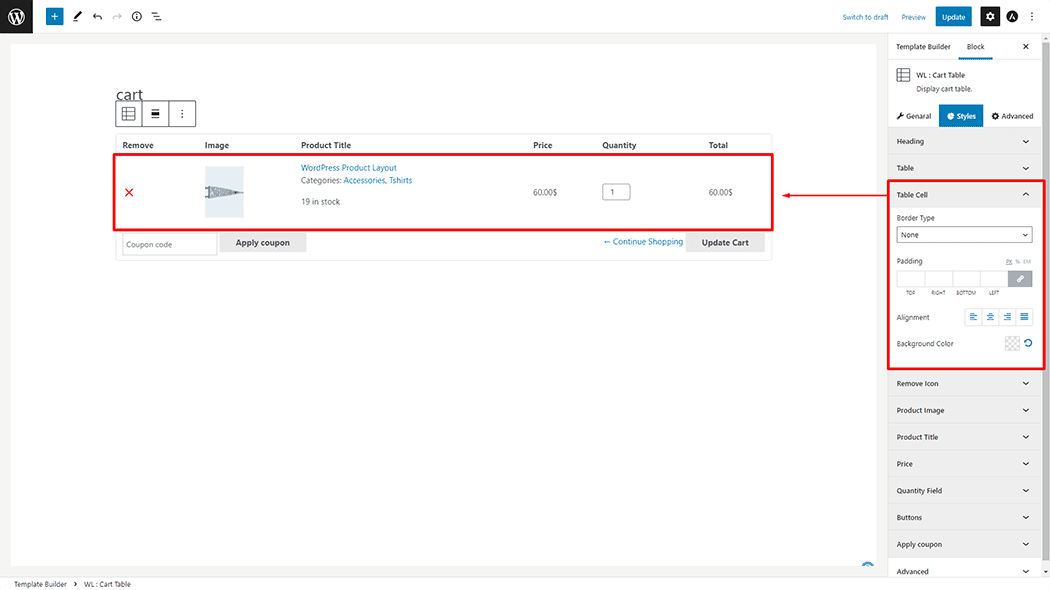
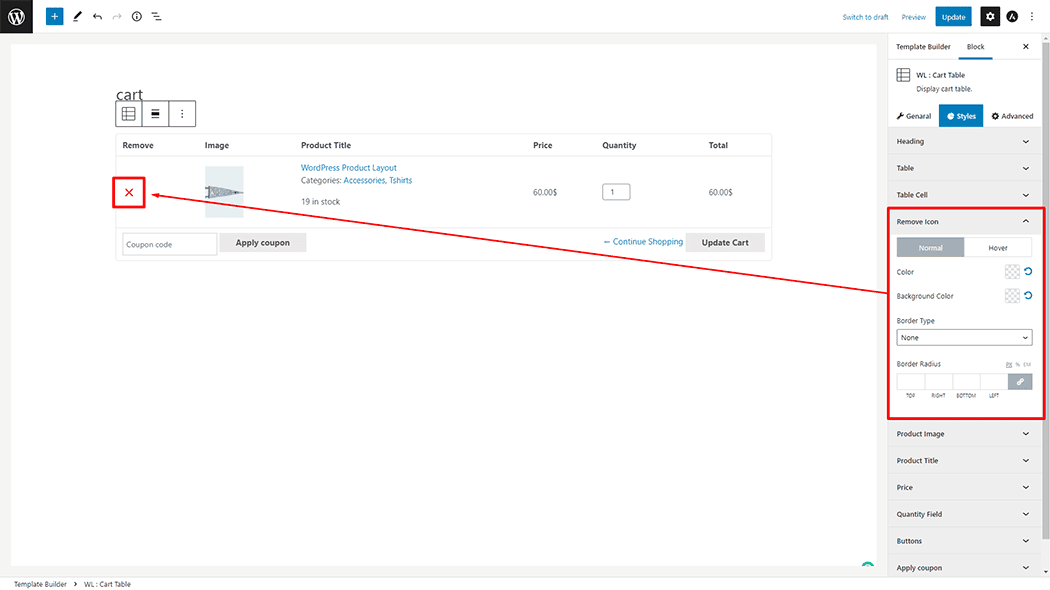
Remove Icon: You can change the Remove Icon Color, Background Color, Border Type, and Border Radius style as you need
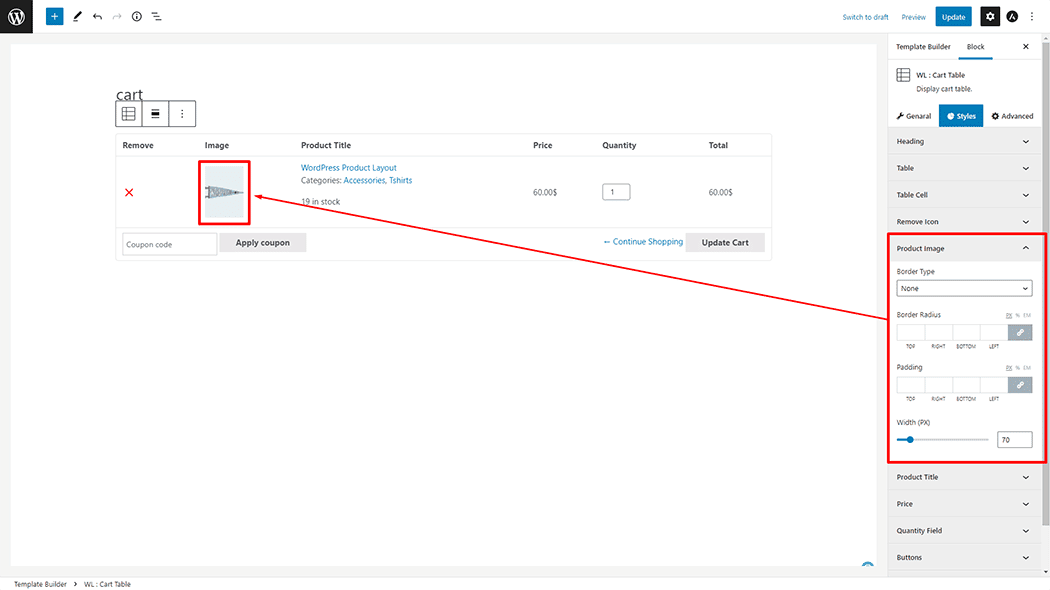
Product Image: You can change the Product Image Border Type, Border Radius, Padding, and Width style as you need
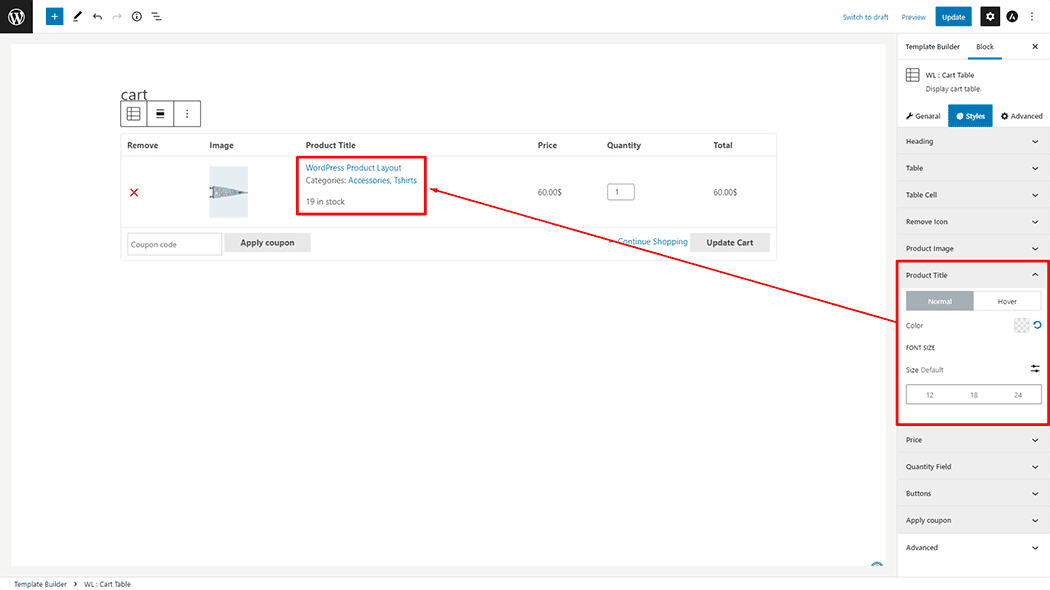
Product Title: You can change the Product Title Color and Font Size style as you need
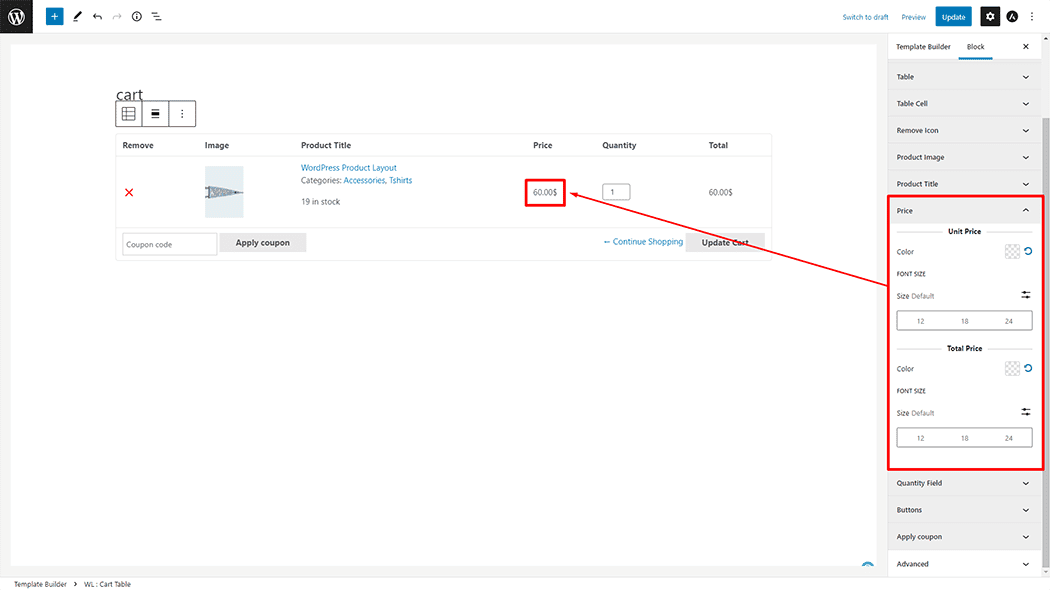
Price: You can change the Price Color and Font Size style as you need
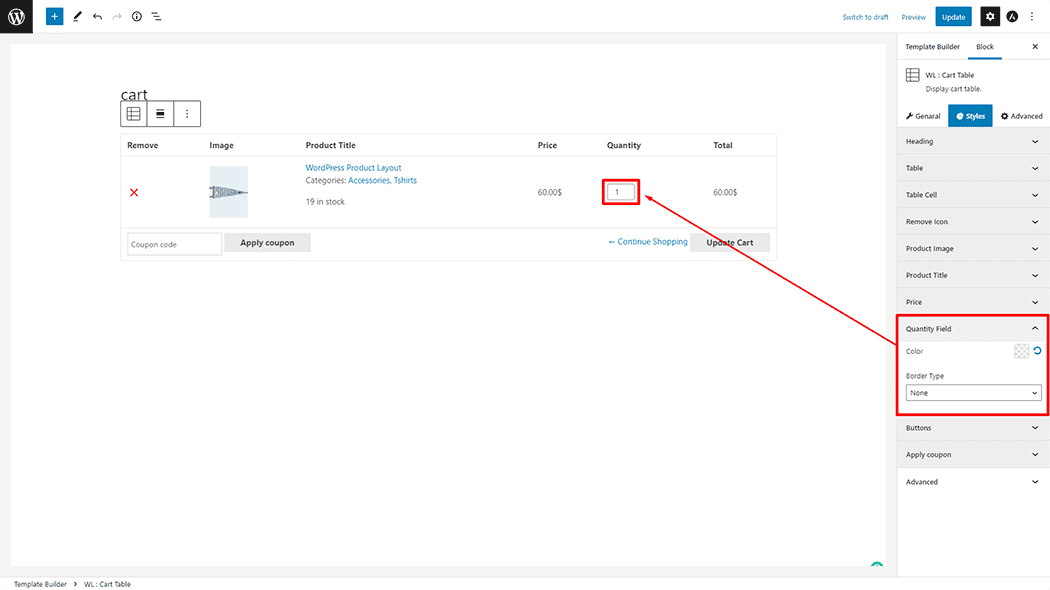
Quantity Field: You can change the Quantity Field Color, and Border Type, style as you need
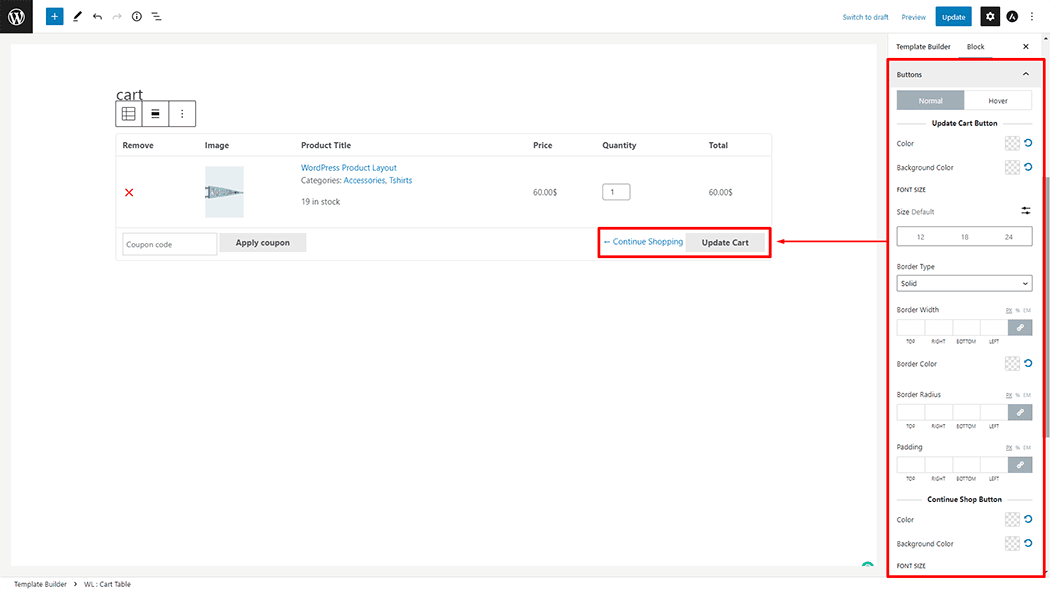
Buttons: You can change the Button’s Color, Background Color, Font Size, Border Type, Border Width, Border Color, Border Radius, and Padding style as you need
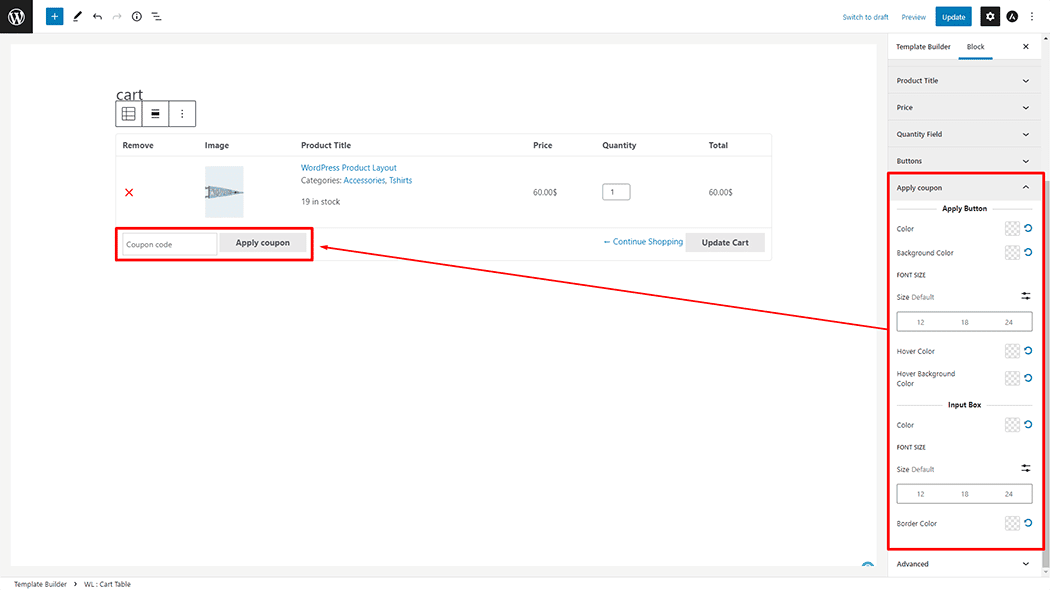
Apply Coupon: You can change the Apply Coupon Color, Background Color, Font Size, Hover Color, and Hover Background Color style as you need
Step 4: Now visit the site
Visit the Cart Page Template to Preview.
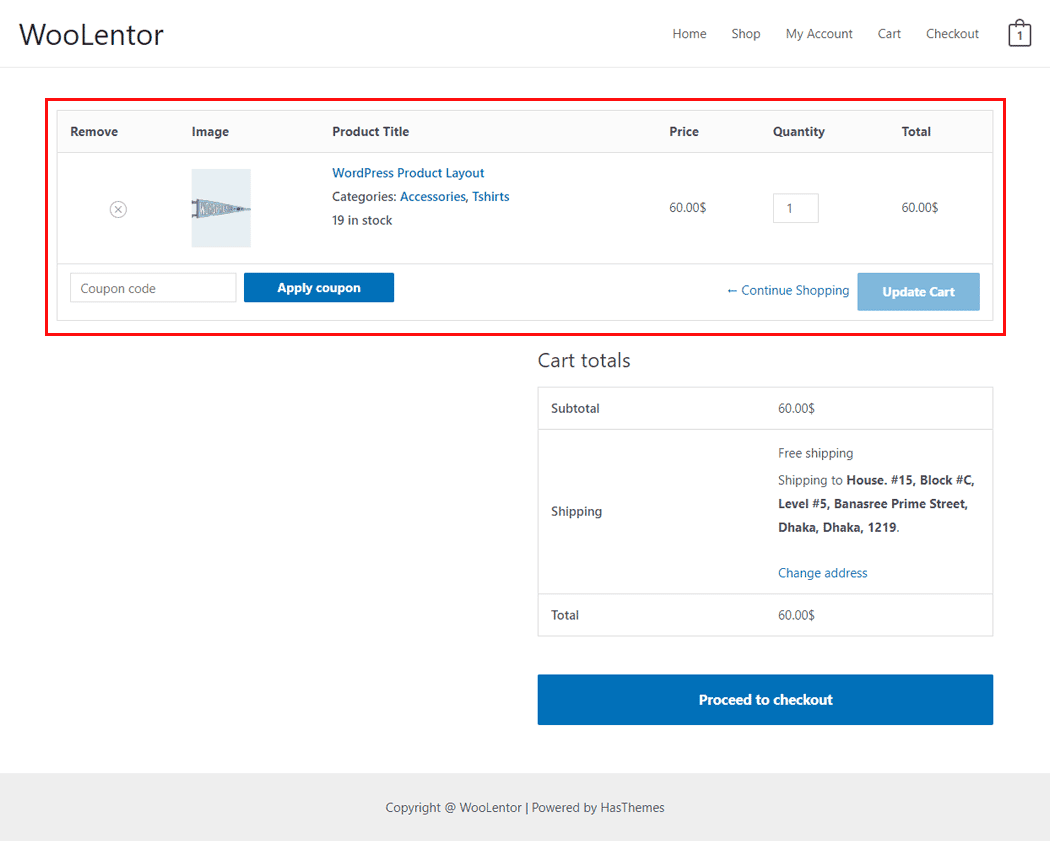
From the style setting make necessary customization from the available options.
Do you want to use Product Cart Table Widget for Elementor? Click Here