Upsell product Custom that you recommend instead of the currently viewed product. Upselling often employs comparison charts to market higher-end products to customers.
Why Upsell Product (Custom) is used?
On the Single Product Template, the “Upsell Product (Custom)†widget is used to view the Single Product Template on WooCommerce. The “Upsell Product (Custom)†widget is mainly designed for the Single Product Template.
Steps of adding Upsell Product (Custom)
Go to WordPress Dashboard > WooLentor > Settings > Elements. From the list of Elements, turn ON the “Upsell Product..( Custom )†widget.
- You need to use the “Upsell Product (Custom)†widget to view your product on the Single Product Template.
- To add an Upsell Product (Custom) widget, Drag and drop the “WL: Upsell Product layout (Custom)†widget onto the Single Product Template.
Step 1: How to Enable Upsell Product (Custom) Widget?
Go to Dashboard > WooLentor > Settings > Elements. From the list of Elements, turn ON the Upsell Product (Custom) widget.
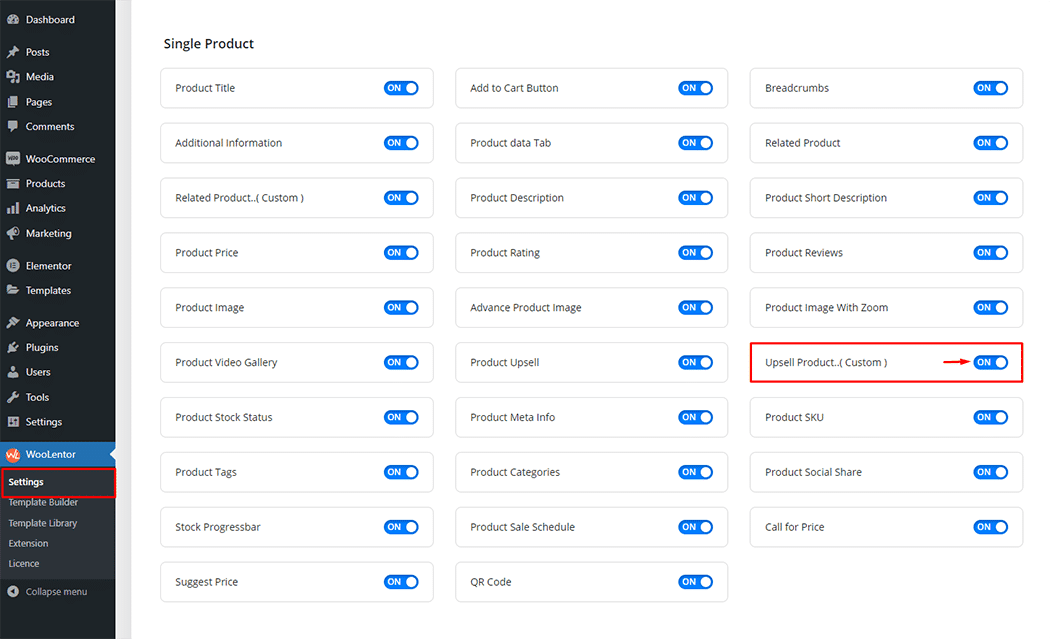
Step 2: How to use the Upsell Product (Custom) Widget?
If you want to leverage the Upsell Product (Custom) feature on your WooCommerce store, you will need to use a widget named “WL: Upsell Product layout (Custom)“. To do so, simply search the widget in the Elementor widget panel, and use it on the corresponding template that you have created for the Single Product Template.
How to create the Single Product Template
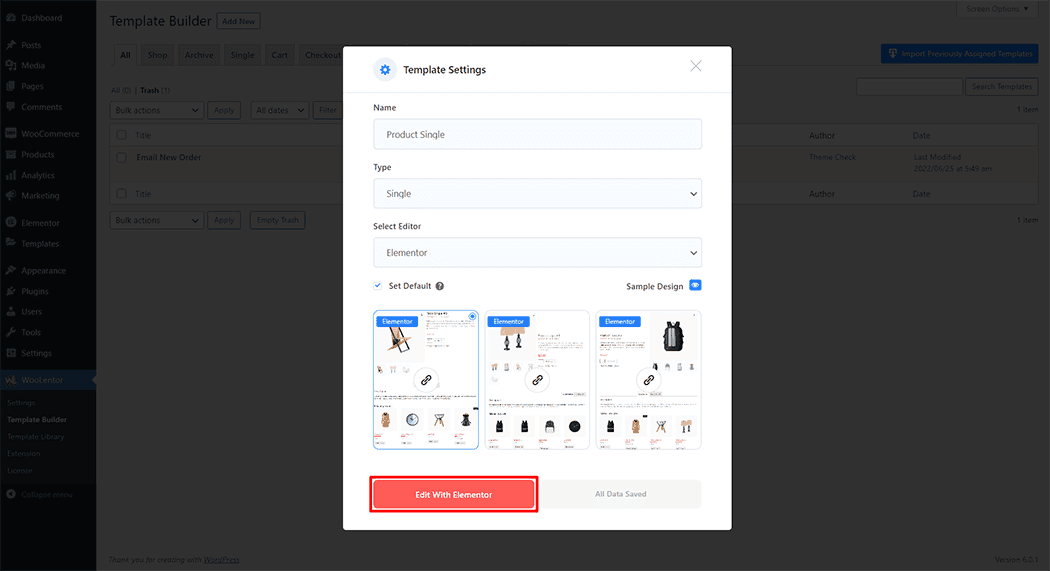
Go to Dashboard > WooLentor > Template Builder. Click the “Add New†button on the top right beside the text “Template Builder†to create a Single Product Template

Set the name of your Template in the popup box for template settings. Then click the “Set Default” checkbox after selecting Single from the dropdown type list. You can choose a default sample design from the “Sample Design” button. Now click the “Save Settings” button to save your settings.

To add the Upsell Product (Custom) widget, click the “Edit with Elementor†button to edit the Single Product Template
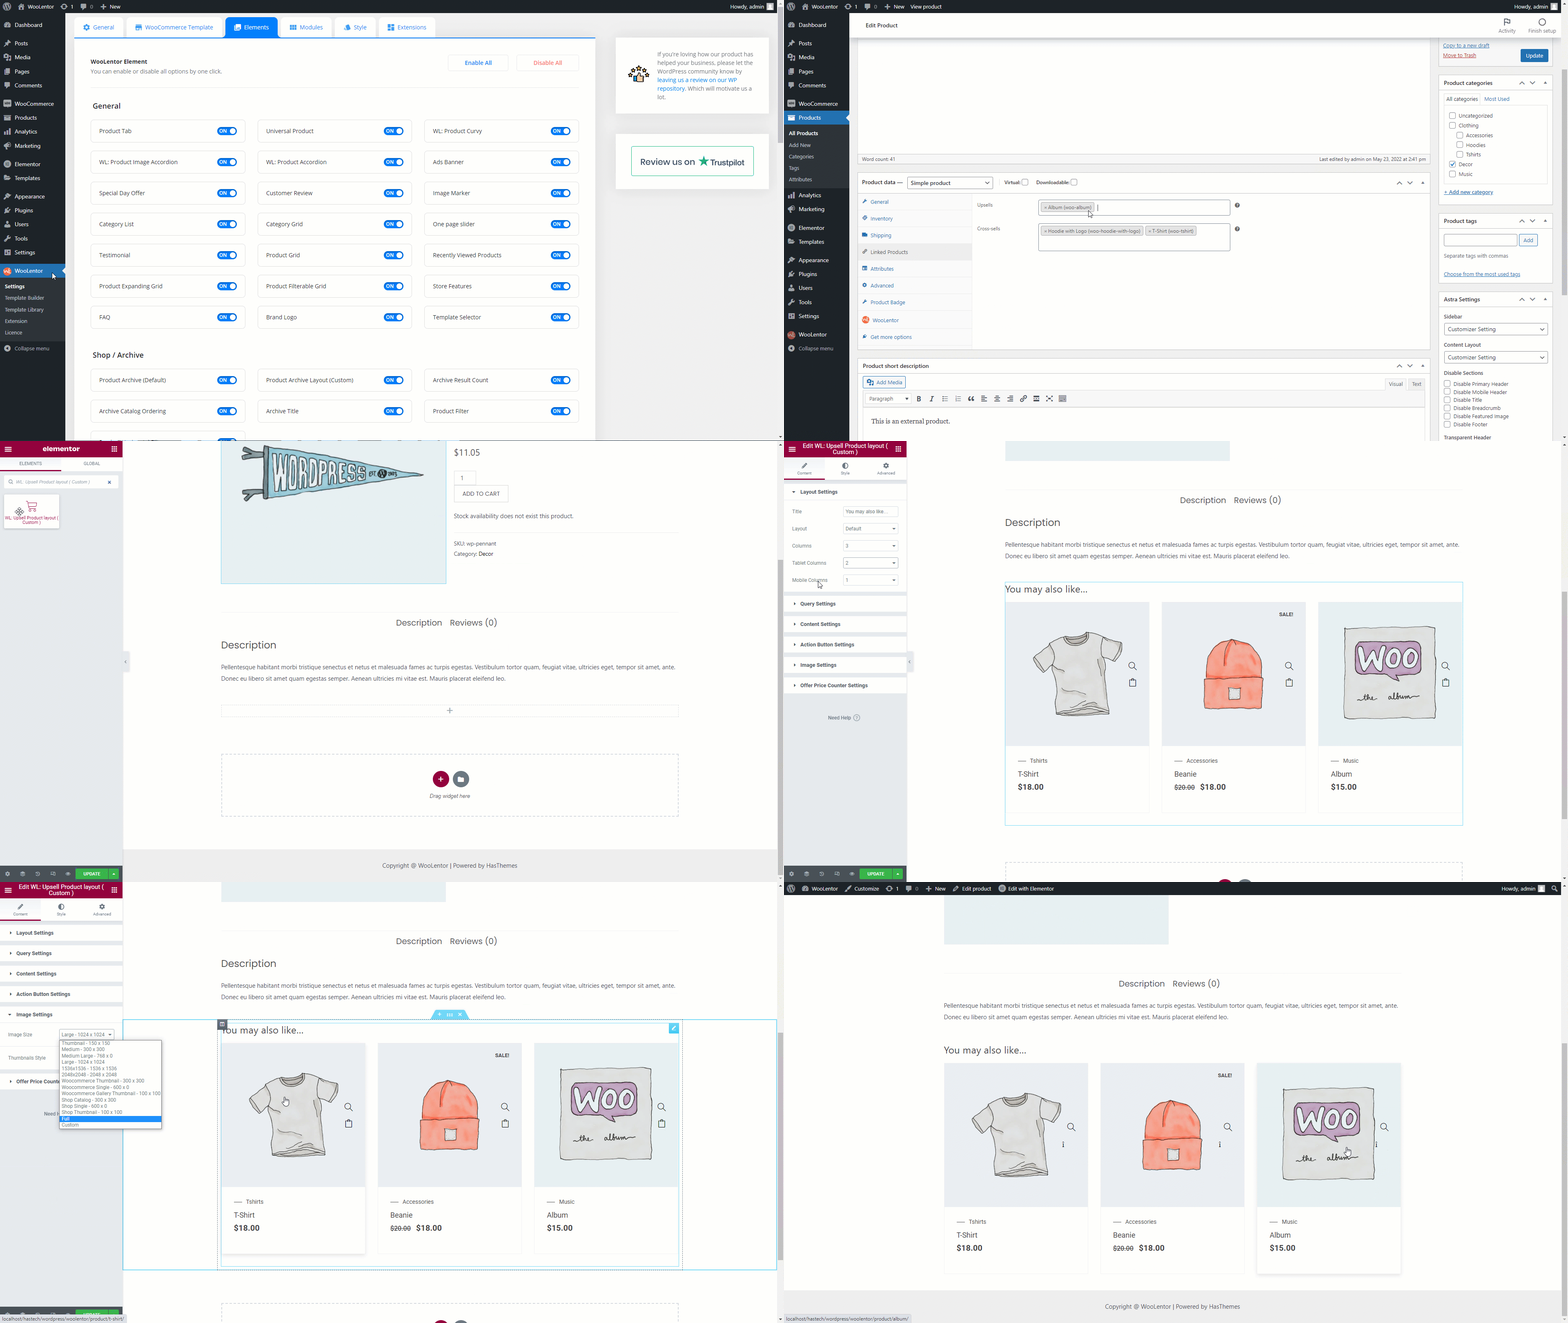
To add the Upsell Product (Custom) widget, open the product to edit. Go to Dashboard > Products > All Products

To add the Upsell Product (Custom) widget, go to Linked Products option and add your products.

To add the Upsell Product (Custom) widget, search by “WL: Upsell Product layout (Custom)†and use the widget that has the “WL Badge†on the Single Product Template.
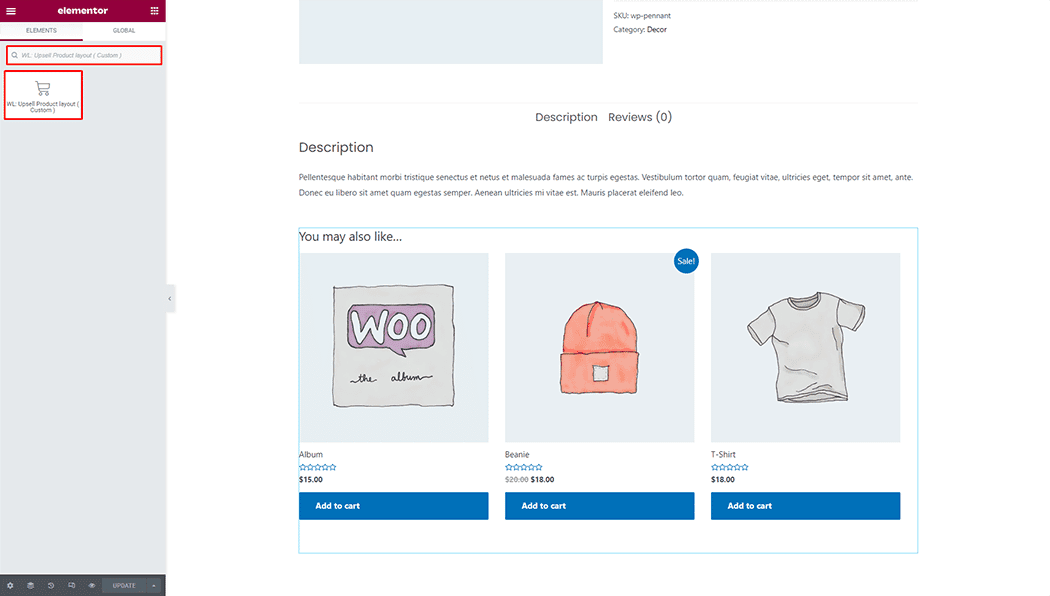
Drag and drop the WooLentor Upsell Product (Custom) widget onto the Single Product Template.
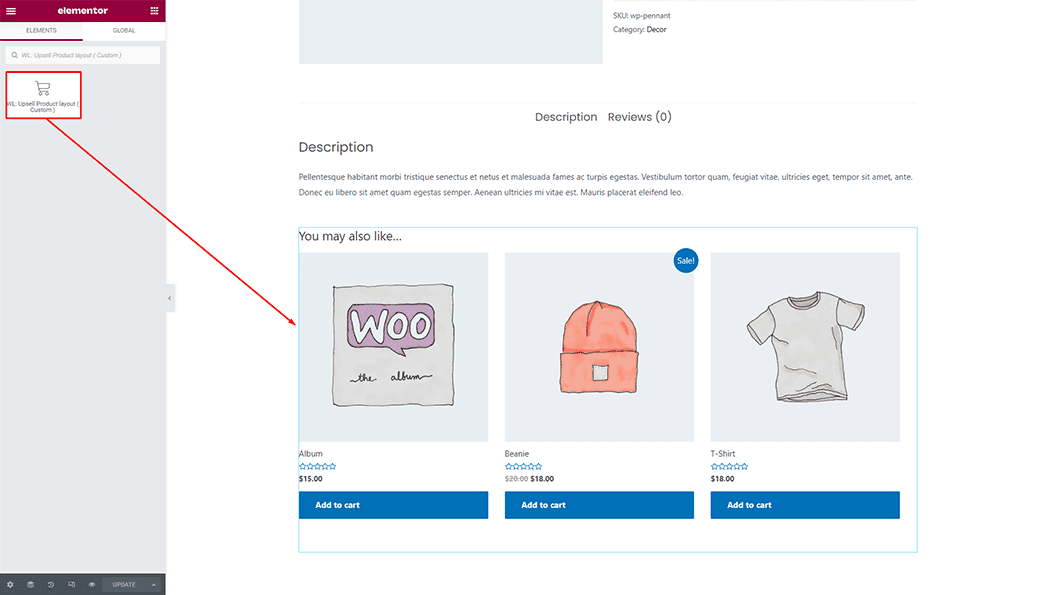
Step 3: How to customize the Upsell Product (Custom) Widget?
Layout Settings: You can set different layout styles, and columns on the responsive device, and also can change the title.
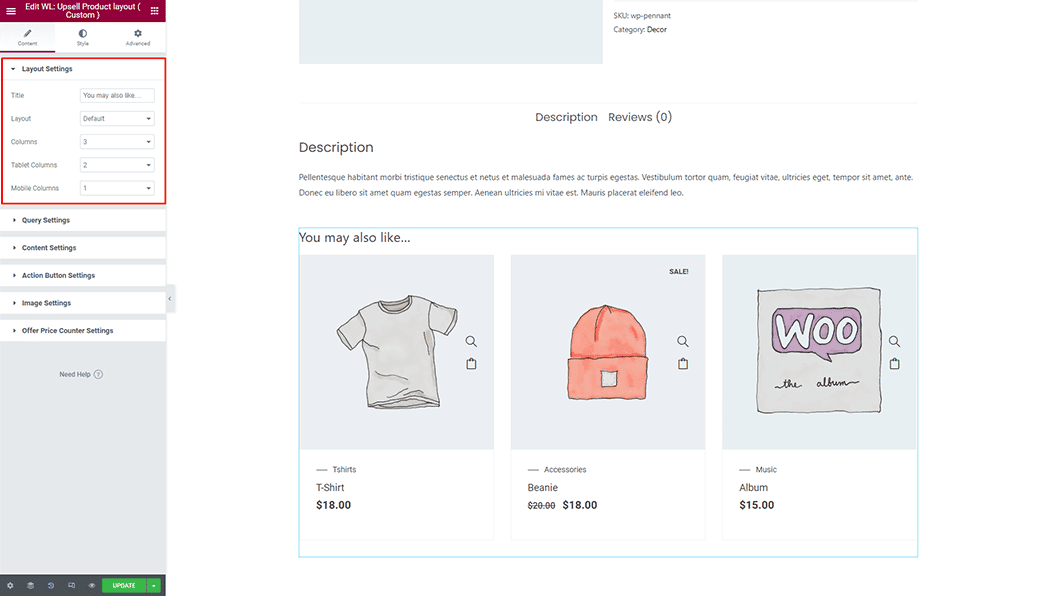
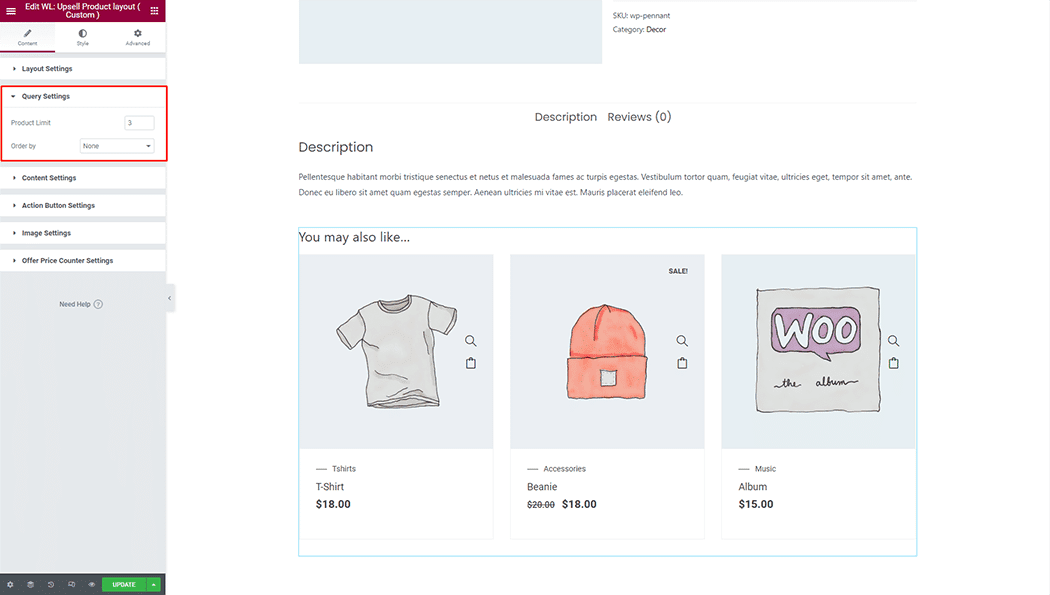
Query Settings: You can set product limit and order type.
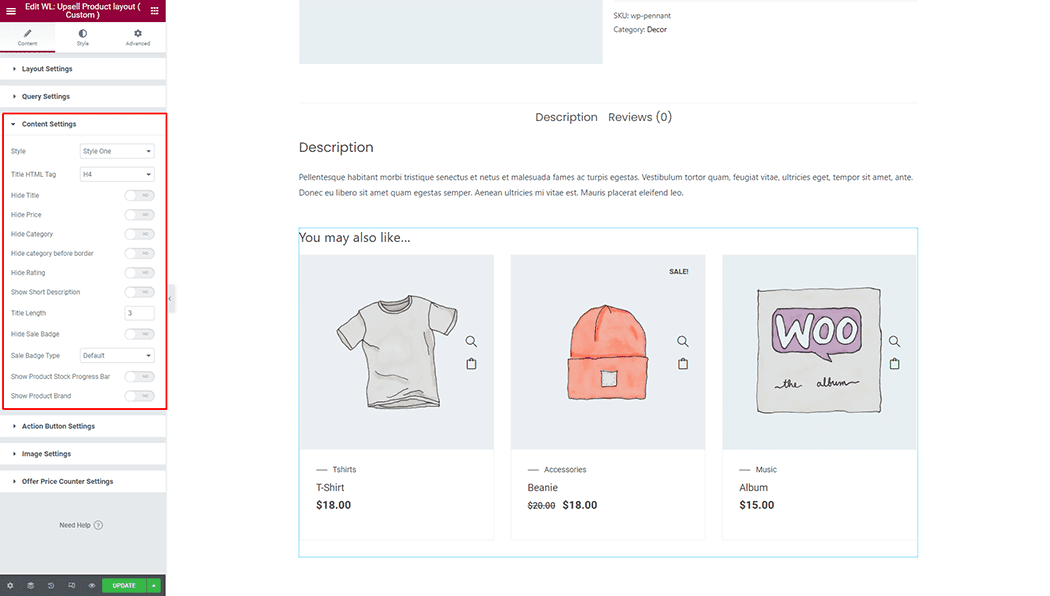
Content Settings: You can set different layout styles, and show or hide any content.
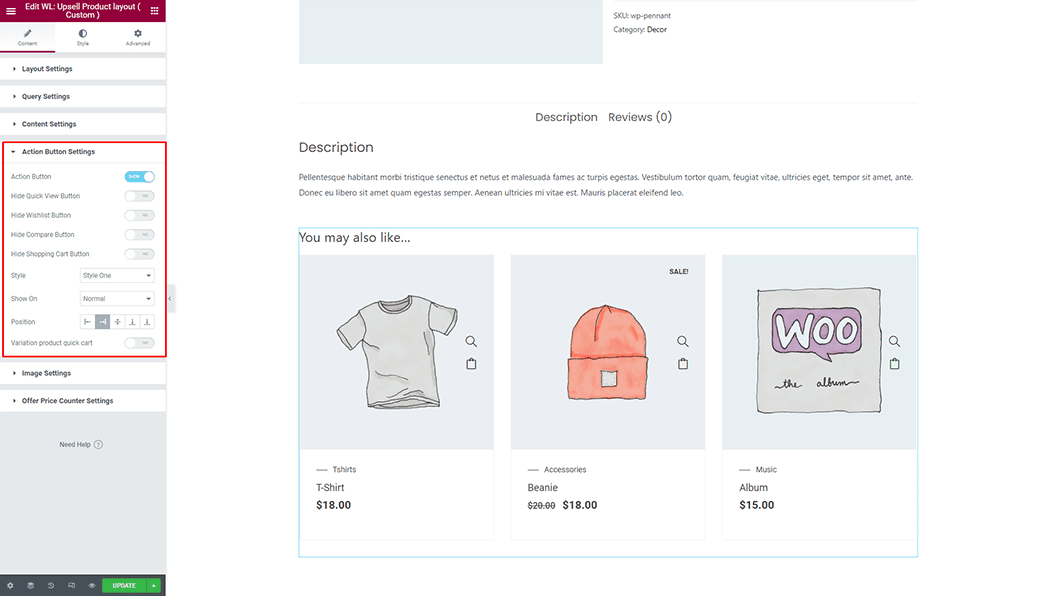
Action Button Settings: You can set different layout styles, and positions, and show or hide any action button.
Quick Checkout Button Options
Once the Quick Checkout module is enabled, the following options will be available:
- Enable: To activate the Quick Checkout button, simply toggle this option on.
- Hide Text: To hide the text on the Quick Checkout button, enable this option.
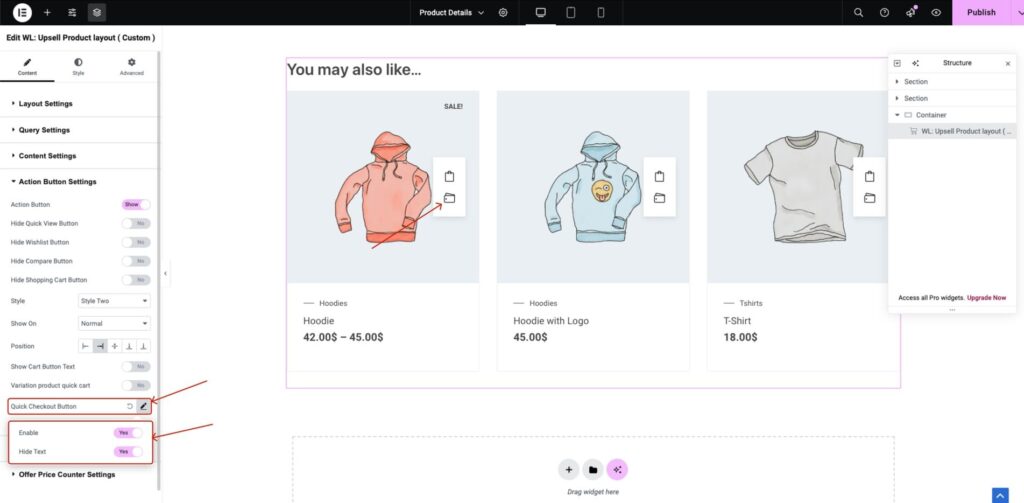
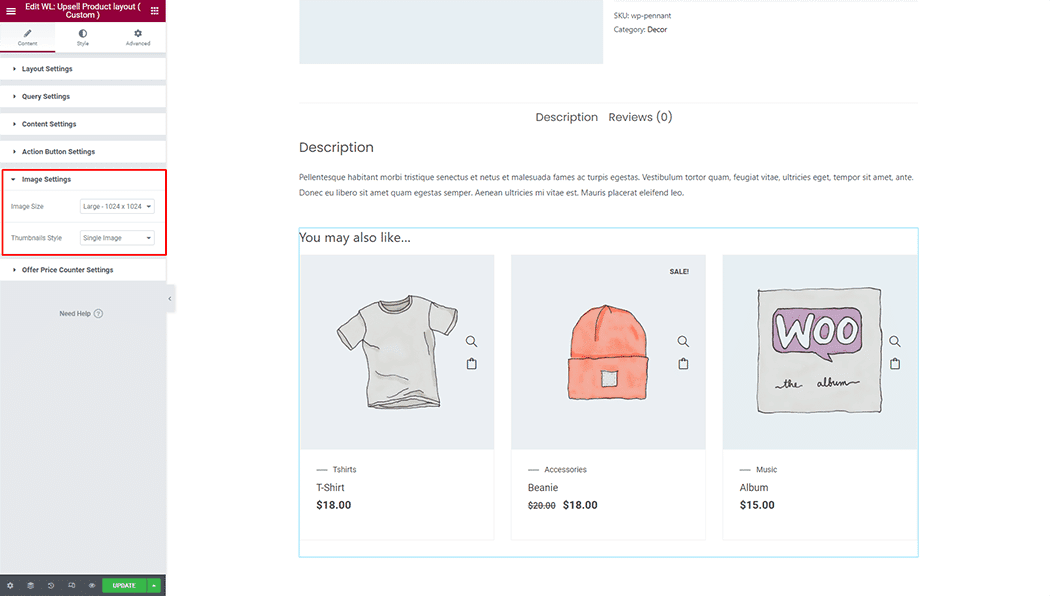
Image Settings: You can set a single image, slider, or tab from the Thumbnails Style. Also, can set image size.
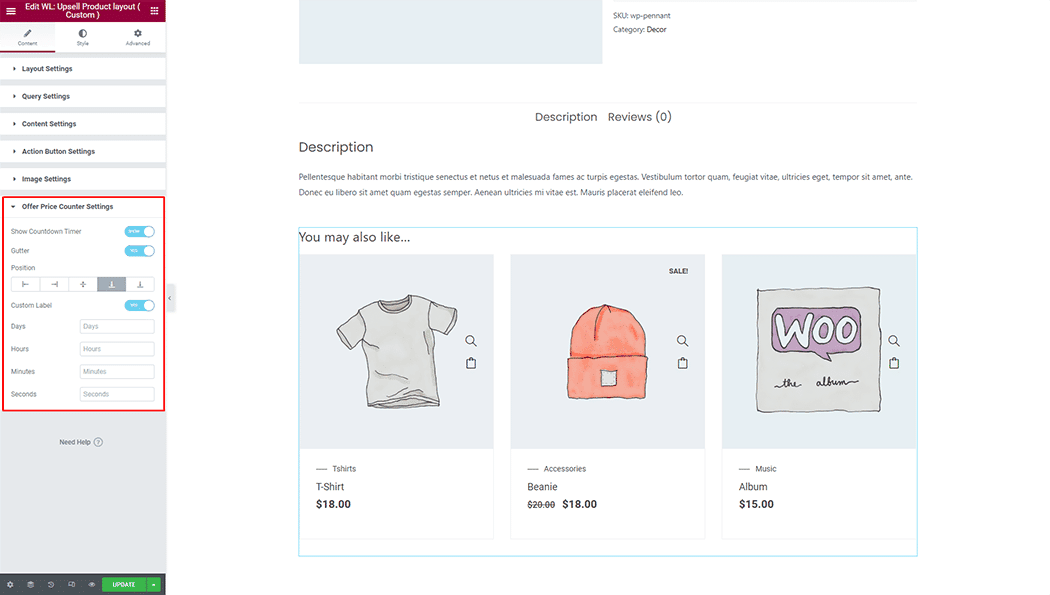
Offer Price Counter Settings: You can show a countdown timer, gutter, position, and custom label.
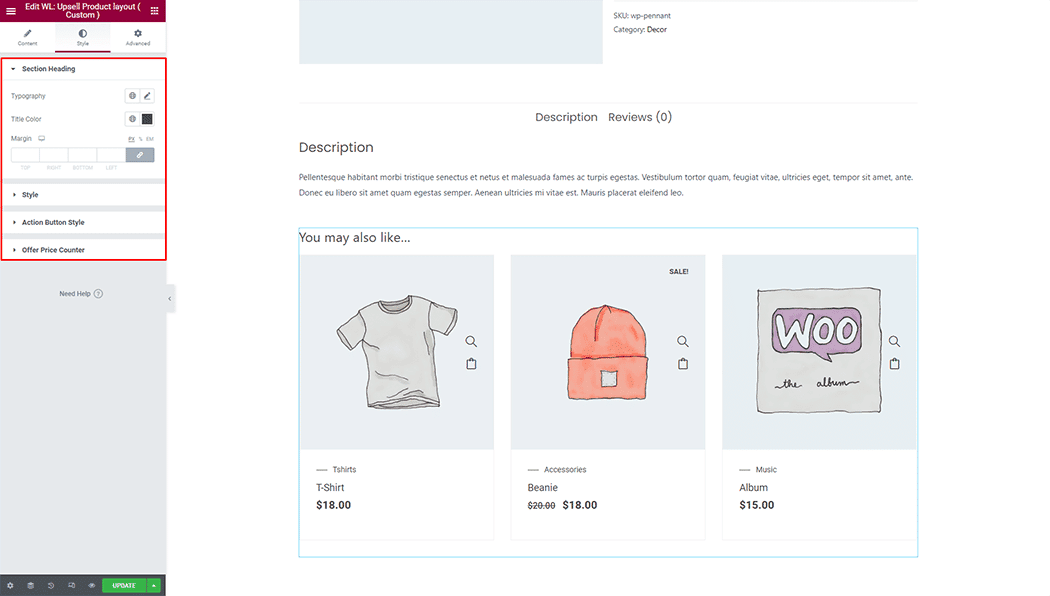
How to customize the Upsell Product (Custom) style
You can change the typography, text color, padding, and margin style of the Upsell Product (Custom) as needed.
Step 4: Now visit the site
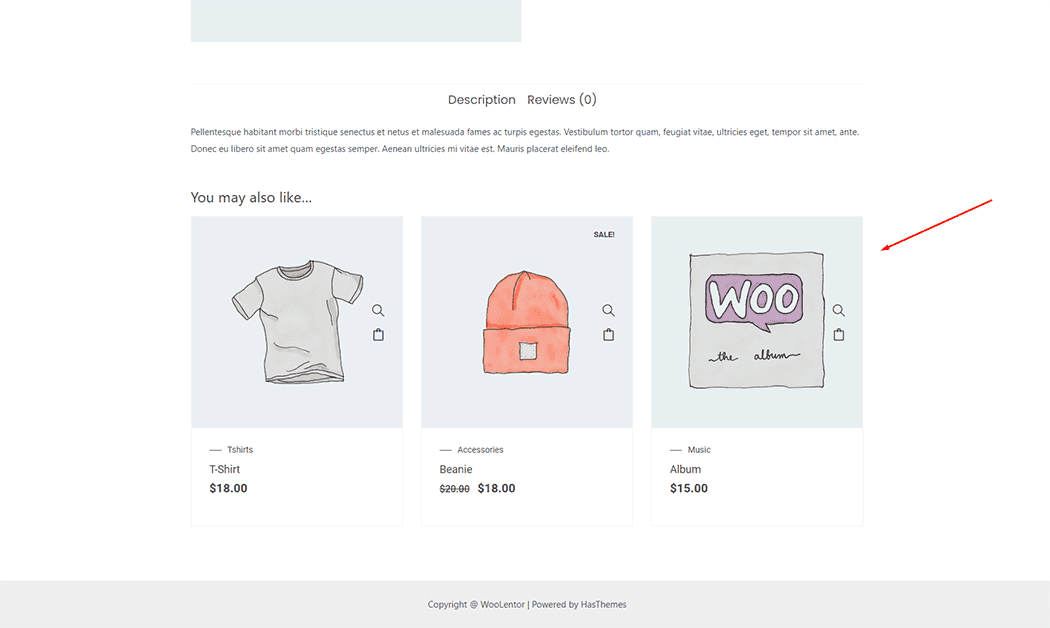
Visit the Single Product Template to Preview.
From the style setting, make necessary customization from the available options.