Email Automation allows for automated email sequences to new customers, current clients, post-purchase emails, and more. Email marketing automation may help promote online store sales. Within WooCommerce, this module enables the development of workflow systems that include Triggers, Rules, and Actions in multiple combinations. WooLentor’s WooCommerce email sequences/marketing automation module is the perfect tool for online store owners who are looking to take their business to the next level. With this module, you’ll be able to create sophisticated email marketing campaigns that will engage your customers and boost your sales. So don’t wait any longer, get WooLentor’s WooCommerce email marketing automation module today!
Why use Email Automation?
Email automation helps you find your audience and engage your customers. Unlike manual campaigns, automation runs in the background while you tend to do other valuable tasks. With automation, you can send personalized emails to each individual, from new visitors to repeat buyers. It allows you to automate requests for feedback, send exclusive offers to high-spending customers, and trigger re-engagement campaigns if subscribers are straying.
Email Automation Benefits.
Automated emailing is a godsend to time-strapped marketers and business owners. Here are several great reasons to automate your emails.
- Here are just some of the benefits of email automation workflows:
- It’s automatic and doesn’t require intervention.
- Increase brand awareness.
- Carefully planned email strategy.
- Save time so you can focus on other tasks.
- Reduce costs.
- Boost business revenue.
- Improve your customer retention rate.
- It makes your marketing strategy scalable.
- Build great relationships with customers.
Steps of adding Email Automation
Go to WordPress Dashboard > WooLentor > Settings > Modules. From the list of Modules, turn ON the “Email Automation” Module.
Step 1: How to Enable Email Automation Module?
Go to Dashboard > WooLentor > Settings > Modules. From the list of Modules, click the setting of Email Automation Module.
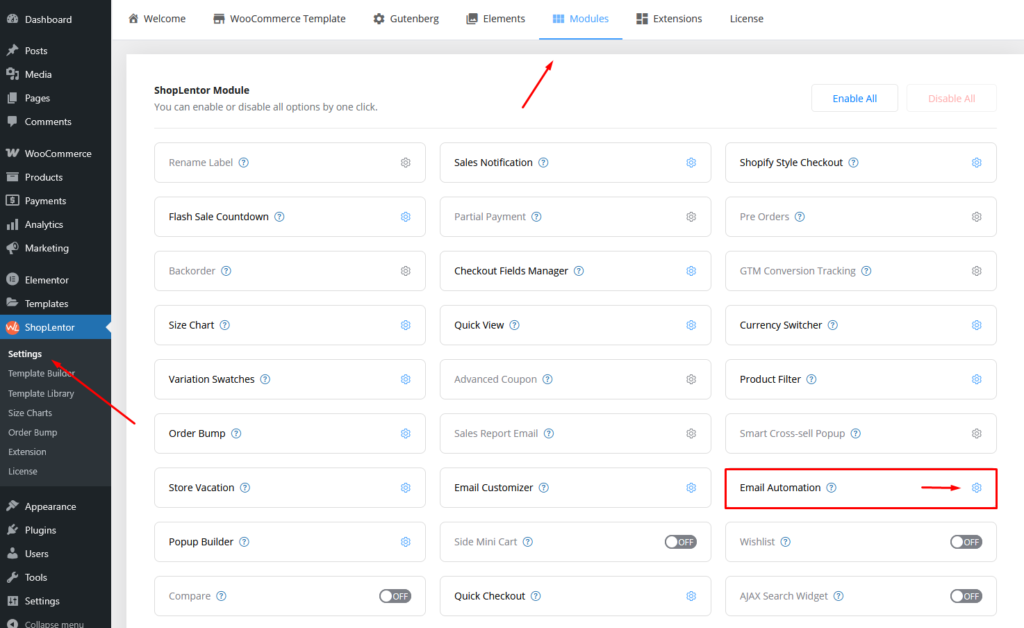
Turn on the Email Automation Module and Save Change after that.
- From name: Enter the name of the sender.
- From address: Add sender email. Please ensure that the sender domain name is used after “@“. Example: admin@domain.com

Step 2: How to use the Email Automation Module?
To do this, simply turn on the Email Automation module in the Modules panel and save changes.
How to Add the Email Automation Templates
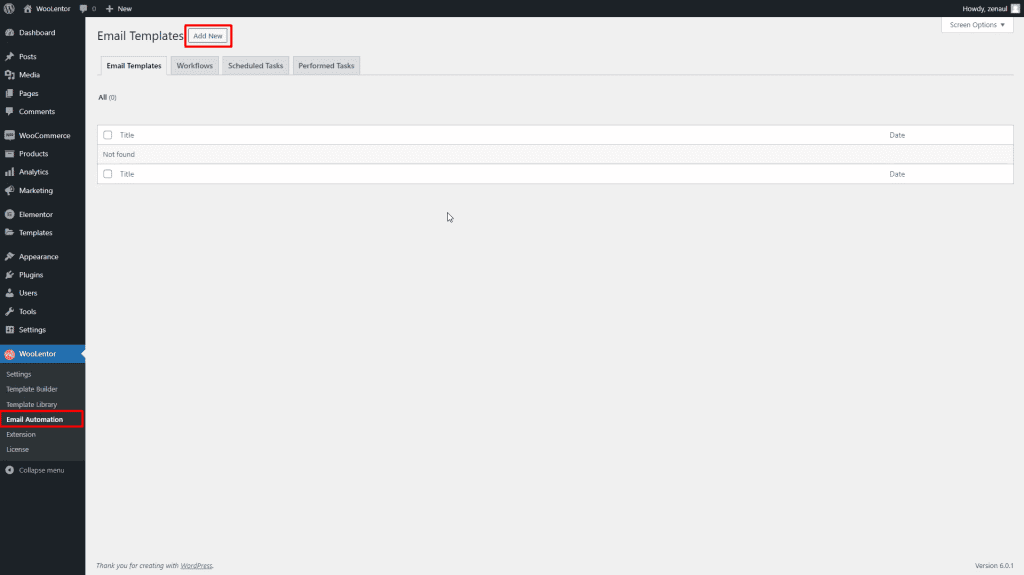
Go to Dashboard > WooLentor > Email Automation. Click the Add New button on the top right beside the text “Email Templates” to create Email Templates.
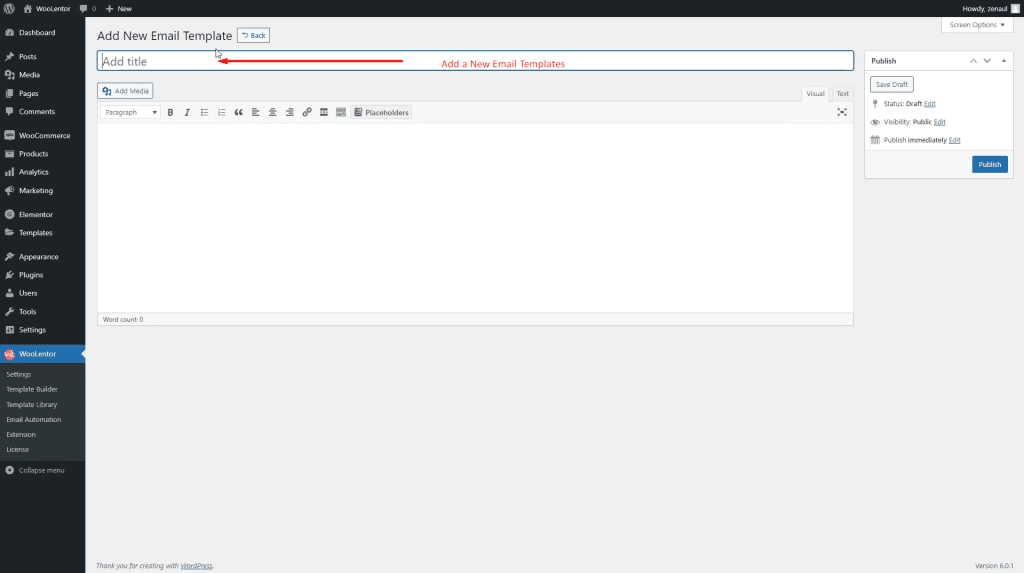
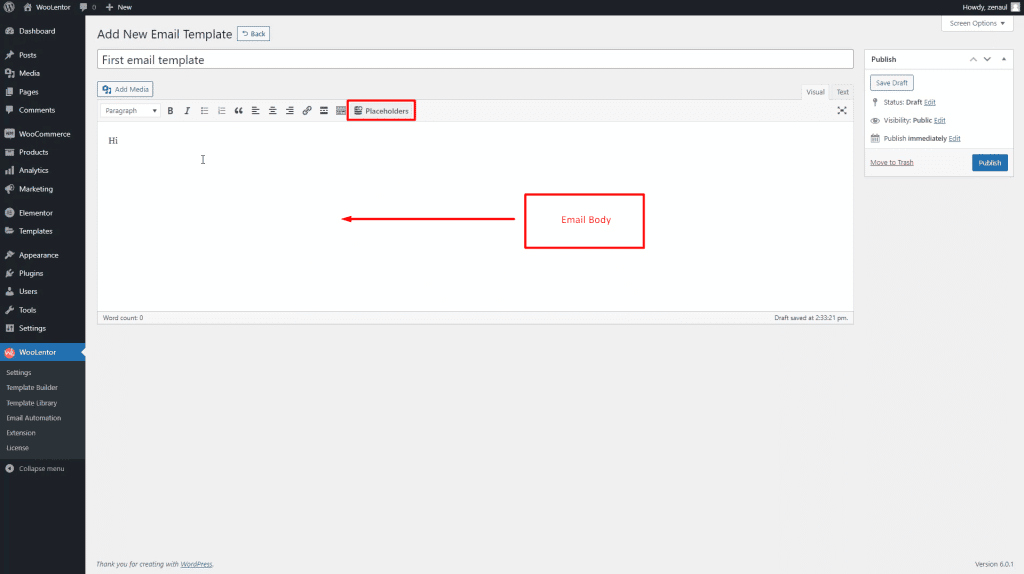
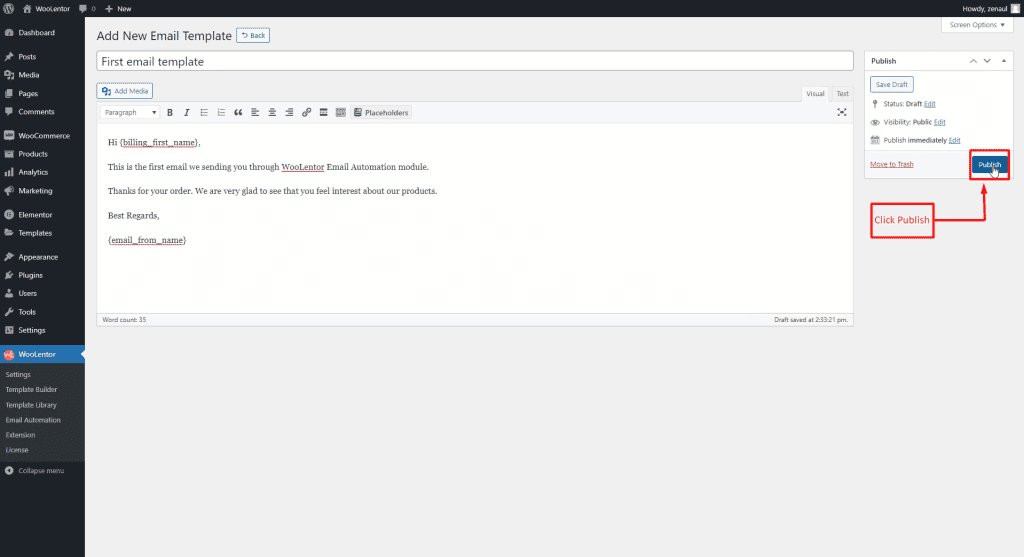
Add the Email Template name, then you need to add your email body. You can add or insert dynamic data to your email body using WooLentor Placeholders. For Example, If you want the customer name then you can find {billing_first name} and {billing_last_name} and use them. Isn’t too Simple?
You can add your Email Template body here.
There are prebuilt list placeholders for inserting dynamic data easily into your email body.
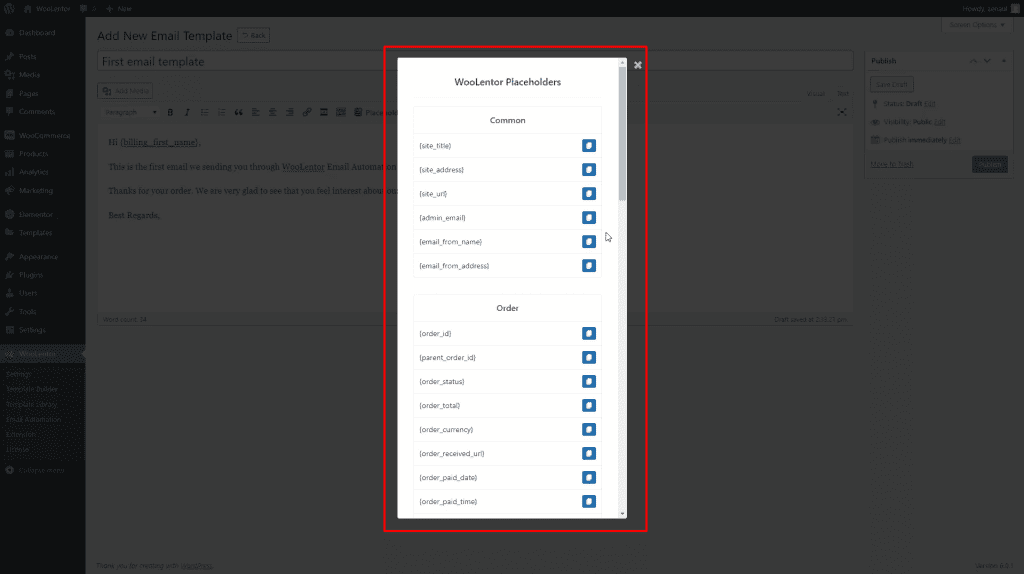
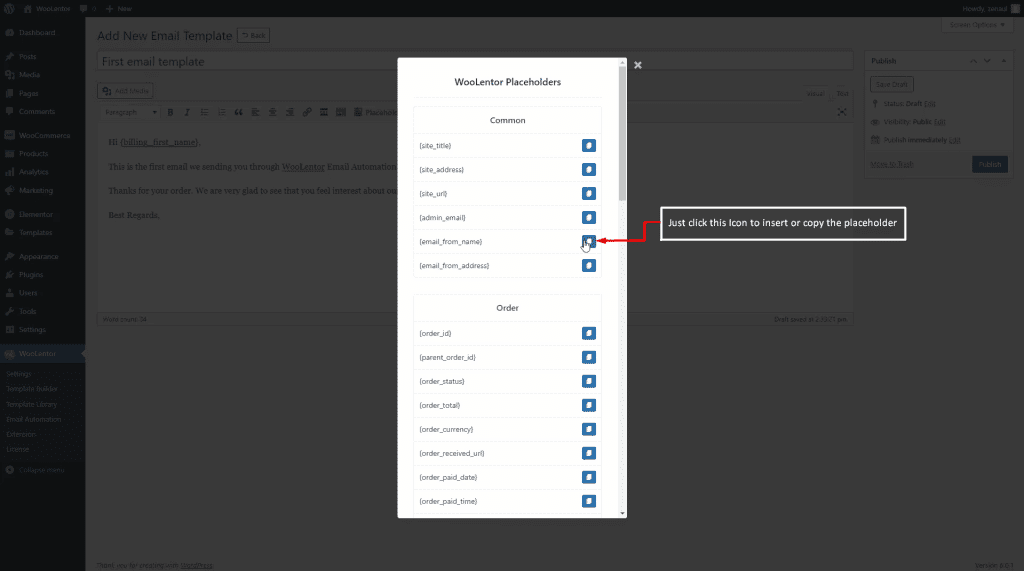
You can insert any placeholder by clicking on the icon beside that placeholder. Also, you can copy and paste the placeholder.
Publish the Email Template.
How to Add the New Workflows
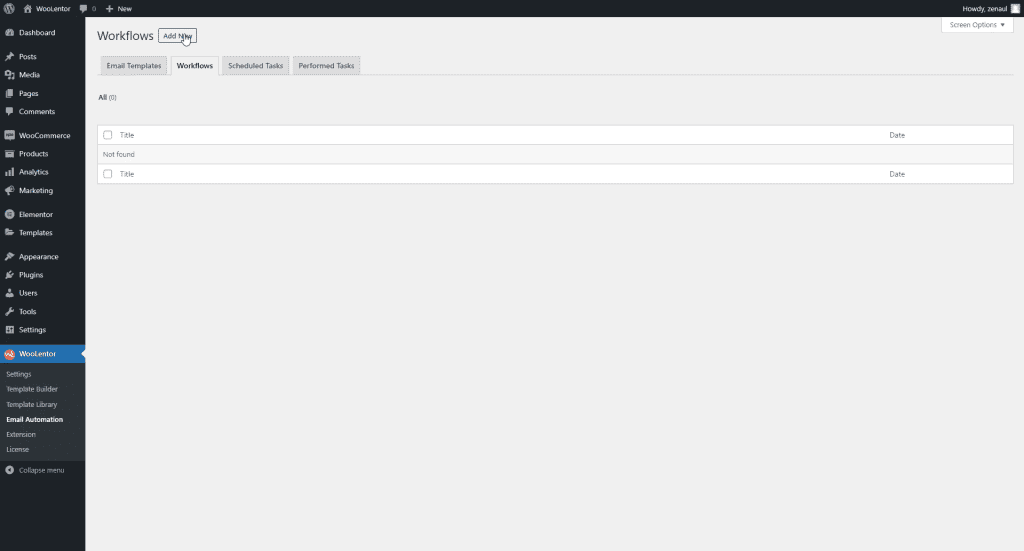
Go to Dashboard > WooLentor > Email Automation. Click the Workflows tab.
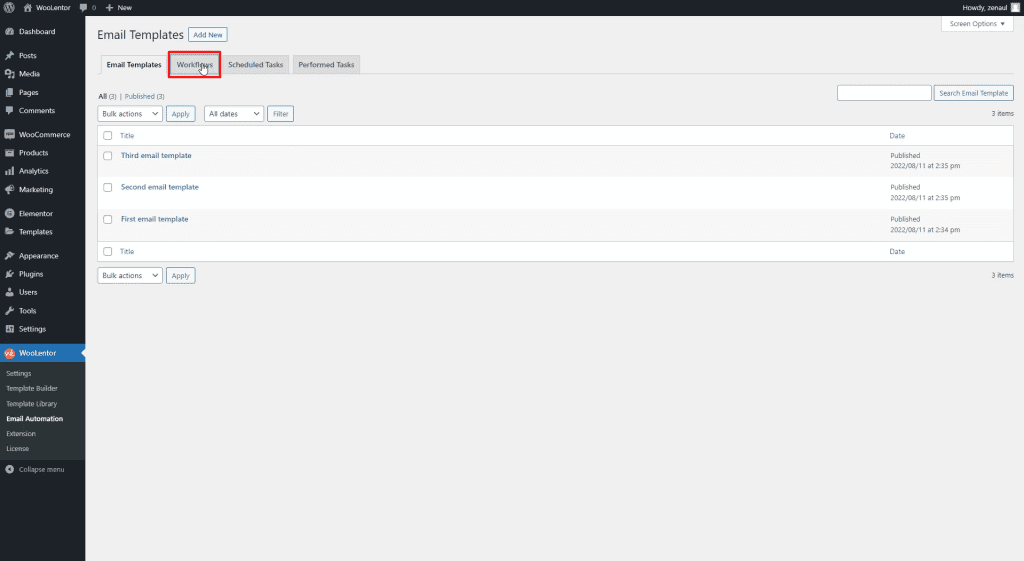
Go to the Workflows menu tab button, then click Add New button.
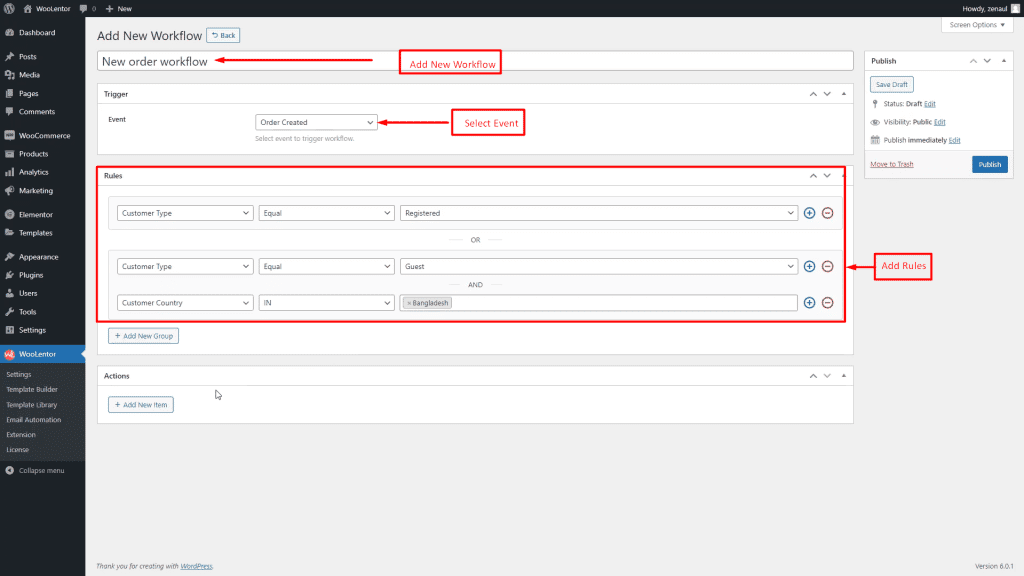
Add a New Workflow, select an Event to trigger, and you can set as of Rules as you need.
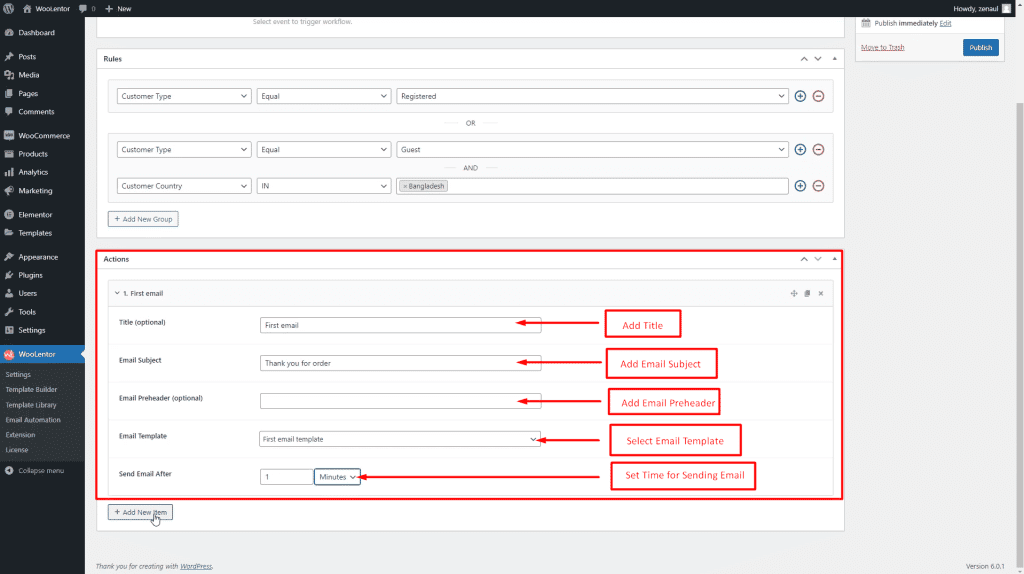
Add New Actions Item
To add actions, click the “ADD NEW ITEM” item and add the following field:
- Title (optional): Add title
- Email Subject: Add email subject.
- Email Preheader (optional): Add an Email preheader.
- Email Template: Add an email template.
- Send Email After: From this option, you can set the time to send the email.
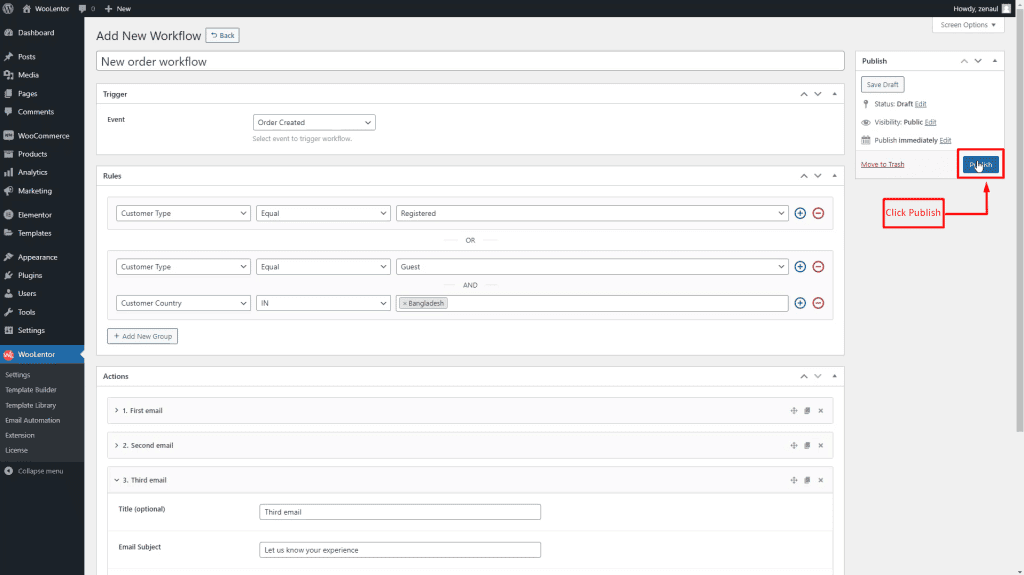
Now you can publish your workflow item.
Scheduled Tasks List
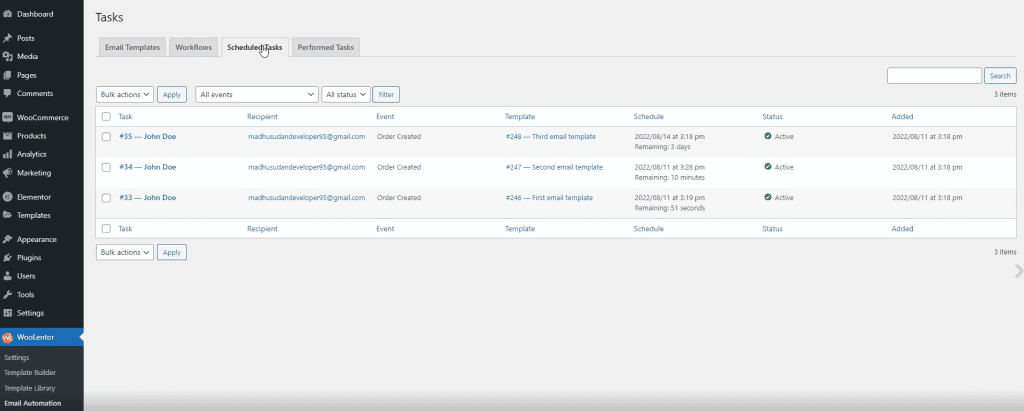
Go to Dashboard > WooLentor > Email Automation. Click the Scheduled Tasks button.
Note: Place an order to view the Scheduled Tasks tab if you select the “Order Created” event to trigger from the Workflows tab.
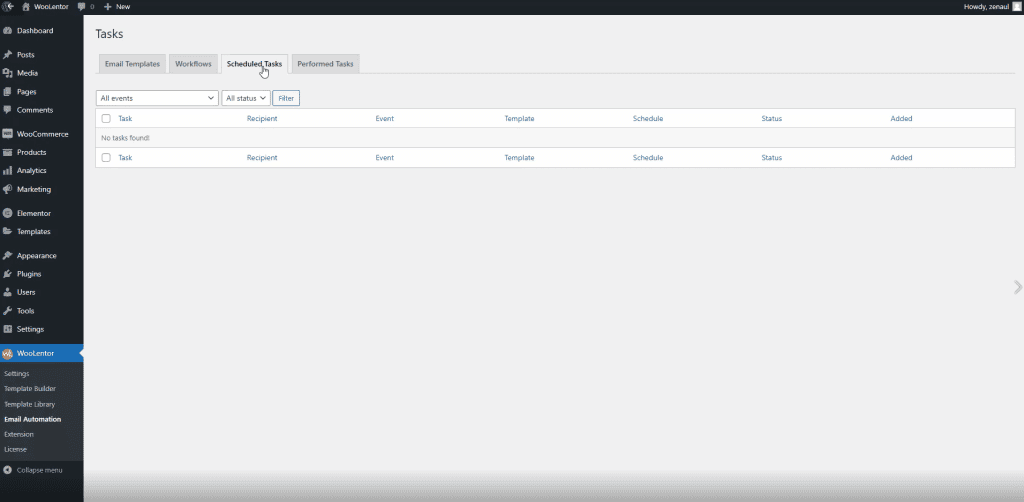
You can see the email automation schedule list here.
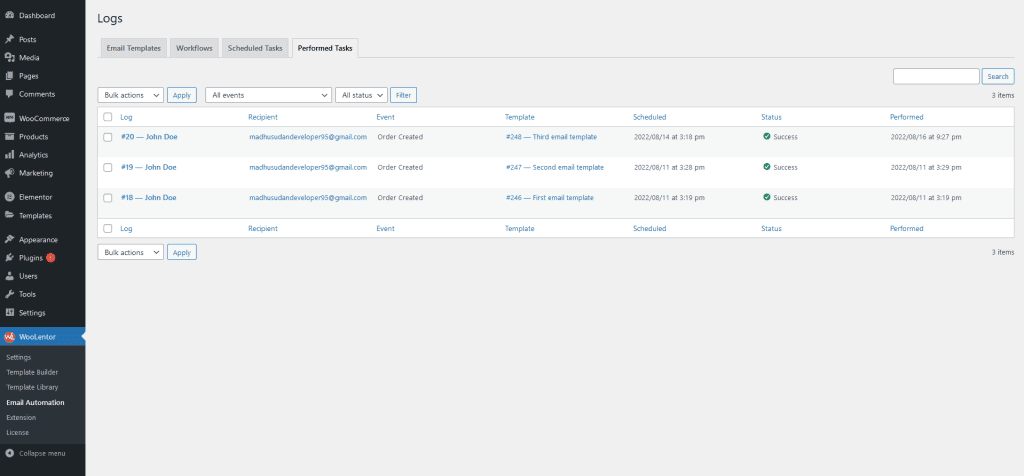
Performed Tasks
Go to Dashboard > WooLentor > Email Automation. Click the Performed Tasks button.
Available Email Automation Placeholders:
| Common Placeholder |
| {site_title} |
| {site_address} |
| {site_url} |
| {admin_email} |
| {email_from_name} |
| {email_from_address} |
| Order Placeholder |
| {order_id} |
| {parent_order_id} |
| {order_status} |
| {order_total} |
| {order_currency} |
| {order_received_url} |
| {order_paid_date} |
| {order_paid_time} |
| {order_created_date} |
| {order_created_time} |
| {order_modified_date} |
| {order_modified_time} |
| {order_completed_date} |
| {order_completed_time} |
| {payment_url} |
| {payment_method} |
| {shipping_method} |
| {billing_address} |
| {billing_first_name} |
| {billing_last_name} |
| {billing_company} |
| {billing_address_1} |
| {billing_address_2} |
| {billing_city} |
| {billing_state} |
| {billing_postcode} |
| {billing_country} |
| {billing_email} |
| {billing_phone} |
| {shipping_address} |
| {shipping_first_name} |
| {shipping_last_name} |
| {shipping_address_1} |
| {shipping_address_2} |
| {shipping_city} |
| {shipping_state} |
| {shipping_postcode} |
| {shipping_country} |
| {shipping_phone} |
| Customer Placeholder |
| {customer_first_name} |
| {customer_last_name} |
| {customer_display_name} |
| {customer_email} |
| {order_currency} |
| {customer_username} |
| {order_paid_date} |
| {customer_role} |
| {customer_created_date} |
| {customer_created_time} |
| {order_modified_date} |
| {customer_modified_date} |
| {customer_modified_time} |